advertisement

Built-in Kit
Installation Instructions
For BuIlt-In KIt model amtK27, amtK30 or amtK36
For use With microwave models dmt2420 and dmW2420
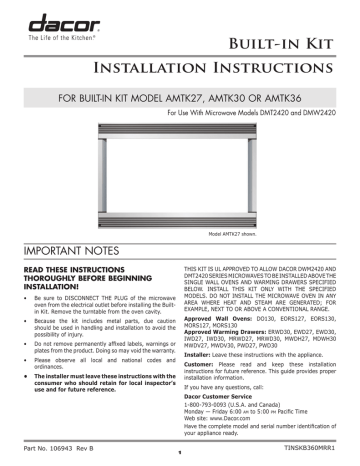
Model AMTK27 shown.
Important notes
READ THESE INSTRUCTIONS
THOROUGHLY BEFORE BEGINNING
INSTALLATION!
• Be sure to DISCONNECT THE PLUG of the microwave oven from the electrical outlet before installing the Builtin Kit. Remove the turntable from the oven cavity.
• Because the kit includes metal parts, due caution should be used in handling and installation to avoid the possibility of injury.
• Do not remove permanently affixed labels, warnings or plates from the product. Doing so may void the warranty.
• Please observe all local and national codes and ordinances.
• The installer must leave these instructions with the consumer who should retain for local inspector’s use and for future reference.
THIS KIT IS UL APPROVED TO ALLOW DACOR DWM2420 AND
DMT2420 SERIES MICROWAVES TO BE INSTALLED ABOVE THE
SINGLE WALL OVENS AND WARMING DRAWERS SPECIFIED
BELOW. INSTALL THIS KIT ONLY WITH THE SPECIFIED
MODELS. DO NOT INSTALL THE MICROWAVE OVEN IN ANY
AREA WHERE HEAT AND STEAM ARE GENERATED; FOR
EXAMPLE, NEXT TO OR ABOVE A CONVENTIONAL RANGE.
Approved Wall Ovens: DO130, EORS127, EORS130,
MORS127, MORS130
Approved Warming Drawers: ERWD30, EWD27, EWD30,
IWD27, IWD30, MRWD27, MRWD30, MWDH27, MDWH30
MWDV27, MWDV30, PWD27, PWD30
Installer: Leave these instructions with the appliance.
Customer: Please read and keep these installation instructions for future reference. This guide provides proper installation information.
If you have any questions, call:
Dacor Customer Service
1-800-793-0093 (U.S.A. and Canada)
Monday — Friday 6:00 am
to 5:00 pm
Pacific Time
Web site: www.Dacor.com
Have the complete model and serial number identification of your appliance ready.
Part No. 106943 Rev B
1
TINSKB360MRR1
1. FRONT FRAME
ASSEMBLY: QTY 1
parts Included in the Kit
2. Exhaust DUCT: QTY 1
3. SCREW-A (1/2"
LENGTH): QTY 10
4. SCREW-B (1-3/4"
LENGTH): QTY 4
Installation step 1
CABINET OR WALL OPENING
Provide an opening in the wall or cabinet as indicated on figure 1. The depth should be a minimum of 20". The floor of the opening should be constructed of plywood strong enough to support the weight of the oven (about 100 lbs.) and should be level for proper operation of the oven. See page 4 for cutout/cabinet spacing.
A HEIGHT : 16 3 /
4
" to 17" (42.5 cm to 43.2 cm)
B WIDTH : 24 3 /
8
" to 24 11 /
16
" (61.9 cm to 62.7 cm)
C DEPTH : minimum 20" (50.8 cm)
Note: While the proper functioning of the oven does not require that the opening be enclosed (with sides, ceiling and rear partition), this may be required by local code, and it is suggested that the local code be checked for any such requirement.
Figure 1
A
ELECTRICAL OUTLET LOCATION
This outlet should not be located in the shaded area of figure
1. If the dimension of DEPTH (C) is more than 21” (53.3 cm), the outlet location may be any area on the rear wall..
At the rear of the opening, provide a 3-pronged, polarized, electrical outlet, 115-120 volt A.C., 15 Amp. or larger.
step 2
ExHAUST DUCT ASSEmBLY INSTALLATION
1. Place the EXHAUST DUCT ASSEMBLY in the opening.
When the EXHAUST DUCT ASSEMBLY is in the opening correctly, its flanges will be tightly against the lower edge of the opening. See Figure 2.
2. Secure the EXHAUST DUCT ASSEMBLY with two SCREWS
A. See Figure 2.
Figure 2
SCREW-A
2
B
4"
EXHAUST
DUCT ASSEMBLY
SCREW-A
C
6"
4"
Installation step 3
OvEN INSTALLATION
1. Place the oven adjacent to the wall or cabinet opening.
Plug the POWER SUPPLY CORD into the electrical outlet.
2. Carefully guide the assembled oven into the prepared opening. Slide the oven on the EXHAUST DUCT ASSEMBLY.
See Figure 3. Avoid pinching the cord between the oven and the wall. Adjust the position of the oven so that the feet of the oven are fitted into the recesses of the
EXHAUST DUCT ASSEMBLY. See Figure 4.
Figure 3
Figure 4
OVEN FOOT
RECESS
EXHAUST DUCT ASSEMBLY
step 4
FRAmE INSTALLATION
1. Position the FRAME ASSEMBLY to be square with the oven. Carefully place the FRAME ASSEMBLY on the oven.
Check that it is level and then secure with two SCREWS
B. See Figure 5.
2. Secure the bottom of the FRAME ASSEMBLY with the two remaining SCREWS B. See Figure 5.
Figure 5
SCREW B
SCREW B
SCREW B
SCREW B
3
OvER OvEN INSTALLATION
Figure 8
Installation
OvER WARmING DRAWER INSTALLATION
Figure 9
RECOMMENDED
HEIGHT 41"
(104.1 CM)
7/8"
(2.2 CM)
MICROWAVE
CUTOUT
TOP OF
MICROWAVE
SHELF
1-7/8"
(4.8 CM)
SINGLE WALL
OVEN CUTOUT
7/8"
(2.2 CM)
RECOMMENDED
HEIGHT
36" (91.4 CM)
MICROWAVE
CUTOUT
1-1/2
(3.8 CM)
WARMING
DRAWER
CUTOUT
Distinctive Appliances Corporation
600 Anton Blvd. Suite 1000
Costa Mesa, CA 92626
4
For Warranty Service: (877) 337-3226
Customer Service: (800) 793-0093
Fax: (626) 403-3130 http://www.Dacor.com
advertisement
* Your assessment is very important for improving the workof artificial intelligence, which forms the content of this project