advertisement

Project: IRMA-Assign
Author: Bernd Schubert
User’s Manual
Assignment Tool for IRMA CAN Sensors
„IRMA-Assign“ V1.1.0.6
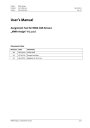
Document status
Revision Date Comments
00 06/24/10 Initial draft
01 07/01/10 General revision
02 04/13/11 Adaption to V1.1.0.6
04/13/2011
Rev. 02
IRMA-Assign 1.1 Manual Rev 02.doc
1/31
Project: IRMA-Assign
Author: Bernd Schubert
04/13/2011
Rev. 02
Table of contents
IRMA-Assign 1.1 Manual Rev 02.doc
2/31
Project: IRMA-Assign
Author: Bernd Schubert
04/13/2011
Rev. 02
1 Introduction
IRMA-Assign is used to assign IRMA CAN Sensors to doors. If more than one sensor is used for certain doors, the sensor positions at these doors are assigned too.
IRMA-Assign offers 3 ways for assignment:
1. Default assignment (refer to paragraph 7.1.3)
2. Manual assignment (refer to paragraph 7.3)
3. Semi-automatic assignment (refer to paragraph 7.4)
The IRMA Sensor assignment procedure performed by IRMA-Assign is based upon modification of the sensor addresses stored in the IRMA Analyzer. It is strongly recommended to use the IRMA service software A21_Update for any update of IRMA Analyzer firmware. Otherwise sensor assignments made using IRMA-Assign will get lost because any specific sensor addresses stored in the IRMA Analyzer will be overwritten by default values.
This document is a short manual describing the features of IRMA-Assign and tries to show its usage. Its target audience are iris customers and third-party people who will be using IRMA-
Assign. The reader should be familiar with the technical concepts of an IRMA CAN system.
2 Requirements and Limitations
IRMA-Assign is part of the so-called IRMA-A21-Windows Suite, which is a set of software components needed to perform service tasks with IRMA 4 systems. Usually, these software components are installed properly by a higher-level setup tool called IRMA-
Setup_Release_5.1.1.exe, which ensures path consistency and error-free collaboration. Please check the iris web site
regularly for updates of the setup tool.
In a nutshell, the requirements to use IRMA-Assign are as follows:
• The IRMA Analyzer firmware needs to support the so-called IRMA installation mode comprising all IRMA Function Areas and the so-called CIP over UIP (CAN IRMA Protocol over Universal IRMA Protocol). These features are provided by any firmware which has
IRMA Opera version 5.93 or later
.
• Required IRMA CAN Sensor firmware:
- Firmware cxyo_05 or later used for IRMA basic Sensors C8To and C9To
- Firmware can_4d32 used for IRMA 3D Sensors DIST4.0x (x=4..6)
- Firmware atm_08 or later in case of IRMA 3D Sensor DIST4.08
• As of now, IRMA-Assign is available with an English or a German user interface. Support of other languages is available on request.
• The Service interface (connector “C”) or system interface (connector “V”) of the IRMA
Analyzer has to be connected to the PC COM interface using the cable K-A21-C-RS232-01-
xxxxx
or the corresponding IRMA service kit. Of course the IRMA system has to be
1 http://www.irisgmbh.de/iris-GmbH_i/technische-dokumente/service-software/index.html
2 see Appendix B
3 External hardware interface available from iris; see Appendix A
IRMA-Assign 1.1 Manual Rev 02.doc
3/31
Project: IRMA-Assign
Author: Bernd Schubert
04/13/2011
Rev. 02 powered on. A USB to RS-232 converter
4
may be used instead of a built-in COM interface.
If doing so, the converter needs to be connected to the PC and its driver software needs to be correctly installed. Please refer to the IRMA component catalogue.
• Last but not least, it should be mentioned that this document refers to IRMA-Assign
V1.1.0.6 or newer.
3 Application Start and Termination
The file name of the the IRMA-Assign application is IrmaAssign.exe. Depending on your installation, you may find it in your IRMA-A21-Windows installation directory or somewhere outside. In the first case, you’ll usually find a corresponding entry in the Start menu, whereas in the second case you’ll need to start the application by double-clicking its icon:
To quit the application, you simply need to click the main window’s close button (X) on the upper right corner:
4 External hardware interface available from iris; see Appendix A
IRMA-Assign 1.1 Manual Rev 02.doc
4/31
Project: IRMA-Assign
Author: Bernd Schubert
Alternatively you can use the shortcut key Alt-F4.
04/13/2011
Rev. 02
The user is requested to select the language of the user interface on the first direct launch of
IRMA-Assign after installation:
If IRMA-Assign is called from within IRMA-A21-Windows, the language of the user interface is passed on by an appropriate command line parameter. As a result, the language setting of IRMA-
Assign is synchronized with that of IRMA-A21-Windows and the selection window shown above will never appear.
IRMA-Assign 1.1 Manual Rev 02.doc
5/31
Project: IRMA-Assign
Author: Bernd Schubert
4 The Main Window
The main window as it appears after direct launch of IRMA-Assign is shown below.
04/13/2011
Rev. 02
To complete the main window overview, two more screenshots follow:
IRMA-Assign 1.1 Manual Rev 02.doc
6/31
Project: IRMA-Assign
Author: Bernd Schubert
04/13/2011
Rev. 02
IRMA-Assign 1.1 Manual Rev 02.doc
7/31
Project: IRMA-Assign
Author: Bernd Schubert
04/13/2011
Rev. 02
The main window of IRMA-Assign consists of three panels with are described in the next paragraphs.
4.1 IRMA System Panel
This panel is the topmost panel in the main window of IRMA-Assign. It comprises these components:
• System status panel
• Group box labelled “IRMA Analyzer”
Essential IRMA Analyzer data are shown in this group box.
• “Query System and Do Default Assignment If Needed” button
Enabled if no action is executed.
• “Apply New Sensor Assignment” button
Enabled if the user has completed a new sensor assignment differing from the one stored in the IRMA Analyzer, and if no action is executed.
• “Exit Without Sensor Assignment” button
Enabled if no action is executed.
The system status panel contains a message and an icon indicating the current status of the IRMA system with respect to the sensor assignment. One of the following messages is displayed in system status panel:
• “IRMA system status unknown”
• “IRMA Sensor assignment in progress”
• “New IRMA Sensor assignments are not written to IRMA Analyzer”
• “IRMA Sensor assignments of IRMA Analyzer are valid and matching assignment grid”
• “IRMA Sensor assignment not possible”
4.2 Sensor Detection Panel
The sensor detection panel is located in the middle of IRMA-Assign’s main window. It comprises these components:
• “Start Detection” button
Enabled if both the IRMA Analyzer query and the IRMA Sensor query were successful.
• “Stop Detection” button
Enabled if the sensor detection has been started successfully.
• Detection action label
Visible when the sensor detection is running. Messages informing the user about the current step of a running sensor detection will be displayed here.
• Detection status panel
Updated when the sensor detection is running. Messages displayed here as well as the panel color are informing the user about the current detection status.
4.3 Configuration Panel
This panel is the bottommost panel in the main window of IRMA-Assign. It comprises these components:
• Radio group “Door Count”
Shows the number of doors as read from the IRMA Analyzer configuration.
IRMA-Assign 1.1 Manual Rev 02.doc
8/31
Project: IRMA-Assign
Author: Bernd Schubert
04/13/2011
Rev. 02
• Group box “Door Types and related IRMA Element Combinations”
Door types (narrow, wide, extra wide) and IRMA Element Combinations used for these doors are shown here. One IRMA Sensor is needed for a narrow door while two IRMA
Sensors are needed for a wide door. Depending on the door width, between 3 and 8 IRMA
Sensors are needed for an extra wide door. Different background colors are used to indicate different doors.
• Sensor assignment grid
The sensor list as read from the IRMA Analyzer and the list of IRMA Sensors actually connected to the IRMA Analyzer as well as the current sensor assignments are shown here.
Different background colors are used to indicate different doors. Sensor addresses differing from the corresponding values stored in the IRMA Analyzer are displayed using red characters. Device numbers of unassigned sensors are displayed using italic characters.
Additional sensor data will be shown as hint when hovering with the mouse pointer over occupied cells of the “Connected” column.
• “Prepare Manual Sensor Assignment” button
Enabled, if IRMA Analyzer query and IRMA Sensor query were successful and no action is executed.
• Signal display panel
Sensor signals will be shown here while the sensor detection is running. If a sensor is detected, its signals will be displayed. Otherwise, the signals of the currently assigned sensor will be shown.
5 INI File
The essential parameters of the IRMA-Assign application are stored in an INI file called
IrmaAssign.ini. This INI file is located in special application data folder and gets updated on termination of IRMA-Assign.
Typical application data folder of IRMA-Assign V1.1.0.6:
C:\Users\UserAccountName\AppData\Roaming\iris-GmbH\IRMA-A21-Windows Release 5
IRMA-Assign 1.1 Manual Rev 02.doc
9/31
Project: IRMA-Assign
Author: Bernd Schubert
6 Log Window And Log File
Use the shortcut key Ctrl-Alt-L to show or hide log window.
04/13/2011
Rev. 02
Any content of the log window is written to the log file IrmaAssign.log on termination of IRMA-
Assign. New information is always appended to the log file which is located in special application data folder. As a result, the size of the log file grows with every run of IRMA-Assign. Any text viewer or text editor may be used to display the log file contents.
Typical application data folder of IRMA-Assign V1.1.0.6:
C:\Users\UserAccountName\AppData\Roaming\iris-GmbH\IRMA-A21-Windows Release 5
Please provide this log file to iris company staff along with any support enquiry regarding IRMA-
Assign.
IRMA-Assign 1.1 Manual Rev 02.doc
10/31
Project: IRMA-Assign
Author: Bernd Schubert
04/13/2011
Rev. 02
7 IRMA Sensor Assignment
7.1 System Query And Default Assignment
The system query and default assignment is a complex action comprising 5 steps:
• Initial Analyzer Query
Always done.
• Sensor Query
Done if no error occurred on preceding analyzer query.
• Default Sensor Assignment
Done if no error occurred on the preceding analyzer query and sensor query, and if there is a mismatch between the current sensor assignment and the list of actually connected sensors.
• Automatic Update of A21 Firmware Parameters
Done if the default sensor assignment has been done.
• Final Analyzer Query
Done if default sensor assignment has been done.
All steps are described in the next paragraphs.
7.1.1 Initial Analyzer Query
The Universal IRMA Protocol (UIP) is used for analyzer query. If the start-up protocol of the IRMA
Analyzer firmware is a customer protocol like e.g. IBIS, switching to UIP is done at first. The user has to select the appropriate communication path and parameters. The query is started once the
“OK” button is pressed afterwards.
IRMA-Assign 1.1 Manual Rev 02.doc
11/31
Project: IRMA-Assign
Author: Bernd Schubert
7.1.2 Sensor Query
The sensor query is done using ICP over UIP.
04/13/2011
Rev. 02
7.1.3 Default Sensor Assignment
Default sensor assignment means that IRMA Sensors will be assigned in the order of ascending device numbers. For this purpose, the underline character being part of IRMA Sensor device number strings may be neglected and device numbers may be treated as 7-digit integer values.
Example: door 1 sensor 1 at door 1 01_00001 door 1 door 2 door 3 sensor 2 at door 1 sensor 1 at door 2 sensor 1 at door 3
01_16383
02_00001
02_12345 door 4 door 4 sensor 1 at door 4 sensor 2 at door 4
15_16382
15_16383
Note: No further sensor assignment is necessary if the IRMA Sensors are installed in the order of ascending device numbers.
Note: The default sensor assignment is not done if the number of connected IRMA Sensors is not equal to the number of sensors read from the IRMA Analyzer configuration. Alternatively, automatic modification of the IRMA Function Area count is offered, if possible.
IRMA-Assign 1.1 Manual Rev 02.doc
12/31
Project: IRMA-Assign
Author: Bernd Schubert
04/13/2011
Rev. 02
7.1.4 Automatic Update of A21 Firmware Parameters
UIP is used to change the A21 firmware parameters. Protocol switching is done at first, if necessary.
IRMA-Assign 1.1 Manual Rev 02.doc
13/31
Project: IRMA-Assign
Author: Bernd Schubert
7.1.5 Final Analyzer Query
A final query of IRMA Analyzer data is done to verify the default sensor assignment.
04/13/2011
Rev. 02
IRMA-Assign 1.1 Manual Rev 02.doc
14/31
Project: IRMA-Assign
Author: Bernd Schubert
04/13/2011
Rev. 02
7.2 Automatic Modification of IRMA Function Area Count
Automatic modification of the IRMA Function Area count is offered if the number of connected
IRMA Sensors is not equal to the number of sensors read from the IRMA Analyzer configuration, but if equality can be achieved by changing the function area count to different admissible value.
IRMA-Assign 1.1 Manual Rev 02.doc
15/31
Project: IRMA-Assign
Author: Bernd Schubert
04/13/2011
Rev. 02
7.3 Manual Assignment
Prerequisite:
A list of the IRMA Sensor device numbers for all sensor positions at all doors has to be available.
Click “Prepare Manual Sensor Assignment” button to start the manual assignment. As a result, the following actions will be executed:
• The column “Assigned” of assignment grid will be cleared.
• All sensors in the “Connected” column will be shown as unassigned, i.e. the device numbers will be displayed using italic characters.
• The sensor addresses shown in the “Sensor Addr.” Column will be resetted to the values stored in the IRMA Analyzer, and hence all address strings will be displayed using black characters.
Manual assignments can now be done using drag-and-drop technique. Click the cell containing the unassigned sensor in the “Connected” column of the sensor assignment grid using left mouse button and drag it to an unoccupied cell in the “Assigned” column. Drop it by unpressing the left mouse button once arrived. Repeat this action for all remaining unassigned sensors. Onceall sensors have been assigned, IRMA-Assign will enable the “Apply New Sensor Assignment” button in the IRMA system panel.
IRMA-Assign 1.1 Manual Rev 02.doc
16/31
Project: IRMA-Assign
Author: Bernd Schubert
04/13/2011
Rev. 02
IRMA-Assign 1.1 Manual Rev 02.doc
17/31
Project: IRMA-Assign
Author: Bernd Schubert
7.4 Semi-automatic Assignment
Prerequisite:
None.
04/13/2011
Rev. 02
The semi-automatic sensor assignment is based upon evaluation of IRMA Sensor signals. The signals are queried from the IRMA Analyzer using the IRMA installation mode comprising all IRMA
Function Areas. The installation mode will be active as long as sensor detection is running. The signals of one IRMA Sensor will be shown in the signal display panel.
In order to use the the semi-automatic assignment, please click the “Start Detection” button.
Shortly thereafter, IRMA-Assign will start giving you instructions (blinking detection action label) and status messages (detection status panel).
IRMA-Assign will analyze the signals sent by the connected sensors in otder to identify the one you are currently covering. Please follow the given instructions. In this case, go to sensor number
1 at the first door and cover it. “Covering” is best done by holding a piece of white paper in a distance of about 25 cm (10 inches) centered below the sensor.
IRMA-Assign 1.1 Manual Rev 02.doc
18/31
Project: IRMA-Assign
Author: Bernd Schubert
04/13/2011
Rev. 02
As you can see, IRMA-Assign will detect sensor covering and will asks you to hold position for a few seconds:
Once IRMA-Assign has no doubts about the correct detection, it will inform you about the result and will perform the assignment of the identified sensor.
As long as there are no problems, IRMA-Assign will tell you to go on like this for the remaining sensors and/or doors.
IRMA-Assign 1.1 Manual Rev 02.doc
19/31
Project: IRMA-Assign
Author: Bernd Schubert
Potential problems that might arise are:
• You cover the same sensor twice
04/13/2011
Rev. 02
• Detection is ambiguous because several sensors show the expected signal signature created by the paper
• Severe problems on the connection of IRMA Analyzer to PC prevent communication
In all cases, IRMA-Assign will show a warning and instruct you to repeat the last instruction, e.g.: or
IRMA-Assign 1.1 Manual Rev 02.doc
20/31
Project: IRMA-Assign
Author: Bernd Schubert
04/13/2011
Rev. 02 or
IRMA-Assign 1.1 Manual Rev 02.doc
21/31
Project: IRMA-Assign
Author: Bernd Schubert
04/13/2011
Rev. 02
When all sensors have successfully been identified, IRMA-Assign will signal “green light” and enable the “Apply New Sensor Assignment” button in the IRMA system panel:
Of course, you can also choose to leave IRMA-Assign without modifications at any time, or to interrupt the detection.
IRMA-Assign 1.1 Manual Rev 02.doc
22/31
Project: IRMA-Assign
Author: Bernd Schubert
04/13/2011
Rev. 02
8 Manual Update of A21 Firmware Parameters
After completion of a manual or semi-automatic assignment, the new sensor addresses have to be written to IRMA Analyzer, i.e. A21 the firmware parameters have to be updated. A confirmation is requested when you are going to update valid IRMA Sensor assignments:
IRMA-Assign 1.1 Manual Rev 02.doc
23/31
Project: IRMA-Assign
Author: Bernd Schubert
04/13/2011
Rev. 02
IRMA-Assign 1.1 Manual Rev 02.doc
24/31
Project: IRMA-Assign
Author: Bernd Schubert
04/13/2011
Rev. 02
A confirmation is requested if user is about to exit IRMA-Assign without writing the new sensor assignments to the IRMA Analyzer. An adequate confirmation is requested if user is about to start a system query without writing the new sensor assignments to the IRMA Analyzer.
IRMA-Assign 1.1 Manual Rev 02.doc
25/31
Project: IRMA-Assign
Author: Bernd Schubert
04/13/2011
Rev. 02
IRMA-Assign 1.1 Manual Rev 02.doc
26/31
Project: IRMA-Assign
Author: Bernd Schubert
04/13/2011
Rev. 02
9 Call of IRMA-Assign by IRMA-A21-Windows
If called from within IRMA-A21-Windows, the language of Irma-Asssign’s user interface as well as any communication parameters are passed on by appropriate command line parameters.
Furthermore, the analyzer query will be started automatically.
10 Troubleshooting
Typical issues that may occur on usage of IRMA-Assign are mentioned in the next paragraphs.
10.1 No IRMA Analyzer Found
Check the power supply of the IRMA Analyzer and its connection to PC as well as the selection of correct communication parameters.
IRMA-Assign 1.1 Manual Rev 02.doc
27/31
Project: IRMA-Assign
Author: Bernd Schubert
10.2 No IRMA Sensors Found
04/13/2011
Rev. 02
Check the complete CAN IRMA bus assembling and verify that all IRMA devices are using same
CAN baud rate.
IRMA-Assign 1.1 Manual Rev 02.doc
28/31
Project: IRMA-Assign
Author: Bernd Schubert
10.3 IRMA Sensor Count Mismatch
04/13/2011
Rev. 02
Change the number of connected IRMA Sensors or use a different IRMA Analyzer firmware to resolve the mismatch.
IRMA-Assign 1.1 Manual Rev 02.doc
29/31
Project: IRMA-Assign
Author: Bernd Schubert
10.4 Aborting of Sensor Query due to Hardware Fault
04/13/2011
Rev. 02
Error 1039 may occur, if sensor query is aborted by switching-off IRMA Analyzer, interruption of cable connection to IRMA Analyzer or disconnections on CAN IRMA bus.
IRMA-Assign 1.1 Manual Rev 02.doc
30/31
Project: IRMA-Assign
Author: Bernd Schubert
04/13/2011
Rev. 02
11 Appendix A: List of IRMA hardware components
Description
PC connection cable, length 3m
PC connection cable, length 10m
iris product name
K-A21-C-RS232-01-00300
K-A21-C-RS232-01-01000
iris order number
0193_40
0193_41
PC connection cable, length 15m
USB to RS-232 converter
FTDI US232R-100
USB to RS-232 converter
Digitus DA-70156 (USB2.0)
USB to RS-232 converter
Digitus DA-70146 (USB1.1)
K-A21-C-RS232-01-01500
USB-RS232-Konverter-
Digitus_DA-70146
USB-RS232-Konverter-
Digitus_DA-70146
0193_42
2913_01
2913_01
Note: USB to RS-232 converters using Prolific PL-2303 chip are known not to work reliably with
IRMA service software.
12 Appendix B: Supported software
12.1 FTDI device driver
• Version 1.0.2176.0 or later is required.
Note: Windows™ Vista and Windows™ 7 will install proper device drivers on the first connection of a USB to RS-232 converter to the PC, provided that an internet connection is available.
12.2 IRMA Analyzer Firmware
• IRMA Opera version 5.93 or later is mandatory, e.g. as found in the firmware files
SC9YO_AA21C_CI-5.94_IMZZA_PV-2.04-CXKO.hex or
SDIST4_AA21C8_CS-5.93_IZZZZ_PV-4.71-01.hex
12.3 IRMA Sensor Firmware
• Firmware cxyo_05 or higher used for IRMA basic Sensors C8To and C9To
• Firmware can_4d32 used for IRMA 3D Sensors DIST4.0x (x=4..6)
• Firmware atm_08 or higher in case of IRMA 3D Sensor DIST4.08
12.4 Operating Systems
• Windows™ XP, quality assurance test made for Windows™ XP Professional SP3
• Windows™ Vista, 32-bit and 64-bit versions, quality assurance test made for Windows™ Vista Business SP1
• Windows™ 7, 32-bit and 64-bit versions, quality assurance test made for Windows™ 7 Professional
• Windows™ Server 2003 or Windows™ Server 2008
IRMA-Assign 1.1 Manual Rev 02.doc
31/31
advertisement
Related manuals
advertisement