advertisement

WARNING
Read these instructions completely before using the jump starter and save them for future reference. Before using the jump starter to jump start a car, truck, boat or to power any equipment, read these instructions and the instruction manual/safety information provided by the car, truck, boat or equipment manufacturer. Following all manufacturers’ instructions and safety procedures will reduce the risk of accident.
Working around lead-acid batteries may be dangerous. Lead-acid batteries release explosive gases during normal operation, charging and jump starting. Carefully read and follow these instructions for safe use. Always follow the specific instructions in this manual and on the jump starter each time you jump start using the jump starter.
All lead-acid batteries (car, truck and boat) produce hydrogen gas which may violently explode in the presence of fire or sparks.
Do not smoke, use matches or a cigarette
lighter while near batteries. Do not handle the battery while wearing vinyl clothing because static electricity sparks are generated when vinyl clothing is rubbed. Review all cautionary material on the jump starter and in the engine compartment.
Always wear eye protection, appropriate protective clothing and other safety equipment when working near lead-acid batteries. Do not touch eyes while working on or around lead-acid batteries.
Always store clamps in their Grip-Lock
®
ears, away from each other or common conductors. Improper storage of clamps may cause the clamps to come in contact with each other, or a common conductor, causing the battery to short circuit and generate high enough heat to ignite most materials.
Use extreme care while working within the engine compartment, because moving parts may cause severe injury. Read and follow all safety instructions published in the vehicle's
Owner's Manual.
While the battery in the jump starter is a sealed unit with no free liquid acid, batteries being jump started with the jump starter unit likely contain liquid acids which are hazardous if spilled.
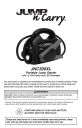
JNC300XL
Portable Jump Starter
with 12 Volt Power and LED Flashlight
Your jump starter is engineered and manufactured to provide years of reliable operation. Please read and understand this owner’s manual and the owner’s manual of any vehicle being jump started before using your jump starter. Please keep this manual for future use.
WARNING
Failure to follow instructions may cause damage or explosion; always shield eyes.
Read entire instruction manual before use.
Warning: This product contains chemicals, including lead, known to the State of California to cause cancer, birth defects and other reproductive harm. Wash hands after handling.
Pb
Never turn the
CONTAINS SEALED LEAD ACID BATTERY.
BATTERY MUST BE RECYCLED.
system and the
Car Start, as well as personal injury.
Charge your jump starter for 12 hours immediately upon retail purchase, charge after each use and charge once every three months when not in use.
Safety Information
WARNING
Read these instructions completely before using the jump starter and save them for future reference. Before using the jump starter to jump start a car, truck, boat or to power any equipment, read these instructions and the instruction manual/safety information provided by the car, truck, boat or equipment manufacturer. Following all manufacturers’ instructions and safety procedures will reduce the risk of accident.
Working around lead-acid batteries may be dangerous. Lead-acid batteries release explosive gases during normal operation, charging and jump starting. Carefully read and follow these instructions for safe use. Always follow the specific instructions in this manual and on the jump starter each time you jump start using the jump starter.
All lead-acid batteries (car, truck and boat) produce hydrogen gas which may violently explode in the presence of fire or sparks.
Do not smoke, use matches or a cigarette
lighter while near batteries. Do not handle the battery while wearing vinyl clothing because static electricity sparks are generated when vinyl clothing is rubbed. Review all cautionary material on the jump starter and in the engine compartment.
Always wear eye protection, appropriate protective clothing and other safety equipment when working near lead-acid batteries. Do not touch eyes while working on or around lead-acid batteries.
Always store clamps in their Grip-Lock
®
ears, away from each other or common conductors. Improper storage of clamps may cause the clamps to come in contact with each other, or a common conductor, causing the battery to short circuit and generate high enough heat to ignite most materials.
Use extreme care while working within the engine compartment, because moving parts may cause severe injury. Read and follow all safety instructions published in the vehicle's
Owner's Manual.
While the battery in the jump starter is a sealed unit with no free liquid acid, batteries being jump started with the jump starter unit likely contain liquid acids which are hazardous if spilled.
General precautions for use:
• Someone should always be within range of your voice or close enough to come to your aid when you work near a lead-acid battery.
• Have plenty of fresh water and soap nearby in case battery acid contacts skin, clothing or eyes. Protective eyewear should always be worn when working near lead-acid batteries.
• If battery acid contacts skin or clothing, wash immediately with soap and water.
If acid enters eye, immediately flood eye with cold running water for at least 10 minutes and get medical attention immediately.
• The charger uses household 120V electrical supply, which if misused, may cause injury or fire.
• Remove personal metal items such as rings, bracelets, necklaces and watches when working with a lead-acid battery. A lead-acid battery can produce a short-circuit current high enough to weld a ring or the like to metal, causing a severe burn.
• Use the jump starter for jump starting lead-acid batteries only. Do not use for jump starting dry-cell batteries that are commonly used with home appliances. These batteries may burst and cause injury to persons and damage to property.
WARNING
Doing so could cause sparking, explosion or other damage to your vehicle's electrical system and the
Car Start, as well as personal injury.
Never turn the
Car Start ON before connecting the Car Start to a vehicle/battery.
• To prevent arcing, NEVER allow clamps to touch together or to contact the same piece of metal.
• Use of an attachment not recommended or sold by the manufacturer may result in a risk of damage to the unit or injury to personnel.
• When using the power extension cord, pull on the plug and never on the wire when disconnecting.
• Do not recharge the jump starter with a damaged power extension cord. Replace it immediately.
• The jump starter may be used under any weather condition – rain, snow, hot or cold temperatures.
• Do not submerge in water.
• Do not operate with flammables such as gasoline, etc.
• If the jump starter receives a sharp blow or is otherwise damaged in any way, have it checked by a qualified service person. If the jump starter is leaking battery acid, do not ship it. Take it to the closest battery recycler in your area.
• Do not disassemble the jump starter. Have it checked by a qualified service person.
• The jump starter should never be left in a completely discharged state for any period of time. Damage to the battery could be permanent, with poor performance as a result. When not in use, recharge every three (3) months.
• Always store, use and charge the jump starter in an area where children cannot get to the unit.
Performance and Temperature
Performance of your jump starter will depend upon several factors:
• A good, solid connection between the jump starter clamps and the battery and ground connections are a must. Moving the clamps back and forth while connecting to the battery will help create a better connection.
• Clean connections between your vehicle or equipment battery and its terminals are very important. For an optimal connection, corrosion (soft grayish-white buildup) on battery terminals must be removed. With the ignition turned off, disconnect the battery cables and clean the terminals and battery posts with a baking soda solution.
• All batteries are affected by temperature changes, and the small, lightweight battery in the jump starter is more sensitive to storage temperature than a standard automotive battery. The ideal storage environment is room temperature, or 68ºF.
Jump Starting Instructions
Note: Review this instruction manual and the instruction/safety manual provided by the manufacturer of the vehicle being jump started.
Note: For optimum performance, do not store your jump starter below 50° when using as
a jump starter. NEVER charge or jump start a frozen battery.
1. Use in a well ventilated area. Shield eyes with safety glasses or goggles.
2. Turn off the ignition and all vehicle accessories (lights, radio, heater, etc.) before making cable connections.
Note: A good, solid and clean connection is essential for a successful jump start
(see Performance and Temperature section).
3. Taking care to never touch the clamps together, first remove the RED POS (+) clamp from it’s ear and connect it to the RED POS (+) battery terminal. Then remove the BLACK NEG (–) clamp from it’s ear and connect it to the engine ground, or a non-moving metal engine part. Never connect to the fuel line, fuel injector or carburator as the engine ground.
Note: Many vehicles feature alt ernate starting points, away from the battery.
Always use the alternate starting points whenever available.
4. Make sure the cables are not in the path of moving engine parts (belts, fans, etc.).
5. Stay clear of batteries while jump starting.
6. Start the vehicle (turn on the vehicle ignition).
Note: If the vehicle doesn’t start within 6 seconds, let the jump starter cool for 3
minutes before attempting to start the vehicle again or you may damage the jump
starter.
7. Once the vehicle is started, disconnect the negative (–) battery clamp from the vehicle ground and return it to its Grip-Lock
®
ear.
8. Disconnect the positive (+) clamp and return it to it’s Grip-Lock
®
ear.
9. Always return the clamps to their Grip-Lock
® clamps to the handle of the jump starter.
ears after use. Never attach the
10. After use, recharge the jump starter (see Recharging section).
12 Volt DC Power
1 Licht . . . . . . . . . . . Tiefpunkt
The jump starter features a 12 Volt power outlet hidden behind the LED flashlight.
Remove the flashlight (taking care not to misplace or damage it) to expose the 12 Volt yellow button.
*
3 Lichter. . . . . . . . . . Gut
2 Lichter. . . . . . . . . . Mitte
Immer auf,
Bitte merken Sie dieses Licht anzeigt, dass der Auflader arbeitet.
LED Ausstellung - Presse und hŠlt roten Knopf
accessory, or overload source, is removed. After extreme power usage, recharge the unit for 36-48 hours.
Immer auf, wenn Auflader angeschlossen ist
Battery Status
Press and hold the red battery level status button to display the battery status.
3 lights . . . . . . . . . . Good
2 lights . . . . . . . . . . Medium
1 light . . . . . . . . . . . Low
Flashing . . . . . . . . . Recharge Unit
Always On
When Charger is Plugged In*
*
Please note this light indicates the charger is working.
LED Display - Press and hold red button
4 lights when plugged in... Charging complete
Always On When Charger is Plugged In
3 luces . . . . . . . . . . Bueno
2 luces . . . . . . . . . . Medio
. . . . . . . . . . . Bajo
Destellar. . . . . . . . . Recargue la Unidad
Siempre En
Cuándo Corcel se Conecta*
*
Note por favor que esta luz indica el corcel trabaja.
Despliegue LED - La prensa y tiene el bot—n rojo
4 luces . Cargar completo
Siempre En
Cuándo Corcel se Conecta
3 lumières. . . . . . . . Bon
2 lumières. . . . . . . . Milieu
1 lumière. . . . . . . . . Niveau bas
Flashing . . . . . . . . . Recharger l'Unité
Toujours Sur
Quand le Chargeur Est Branché sur*
*
S'il vous plaît noter cette lumière indique que le chargeur travaille.
Exposition LED - La presse et tient le bouton rouge
4 lumières. . . . . . . . Charger complet
Toujours Sur
Quand le Chargeur Est Branché sur
3 luci . . . . . . . .
2 luci . . . . . . . .
1 luce . . . . . . .
Lampeggiare. .
Sempre Su
.
.
.
.
.
.
.
.
.
.
.
Buono
Mezzo
Basso
. Ricaricare l'Unità
Quando il Caricatore è Inserito In*
*
Per favore di notare questa luce indica il caricatore lavora.
La Mostra LED - la stampa e tiene il bottone rosso
4 luci . . . . . . . . L'addebitamento completo
Sempre Su
Quando il Caricatore è Inserito In
3 Lichter. . . . . . . . . . Gut
2 Lichter. . . . . . . . . . Mitte
1 Licht . . . . . . . . . . . Tiefpunkt
Aufleuchten . . . . . . . Laden Sie auf
Immer auf,
wenn Auflader angeschlossen ist*
*
Bitte merken Sie dieses Licht anzeigt, dass der Auflader arbeitet.
4 Lichter. . . . . . . . . Laden vollständig
2. Plug the charger cord into the Recharge Jack on the front of the unit.
3. Plug the wall charger into an AC outlet.
4. The right LED will turn on while the charger is plugged into AC power to indicate the unit is charging.
3 lights . . . . . . . . . . Good
2 lights . . . . . . . . . . Medium
Flashing . . . . . . . . . Recharge Unit
Always On
*
Please note this light indicates the charger is working.
fully charged, all LED’s will light.
LED Display - Press and hold red button
4 lights when plugged in... Charging complete
Always On When Charger is Plugged In
Flashlight
*
3 luces . . . . . . . . . . Bueno
2 luces . . . . . . . . . . Medio
. . . . . . . . . . . Bajo
Destellar. . . . . . . . . Recargue la Unidad
Storage
The jump starter may be stored virtually anywhere, and in any position, though we recommend storing the unit upright. However, take precautions to ensure that the positive and negative clamps do not come into contact with each other or a common metal surface. We recommend storing the jump starter in the box in which it was originally received.
4 luces .
Siempre En
Cargar completo
Cuándo Corcel se Conecta
Battery Disposal
Pb
This unit contains a sealed non-spillable lead-acid battery.
3 lumières. . . . . . . . Bon
2 lumières. . . . . . . . Milieu
1 lumière. . . . . . . . . Niveau bas
The jump starter battery may be removed by unscrewing the perimeter screws on the back cover. Disconnect the wires from the battery terminals. Note the position of the battery and wire locations.
*
Toujours Sur
S'il vous plaît noter cette lumière indique que le chargeur travaille.
Exposition LED - La presse et tient le bouton rouge
4 lumières. . . . . . . . Charger complet
Toujours Sur
Quand le Chargeur Est Branché sur
3 luci . . . . . . . .
2 luci . . . . . . . .
1 luce . . . . . . .
Lampeggiare. .
Sempre Su
.
.
.
.
.
.
.
.
.
.
.
Buono
Mezzo
Basso
. Ricaricare l'Unità
Quando il Caricatore è Inserito In*
*
Per favore di notare questa luce indica il caricatore lavora.
La Mostra LED - la stampa e tiene il bottone rosso
4 luci . . . . . . . . L'addebitamento completo
Sempre Su
Quando il Caricatore è Inserito In
Limited Warranty
Clore Automotive warrants this product to be free from defects in material or workmanship for a period of one year from the date of original end user purchase.
This warranty extends to each person who acquires lawful ownership within one year of the original retail purchase, but is void if the product has been abused, altered, misused or improperly packaged and damaged when returned for repair.
This warranty applies to the product only and does not apply to any accessory items included with the product which are subject to wear from usage; the replacement or repair of these items shall be at the expense of the owner.
THE TERMS OF THE CLORE AUTOMOTIVE LIMITED WARRANTY CONSTITUTE
THE BUYER’S SOLE AND EXCLUSIVE REMEDY. THE IMPLIED WARRANTIES OF
MERCHANTABILITY AND FITNESS FOR A PARTICULAR PURPOSE ARE LIMITED
IN DURATION TO THIS EXPRESS WARRANTY. AFTER 1 YEAR FROM DATE OF
PURCHASE, ALL RISK OF LOSS FROM WHATEVER REASON SHALL BE PUT UPON
THE PURCHASER.
CLORE AUTOMOTIVE SHALL NOT BE LIABLE FOR INCIDENTAL AND CONSEQUENTIAL
DAMAGES UNDER ANY CIRCUMSTANCES: CLORE AUTOMOTIVE’S LIABILITY, IF ANY,
SHALL NEVER EXCEED THE PURCHASE PRICE OF THIS PRODUCT REGARDLESS OF
WHETHER LIABILITY IS PREDICATED UPON BREACH OF WARRANTY (EXPRESS OR
IMPLIED), NEGLIGENCE, STRICT TORT OR ANY OTHER THEORY.
Some states do not permit the limitation of warranties or limitation of consequential or incidental damages, so the above disclaimer and limitation may not apply to you. This warranty gives you specific legal rights, and you may also have other rights which vary from state to state.
For Warranty or Service
If this product fails within the first 30 days after retail purchase due to a defect in material or workmanship, return it to your place of purchase for an exchange. From day 31 to day 365 after retail purchase, contact Clore Automotive Technical Service at the number below for warranty service. A valid, dated sales receipt is required to obtain service under this warranty.
For best service and to receive periodic product updates, follow the instructions below to register your purchase:
Please visit: www.cloreregistration.com
Click on the Jump-N-Carry logo
Complete the information in the web form and click “submit”
It’s that easy!
For answers to questions concerning use, out-of-warranty service, or warranty/service information on this or other Clore Automotive products, contact:
Clore Automotive Technical Service
800.328.2921
913.310.1050 www.cloreautomotive.com
Warning: This product contains chemicals, including lead, known to the State of California to cause cancer, birth defects and other reproductive harm. Wash hands after handling.
Informacion de Seguridad
Precauciones generales para el uso:
• Al trabajar cerca de baterías de plomo-ácido, siempre debe haber alguien cerca, para que pueda oírlo y ayudarlo de ser necesario.
• Tenga a mano abundante agua fresca y jabón, por si el ácido de la batería entra en contacto con la piel, los ojos o la ropa. Siempre debe usar protección para los ojos al trabajar cerca de baterías de plomo-ácido.
• Si el ácido de la batería entra en contacto con la piel o la ropa, lávela de inmediato con agua y jabón. Si el ácido entra en contacto con los ojos, enjuáguelos de inmediato con abundante agua fría por un mínimo de 10 minutos y solicite atención médica con urgencia.
• Tenga sumo cuidado en evitar que una herramienta metálica caiga sobre la batería.
Podría producir chispas o provocar un cortocircuito en la batería u otras piezas eléctricas y así originarse una explosión.
• El cargador utiliza el suministro eléctrico de 120 voltios normal de una casa que, si se lo usa en forma indebida, puede provocar lesiones o incendios.
• Al trabajar con baterías de plomo-ácido, quítese los accesorios personales de metal, tales como anillos, brazaletes, collares y relojes. Las baterías de plomo-ácido pueden provocar un cortocircuito con corriente capaz de derretir completamente un anillo u objeto similar y así provocar quemaduras graves.
• Utilice la unidad arrancador para arrancar sólo baterías de plomo-ácido. No la utilice para recargar baterías de celdas secas, que suelen usarse en los electrodomésticos.
Podrían explotar y provocar lesiones y daños materiales.
• NUNCA arranque ni recargue una batería congelada.
• Para evitar la formación de un arco eléctrico, NUNCA permita que las pinzas se toquen entre sí o entren en contacto con una misma pieza de metal.
• El uso de accesorios no recomendados o comercializados por el fabricante podría representar un riesgo de daño a la unidad o lesiones al personal.
• Si utiliza un cargador de pared o un cable de extensión, al desconectar la unidad, tire del enchufe, nunca del cable.
• No recargue la unidad arrancador con un cable de extensión dañado. Reemplácelo inmediatamente.
• La unidad arrancador puede utilizarse en cualquier condición climática: lluvia, nieve, calor o frío.
• No la sumerja en agua.
• No la opere cerca de productos inflamables, como gasolina, etc.
• Si la unidad arrancador recibe un golpe fuerte o se daña de alguna manera, haga que la revise un profesional de servicio técnico. Si se produce un derrame de ácido de la batería, no la despache. Llévela al establecimiento de reciclado de baterías más próximo a su domicilio.
• No desarme la unidad arrancador. Haga que la revise un profesional de servicio técnico.
• La unidad arrancador nunca debe quedar con la batería totalmente descargada durante lapso alguno. La batería podría dañarse en forma permanente y, en consecuencia, funcionar mal. Cuando no la use, recárguela cada tres (3) meses.
• Siempre tienda, utiliza y carga el arrancador en un área donde niños no pueden llegar a la unidad.
Rendimiento y temperatura
El rendimiento de su unidad arrancador dependerá de varios factores:
• Es fundamental lograr una conexión firme e integral entre las pinzas de la unidad arrancador, y la batería y la puesta a tierra. Si mueve las pinzas hacia adelante y hacia atrás al conectarlas a la batería, ayudará a que tengan mejor contacto.
• Es muy importante que las conexiones entre la batería del vehículo o equipo y los terminales estén limpias. Para una conexión óptima, elimine la corrosión
(acumulación blanda de color blanco grisáceo) de los terminales de la batería. Con el motor apagado, desconecte los cables de la batería y limpie los terminales y bornes de la batería con una solución de bicarbonato de sodio.
• Todas las baterías se ven afectadas por los cambios de temperatura, y la batería compacta y liviana de la unidad arrancador es más sensible a la temperatura de almacenamiento que una batería estándar para automóviles. El almacenamiento ideal es a temperatura ambiente o 68° F.
Instrucciones para arranques de emergencia
Nota: Revise la información de este manual de instrucciones y del manual de instrucciones/seguridad que proporciona el fabricante del vehículo que va a arrancar.
Nota: Para un rendimiento óptimo, no guarde la unidad arrancador a temperaturas inferiores a los 50° F (10° C) cuando lo utilice como arrancador de emergencia. NUNCA arranque ni recargue una batería congelada.
1. Use la unidad en un espacio bien ventilado. Protéjase los ojos con gafas o lentes de seguridad.
2. Apague el motor y todos los accesorios del vehículo (luces, radio, calefacción, etc.) antes de conectar los cables.
Nota: Para un arranque de emergencia satisfactorio, es fundamental contar con
una conexión plena y firme (consulte la sección Rendimiento y temperatura).
3. Con sumo cuidado de que las pinzas nunca se toquen entre sí, quite primero la pinza ROJA POSITIVA (+) de su cubierta y conéctela al terminal ROJO
POSITIVO (+) de la batería. Luego quite la pinza NEGRA NEGATIVA (–) de su cubierta y conéctela a la puesta a tierra del motor o a una pieza metálica del motor que no sea móvil. Para la puesta a tierra del motor, nunca conecte la pinza al conducto de gasolina, al inyector o al carburador.
Nota: Muchos vehículos traen puntos de arranque alternativos, alejados de la
batería. Si el vehículo los tiene, use siempre los puntos de arranque alternativos.
4. Asegúrese de que los cables no se enganchen con las partes móviles del motor
(correas, ventiladores, etc.).
5. Manténgase alejado de las baterías al arrancar de emergencia un motor.
6. Ponga en marcha el vehículo (encienda el motor).
7. Una vez que encienda el motor, desconecte la pinza negativa (–) de la estructura del vehículo y colóquela en su cubierta.
8. Desconecte la pinza positiva (+) y colóquela en su cubierta.
9. Después de usar las pinzas, colóquelas siempre en las cubiertas respectivas.
Nunca sujete las pinzas a la manija de la unidad arrancador.
10. Luego de usarla, recargue la unidad arrancador (consulte la sección Recarga).
Energia de 12 voltios de CD
La unidad arrancador representa una 12 salida del poder del Voltio escondida detrás de la linterna de LED. Quite la linterna (tomando el cuidado para no perder ni dañarlo) exponer la 12 salida del Voltio. Para prender la salida, deprima el botón amarillo. Para girar de la salida, deprime el botón amarillo. Este equipo puede suministrar potencia a accesorios de hasta 12 Amperios.
Si la calificación de amperaje se excede, un cortacircuitos incorporado de auto-repone cierra automáticamente el poder lejos hasta que el accesorio, o la fuente de sobrecarga, se quite. Después que el uso extremo del poder, recarga la unidad durante 36-48 horas.
Estado de la bateria
Mantenga presionado el botón rojo de nivel de batería para que aparezca el estado de la batería.
Recarga
1. El arrancador viene con un corcel del monte de pared.
2. Tape la cuerda del corcel en la Recarga Jack en la frente de la unidad.
3. Tape el corcel de pared en cualquier salida de C.A.
4. El correcto LED prenderá mientras el corcel se tapa en el poder de C.A. para indicar la unidad carga.
5. Nosotros no recomendamos cargando la unidad para más de 24 horas bajo el uso normal. Los tiempos sugeridos de recarga son:
• Recargue la unidad por 3 horas cuando la unidad se utiliza para arranca
• Recargue la unidad por 12-24 horas bajo condiciones muy altas de descarga
6. La prensa y tiene el botón rojo para verificar la batería que carga la posición.
Cuándo la unidad se carga completamente, todo LED encenderá.
Linterna
La unidad arrancador está equipada con una linterna incorporada. La transportabilidad de la unidad hace el arrancador muy útil en tiempos de la emergencia, la recreación y el uso general. Apriete simplemente el botón amarillo para prender la linterna o lejos.
Almacenamiento
La unidad arrancador puede almacenarse prácticamente en cualquier lugar y en cualquier posición. En todo caso le recomendamos que almacene el equipo en posición vertical. Sin embargo, tome precauciones para asegurarse de que las pinzas positiva y negativa no entren en contacto entre sí o con una misma pieza metálica. Se recomienda almacenar la unidad arrancador en la caja en la que la recibió originalmente.
Pb
Desecho de bateria
Esta unidad contiene una batería sellada de plomo-ácido
antiderrame. La batería debe reciclarse. Consulte a los organismos gubernamentales locales o estatales acerca de las reglamentaciones para un desecho adecuado.
La batería arrancador puede extraerse quitando los tornillos perimetrales de la cubierta posterior. Desconecte los cables de los terminales de la batería. Tenga presente la posición de la batería y la ubicación de los cables.
Garantia limitada
Clore Automotive justifica este producto para ser libre de defectos en la materia o la habilidad para un período de un año de la fecha de la compra original de usuario final.
Esta garantía se extiende a todas las personas que adquieran legalmente el derecho de propiedad dentro de los uno año de la compra inicial, pero es nula en caso de que el producto haya sufrido abusos, o haya sido alterado, o visto sujeto a mal uso o empacado en forma inadecuada y dañado durante el traeyecto de devolución luego de la reparación.
Esta garantía se aplica al producto solamente y no a los accesorios incluídos con el producto y sujetos a desgaste; el reemplazo o la reparación de dichos accesorios corre por cuenta del comprador.
LOS TERMINOS Y CONDICIONES DE ESTA GARANTIA LIMITADA DE CLORE
AUTOMOTIVE CONSTITUYEN EL REMEDIO UNICO Y EXCLUSIVO DEL COMPRADOR.
LA DURACION DE LAS GARANTIAS IMPLICITAS O MERCANTIBILIDAD Y ADECUACION
DE ESTE PRODUCTO PARA UN USO DETERMINADO ESTAN LIMITADAS A LA
DURACION DE ESTA GARANTIA. AL CABO DE LOS 1 AÑO DE LA FECHA DE COMPRA,
TODOS LOS RIESGOS DE PERDIDA POR CUALQUIER MOTIVO CORREN POR CUENTA
DEL COMPRADOR.
CLORE AUTOMOTIVE NO SE HACE RESPONSABLE POR LOS DAÑOS INCIDENTALES
O FORTUITOS BAJO NINGUNA CIRCUNSTANCIA: LA RESPONSABILIDAD DE
CLORE AUTOMOTIVE, SI ALGUNA, NUNCA EXCEDERA DEL PRECIO DE COMPRA
DEL APARATO SIN TENER EN CUENTA SI LA RESPONSABILIDAD SE DEBE
A ROMPIMIENTO DEL CONTRATO DE GARANTIA (EXPRESA O IMPLICITA),
NEGLIGENCIA, O CUALQUIER OTRA TEORIA JURIDICA.
Algunos estados no permiten limitaciones de garantías o limitaciones de daños en consecuencia o fortuitos, de modo que la limitación de responsabilidades previa puede no corresponder en su caso. Esta garantía otorga derechos legales específicos, y puede ser que le correspondan otros derechos que varían de estado en estado.
Servicio técnico o garantia
Si este producto falla dentro de los primeros 30 días después que la venta al por menor compra debido a un defecto en la materia o la habilidad, lo vuelva a su lugar de la compra para un cambio. Del día 31 al día 365 después de la compra de la venta al por menor, contactan Clore el Servicio Técnico Automotor en el número abajo para servicio de garantía. Un válido, fechó recibo de ventas se requiere a obtener el servicio bajo esta garantía.
Para respuestas a preguntas con respecto al uso, servicio fuera de la garantía, o información sobre servicio y garantía sobre otros productos Clore Automotive, póngase en contacto con:
Clore Automotive Technical Service
800.328.2921
913.310.1050 www.cloreautomotive.com
Informations de sécurité
Précautions générales d’utilisation :
• Assurez-vous qu’un tiers soit à portée de voix ou à proximité pour vous prêter assistance quand vous travaillez près d’une batterie au plomb-acide.
• Ayez une réserve d’eau douce et de savon à portée de main au cas où l’acide de la batterie entrerait en contact avec votre peau, vos vêtements ou vos yeux. Portez toujours des lunettes de protection quand vous travaillez près d’une batterie au plombacide.
• Si l’acide de la batterie entre en contact avec votre peau ou vos vêtements, lavezles immédiatement à l’eau et au savon. Si l’acide pénètre dans vos yeux, rincez-les immédiatement à l’eau courante froide pendant au moins 10 minutes et consultez immédiatement un médecin.
• Faites très attention à ne pas laisser tomber d’outil métallique sur une batterie. Cela pourrait créer une étincelle ou entraîner un court-circuit de la batterie ou d’un appareil
électrique, ce qui risquerait de provoquer une explosion.
• Le chargeur fonctionne sous une alimentation électrique 120 V, ce qui, en cas de mauvaise utilisation, pourrait occasionner des blessures ou déclencher un incendie.
• Retirez tout bijou ou objet métallique (bague, bracelet, collier et montre) quand vous travaillez près d’une batterie au plomb-acide. Une batterie au plomb-acide peut produire un courant de court-circuit suffisamment élevé pour souder une bague (ou un objet similaire) à un autre métal, ce qui pourrait provoquer de graves brûlures.
• Utilisez le survolter pour recharger/survolter uniquement des batteries au plomb-acide.
N’utilisez pas de batterie à anode sèche, telles que celles qui sont régulièrement utilisées dans les appareils ménagers. En effet, ces batteries pourraient exploser, blessant les personnes situées à proximité et provoquant des dégâts matériels.
• N’essayez JAMAIS de charger ou de survolter une batterie gelée.
• Pour empêcher l’apparition d’arcs électrique, ne laissez JAMAIS les pinces se toucher ou entrer en contact avec le même morceau de métal.
• Si vous utilisez un accessoire complémentaire qui n’est pas conseillé ou vendu par le fabricant, vous risquez d’endommager l’appareil ou d’être blessé.
• Pour utiliser le chargeur mural ou une rallonge, tirez sur la fiche et jamais sur le cordon.
• Ne rechargez pas le survolter en utilisant une rallonge endommagé(e). Le remplacer tout de suite.
• Le survolter peut être utilisé dans n’importe quelle condition climatique : Pluie, neige, température chaude ou froide.
• Ne le plongez pas dans de l’eau.
• Ne l’utilisez pas avec des produits inflammables, tels que l’essence.
• Si le survolter reçoit un choc violent ou qu’il est endommagé, faites-le inspecter par un technicien qualifié. Si de l’acide de batterie s’échappe du survolter, ne l’expédiez pas, mais ramenez-le au centre de recyclage de batteries le plus proche de vous.
• Ne démontez pas le survolter. Faites-le inspecter par un technicien qualifié.
• Ne laissez jamais le survolter déchargé pendant une longue période. Vous risqueriez en effet d’endommager la batterie de manière permanente. Lorsqu’il n’est pas utilisé, laissez le survolter connecté au chargeur mural et rechargez-le tous les trois mois.
• Toujours le magasin, utiliser et charger le survolter un secteur où un enfants ne peuvent pas obtenir à l’unité.
Performance et température
La performance du survolteur dépend de plusieurs facteurs :
• Il est absolument indispensable d’assurer un excellent contact entre les pinces du survolteur, la batterie et la mise à terre. Faites basculer les pinces d’avant en arrière quand vous les reliez à la batterie pour obtenir un meilleur contact.
• Un bon contact entre la batterie de votre véhicule (ou équipement) et les bornes du survolteur est très important. Pour un contact optimal, enlevez toute corrosion
(dépôt mou blanchâtre) sur les bornes de la batterie. Coupez le contact, retirez les câbles de la batterie et nettoyez les bornes de batterie à l’aide d’une solution au bicarbonate de soude.
• Toute batterie subit les effets des changements de température. La petite batterie légère du survolteur est encore plus sensible à la température d’entreposage qu’une batterie d’auto conventionnelle. La température idéale pour l’entreposage est la température ambiante, soit 68 ºF.
Instructions relatives au survoltage
Note : Lisez attentivement ce mode d’emploi, ainsi que le mode d’emploi et les instructions relatives à la sécurité fournis par le fabricant du véhicule que vous aidez à démarrer.
Note : Pour obtenir des performances optimales, n’entreposez pas le survolter à moins de 50° F lorsqu’il est utilisé en tant que survolteur. N’essayez jamais de charger ou de survolter une batterie gelée.
1. Choisissez un endroit bien aéré. Protégez-vous les yeux avec des lunettes protectrices.
2. Coupez le contact et éteignez tous les accessoires du véhicule (éclairage, radio, chauffage, etc.) avant de relier les câbles.
Note : Il est essentiel d’assurer un contact propre et net pour réussir le survoltage
(voir la section Performance et température).
3. En prenant soin de ne jamais mettre les pinces en contact, retirez d’abord la pince du câble positif (+) rouge de sa gaine et reliez-la à la borne positive (+) rouge de la batterie. Retirez ensuite la pince du câble négatif (–) noir de sa gaine et reliez-là au bloc-moteur ou à une autre composante métallique non mobile du moteur. Ne reliez jamais les câbles à la canalisation d’essence, à l’injecteur de combustible ou au carburateur à la place du bloc-moteur.
Note : Certains véhicules sont équipés de points de démarrage alternatifs, à
distance de la batterie. Utilisez toujours les points de démarrage alternatifs, le cas
échéant.
4. Vérifiez que les câbles ne se trouvent pas sur la trajectoire des pièces mobiles du moteur (courroies, ventilateur, etc.).
5. Tenez-vous à distance des batteries pendant le survoltage.
6. Démarrez le véhicule.
Note : Si le véhicule ne démarre pas au bout de 6 secondes, laissez le survolter
refroidir pendant 3 minutes avant toute nouvelle tentative de démarrage, sans quoi
vous risquez d’endommager le survolter.
7. Une fois que le véhicule a démarré, déconnectez la pince négative (–) de l’armature du véhicule et rangez-la dans sa gaine.
8. Déconnectez la pince positive (+) et rangez-la dans sa gaine.
9. Rangez toujours les pinces dans leur gaine après utilisation. N’accrochez jamais les pinces à la poignée du survolteur.
10. Après utilisation, rechargez le survolteur (voir la section Rechargement du
survolteur).
3 Lichter. . . . . . . . . . Gut
2 Lichter. . . . . . . . . . Mitte
1 Licht . . . . . . . . . . . Tiefpunkt
Aufleuchten . . . . . . . Laden Sie auf
Immer auf,
wenn Auflader angeschlossen ist*
*
Bitte merken Sie dieses Licht anzeigt, dass der Auflader arbeitet.
LED Ausstellung - Presse und hŠlt roten Knopf
4 Lichter. . . . . . . . . Laden vollständig
Immer auf, wenn Auflader angeschlossen ist
3 lights . . . . . . . . . . Good
2 lights . . . . . . . . . . Medium
1 light . . . . . . . . . . . Low
Flashing . . . . . . . . . Recharge Unit
Always On
When Charger is Plugged In*
*
Please note this light indicates the charger is working.
LED Display - Press and hold red button
4 lights when plugged in... Charging complete
Always On When Charger is Plugged In
Alimentation c.c. 12 V
endommager il) exposer la 12 sortie de Volt. Pour allumer la sortie, déprimer le bouton
*
3 luces . . . . . . . . . . Bueno
2 luces . . . . . . . . . . Medio
Destellar. . . . . . . . . Recargue la Unidad
Siempre En
Cuándo Corcel se Conecta*
Note por favor que esta luz indica el corcel trabaja.
Si le classement d’intensité de courant est dépassé, un disjoncteur d’auto remet à l’état
Despliegue LED - La prensa y tiene el bot—n rojo
source de surcharge, est enlevé. Après l’usage extrême de pouvoir, recharger l’unité pour 36-48 heures.
4 luces .
Siempre En
Cargar completo
Cuándo Corcel se Conecta
État de la batterie
Maintenez le rouge bouton d’état de la batterie enfoncé pour afficher le résultat.
3 lumières. . . . . . . . Bon
2 lumières. . . . . . . . Milieu
1 lumière. . . . . . . . . Niveau bas
Flashing . . . . . . . . . Recharger l'Unité
Toujours Sur
Quand le Chargeur Est Branché sur*
*
S'il vous plaît noter cette lumière indique que le chargeur travaille.
Exposition LED - La presse et tient le bouton rouge
Rechargement du survolteur
2. Boucher la corde de chargeur dans le Recharge le Cric sur le devant de l’unité.
3. Boucher le chargeur de mur dans n’importe quelle sortie de courant alternatif.
4. La droite LED allumera pendant que le chargeur est connecté à l’alimentation pour
3 luci . . . . . . . .
2 luci . . . . . . . .
Mezzo
1 luce . . . . . . .
Lampeggiare. .
.
.
.
.
.
.
.
.
.
.
.
Buono
Basso
. Ricaricare l'Unità
*
Per favore di notare questa luce indica il caricatore lavora.
La Mostra LED - la stampa e tiene il bottone rosso
4 luci . . . . . . . . L'addebitamento completo
Sempre Su
Quando il Caricatore è Inserito In
Éclairage
Le survolteur survoltage est pourvu d’un éclairage intégré LED. La portabilité de l’unité fait le survolteur survoltage extrêmement utile dans les temps d’urgence, la récréation et l’usage général. Simplement appuyer le bouton jaune pour allumer la lumière ou de.
Entreposage
Le survolteur peut être entreposé quasiment n’importe où et dans n’importe quel sens.
Toutefois, nous recommandons de ranger l’unité à la verticale. Cependant, prenez garde
à ce que les pinces des câbles positifs et négatifs n’entrent jamais en contact l’une avec l’autre ou avec une surface métallique quelconque. Il est recommandé de ranger le survolteur dans son boîtier d’origine.
Pb
Élimination de la batterie
Cet appareil contient une batterie au plomb-acide à bac hermétique étanche.
Cette batterie doit être recyclée. Demandez conseil auprès de l’administration locale ou nationale pour connaître les règlements en matière d’élimination.
Pour retirer la batterie du survolteur, enlevez les vis périmétriques du panneau arrière.
Débranchez les fils des bornes de la batterie. Remarquez la position de la batterie et l’emplacement des fils.
Garantie limitée du survolteur
Clore Automotive mérite ce produit pour être libre des défauts dans le matériel ou de l’exécution pour une période d’une année de la date d’achat d’utilisateur final original.
La présente garantie s’applique à toute personne ayant fait l’acquisition du produit dans les un an suivant la date d’achat au détail initial, mais elle est nulle et non avenue si le produit a été traité de façon abusive, modifié, mal utilisé ou mal emballé et endommagé lors de son retour à l’atelier de réparation.
La présente garantie s’applique uniquement au produit et non aux accessoires qui s’usent à l’usage, inclus avec le produit ; le remplacement ou la réparation de ces pièces sera à la charge du propriétaire.
LES TERMES DE LA GARANTIE LIMITÉE CLORE AUTOMOTIVE CONSTITUENT LE
RECOURS UNIQUE ET EXCLUSIF DE L’ACHETEUR. LES GARANTIES IMPLICITES DE
QUALITÉ MARCHANDE ET D’ADAPTATION À UN USAGE PARTICULIER SONT LIMITÉES
À LA DURÉE DE LA PRÉSENTE GARANTIE EXPRESSE. APRÈS UN AN À COMPTER DE
LA DATE D’ACHAT, TOUT RISQUE DE PERTE POUR QUELQUE RAISON QUE CE SOIT
SERA À LA CHARGE DE L’ACHETEUR.
EN AUCUN CAS CLORE AUTOMOTIVE NE POURRA ÊTRE TENUE RESPONSABLE DE
DOMMAGES ACCESSOIRES ET CONSÉQUENTS. LA RESPONSABILITÉ DE CLORE
AUTOMOTIVE NE DEVRA JAMAIS EXCÉDER LE PRIX D’ACHAT DE CETTE MACHINE,
QUE LADITE RESPONSABILITÉ DÉCOULE D’UNE RUPTURE DE GARANTIE (EXPRESSE
OU IMPLICITE), DE NÉGLIGENCE, D’ACTE DOMMAGEABLE OU DE TOUTE AUTRE
RAISON.
Certaines provinces n’autorisant pas la restriction des garanties ou la restriction des dommages accessoires ou conséquents, le présent déni de responsabilité et la présente restriction ne s’appliquent pas à tous les cas. Cette garantie vous donne des droits spécifiques, et vous pouvez avoir d’autres droits qui varient d’une province à l’autre.
Service de garantie
Si ce produit échoue dans le premier 30 jours après l’achat de détail en raison d’un défaut dans le matériel ou dans l’exécution, le retourner votre placer d’achat pour un échange. Du jour 31 au jour 365 après l’achat de détail, contacter Clore le
Service Technique Automoteur au nombre au dessous pour le service de garantie.
Une ventes valide et démodé que le reçu est exigé obtenir le service sous cette garantie.
Pour toute question concernant l’utilisation, le service hors garantie ou le service sous garantie d’autres produits Clore Automotive, contacter :
Clore Automotive Technical Service
800.328.2921
913.310.1050 www.cloreautomotive.com
JNC300XL
Portable Jump Starter
with 12 Volt Power and LED Flashlight
© 2015 Clore Automotive 842-404-002 B
advertisement
* Your assessment is very important for improving the workof artificial intelligence, which forms the content of this project
Related manuals
advertisement