Engenius ENS1750 Owner Manual
Add to My manuals4 Pages
EnGenius ENS1750: A versatile networking device offering multiple operating modes for flexible wireless connectivity, including Access Point, Client Bridge, WDS AP, WDS Bridge, WDS Station, and Client Router.
With its PoE injector and included power adapter, the ENS1750 provides easy setup and installation, allowing you to extend your wireless network or create a new one.
Whether you need to connect your home, office, or outdoor space, the ENS1750's wall and pole mounting options provide various placement possibilities.
Secure your wireless connection with the ENS1750's advanced security features, ensuring the privacy and integrity of your data.
advertisement

ENS1750 Quick Installation Guide
Package content
Unpack the box and verify the content:
- ENS1750
- PoE injector
- Power adapter
- Quick Start Guide
- Wall mount screw set
- 2* Pole mounting strap
Minimum requirements
- Broadband Internet Service (cable or DSL modem)
- Internet browser (Internet Explorer, Safari, Firefox, Chrome)
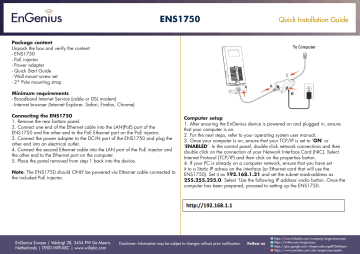
Connecting the ENS1750
1. Remove the rear bottom panel.
2. Connect one end of the Ethernet cable into the LAN(PoE) port of the
ENS1750 and the other end to the PoE Ethernet port on the PoE injector.
3. Connect the power adapter to the DC-IN port of the ENS1750 and plug the other end into an electrical outlet.
4. Connect the second Ethernet cable into the LAN port of the PoE injector and the other end to the Ethernet port on the computer.
5. Place the panel removed from step 1 back into the device.
Note : The ENS1750 should ONLY be powered via Ethernet cable connected to the included PoE injector.
Computer setup
1. After ensuring the EnGenius device is powered on and plugged in, ensure that your computer is on.
2. For the next steps, refer to your operating system user manual.
3. Once your computer is on, ensure that your TCP/IP is set to ‘ ON ’ or
‘ ENABLED ’. In the control panel, double click network connections and then double click on the connection of your Network Interface Card (NIC). Select
Internet Protocol (TCP/IP) and then click on the properties button.
4. If your PC is already on a computer network, ensure that you have set it to a Static IP adress on the interface (or Ethernet card that will use the
ENS1750). Set it as 192.168.1.21
and set the subnet mask-address as
255.255.255.0
.
Select ‘Use the following IP address’-radio button. Once the computer has been prepared, proceed to setting up the ENS1750.
EnGenius Europe | Veldzigt 28, 3454 PW De Meern,
Netherlands | 0900-WIFIABC | www.wifiabc.com
Disclaimer: Information may be subject to changes without prior notification.
Follow us https://www.linkedin.com/company/engeniuseurope https://twitter.com/engeniuseu https://plus.google.com/+EngeniusEuropeBVDeMeern https://www.youtube.com/user/engeniuseuropebv
ENS1750 Quick Installation Guide
ENS1750 setup
1. To configure the ENS1750, open a web browser (example: Microsoft Internet
Explorer, Mozilla Firefox, Google Chrome, etc.)
2. In the adress bar of the web browser, enter: 192.168.1.1
(the default IP address of the ENS1750) and hit ENTER .
3. A login screen will appear. By default, the username of the ENS1750 is admin and the password is admin . Enter the current username and password of the ENS1750 and then click ‘ Login ’. Refer to the ENS1750 user manual on how to change the username and password.
4. After clicking ‘ Login ’ with the correct username an password, the ENS1750 main menu will appear. If you are successful, proceed to setting up the wireless connection.
Switching between operating modes
This device can operate in the following modes: Access point, Client bridge,
WDS AP, WDS bridge, WDS station and Client router.
A. Click on the ‘operation mode’ link under the system navigation drop-down menu.
B. Operating mode: Select an operating mode from the list (Access point, Client bridge, WDS AP, WDS bridge, WDS station or Client router.) and then click on the ‘Apply’ button.
C. All basic setup is completed. Note: The wireless connection is not secure. To setup security on the ENS1750, refer to the ENS1750 user manual.
EnGenius Europe | Veldzigt 28, 3454 PW De Meern,
Netherlands | 0900-WIFIABC | www.wifiabc.com
Disclaimer: Information may be subject to changes without prior notification.
Follow us https://www.linkedin.com/company/engeniuseurope https://twitter.com/engeniuseu https://plus.google.com/+EngeniusEuropeBVDeMeern https://www.youtube.com/user/engeniuseuropebv
ENS1750 Quick Installation Guide
ENS1750 Wall mounting
A. Attach the location sticker to the desired location on the wall and use a 6mm drill bit to drill the two holes.
C. Align the ENS1750 over the keyhole mounting slots and insert both screw heads into each keyhole slot. Then slide the ENS1750 downward until it’s firmly hooked in place.
B. Insert the screw anchors into the 6mm holes then insert the screws and tighten.
EnGenius Europe | Veldzigt 28, 3454 PW De Meern,
Netherlands | 0900-WIFIABC | www.wifiabc.com
Disclaimer: Information may be subject to changes without prior notification.
Follow us https://www.linkedin.com/company/engeniuseurope https://twitter.com/engeniuseu https://plus.google.com/+EngeniusEuropeBVDeMeern https://www.youtube.com/user/engeniuseuropebv
ENS1750
ENS1750 Pole mounting
A. Use a flathead screwdriver to unfasten the screw on the pole mounting ring and thread it through the middle tab on the rear of the ENS1750.
Quick Installation Guide
B. Mount the ENS1750 onto the pole by wrapping the ring around the pole and fastening the screw.
EnGenius Europe | Veldzigt 28, 3454 PW De Meern,
Netherlands | 0900-WIFIABC | www.wifiabc.com
Disclaimer: Information may be subject to changes without prior notification.
Follow us https://www.linkedin.com/company/engeniuseurope https://twitter.com/engeniuseu https://plus.google.com/+EngeniusEuropeBVDeMeern https://www.youtube.com/user/engeniuseuropebv
advertisement
Key Features
- 2.4 GHz
- 5 GHz
- Maximum data transfer rate: 1300 Mbit/s
- IEEE 802.11a, IEEE 802.11ac, IEEE 802.11b, IEEE 802.11g, IEEE 802.11n
- 64-bit WEP, 128-bit WEP, 152-bit WEP, WEP, WPA, WPA2
- Internal Integrated antenna
Related manuals
advertisement