advertisement

User’s Manual
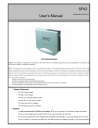
SPIO
Mobile Hard Disk Drive
FCC Compliance Statement
Caution: Any changes or modifications in construction of this device which are not expressly approved by the party responsible for compliance could void the user’s authority to operate the equipment.
NOTE : This equipment has been tested and found to comply with the limits for a Class B Digital Device, pursuant to Part 15 of the FCC Rules. These limits are designed to provide reasonable protection against harmful interference in a residential installation. This equipment generates, uses and can radiate radio frequency energy and, if not installed and used in accordance with the instruction, may cause harmful interference to radio communication.
However, there is no guarantee that interference will not occur in a particular installation. If this equipment dose cause harmful interference to radio or television reception. Which can be determined by turning the equipment off and on, the user is encouraged to try to correct the interference by one or more of the following measures :
- Reorient or relocate the receiving antenna.
- Increase the separation between the equipment and receiver
- Connect the equipment into an outlet on a circuit different from that to which the receiver is connected.
- Consult the dealer or an experienced radio/TV technician for help .
* Product Features
Slim & deluxe design
Built in power supply
One touch assembly without screws
Easy to use, carry and travel with it
Plug & Play and Hot Plugging
Scheduling auto back-up software
* Caution
New hard disk requires FDISK and Formatting . SPIO can’t be detected in the computer without this process.
Do not drop or aggressively handle the SPIO. It may cause damage to the hard disk.
Avoid exposing the SPIO to the magnetic like a speaker and humidity . It may cause damage to the hard disk..
Do not remove or disconnect the SPIO from PC while the SPIO is transferring the data. It may cause damage to
1
hard disk.
<On the data loss resulted from ignoring above notes, Valueplus Inc. is not responsible for it.>
< Please refer to the Installation Procedure >
Hardware Installation
(4 page)
Driver Installation
(5 page)
Partition and format
(6 page)
Ready to Use
(7 page)
2
< Contents >
Product features and caution
1. Specification
2. System Requirements
3. Installation
1) Hardware installation
2) Driver installation
2) Partition and format
3) Ready to use
4. How to use HardCopy (Auto-scheduling backup software) ?
5. Trouble Shooting
6. Warranty
3
1. Specification
Model
Transfer Rate
Hard Disk
Dimension
OS
Weight
Windows
Mac
SPIO 352
480Mbps
3.5”, IDE Hard Disk
196mm x 150mm x 35mm (D x W x H)
1.2Kg (Including HDD)
98 / 98SE / ME / 2000 / XP
OS 8.6 higher
2. System Environment
[ Windows PC ]
USB 2.0 / 1.1
- System : Pentium or higher IBM compatible PC or Mac
- Memory : Over 32MB
- OS : Windows 98 / ME / 2000 / XP, Mac OS 8.6 & higher
- Interface : USB2.0 / 1.1 port (For USB2.0 support, USB2.0 based main board or USB 2.0 PCI card, or PCMCIA cards are required)
- CD Drive for driver installation or internet connection for download of installation driver
[ Macintosh ]
USB 2.0/1.1
- System : PC that has USB port
- Memory : Over 32MB
- OS : Mac OS 8.6 & higher
- CD Drive for driver installation or internet connection for download of installation driver
3.
Installation
1) Hardware installation
1.Prepare the SPIO 352 and HDD(3.5” IDE type for general computer).
2.Push down the hook, pull the slide bar, and open the case.
3.Connect the 40pin IDE cable of PCB and 4pin of power cable each to the 40pin IDE connector of HDD and 4pin power connector. You have to make sure that the red lines of 40pin ribbon cable have to be No.1 pin.
4.Close the cover and slide the bar to lock the case.
5.Now, the hardware installation is finished.
4
2)Driver installation for Windows 98 User
Before connecting the SPIO to your computer, double click the file “USB-IDE98_v1016B.exe”, and install the driver at your computer.
Follow the installation process in Figure 1~3
Figure 1. After double click “USB-IDE98_v1016B.exe”, InstallShield Wizard will start.
Figure 2. Click “Next”
Figure 3. Click “Finish”
5
<Driver Installation under Windows ME / 2000 / XP >
SPIO is automatically detected without driver installation under Windows ME, 2000, XP.
.
3) Partition and Format
*Caution : The driver should be Installed before partition and Format.
To partition new hard disk, run the fdisk command.
1)Fdisk and format of new hard disk at windows 98 / ME a.Install the driver after connecting the product to computer (Driver is installed automatically under Windows ME) b.After driver installation, select and click start -> program -> MS DOS c. Type fdisk at command prompt and press Enter key d. You receive following message “ Do you wish to enable large disk support ?”. e.Type Y and press Enter key. f. Press 5 to c hange current fixed disk drive option menu .
-> Type the number of hard disk in enter fixed disk drive number -> Press the Enter key g.Press 1 to select the Create DOS partition or Logical DOS Drive menu option -> Press “Enter” key h. After verifying drive integrity, you receive following message Do you wish to use the maximum available size for primary DOS partition ?
i. Type Y and press the Enter key
After verifying drive integrity again, You receive following message Primary Dos Partition created, drive letters changed or added . j . Then press “ESC” key to return to the fdisk option menu. k. Press “ESC” key again -> You receive following message Restart the computer -> Press ESC again
-> At command prompt C:\windows\ , type Exit to return to windows. l. Remove SPIO from the computer. m. Reconnect the SPIO to the computer, again n. The Drive Letters will be created in My computer and drive icon will be shown in the system tray. o. Choose the SPIO drive -> right click it with mouse and do the format.
2) Fdisk and format of new hard disk at windows 2000 / XP
Choose My computer in the desk top screen and right click -> choose Management and right click
6
-> choose Disk Management and left click a.Right click the Not allotted drive in Disk management -> execute the Making partition . b. When partition magician is started, click the Next .
c. If the main partition(P) is checked. Then click the Next .
d. After verifying drive integrity, You receive following message Primary Dos Partition created, drive letters changed or added , click Next . f. Choose the file system (NTFS, FAT32), then click Next .
* Caution : NTFS file system can’t be recognized under windows 98 / ME.
The NTFS File system will be recognized only under windows 2000 higher
If you want to use SPIO under windows 98 / ME also, please choose FAT32 System.
If you want to format over 32GB of HDD by Fat32, please format under windows 98 / ME. g. After completion of partition magician , click the “Finish”
3) For MAC
* Caution : The driver should be Installed before “partition and Format”.
1)MAC OS 8.6 Higher
2)SPIO can’t be detected in the computer without this process..
Install the driver first and then initialize it.
3)If you want to use SPIO in both MAC and IBM system, do fdisk and format in IBM computer.
4)a. First, install the driver in USB folder of MAC OS folder. b. Restart the computer. c. Connect SPIO to the computer. d. The driver Icon will be generated in the screen.
4)Ready to Use
(1)How to check if SPIO is well installed in the system ?
If the new driver is generated in [My computer], you can use SPIO right away.
(2) How to remove SPIO safely from your system ?
Windows
1)Finish all operation of SPIO before removing. Double click the “USB Safe Remover” icon on the screen, and you can find “Safely
Remove Hardware” window. Select the “Stop”
2)When you get the pop up message “It is now safe to remove the USB device”, SPIO can be removed safely.
7
Mac
Drag & Drop the SPIO icon to the trash icon on Desktop.
4. How to use HardCopy (Auto-scheduling backup software) ?
Insert the program into CD-ROM Drive. There is a directory of [Hardcopy]. Double click on the “Hardcopy.exe” icon.
Click OK to install the Hardcopy under the default directory. Don’t need to restart your computer. You are ready to use
Hardcopy. You can find Hardcopy icon on the desktop
To back up the data for the first time
1. Backup List: List Job name, update time, and status.
(A) Status
* “Start” – Start copy.
* “Enable” – Active state. Regular backup will be done with specified period
* “Disable” – Inactive state. No more regular backup activity.
* “Copy” – Under backup processing.
(B) To change the active status, click “the name of status”.
2. Menu: [New Job- Make a new job] [Open- open the activated job] [Delete- remove the job] [Stop- disable the job]
Option for backup operation
3. Basic: You can see the left window after select New Job or Open.
(A) Job name: Make a new job name.
(B) Period: Set up the regular backup schedule (default is 10min.)
(C) Drive: Select the object folder and backup destination.
(D) Create folder: Make a new backup folder name.
8
4. Advanced:
(A) Execute a. File/Folder: backup file and folder. b. File: backup only file.
(B) Folder option: Separate backup time folder is created for each task.
(C) Copy option: Can backup hidden file, or backup with file compression.
(D) File option: You can backup specific file with selection of file name and file extension.
(E) Schedule Time: IF you have chosen a daily schedule, you can specify an exact time of the day when it runs.
After this schedule time setting, previous general period setting is disregarded.
You can change the property of job after opening the specific job.
5. Trouble shooting
1) SPIO is not recognized in the system after plugging.
- If your OS is windows 98 SE, check if drive installation is well finished, or not.
- If you bought new HDD separately with SPIO, check if partition and formatting is completed or not.
2) Under Windows XP, finding message “Hi-Speed USB Installation is fixed incorrectly to Hi-Speed USB
Installation Hub”
- This message is shown when system doesn’t support USB2.0, and SPIO is operated in USB1.1 in this case.
You should upgrade main board that support USB2.0 or use USB 2.0 PCI card (PCMCIA card).
6. Warranty
Limited Warranty
Valueplus warrants that the product enclosed to be free of defects for a period of 1-year from the date of purchase. In the event of a defect in material or workmanship during the warranty period, Valueplus, at its discretion, will repair or replace the defective product when the defectively product is returned to Valueplus by the owner/authorized seller.
The remedy for this breach of warranty is limited to servicing or replacement only and should not cover any other damages, including but not limited to the loss of profit, special, incidental, consequential, and other similar claims.
If the product is found to be defective, Valueplus at its option, agrees to replace or repair the product without extra charge except as stated below, provided that you can show dated proof of purchase. If you ship the product back to Valueplus, you must assume the risk of damage or loss in transit. You must use the original container
(or equivalent) and pay the shipping charge.
Valueplus may replace or repair the product with new or reconditioned parts, and the replaced parts or product become the property of Valueplus. In case of the failure caused by careless mistakes and the natural disaster such as fire, flood, earthquake, and damage from water, it’ll be charged.
9
Warranty registration
Product
Serial No.
Place of purchasing
Customer
Customer address
Model
Date of purchasing
Phone
Phone
- In case of failure, please contact your local retail shop or customer service center.
Valueplus, Inc.
TEL : 82-31-717-5880 FAX : 82-31-717-5988
E-mail : [email protected]
, http://www.valueplus.co.kr
Date Month year
10
advertisement
* Your assessment is very important for improving the workof artificial intelligence, which forms the content of this project
Related manuals

advertisement