advertisement

MagTaan User Manual
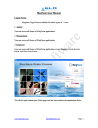
Login Form:
Magtaan Login Form available for three types of Users.
1. Admin:
You can access all forms of MagTaan application.
2. Management:
You can access all forms of MagTaan application.
3. Employee:
You can access all forms of MagTaan application except Supplier Form, Service
Form, And New User Form.
The click Login button open Main page and the close button the application Exits.
www.glasoft.com
Page 1
New User Form (Ctrl+N):
If you new user fill User Name, Password, Confirm Password, Enter the company E-MailID , company E-Mail password and select Role.
www.glasoft.com
Page 2
2. Once the username created, next time we can’t create the same username.
3. But we can update & delete the username details. If you update or delete user details, double click the grid table.
www.glasoft.com
Page 3
Change Password (Ctrl+h):
1. If u like to change your Password, Select change password Form
2. Enter valid username. The name that you enter is must be in new user, otherwise
error must will occur. www.glasoft.com
Page 4
Add Supplier (Ctrl+U):
1. If you are a new supplier, then enter these details. Please enter correct Email
Id.
2. But we can update & delete the supplier details. If you update or delete supplier details double click the grid table.
www.glasoft.com
Page 5
3. Once the supplier name created, next time we can’t create .Duplicate doesn’t allow.
www.glasoft.com
Page 6
Add Client (Ctrl+L):
1. If you are a new client, Please enter Serial No, Client Id.
2. Once the client ID created, next time we can’t create same id, doesn’t allow duplicate values.
2. But we can update & delete the client details. If you update or delete client details, double click the grid table.
www.glasoft.com
Page 7
Add Service (Ctrl+I):
1. If you are enter a new service, Please enter Serial No, Service Name.
2. Once the service name created, next time we can’t create same service name, doesn’t allow duplicate values.
www.glasoft.com
Page 8
3. But we can update & delete the service details. If you update or delete service details double click the grid table.
Purchase Order (Ctrl+P):
1. Select service/product & supplier field using Add supplier & Add service form.
2. Service/Product, Supplier, ClienID, Description fields are must enter.
3. If you select Passport or visa in service form must enter the reference. Otherwise no need. Customer reference, value, EmailID Cc is optional.
www.glasoft.com
Page 9
4. If you select supplier, the corresponding supplier Emailed displayed.
5. Attach, what file you like to send example Passport scan copy and visa.
6. If u attach a wrong file, remove button is used to remove the unwanted files.
7. If you enter all details, then click the send button the attached file sends to the corresponding Email id.
8. We can update & delete the Purchase Order details. If you update or delete
Purchase Order details double click the gridtable.
www.glasoft.com
Page 10
View Purchase Report (Ctrl+R):
1. Select one Order No, the corresponding login person name will be displayed, and then the MailiD will be displayed, who you have to send.
2. Click send button the mail will send.
View Purchase Report Date Wise (Ctrl+D):
1. Select from date and to date, then click display button. The details will be displayed between the from date & to date.
2. Select username or supplier or service the person order no only displayed.
www.glasoft.com
Page 11
advertisement
* Your assessment is very important for improving the workof artificial intelligence, which forms the content of this project
advertisement