advertisement
 | Manualzz")
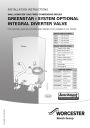
INSTALLATION INSTRUCTIONS
WALL HUNG RSF GAS FIRED CONDENSING BOILER
GREENSTAR i SYSTEM OPTIONAL
INTEGRAL DIVERTER VALVE
FOR CENTRAL HEATING SYSTEMS AND INDIRECT FED DOMESTIC HOT WATER
Diverter valve kit numbers
12kW 7 716 192 566
15kW 7 716 192 567
18kW 7 716 192 568
24kW 7 716 192 409
1
2
1
1
2
1
1
1
Diverter valve kits contain:
1 Copper return pipe
Brass service valve
15mm Compression nut
15mm Olive
Diverter valve motor
Diverter valve harness
Screws
Code plugs
Code plug tie
Code plug numbers
12i System Natural gas 1118
L.P.G.
1119
15i System Natural gas 1122
L.P.G.
1123
18i System Natural gas 1126
L.P.G.
1127
24i System Natural gas 1114
L.P.G.
1115
UK/IE
2
CONTENTS
CONTENTS
1 KEY TO SYMBOL AND SAFETY PRECAUTIONS . 3
Explanation of symbols . . . . . . . . . . . . . . . 3
Safety precautions . . . . . . . . . . . . . . . . . . 4
2 PLUMBING MANIFOLD . . . . . . . . . . . . . . . . . . . . 6
3 BOILER CONNECTIONS . . . . . . . . . . . . . . . . . . . 7
Gas and water connections . . . . . . . . . . . . 8
4 fITTING THE DIVERTER VALVE & CODE PLUG 10
Fitting the diverter valve motor: . . . . . . . 10
Access to the code plug . . . . . . . . . . . . . 10
Fitting the code plug . . . . . . . . . . . . . . . . 11
Fitting the cylinder temperature sensor . 11
Diverter valve and sensor connections . . 11
5 ELECTRICAL . . . . . . . . . . . . . . . . . . . . . . . . . . . 12
Internal diverter valve with a vented cylinder . . . . . . . . . . . . . . . . . . . . . 12
Position of wired components . . . . . . . . 14
6 PRE-COMMISSIONING CHECKS . . . . . . . . . . . 15
7 BOILER FUNCTION . . . . . . . . . . . . . . . . . . . . . . 16
Fault finding . . . . . . . . . . . . . . . . . . . . . . 16
Boiler function . . . . . . . . . . . . . . . . . . . . . 17
Protection function . . . . . . . . . . . . . . . . . 18
6 720 645 222a (2012/05)
KEY TO SYMBOLS AND SAFETY PRECAUTIONS
1 KEY TO SYMBOLS AND SAFETY PRECAUTIONS
1.1
EXPLANATION OF SYMBOLS
WARNING SYMBOLS
Safety instructions in this document are framed and identified by a warning triangle which is printed on a grey background.
Electrical hazards are identified by a lightning symbol surrounded by a warning triangle.
Signal words indicate the seriousness of the hazard in terms of the consequences of not following the safety instructions.
•
NOTICE indicates possible damage to property or equipment, but where there is no risk of injury.
•
CAUTION indicates possible injury.
•
WARNING indicates possible severe injury.
•
DANGER indicates possible risk to life.
IMPORTANT INFORMATION
Notes contain important information in cases where there is no risk of personal injury or material losses and are identified by the symbol shown on the left. They are bordered by horizontal lines above and below the text.
ADDITIONAL SYMBOLS
•
Symbol
B
Æ
–
Meaning a step in an action sequence a reference to a related part in the document or to other related documents a list entry a list entry (second level)
Tab. 1 Symbols
SYMBOLS USED IN THIS MANUAL
Domestic Hot Water
Central Heating
Hot Water Storage Cylinder
Domestic Cold Water Supply
Electrical Supply
PLEASE READ THESE INSTRUCTIONS CAREFULLY
BEFORE STARTING INSTALLATION.
THESE INSTRUCTIONS ARE APPLICABLE TO THE
WORCESTER APPLIANCE MODEL(S) STATED ON THE
FRONT COVER OF THIS MANUAL ONLY AND MUST NOT
BE USED WITH ANY OTHER MAKE OR MODEL OF
APPLIANCE.
THE INSTRUCTIONS APPLY IN THE UK ONLY AND MUST
BE FOLLOWED EXCEPT FOR ANY STATUTORY
OBLIGATION.
THIS APPLIANCE MUST BE INSTALLED BY A GAS SAFE
REGISTERED, COMPETENT PERSON. FAILURE TO
INSTALL CORRECTLY COULD LEAD TO PROSECUTION.
IF YOU ARE IN ANY DOUBT CONTACT THE WORCESTER
TECHNICAL HELPLINE.
DISTANCE LEARNING AND TRAINING COURSES ARE
AVAILABLE FROM WORCESTER.
PLEASE LEAVE THESE INSTRUCTIONS WITH THE
COMPLETED BENCHMARK CHECKLIST, (OR A
CERTIFICATE CONFIRMING COMPLIANCE WITH IS 813,
EIRE ONLY) AND THE USER MANUAL WITH THE OWNER
OR AT THE GAS METER AFTER INSTALLATION OR
SERVICING.
THE BENCHMARK CHECKLIST CAN BE FOUND IN THE
BACK PAGES OF THE INSTALLATION MANUAL.
ABBREVIATIONS USED IN THIS MANUAL:
Ø
NG
LPG
CH
DHW
PRV
NTC
Diameter
Natural Gas
Liquid Petroleum Gas
Central Heating
Domestic Hot Water
Pressure Relief Valve
Negative Temperature Coefficient (sensor)
IP
RCD
TRV
WRAS
Ingress Protection
Residual Current Device
Thermostatic Radiator Valve
Water Regulations Advisory Scheme
SEDBUK Seasonal Efficiency of Domestic Boilers in the United Kingdom
Tab. 3 Abbreviations
Gas Supply
Tab. 2 Commonly used symbols
6 720 645 222a (2012/05) 3
KEY TO SYMBOLS AND SAFETY PRECAUTIONS
1.2
SAFETY PRECAUTIONS
IF YOU SMELL GAS:
B CALL NATIONAL GAS EMERGENCY SERVICE ON
0800 111 999
B LPG BOILERS CALL THE SUPPLIER‘S NUMBER ON
THE SIDE OF THE LPG TANK
B TURN OFF THE ECV (EMERGENCY CONTROL VALVE)
AT THE METER
B DO NOT TURN ELECTRICAL SWITCHES ON OR OFF
B DO NOT STRIKE MATCHES OR SMOKE
B PUT OUT NAKED FLAMES
B OPEN DOORS AND WINDOWS
B KEEP PEOPLE AWAY FROM THE AFFECTED AREA
BOILER OPERATION:
This boiler must only be operated by a responsible adult who has been instructed in, understands, and is aware of the boiler‘s operating conditions and effects.
Benchmark places responsibilities on both manufacturers and installers. The purpose is to ensure that customers are provided with the correct equipment for their needs, that it is installed, commissioned and serviced in accordance with the manufacturer's instructions by competent persons and that it meets the requirements of the appropriate Building Regulations.
The Benchmark Checklist can be used to demonstrate compliance with Building Regulations and should be provided to the customer for future reference.
Installers are required to carry out installation, commissioning and servicing work in accordance with the Benchmark Code of Practice which is available from the Heating and Hotwater Industry Council who manage and promote the scheme.
Visit centralheating.co.uk for more information.
HEALTH AND SAFETY
The appliance contains no asbestos and no substances have been used in the construction process that contravene the COSHH Regulations (Control of
Substances Hazardous to Health Regulations 1988).
COMBUSTION AND CORROSIVE MATERIALS
Do not store or use any combustible materials (paper, thinners, paints etc.) inside or within the vicinity of the appliance.
Chemically aggressive substances can corrode the appliance and invalidate any warranty.
FITTING AND MODIFICATIONS
Fitting the appliance and any controls to the appliance may only be carried out by a competent engineer in accordance with the current Gas Safety (Installation and
Use) Regulations.
Flue systems must not be modified in any way other than as described in the fitting instructions. Any misuse or unauthorised modifications to the appliance, flue or associated components and systems could invalidate the warranty. The manufacturer accepts no liability arising from any such actions, excluding statutory rights.
SERVICING
Advise the user to have the system serviced annually by a competent, qualified Gas Safe registered engineer.
Approved spares must be used to help maintain the economy, safety and reliability of the appliance.
IMPORTANT
The service engineer must complete the Service Record on the Benchmark Checklist after each service.
INSTALLATION REGULATIONS
Current Gas Safety (Installation & Use) Regulations:
All gas appliances must be installed by a competent person in accordance with the above regulations.
Failure to install appliances correctly could lead to prosecution.
The appliance must be installed in accordance with, and comply to, the current: Gas Safety Regulations, IEE
Regulations, Building Regulations, Building Standards
(Scotland) (Consolidation), Building Regulations
(Northern Ireland), local water by-laws, Health & Safety
Document 635 (The Electricity at Work Regulations
1989) and any other local requirements.
4 6 720 645 222a (2012/05)
British Standards:
Where no specific instruction is given, reference should be made to the relevant British Standard codes of
Practice.
BS7074:1 Code of practice for domestic and hot water supply
BS6891 Installation of low pressure gas pipe work up to 28mm (R1)
BS5546 Installation of gas hot water supplies for domestic purposes
EN12828 Central heating for domestic premises
BS5440:1 Flues and ventilation for gas appliances of rated heating not exceeding 70kW (net) :
Flues
BS5440:2 Flues and ventilation for gas appliances of rated heating not exceeding 70kW (net) : Air
Supply
BS7593 Treatment of water in domestic hot water central heating systems
BS6798 Installation of gas fired boilers of rated input up to 70kW (net)
Irish Standards
The relevant Irish standards should be followed, including:
•
ECTI National rules for electrical installations
•
IS 813:2002 for Domestic Gas Installations.
LPG Installations
An appliance using L.P.G. must not be installed in a room or internal space below ground level unless one side of the building is open to the ground.
Timber framed building:
Where the boiler is to be fitted to a timber framed building the guidelines laid down in BS5440: Part 1 and
IGE "Gas Installations in Timber Frame Buildings” should be adhered to.
Potable water:
All seals, joints and compounds (including flux and solder) and components used as part of the secondary domestic water system must be approved by WRAS.
CH Water:
Artificially softened water must not be used to fill the central heating system.
KEY TO SYMBOLS AND SAFETY PRECAUTIONS
6 720 645 222a (2012/05) 5
PLUMBING MANIFOLD
2 PLUMBING MANIFOLD
CONNECTIONS:
•
Heating System: 22mm compression fittings
•
Gas: 22mm compression fitting
•
Cylinder Return 15mm compression fitting
•
Use the fittings supplied in the Hardware literature pack and the Optional Diverter Valve Kit.
NOTICE: Fitting the service valve
B
B The service valve (7) from the Optional
Diverter Valve Kit must be fitted and secured to the wall mounting frame with two screws (8) supplied, before the wall mounting frame is fitted to the wall.
If the boiler pipes are to be run behind the appliance ensure that the pipes pass through the slot in the guide (9). This is fitted to the boiler frame.
Further guidance on pipe routing can be found printed on the boiler template
(supplied with the boiler).
9
1 2
4 1 2 6 3 5
Fig. 1 Pipe dimensions
6
6
3
8
4
5
1
2 3
6
Fig. 2 Plumbing manifold with wall frame
6720644222-01.1Wo
# Function
1 CH and cylinder flow
2 Gas
3 CH Return
4 Condensate
5 Pressure Relief Valve
6 Cylinder return
From left case edge
70 mm
200 mm
330 mm
35 mm
367 mm
267 mm
Diameter of pipe
22 mm
22 mm
22 mm
22 mm
15 mm
15mm
6 720 645 222a (2012/05)
7
BOILER CONNECTIONS
3 BOILER CONNECTIONS
CAUTION: CYLINDER RETURN PIPE
B The following must be completed before the boiler is mounted onto the wall mounting frame
3.1
ASSEMBLY OF THE INTERNAL CYLINDER RETURN PIPE TO THE BOILER
Use the packaging as protection, turn the boiler on its left hand side to enable fitting of the hot water return pipe.
B Move the control panel into the service position by removing the screw from the retaining bracket.
2. Remove the brass bung assembly from the hydraulic block by removing the screw and sliding it free from the flange on the clamping plate. Make sure that the other brass bung assembly is retained in place.
3. Remove the copper pipe from the Optional Integral Diverter Valve Kit and feed the flat end of the pipe through the rear of the boiler as shown.
4. Before fitting the pipe, check that the seal is in position on the plastic moulding. Slide the flat end of the pipe under the flange on the hydraulic block clamping plate ensuring that pipe is located correctly.
5. Secure the clamping plate by re-tightening the two screws (1) loosened in step 1.
1.
1.
2.
Fig. 3 Hot water return pipe fitting
6 720 645 222a (2012/05)
4.
3.
5.
7
BOILER CONNECTIONS
3.2
GAS AND WATER CONNECTIONS
CAUTION:
B ISOLATE THE MAINS GAS SUPPLY
BEFORE STARTING ANY WORK AND
OBSERVE ALL RELEVANT SAFETY
PRECAUTIONS.
B Remove template and secure the wall mounting frame to the wall with the fittings supplied.
B System pipes may be run vertically upwards behind the boiler or below it.
See Plumbing Manifold Section on page 6.
1. CH and cylinder flow (22mm),
2. Gas inlet (22mm),
3. Cylinder return(15mm),
4. CH return (22mm)
If using the optional filling loop: 7 716 192 281 (not supplied with the boiler) fit it before hanging the boiler on the wall frame.
The bonded washer supplied is for the Gas connection only.
B Fit sealing washers to service valves before hanging boiler.
1.
Fig. 5 PRV connection in the down position
CAUTION: Caps or plastic strip fitted to pipes must be removed before hanging the boiler.
B Hang the boiler on to the wall mounting frame by the two brackets positioned left and right at the top rear of the appliance.
Do not lift the appliance by the air gas manifold. There are two handling holes incorporated into the inner casing left and right in the lower section of the appliance.
1.
2.
3.
4.
6720645222-04.1Wo
Fig. 4 Sealing washers
NOTICE: Before hanging the boiler onto the wall mounting frame ensure that the pressure relief valve connection is in the
DOWN position.
This is located on the right hand side of the wall frame at the rear.
1. Pull the extended tab/lever forward and down until there is no further travel.
6720643895-22.1Wo
Fig. 6 Hanging the boiler
NOTICE: The pressure relief connector must be repositioned after the boiler has been correctly mounted to the wall mounting frame.
8 6 720 645 222a (2012/05)
1. Push the lever on the pressure relief connector UP until the stop on the inside of the handle is over the shoulder of the metal bracket to secure in place.
1.
BOILER CONNECTIONS
2.
1.
Fig. 7 PRV in the up position
B Remove the screw from the control panel retaining bracket and lower the control panel into the service position.
B Make connections to the heating system and cylinder.
Connect the gas supply to the boiler gas cock 22mm compression.
To connect the expansion vessel flexible pipe to the hydraulic manifold situated to the left of the pump:
B Remove and discard the plastic cap from the expansion vessel flexible pipe.
1. Refer to figure 8, release the retaining clip.
2. Remove and discard the orange plastic blanking plug
(2) from the pressure vessel connection at the hydraulic manifold.
6720645222-05.1Wo
Fig. 8 Blanking plug removal
1. Refer to figure 9 and insert the expansion vessel
flexible pipe it to the fitting on the pump.
2. Secure in place with the wire retaining clip.
2.
1.
6720645222-06.1Wo
Fig. 9 Expansion vessel connection
B Connect the pressure relief drain pipe to 15mm compression joint using the compression nut and olive supplied in the literature/hardware pack.
6 720 645 222a (2012/05) 9
FITTING THE DIVERTER VALVE AND CODE PLUG
4 FITTING THE DIVERTER VALVE AND CODE PLUG
4.1
FITTING THE DIVERTER VALVE
MOTOR:
1. Remove the diverter blanking plate by pulling it forwards to free it from its location.
4.2
ACCESS TO THE CODE PLUG
1. Referring to figure 12, unscrew the three screws in
the control panel.
2. Pull off the connections cover.
1.
2.
1.
1.
1.
6720645222-07.1Wo
Fig. 10 Removing Diverter valve blanking plate
1. To fit the diverter valve motor, push the motor into the housing until the motor “clicks” securely into place, ensuring that the actuator arm locates into the middle of the “H” receptor on the motor.
2. Connect the plug of the diverter valve motor harness into the socket on the diverter valve motor.
3. Slide the protective cover over the diverter valve motor.
Fig. 12 Removing the connection cover
B Identify ST18, the code plug and connector.
ST6
ST10 ST8
ST18
ST15
ST17
3.
1.
2.
Fig. 11 Fitting Diverter motor and cover
6720645222-08.1Wo
Fig. 13 Connector locations
NOTICE: RESET THE CONTROL BOARD
Following changes to the wiring of ST15 and
ST8 the control board will need to be reset to recognise the new connection.
To reset the control board:
B Hold the Service mode “Spanner” and the
Eco buttons down for at least five seconds.
10 6 720 645 222a (2012/05)
4.3
FITTING THE CODE PLUG
Boiler size
12kW i System kit
15kW i System kit
18kW i System kit
24kW i System kit
Gas
NG
LPG
NG
LPG
NG
LPG
NG
LPG
Code plug no.
1118
1119
1122
1123
1126
1127
1114
1115
1. Refer to figure 14. Remove the code plug from the
controller, cut the tie securing the plug to the boiler chassis and discard the plug and tie.
2. Fit the code plug from the kit making sure that code plug is secured to the boiler chassis with the new tie.
B Confirm that the number on the code plug corresponds to the boiler type in the table above.
FITTING THE DIVERTER VALVE AND CODE PLUG
NOTICE: Figure 15 applies only to foam
covered open vent cylinders.
1.
6.
2.
3.
5.
4.
2.
1.
ST18
6720645222-10.1Wo
Fig. 14 Fitting new code plug
4.4
FITTING THE CYLINDER
TEMPERATURE SENSOR
Refer to the cylinder installation instructions for the position of the sensor, there may already be a “sensor pocket” available. If no “pocket” is available, for foam insulated cylinders only with no metal jacket, follow the steps below.
1. Mark a rectangular hole of approximately 50 by
100mm approximately one third of the cylinder length from the bottom of the cylinder.
CAUTION: Cut carefully!
B Do not to pierce the wall of cylinder.
B Do not cut any metal insulation jacket.
1. Using a sharp knife, cut through the insulation, remove and retain the piece of insulation.
2. Apply heat conductive paste to the sensor and place the sensor on the cylinder body in the middle of the cut-out.
3. Hold the sensor in position with a piece of aluminium tape.
4. Replace the insulation material.
5. Secure the insulation in place with suitable cloth tape.
6720645222-24.1Wo
Fig. 15 Sensor connection to cylinder
4.5
DIVERTER VALVE AND SENSOR
CONNECTIONS
NOTICE: Do not route low voltage cables alongside mains voltage cables.
This can cause interference on the low voltage cables.
1. Connect the Diverter valve motor harness to the edge connector ST17.
2. Connect the cylinder temperature sensor (1) to the edge connector ST15.
If the ST15 connector and sensor is being used do not connect ST8 as well.
The link is not required.
ST15
ST17
2.
1.
1
6720645222-11.1Wo
Fig. 16 Diverter motor and sensor connections
B Replace the control panel cover.
B Move the control panel to the up position and secure.
6 720 645 222a (2012/05) 11
ELECTRICAL
5 ELECTRICAL
NOTICE:
B Mains supply to the boiler must be through a fused double pole isolator situated adjacent to the appliance. The isolator must have a contact separation of 3mm minimum in both poles. External fuse rating 3A.
B When stripping wires always ensure copper strands do not fall into the control box.
B There should be no external wiring centre.
B A fascia mounted twin channel programmer must be used.
Timers available:
DT20 Twin Channel Programmer (7 716 192 038),
DT10RF Digistat (7 716 192 052),
DT20RF Digistat (7 716 192 054).
5.1
INTERNAL DIVERTER VALVE WITH A VENTED CYLINDER
ACCESS TO ELECTRICAL CONNECTIONS:
Remove boiler casing to access control panel.
1. Unscrew the single screw and lower the control box into the horizontal position.
2. Unscrew the three screws in the control panel and pull off the connections cover.
3. 230V room thermostat with timer 7 716 192 038
(ST10):
B Remove link - L
S
/L
R
B Connect room stat LIVE supply to terminal (L
S
)
B Connect room stat LIVE return to terminal (L
R
)
B Connect room stat NEUTRAL to terminal (N
S
)
Room Thermostat
DT20 Twin Channel
Programmer
Cylinder temperature sensor neutral live switched live
L
R
L
S N S
N
ST10 NOTICE:
B If the timer 7 716 192 052 or 7 716 192
054 is used, the room thermostat is incorporated in the transmitter.
Therefore keep link fitted across L
S
/L
R
.
4. Hot water channel
5. Optional external frost stat connection (ST6):
B Connect frost stat wires to terminal (F
S
) and (F
R
)
6. Diverter valve motor (ST17):
B Connect electrical harness from diverter valve motor to ST17 (see following page).
Fig. 17
230V
MAINS
SUPPLY
N E L
L
6720645222-17.1Wo
12 6 720 645 222a (2012/05)
5.2
INTERNAL DIVERTER VALVE WITH AN UNVENTED CYLINDER
Twin Channel
Programmer
Cylinder temperature sensor
*
DUAL THERMOSTAT
HIGH LIMIT HOT WATER CONTROL
THERMAL CUT-OUT THERMOSTAT
230V
MAINS
SUPPLY
L
E
N brown green/yellow blue
Room Thermostat neutral live switched live
L R L S N
S
N L
6720645222-20.1Wo
OPTIONAL EXTERNAL FROST STAT CONNECTION ST6
Frost Thermostat
ELECTRICAL
FR FS NP LP
ST6
6720643895-43.1Wo
Fig. 18 Frost Thermostat
B Connect frost thermostat cables to terminals F
S
B These are not polarity sensitive.
& F
R
.
CONNECTOR LOCATIONS
ST6
ST10 ST8
ST18
Fig. 19 Electrical connector information
6 720 645 222a (2012/05)
ST15
ST17
13
ELECTRICAL
5.3
POSITION OF WIRED COMPONENTS
FAN
† Fan wiring:
Live = purple
Neutral = brown
SPARK
ELECTRODES
FLOW TEMP.
SENSOR (NTC)
FLAME SENSE
ELECTRODE
OVERHEAT
STAT
GAS
VALVE
SAFETY
SOLENOID
SAFETY
SOLENOID
FLUE
OVERHEAT
STAT
PUMP
DIVERTER
VALVE
MAINS
SUPPLY
Wall plate contacts
(for FX controls)
B B Earth
230V
EXTERNAL
ROOM STAT
WHEN USED
WITH DT20
Neutral Supply
Live Supply
Live Return
CH TEMPERATURE
CONTROL
*
L R L S N S N
ST10
L
Colour sequence †
ST5
SPARK
TRANSFORMER
SI1
Fuse F1, slow
2.5 A, AC 230 V
9V 25V
230V/AC
ST1
PUMP
SUPPLY
EXTERNAL
FROST STAT
(OPTIONAL)
ST4 FR FS
DHW TEMPERATURE
CONTROL (CYLINDER)
NP LP ST6 1
A
F
B
B
4
2
Outside sensor
(FW 100)
ST8
ST17
EMS BUS contacts
(for FX controls)
WORCESTER 24V CONTROLS, PLUG IN POINT
OPTIONS: DT20 OR DT20 RF OR DT10 RF
(under blanking cover on fascia)
ST9
DIAGNOSTIC
INTERFACE
Fuse F3, slow T 0.5 A
SI2
Fuse F2, slow T1 .6 A
SI3
ST18
CODE PLUG
Red
Orange
Blue
Yellow
Green
Black
Blue
Blue
Purple
Purple
Orange
Orange
Green
Red
Red
Cylinder temperature sensor
Fig. 20 Wired components
14 6 720 645 222a (2012/05)
*
PRE WIRED LINK
6720645222-22.1Wo
6 PRE-COMMISSIONING CHECKS
NOTICE: If the boiler is not to be commissioned immediately then:
B after successfully completing all of the checks and any rectification work, close the gas and water valves, shut off the gas supply, electrically isolate the boiler and label appropriately.
1. Check that the service and water pipes are connected to the correct position on the manifold.
–
A - Flow (22mm)
–
B - CH Return (22mm)
–
C - Gas inlet (22mm)
–
D - Cylinder Return (15mm)
2. Check the gas type specified on the identification plate matches that of the gas supply. Turn on the main gas supply, check the gas pipework, connections and rectify any leaks.
3. Check that the condensate pipe has been connected to the syphon.
4. Check pressure relief drain pipe is correctly fitted and securely tightened.
NOTICE:
B NOW RETURN TO THE I SYSTEM
INSTRUCTION MANUAL (FILLING THE
SYSTEM) TO CONTINUE INSTALLATION.
PRE-COMMISSIONING CHECKS
6 720 645 222a (2012/05) 15
BOILER FUNCTION
7 BOILER FUNCTION
7.1
FAULT FINDING
If in the unlikely event the boiler does not give complete satisfaction, before calling for a service engineer, the installer should check the following:-
FOR BOILERS WITH INTEGRAL DIVERTER VALVE AND
CONTROLS
NO CENTRAL HEATING, BUT HOT WATER OK
Remove the room stat wiring from Ls, LR and N from terminal block ST10. Fit a link between Ls and LR, if the
CH now works there is likely to be a problem with the room stat or wiring to it.
NO HOT WATER, BUT CENTRAL HEATING OK
If a cylinder stat is used, remove the cylinder stat wiring from 7 and 9 on the terminal block ST8. Fit link across 7 and 9.
If the HW now functions, there is likely to be a problem with the cylinder stat or wiring to the stat.
FOR ALL BOILERS WITH INTERNAL OR EXTERNAL
CONTROLS
Burner lights then goes out in DHW or CH mode
Does the boiler run normally with the front cover off and then fail when the cover is put back on?
If yes there is likely to be a flue problem - either the air inlet is blocked or the inner flue is leaking flue gases into the air inlet.
BOILER NOISY OR GOING TO OVERHEAT
1. Was the system flushed?
2. Has the pump been bled and the dust cap released.
GENERAL CHECKS
1. Is all the air bled from the gas supply?
2. Is all the air bled from the primary water system?
3. Is there 230v ac across the boiler live and neutral terminals?
(L & N on ST10)
4. Is the polarity correct?
5. Is the incoming gas pressure at least 18mbar with the boiler at maximum output?
16 6 720 645 222a (2012/05)
7.2
BOILER FUNCTION
BOILER FUNCTION
Fig. 21 Boiler function
6 720 645 222a (2012/05) 17
BOILER FUNCTION
7.3
PROTECTION FUNCTION
AUTOMATIC INTERNAL FROST FUNCTION
Internal boiler temperature between
8°C & 5°C
Boiler automatic frost function
(monitors internal boiler primary temperature)
Pump runs
Internal boiler temperature rises above 9°C
Pump switches off after a 3 minute overrun period
Internal boiler temperature below 5°C
Central heating demand is activated
Internal boiler temperature rises above 12°C
Central heating demand switches off
Pump switches off after a 3 minute overrun period
PUMP OVERRUN FUNCTION
End of boiler demand
(central heating or domestic hot water)
Pump runs for 3 minutes to dissipate heat from the boiler into the system
PUMP ANTISEIZE FUNCTION
No central heating demand after a 24hr period
Pump runs 5 seconds every 24hrs from last time pump ran
A central heating demand activated, pump runs normally
6720643895-111.1Wo
Fig. 22 Protection function
18 6 720 645 222a (2012/05)
NOTES
BOILER FUNCTION
6 720 645 222a (2012/05) 19
Worcester, Bosch Group
Cotswold Way, Warndon, Worcester WR4 9SW.
Tel. 0844 892 9900
Worcester, Bosch Group is a brand name of Bosch Thermotechnology Ltd.
worcester-bosch.co.uk
6 720 645 222a (2012/05)
WORCESTER, BOSCH GROUP:
TECHNICAL SUPPORT: 0844 892 3366
APPOINTMENTS:
SPARES:
0844 892 3000
01905 752571
LITERATURE:
TRAINING:
SALES:
0844 892 9800
01905 752526
01905 752640
advertisement
* Your assessment is very important for improving the workof artificial intelligence, which forms the content of this project