advertisement

Quick Guide
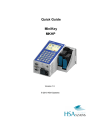
MiniKey
MKHP
Version 1.3
© 2010 HSA Systems
2 MKHP Quickstart Manual
Table of Contents
Keyboard
3
Physical setup
4
1 ................................................................................................................................... 4
2 ................................................................................................................................... 5
3 ................................................................................................................................... 7
4 ................................................................................................................................... 10
5 ................................................................................................................................... 12
6 ................................................................................................................................... 13
7 ................................................................................................................................... 16
Other settings
18
1 ................................................................................................................................... 18
2 ................................................................................................................................... 19
3 ................................................................................................................................... 21
4 ................................................................................................................................... 24
5 ................................................................................................................................... 25
6 ................................................................................................................................... 27
7 ................................................................................................................................... 28
Support
30
© 2010 HSA Systems
1 Keyboard
Keyboard 3
© 2010 HSA Systems
4 MKHP Quickstart Manual
2 Physical setup
2.1
Select head type
On the MKHP you can print with 2 print heads, but with no more than 4 pens.
This is how you setup your heads on the MKHP.
Press the tool button on the keyboard
Use the arrow buttons on the keyboard to highlight "Head setup". Press accept to continue.
Use the arrow buttons to select either Head 1 or Head 2. Press accept to continue.
© 2010 HSA Systems
Physical setup 5
Use the arrow buttons on your keyboard to select "head size". Press accept to change values.
Use the arrow buttons to select the green check mark in the bottom right corner. Press accept to finish.
2.2
Select head position
Example A. This the default position of the head. If your head is positioned as shown, "upside down" must be set to off.
© 2010 HSA Systems
6 MKHP Quickstart Manual
Example B. If you want to position your head as shown below, "upside down" must be set to on.
Press the tool button on the keyboard
Use the arrow buttons on the keyboard to highlight "Head setup". Press accept to continue.
© 2010 HSA Systems
Physical setup 7
Use the arrow buttons to select either Head 1 or Head 2. Press accept to continue.
Use the arrow buttons to select "upside down". Press accept to change the values.
If your head is positioned as shown in example B , "upside down" must be set to on. If you head is positioned as shown in Example A, upside down must be set to off.
Use the arrow buttons to select the green check mark in the bottom right corner. Press accept to finish.
2.3
Print direction
Press the tool button on the keyboard
© 2010 HSA Systems
8 MKHP Quickstart Manual
Use the arrow buttons on the keyboard to highlight "Machine". Press accept to continue.
Use the arrow buttons on your keyboard to select "print direction".
© 2010 HSA Systems
Print direction is the same as the travel direction of the medium.
Physical setup 9
Use the arrow buttons to select the red arrow in the bottom right corner. Press accept to finish.
© 2010 HSA Systems
10 MKHP Quickstart Manual
2.4
Start distance
You are required to enter a start distance. The sensor start distance is the distance from the sensor to the head.
The MKHP is provided with a integrated sensor in the print head. This means that with 0 sensor distance, printing will commence when the medium(paper, box etc) has reached the first nozzle row. 0 sensor distance will place your print close to the edge of the medium. Enter a higher sensor distance to move your print further away from the edge.
The MKHP can also be connected to an external sensor. In this case please measure the distance from the sensor to the print head.
© 2010 HSA Systems
Physical setup 11
Press the tool button on the keyboard
Use the arrow buttons on the keyboard to highlight "Machine". Press accept to continue.
Use the arrow buttons, to highlight the "start distance". Press accept to continue.
© 2010 HSA Systems
12 MKHP Quickstart Manual
Enter your start distance. Press accept to continue.
2.5
Sensor settings
Press the tool button on the keyboard
Use the arrow buttons on the keyboard to highlight "Machine". Press accept to continue.
© 2010 HSA Systems
Physical setup 13
Use the arrow buttons, to highlight the "sensor edge". Press accept to change values.
Set the sensor settings to positive or negative, depending on the type of sensor you are using.If printing starts when the sensor's signal goes active, the sensor edge should be set to positive. If printing starts when the sensor's signal goes inactive, the edge should be negative. If you use the standard sensor supplied with the MKHP, the sensor settings must be set to negative.
Use the arrow buttons to highlight the red arrow at the bottom of the screen. Press accept to finish.
2.6
Pen Offset
If you are using a 2-pen head, you are required to adjust the pen offset. The pen offset is the distance from the first nozzle row of the first pen to the first nozzle row on the second pen.
Press the tool button on the keyboard
© 2010 HSA Systems
14 MKHP Quickstart Manual
Use the arrow buttons on the keyboard to highlight "Head setup". Press accept to continue.
Use the arrow buttons to select either Head 1 or Head 2.Press accept to continue.
© 2010 HSA Systems
Physical setup 15
User the arrow buttons to highlight "offset". Press the enter button on your keyboard.
Enter your pen offset value. Press accept when done.
.
The recommended settings are:
Pen 1 O mm
Pen 2 25.4 mm
© 2010 HSA Systems
16 MKHP Quickstart Manual
2.7
Head offset
If you have multiple heads installed on your system, you are required to adjust the offset between them.
The distance is measured from the first nozzle row of the first pen in the first head to the first nozzle row of the first pen in the second head. The first head has a 0,0 mm offset.
Press the tool button on the keyboard
Use the arrow buttons on the keyboard to highlight "Head setup". Press accept to continue.
© 2010 HSA Systems
Physical setup 17
Use the arrow buttons to select either Head 1 or Head 2. Press accept to continue.
Use the arrow buttons to highlight "offset". Press accept to changes values.
© 2010 HSA Systems
18 MKHP Quickstart Manual
Enter new head offset. Press accept to finish.
3 Other settings
3.1
Select fixed speed
Press the tool button on the keyboard
Use the arrow buttons on the keyboard to highlight "Machine". Press accept to continue.
© 2010 HSA Systems
Other settings 19
Use the arrow buttons to highlight "Print mode". Press accept to change the values.
If you are using fixed speed, print mode must be set to Velocity. Please make sure the velocity settings are correct. Compare the settings with the speed of your conveyor. You can use a tachometer to measure your conveyor speed.
3.2
Setting up encoder
Press the tool button on the keyboard
Use the arrow buttons on the keyboard to highlight "Machine". Press accept to continue.
© 2010 HSA Systems
20 MKHP Quickstart Manual
Use the arrow buttons to highlight "Print mode". Press accept to change the values. must be set to position.
Print mode
To calculate the encoder value for a hollow shaft encoder, you need to know the circumference of the wheel and the number of pulses transmitted in on revolution.
Please refer to the documentation from your encoder supplier. If you use a shaft encoder, you need to know the belt pulley diameter.
Example, hollow shaft encoder
In the following example the encoder transmit 5000 pulses in one revolution. The wheel has a diameter of
64mm.
Circumference = Pi * Diameter=64mm*3.14 = 200.96mm
The encoder value is 200.96/5000= 0,04.
If quadrature is set to on, the encoder value must be divided by 4, so the encoder value will be 0.01.
Example, shaft encoder
In the following example the encoder transmit 5000 pulses in one revolution. The belt pulley has a diameter of 300mm.
Circumference = Pi * Diameter=3,14*300 = 942mm
The encoder value is 942/5000= 0,19.
If quadrature is set to on, the encoder value must be divided by 4, so the encoder value will be 0.09.
© 2010 HSA Systems
Other settings 21
3.3
Ink settings
please make sure that the ink settings "Pen voltage" and "fire pulse width" are correct. These settings can greatly
Press the tool button on the keyboard
Use the arrow buttons on the keyboard to highlight "Head setup". Press accept to continue.
Use the arrow buttons to select either Head 1 or Head 2. Press accept to continue.
© 2010 HSA Systems
22 MKHP Quickstart Manual
Use the arrow buttons to select "Pen voltage" or "Fire pulse width. Press accept to change the values.
Enter a new value. Press the accept button to finish.
Please enter the values for the ink of your choice. The list below contains the inks most commonly used. It is impossible to provide a complete of all inks available. There are many types of ink on the market and new types are being introduced all the time. So if your ink is not on the list, please contact your ink supplier for advice.
© 2010 HSA Systems
Other settings 23
Manufacturer Code
HP black inks C6195A
C8842A
Q2344A
CG339A
HP color Inks C6168A
C6169A
Collins black inks
C6170A
CM150
CM150H
CM290FD
CM557
CM557H
CM796KB
CM838H
CM902H
CM903
Complete
TSK1750
TSK1948
TWK1268
TWK1369
TWK1386
TWK1396
TWK1579H
TWK1818H
TWK1915H
TWK1921
TWK9015H
Ink name Voltage
HP Fast Dry Black Ink
HP Versatile Black Ink
HP Dye Black 1918 Cartridge
HP45A 10 pack black ink cartridges
HP Spot Red Ink
HP Spot Green Ink
HP Spot Blue Ink
Collins Black Hi Speed Ink
Collins Black Hi Speed Ink Heads Up
Collins Black Fast Dry
Collins Black Coated Stock
Collins Black Coated Stock Heads Up
Collins Black Ink Fast Dry Coated
Collins Fluorescent Red Heads Up
Collins Black Ink Heads Up
Collins Black Ink
Collins Complete Black Ink 10
Collins BEAR Black Dye Ink ct (flammable) 7.4
Collins SHARK Black Dye Ink ct
Collins ONYX Black dye ink (flammable)
10
10
10
10
10
10
Collins MAX Black pigment ink (flammable) 10
Collins MAX2 Black pigment ink 10
Collins MAX3 Black pigment ink
Collins Complete Black Ink Heads Up
10
10
Collins Complete Black Ink, Heads Up
Collins CORE Black Ink Heads Up
Collins MAX PLUS Black pigment ink
Collins Reliable Black Ink Heads Up
10
10
10
10
11.2
11.2
11.2
11.2
10
10
10
10
11.2
11.2
11.2
10
2.25
2.25
2.25
2.25
2.25
2.25
2.25
2.25
2.25
2.25
2.25
2.25
2.25
2.25
2.25
2.25
2.25
2.25
Fire Pulse width
1.9
2.25
2.25
1.9
1.9
1.9
1.9
2.25
2.25
2.25
© 2010 HSA Systems
24 MKHP Quickstart Manual
Code
Manufacturer
Collins Color inks
Collins special inks
CM457
CM488
CM500
CM501
CM502
CM503
CM506
CM784
CM785
CM787
CM788
CM789
CM790
CM791
CM631
TWB1374
TWB1388
TWR1370
TWR1397
TWW1284
TWW1406
TWW1929
TWY1372
TWY1443
3.4
Select resolution
Ink name
Collins Blue Ink
Collins Blue Ink
Collins Red Ink
Collins Cyan Ink
Collins Blue Ink
Collins Green Ink
Collins Red Ink
Collins Orange Ink
Collins Yellow Ink
Collins Magenta Ink
Collins Brown Ink
Collins Purple Ink
Collins Green Ink
Collins Red Ink
Collins Invisible UV Ink
Collins Reliable Blue dye ink Heads Up
Collins MAX2 Blue pigment ink
Collins Reliable Red Ink Heads Up
Collins MAX2 Red pigment ink
Collins IR Invisible Blue Dye ink
Collins Invisible MAX UV ink
Collins Invisible UV Fluorescent red ink
Collins Reliable Yellow Ink Heads Up
Collins MAX2 Yellow Pigment Ink
Voltage
10
10
10
10
10
10
10
10
10
10
10
10
10
10
10
10
10
10
10
10
10
10
10
10
2.25
2.25
2.25
2.25
2.25
2.25
2.25
2.25
2.25
2.25
2.25
2.25
2.25
2.25
2.25
2.25
2.25
2.25
Fire Pulse width
2.25
2.25
2.25
2.25
2.25
2.25
Press the tool button on the keyboard
Use the arrow buttons on the keyboard to highlight "Machine". Press accept to continue.
© 2010 HSA Systems
Other settings 25
Use the arrow buttons on your keyboard to select "resolution". Press the accept button to change the values.
Resolution can be set to 1 row, 150 dpi, 300 dpi or 600 dpi. For printing with 150 dpi, 300 dpi or 600 dpi resolution, an encoder is required.
Use the arrow buttons to highlight the red arrow at the bottom of the screen. Press accept to finish.
3.5
System Clock
Press the tool button on the keyboard
Use the arrow buttons on the keyboard to highlight "System". Press accept to continue.
© 2010 HSA Systems
26 MKHP Quickstart Manual
Use the arrow button to select "Clock". Press accept to continue.
Use the arrow buttons on your keyboard to selct either "current date" or "current time". Press accept to change values.
© 2010 HSA Systems
Enter a new value. Press the accept button on your keyboard to finish.
Other settings 27
3.6
Select buffer mode
The buffer is a location in the controller memory that holds data waiting to be printed when printing of other data is in progress. Turn buffer mode off if instant printing is required. Typically this is needed if you want to print the exact time.
Press the tool button on the keyboard
Use the arrow buttons on the keyboard to highlight "Machine". Press accept to continue.
© 2010 HSA Systems
28 MKHP Quickstart Manual
Use the arrow buttons on your keyboard to select "Buffer mode". Press the accept button to change the values.
Use the arrow buttons to highlight the red arrow at the bottom of the screen. Press accept to finish.
3.7
Testjob and troubleshooting
On the MKHP you will find a test job to help you setup you controller.
Load and print the test job to test your MKHP.
You you have 1 pen installed on your system, only the first line will be visible.
If you have 2 pens installed on your system, the first and the second line will be visible.
When printing the test job, please do not exceed the speed limits shown below.
· 600x600 dpi
· 300x300 dpi
· 150x300 dpi
· 300x300 dpi (One row)
Speed limit is 37 m/min
Speed limit is 148 m/min
Speed limit is 296 m/min
Speed limit is 74 m/min
© 2010 HSA Systems
Other settings 29
Troubleshooting
There is no printout at all. Please make sure your hardware has been properly connected. Please refer to the installation manual. If your hardware is working, the most likely explanation is that either the start distance or the sensor settings are wrong. If the start distance is to short, printing will start before the media has reached the head. If the sensor settings are wrong, printing will start after the media has passed the head. Please refer to the chapters "start distance" and "sensor settings".
Only a part of the print has been printed. Check your start distance. If the start distance you have entered is shorter than the distance between the sensor and the head, printing will start before the media has reached the head and consequently only a part of the printout will be printed on the paper.
The print is blurred. Check the distance between the head and the media. The optimal distance is
0.5mm. Please refer to the installation manual. Make sure your ink settings are correct. Please refer to the chapter on the subject.
There are white lines in the print. Check your head. The head must be placed in an angle of 90 degrees in relation to the print direction. Please refer to the installation manual. Also check that your pen offset and your head offset is correct. Refer to the chapter on the subject.
The print has been mirrored. Please make sure the selected print direction is correct. Please refer to the chapter on the subject.
There is a shadow image in the print. Your encoder value could be wrong. Please refer to the chapter
"Setting up encoder". You will also see a "shadow image" in your print out if your are printing faster than the speed limits shown above. Check the resolution settings. If your are printing in velocity mode, resolution must be set to one row.
Your printout should be approx. 84 mm long. If the printout is much longer or much shorter, several things could be wrong. If you are printing in velocity mode, your speed may be incorrect. Please refer to the chapter "Select fixed speed".If you are using an encoder, your encoder value could be wrong. Please refer to the chapter "Setting up encoder".Your encoder may not be properly installed. Please refer to the installation manual.
If either the date or the time on your print is incorrect, please check your system clock settings. Make sure buffer mode is set to off.
If the vertical line appears interrupted on your printout, you will need to readjust your head offset and pen offset.
© 2010 HSA Systems
4
30 MKHP Quickstart Manual
Support
For product support, please contact HSA SYSTEMS Customer Service department
HSA SYSTEMS CUSTOMER SERVICE DEPARTMENT
Phone: +45 66103401
Email: [email protected]
© 2010 HSA Systems
advertisement
* Your assessment is very important for improving the workof artificial intelligence, which forms the content of this project