advertisement
▼
Scroll to page 2
of
16

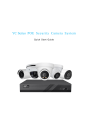
YC Series POE Security Camera System Quick Start Guide Table of Contents Chapter1 System Requirement................................................................................. . - 1 Chapter 2 Network Connection ................................................................................. - 2 2.1 Setting the Network Camera over the LAN ................................................. - 2 2.2 Wiring over the LAN ....................................................................................- 2 Chapter 3 Access to the Network Camera ................................................................. - 4 3.1 Accessing by Web Browsers .........................................................................- 4 3.2 Web login ......................................................................................................- 6 Chapter 4 Camera Connection to NVR................................................................................. - 11 - Chapter5 Frequently Asked Questions..................................................................... - 12 5.1 Why can’t I open the default IP address 192.168.1.110 via web browser ?- 12 5.2 How to reset the password ? ...................................................................... - 125.3 How to upgrade the IP camera ? .................................................................- 13 5.4 How to fetch the RTSP video stream and http snapshot ? ..........................- 13 5.5 Why does the NVR not show image after adding your IP camera ? .......... - 13 5.6 How to make the NVR record in motion detection mode ? ....................... - 13 - Chapter1 System Requirement Operating System Microsoft Windows XP SP1/7/8/10 CPU 3.0 GHz or higher RAM 4G or higher Display 1024×768 resolution or higher Web Browser For camera that supports plug-in free live view Internet Explorer 8 – 11, Mozilla Firefox 30.0 and above version and Google Chrome 41.0 and above version. Note: For Google Chrome 45 and its above version or Mozilla Firefox 52 and its above version which are plug-in free, Picture and Playback functions are hidden. To use mentioned functions via web browser, change to their lower version, or change to Internet Explorer 8.0 and above version. -1- Chapter 2 Network Connection 2.1 Setting the Network Camera over the LAN Purpose: To view and configure the camera via a LAN, you need to connect the network camera in the same subnet with your computer, and install the AjDevTools or SADP software to search and change the IP of the network camera. Tools:http://ourdownload.store/ AjDevTools:Download SADP:Download 2.2 Wiring over the LAN The following figures show the two ways of cable connection of a network camera and a computer: Purpose: ① To test the network camera, you can directly connect the network camera to the computer with a network cable.(Connecting directly must supply the camera with DC 12V power supply) Connecting Directly -2- ② Set network camera over the LAN via a switch or a router. (If it is a POE switch, you do not need to power the camera). Connecting via a Router or a Switch ③ Connect cameras to NVR. NVR with POE NVR without POE -3- Chapter 3 Access to the Network Camera 3.1 Accessing by Web Browsers Steps: 1. Computer download and install the AjDevTools or SADP software tool. 2.After installation,open the software and click the Start Search. 1 Search for the IP address of the camera; 2 Query the IP address of the Camera; 3. Modify the IP address of the camera and computer in the same network segment Setting method: ① Select the IP address of the camera; ② Click IP Batch Manual Setting IP address; -4- ③ Modify the IP address of the camera to be in the same networksegment as the IP address of the computer or choose DHCP toobtain an IP address automatically; ④ Select OK--Successfully modified; 5.The status shows that the Login success, it can be accessed by the computer Web;If you want to configure the camera, click on “Remote configuration” or ”Open Web Page”. -5- 3.2 Web login 1.Open the web browser or click Go to web; 2.In the browser address bar, input the IP address of the network camera, and press the Enter key to enter the login interface; 3.Input the user name and password and click Login. Note: The default IP address is 192.168.0.123. Username:admin Password:123456 First login Click “install Web Plug-in” when prompted. -6- ① You have to download and run the exable as administrato ② If failed to install plug-in, download and save the WEBConfig.exe tocomputer, close all browsers then re-install it. -7- ③ If there is a delay in video response when accessing remotely, please switch to Sub Stream instead. To learn the function of each button, just put the mouse on, it will show screen tips. ④ P2P function settings Steps:Configuration > Camera > Image >Image. Using the P2P ID and QR code, you can access the camera remotely anywhere via smart phone with Internet access. Please register an account via mobile phone after installing the Danale APP rom APP Store or Google Play Market, then log in and add your camera to start previewing. Or you can go to the website http://www.danale.com/ to register if you need PC remote access. You can download APP from the website to find out more. -8- P2P function add steps: Visit the Apple App Store or the Google Play Store to download the Danale app for iOS or Android devices. Scan QR code download ① ② -9- ① For new users, please select “ Sign UP ”.In the following page, Create Account ,and enter your email or mobile number.Fill in the received verification code. ② Select to:“Add devices”,Select “QR Code to add” to get into the scan camera QR code page, or select “NEXT” to discover the connected local LAN IP camera. ③ ④ ③Scan the QR code of the P2P interface displayed on the web side of the camera-> Choose Name you Device.The camera has been successfully added to the phone. ④select the camera list to start viewing video. Tips: 1 Select to check your account profile and configure settings. ② To share your camera with your friends or another user, click his/her Danale account. - 10 - icon and type in or scan Note: If you can not connect the camera, please check your Internet connection and verify the IP address, gateway, and DNS setting in the camera. The Cloud login status should be online, which means the camera has registered to the cloud server. Chapter 4 Camera Connection to NVR There are two ways that connect to NVR (two types of NVR) ① Connect to POE port NVR ② Connect to Without POE port NVR The camera can work with Hikvision POE NVR,Plug and Play, besides,the IP camera also supports standard ONVIF protocol ,which can be added to third-party video recorder easily with ONVIF. - 11 - Note: ①Before connecting cameras to NVR that has POE switch ,make sure the NVR and cameras have valid IP scheme that matchs each other.( e.g.: Dahua NVR POEPort’s IP Network Segment is 10.1.1.XX, so the camera IP must be 10.1.1.XX) ②Before connecting cameras to NVR that has no POE switch, make sure the NVR , cameras and the POE switch router have valid IP scheme that matchs each other.( e.g.: POE switch router router’s IP is 192.168.1.1, so the camera IP must be192.168.1.XX) ③Some POE NVR models support plug and play(such as Hikvision POE NVR),if the “Plug & Play”feature is not available or not applicable, please add cameramanually Chapter5 Frequently Asked Questions 5.1 Why can’t I open the default IP address 192.168.0.123 via web browser ? The default IP address may not match your LAN’s IP scheme. Check your computer’s IP address before accessing the camera. If the IP address does not match the 192. 168. 0.x scheme, please install the IP search tool from the download website to modify the camera’s IP address. Make sure the IP address of the camera matches the LAN IP scheme. For example, if the your LAN is 192. 168.1.xxx(192. 168.2.xxx)..., then set the IP camera to 192. 168.1. 123(192. 168.2.123)... and so on. 5.2 How to reset the password ? The default Username: admin, Password: 123456. If you lost the password or wantto reset the camera’s setting, please install the search tool Ajdev to search the camera IP and click Batch Reset button. - 12 - 5.3 How to upgrade the IP camera ? ①Ask the supplier for the suitable firmware. ②You can use the web browser, search tool, or PC client to upgrade the camera. ③Go to the Configuration > System >update, click browse and select the firmware, then click Upgrade button and wait for the operation to complete. 5.4 How to fetch the RTSP video stream and http snapshot ? ①Main Stream: rtsp://admin:123456@IP address/stream0 ②Sub Stream: rtsp://admin:123456@IP address/stream1 5.5 Why does the NVR not show image after adding your IP camera ? ①Make sure you selected the right protocol and enter the correct username and password when adding the cameras. ②Make sure the NVR and IP camera are the same IP scheme. (eg. NVR:192.168.1.x, and IP camera:192.168.1.y). ③Try changing the camera encode mode to H.264 if the NVR can’t support H.265. (Configuration -> Camera -> Video > Encode mode: H.264) 5.6 How to make the NVR record in motion detection mode ? ①Enable the IP camera motion detection function via web browser. ②add the IP camera via ONVIF protocol. ③change the NVR record mode to Motion Detection mode. ④check the NVR screen motion detection icon and try playback (Please refer to your NVR’s manualfor NVR’s motion record option.) - 13 -
advertisement
Key Features
- High-resolution image quality for clear and detailed images
- Advanced motion detection with customizable alerts
- Remote access via web browser or mobile app for easy monitoring
- Weatherproof design for outdoor use
- Plug-and-play installation for easy setup
- Supports up to 128GB of storage for extensive recording
- Night vision for clear images even in low light conditions
- Two-way audio for communication with visitors or intruders
- Multiple camera support for comprehensive coverage
- Easy integration with other security systems
Related manuals


Frequently Answers and Questions
What is the default IP address of the network camera?
The default IP address is 192.168.1.110.
What is the default username and password?
The default username is admin and the default password is 123456.
How do I reset the password?
To reset the password, press and hold the reset button on the back of the camera for 10 seconds.
Why can't I access the camera remotely?
Make sure that the camera is connected to the internet and that the port 80 is open on your router.
How do I upgrade the firmware?
To upgrade the firmware, download the latest firmware from the manufacturer's website and follow the instructions in the user manual.
advertisement