advertisement

iWiegand access controller
Installation Guide
General
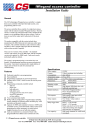
The CS Technologies iWiegand access controller is a single door access controller which provides high security, easy programming and low-cost.
The access controller allows control of a single door using a reader with the industry-standard Wiegand interface. The door can have a reader (any Wiegand reader with a standard 26-bit output), an exit pushbutton and an electric release. Cards or keys are used at the reader and if authorised will be given access.
The readers compatible with the system include those manufactured by HID, Motorola, Keri and many other types of readers. The controller interfaces easily with door strikes and there is also a separate output provided for interfacing with an alarm system if required.
There are two versions of the controller – the standard version, with capacity for up to 4000 cards, and the extended version with capacity for 16000 cards. Cards can be easily individually added or deleted.
The system is programmed using a convenient low-cost keypad. All programming functions are password protected for security. Convenient commands allow rapid addition of single cards or blocks of cards for extremely fast commissioning.
Features
Dedicated controller; easy programming.
Easy installation
Programming commands are password protected.
Operates from 12VDC, which can also be used to power the locks.
Programming commands available include
- add user
- delete user
- bulk add users
- bulk delete users
- set trigger time for each of two relays
- invert LED operation
- set base address
Very economical and reliable
Works with any reader with a wiegand output, including literally hundreds of different readers including key, card, proximity and biometric readers.
Capacity for 4000 cards (standard version) or 16000 cards
(extended version), each individually coded. Cards can be programmed to either momentary or unlock/relock
(toggle) functions for one or both relay outputs.
Cards are numbered in a consecutive block with a programmable base address and a constant site code.
Specifications
Power supply: 12VDC
Current 150mA maximum (not including
Consumption: door strikes)
Temperature range: 0
°C to 70°C
Humidity range: 0 to 95% relative noncondensing
Shipping weight:
Housing:
Reader interfaces:
Exit requests:
Relay outputs:
Relay trigger time:
User capacity:
300g
High impact ABS plastic box with bulkhead mounting lugs
One 26-bit Wiegand interface
Presco keypad interface for programming
One normally open input which triggers both relays
Two ‘form-c’ relays rated at
10A/125VAC
Relay 1: 1-128 seconds
Relay 2: 1-255 seconds
Relays can also be set to 0s which makes them change state (toggle) each time they are triggered.
4000 cards (standard) or 16000 cards
(extended). iWiegand access controller
27 Bank Street Meadowbank NSW 2114 Australia
Tel: +61 2 9809 0588 Fax: +61 2 9809 2446 email: [email protected]
Cable Types
Function
Proximity reader to controller
Exit request to controller
Programming keypad to controller
Controller to door strikes
Cable
6-core screened cable (max 100m) + optional fig-8 for power for readers requiring extra current.
Figure-8 cable
Figure-8 cable
Figure-8 cable (recommend 24-strand)
Installation procedure
Mounting the iWiegand access controller:
The controller should be mounted in a convenient location.
Removing the base of the box will release the circuit board which can be terminated. To mount the box, make all connections first then replace the base of the box and mount the box using the two ‘bulkhead’ mounting tabs on the top and bottom of the box.
Connecting the wiegand reader:
Standard Wiegand format readers have connections for power, data0 and data 1 and generally a LED connection. Check the reader documentation for the power supply required – some readers need 12VDC while others need 5VDC.
The default setting for the LED connection is for a red LED i.e. the LED is red in its normal state (when the door is locked). Some readers have the LED operation reversed; in this case it’s possible to program the system to ensure that the
LED colour is red when the door is locked.
The colours of the wires listed below will probably be correct for most readers but check the reader wiring designations to be certain.
Reader wire
Colour (check reader documentation to be certain
0V Black
IWiegand connection
GND
Power
Data 0
Data 1
LED
Red
Green
White (sometimes yellow) IN2
Varies –can be brown, blue, orange, yellow
+5V or 12V depending on reader
IN1
IN3
Some wiegand readers have a wire designated HOLD. This should not be connected.
Connecting exit request pushbutton:
An exit request pushbuttons can be connected. The exit request pushbutton is normally open; when the switch closes the door is triggered for its release time.
Exit request: between IN4 and GND
Connecting the programming keypad:
The programming keypad is a Presco reader, which has GND and DAT lines. These connect to the JP3 connector with the white (DAT) wire connecting to the left hand pin (closest to the corner) and the black (GND) wire connecting to the right hand pin.
It is not necessary to leave the programming keypad connected once the system is commissioned.
Connecting the relay outputs:
The controller has two ‘form-C’ relay outputs. Both outputs are triggered by a valid read or an exit request. They can be triggered for a programmable amount of time or also set to toggle. The door strikes or other electronic locks and/or alarm panels or alarm shunts are connected to these relays following the diagram which is later in this manual.
Before powering up the controller
Unit installed in dry, secure location
Reader wiring checked
Keypad wiring checked
Strike wiring checked
Exit request wiring checked
No short to 0V on any power connections
After powering up the controller:
Controller beeps 10 times on power-up
LED1 (Power) on
LED2 (Heartbeat) flickering slowly when not in programming mode, fast when in programming mode.
Setting up the site code:
All of the cards for a particular site are coded with a unique site code. This information must be loaded into the controller so that it will recognise only cards with that site code.
To set the controller site code, connect a link across LK5.
Now presenting any card to the reader will make the controller beep 5 times to indicate that the site code has been read from the card and stored in the controller.
Setting up the programming master code:
When LK5 is connected, the master programming code can be set by entering it on the keypad. Enter a 6-digit number and press the ‘E’ key. The keypad will beep 5 times to indicate that the new master code has been stored in the controller.
Indication lights and sounds:
The iWiegand controller is fitted with a LED for each relay to indicate when it is energised.
When a valid card is presented at a reader both relays will operate for their programmed trigger time.
The LED indicator on the reader will be activated whenever relay 1 is active iWiegand access controller
27 Bank Street Meadowbank NSW 2114 Australia
Tel: +61 2 9809 0588 Fax: +61 2 9809 2446 email: [email protected]
Programming the iWiegand controller
Enter programming mode:
To enter programming mode, enter the number which was programmed as the master code on the keypad and press the ‘E’ key.
(MASTER CODE) E
If the code is valid you should hear a rising beep to indicate that programming mode has been entered, and the red LED on the controller should flash quickly. If the code is not valid the keypad will beep twice quickly.
Once in programming mode there are several commands available as listed below. After the completion of a successful command the keypad will ‘warble’ to indicate the command has been accepted. If the command fails the keypad will do a long beep.
Exit programming mode:
To exit programming mode the command is
9 E
When entered you will hear a falling beep to indicate that programming mode has been exited.
Programming mode will also timeout after about 4 minutes of inactivity; if this happens the controller will beep 5 times.
Set relay trigger time:
The door trigger time can be set from 1 to 128 seconds for relay 1 and 1 to 255 seconds for relay 2. The trigger time can also be set to
0 for either relay in which case that relay will change state (toggle) each time it is triggered by either a valid card or an exit request.
The command to set the trigger time is
5 * (RELAY NUMBER) * (TRIGGER TIME) E
For example, to set the time on relay 1 to 5 seconds and the time on relay 2 to 30 seconds you would enter the commands
5 * 1 * 5 E
5 * 2 * 30 E
Programming users:
There are four commands available for programming users:
1: Add user:
1 * (CARD NUMBER) E
This command adds a single user to the system. For example, to add card 100 you would enter: 1 * 100 E
2: Delete user:
2 * (CARD NUMBER) E
This command deletes a single user from the system. For example, to delete card 100 you would enter: 2 * 100 E
3: Bulk add users:
It is possible to program many users in bulk, making commissioning the system very fast. The command to bulk enter users is:
3 * (START USER) * (NUMBER OF USERS) E
For example, to add 1000 users starting at card 501 the command would be:
This would add users 501-1500.
3 * 501 * 1000 E
4: Bulk delete users:
It is possible to delete many users in bulk. The command to bulk delete users is:
4 * (START USER) * (NUMBER OF USERS) E
For example, to delete 1000 users starting at card 501 the command would be:
This would delete users 501-1500.
4 * 501 * 1000 E
Note that a bulk add or delete operation can take a little while if many cards are being added or deleted. During the bulk operation the on-board red LED will be solid, and every few seconds during the bulk operation the controller will give a short ‘bip’. When the bulk addition or deletion is complete the controller will quickly beep 10 times to indicate that the command has completed.
Set LED operation:
The reader LED operation can be reversed using the ‘6’ command.
6 * (0/1) E
If the parameter for this command is 0 then the LED operation is ‘normal’ and if it is 1 then the LED operation is ‘inverted’.
Set base address:
The iWiegand controller can work with up to 4000 (standard) or 16000 (extended users). In each case the users must be in a continuous block. Using the ‘set base address’ command allows the user numbering to start at other than 0. For example you may have a block of cards from 11001 to 15000. The standard iWiegand controller can work with these cards by simply setting the base address to 11000. The ‘7’ command sets the base address; the default value for the base address is 0; the base address can be any number from
0 to (65536 minus controller capacity).
7 * (BASE ADDRESS) E
Door 1 strike
Additional strike, interface to alarm output, reed switch shunt etc
Diodes shown are 1N4001 or similar. It is good practice to fit a diode across the coil of any electric lock.
JP3
For the 4000 user version (standard firmware) this is a 93C66 chip.
For the 16000 user version (extended firmware) this is a 93C86 chip.
LK1
LK2
LK3
LK4
LK5
LED2
LED1
LK1-2 always on
LK3-4 always off
JP4, JP5 no connection
LK6 down
LK5 - ON to set master code and site code
OFF for normal operation
LK6
+12V 0V +5V GND IN1 IN2 IN3 IN4
12VDC power supply
+
-
Presco connection
DTA (white)
GND (black)
Door 1 exit button
(normally open)
Wiegand reader
Colours given may vary depending on the reader used; check the reader documentation both for colour designation and also for reader voltage requirement.
Reader wire Possible colours iWiegand connection
0V Black
DATA 0 Green
DATA 1
LED
+V
White or Yellow
Red (+V)
GND
IN1
IN2
Brown, Yellow, etc IN3
+5 or 12V
advertisement
* Your assessment is very important for improving the workof artificial intelligence, which forms the content of this project
Related manuals
advertisement