advertisement

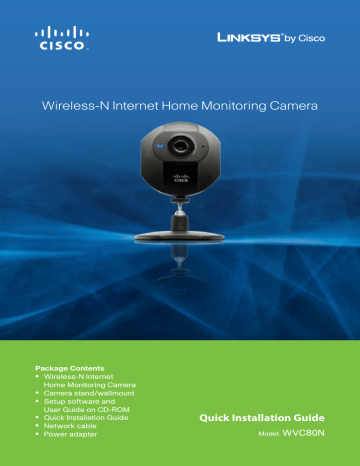
Wireless-N Internet Home Monitoring Camera
Package Contents
•
Wireless-N Internet
Home Monitoring Camera
•
Camera stand/wallmount
•
Setup software and
User Guide on CD-ROM
•
Quick Installation Guide
•
Network cable
•
Power adapter
Quick Installation Guide
Model:
WVC80N
Installation
A. Insert the Setup CD-ROM into your CD-ROM drive.
B. Click Start Setup, then click
Next.
C. Click Next.
D. Select I accept this agreement, then click Next.
E. Please wait while the Wizard identifies the devices on your network. When it has finished, click Next.
F. Follow the on-screen instructions to connect the
Camera.
G. Please wait while the Wizard searches for the Camera.
H. Enter a username and password for the Camera. The username and password may only contain letters, numbers, or the underscore ( _ ) character. When you have finished, click Next.
I. Choose a descriptive name for your camera and enter it in the
Friendly Name field.
If you would like to save the
Camera’s settings to a text file on your desktop, select Save
settings to your desktop. Click
Next.
J. Please wait while the Wizard configures your settings.
K. The Wizard now guides you through the wireless setup. Click
Next.
L. If the wizard is able to automatically retrieve your router’s settings, you will see this screen. If you would like to use this network, click Next and go to Step O.
If you do not see this screen, or you would like to connect to a different network, select
I would like to connect to a
different network and click
Next. Go to step M.
M. The Wizard searches for available wireless networks.
When it has finished, select your wireless network and click Next.
N. If your network uses wireless security, the Enter Wireless
Network Security Key screen appears. Enter your password in the Security Key field and click
Next.
If your network does not use wireless security, go to step O.
O. Please wait while the Wizard configures your network.
P. Follow the on-screen instructions to disconnect the cables from the Camera.
Q. Enter your router’s username and password and click Next.
Congratulations! The Camera installation is complete.
To set up your Camera for remote viewing over the Internet, continue to “Remote Access Setup” below.
Remote Access Setup
Using the TZO DDNS Service, you can access the Camera from anywhere on the Internet by using the Camera’s domain name. To set up your TZO account, follow these instructions.
A. To begin the TZO signup process, click Next. Go to step B.
To skip the TZO signup process, select No, thanks and click
Next. Go to step H.
B. Click Next.
C. If you are setting up a new TZO account, select I would like to create a new TZO DDNS domain
name... and click Next. Go to step D.
If you already have a TZO account, select No thanks, I have an existing
TZO DDNS domain name... and click Next. Go to step F.
D. Enter your email address and your desired domain name, then click Next.
The Wizard connects your
Camera to the internet.
E. Your TZO account sign up is complete. An email is sent to you with your account information.
Click Next. Go to step H.
F. Enter your current TZO domain name and click Next.
G. Your TZO account setup is complete.
Click Next.
H. The Camera setup is complete.
Click Finish.
Congratulations! Your TZO account setup is complete.
Refer to the User Guide for instructions on configuring the Web-based Utility.
For additional information or troubleshooting help, refer to the User Guide on the CD-ROM.
Additional support is also available by phone or online.
24-Hour Technical Support
800-326-7114
Website http://www.linksysbycisco.com
RMA (Return Merchandise Authorization) http://www.linksysbycisco.com/warranty
Support http://www.linksysbycisco.com/support
© 2009 Cisco Systems, Inc. All rights reserved. Cisco, the Cisco logo, and Linksys are trademarks or registered trademarks of Cisco Systems, Inc. and/ or its affiliates in the United States and certain other countries. All other trademarks mentioned in this document or website are the property of their respective owners. The use of the word partner does not imply a partnership relationship between Cisco and any other company.
09081210NC-ST 3420-00571
advertisement
* Your assessment is very important for improving the workof artificial intelligence, which forms the content of this project