advertisement

User Manual
Convertible Tablet roda PEGASUS
PEGASUS User Manual roda
—————————————————————————————
—————————————————————————————
Page 2 of 23
PEGASUS User Manual roda
————————————————————————————— roda computer GmbH
Landstrasse 6
77839 Lichtenau/Baden
Telephone: +49(0)7227/9579-0
Telefax: +49(0)7227/9579-20 roda Service Center Hüllhorst
Bredenhop 20
32609 H
üllhorst
Telephone: +49(0)5744/944-470
Telefax: +49(0)5744/944-475
—————————————————————————————
Page 3 of 23
PEGASUS User Manual roda
—————————————————————————————
No part of this publication may be processed; such as reproduced, transmitted, transcribed, stored in a retrieval system, translated into any computer language in any form, or by any means of electronic, mechanical, magnetic, optical, chemical, or others without the prior written permission of the manufacturer.
The manufacturer reserves the right to revise this publication and to make changes to the contents hereof without obligation to notify any person of such revision or changes.
The manufacturer makes no representations or warranties, either expressed or implied, about the contents and specifically disclaims any warranties as to merchantability or fitness for any particular purpose. Any of the software described in this manual is sold or licensed "as is". Should the programs prove defective following purchase, the buyer (and not the manufacturer, its distributor, or its supplier) assumes the entire cost of all necessary servicing, repair and any incidental or consequential damages resulting from any software defects.
Copyright
© 20
10 roda computer GmbH Lichtenau, January 2010
Author: Joachim Tschan
Version History:
Version Description Date Written by
1.0 Creation 18.01.2010 Joachim Tschan
1.1 Revision 01.04.2010 Christian Fessler
Trademark Acknowledgments
Microsoft, Windows and Windows XP are registered trademarks of Microsoft
Corp.
All product and company names are trademarks or registered trademarks of their respective holders.
—————————————————————————————
Page 4 of 23
PEGASUS User Manual roda
—————————————————————————————
EMC and Safety Notice
Federal Communications Commission Radio Frequency Interference Statement
This equipment has been tested and found to comply with the limits for a class B digital device, pursuant to part 15 of the FCC Rules. These limits are designed to provide reasonable protection against harmful interference in a residential installation.
-
-
This equipment generates, uses, and radiates radio frequency energy and if not installed and used in accordance with the instructions, may cause interference to radio communications. However, there is no guarantee that interference will not occur in a particular installation. If this equipment does cause harmful interference to radio or television reception, which can be determined by turning the equipment off and on, the user is encouraged to try to correct the interference by one or more of the following measures:
- Re-orient or relocate the receiving antenna.
-
Increase the separation between the equipment and receiver.
Connect the equipment into an outlet on a circuit different from that to which the receiver is connected.
Consult the supplier or an experienced radio/TV technician for help.
This Transmitter must not be co-located or operating in conjunction with any other antenna or transmitter.
Any changes or modifications (including the antennas) made to this device that are not expressly approved by the manufacturer may void the user
’s authority to operate the equipment.
This equipment complies with FCC RF radiation exposure limits set forth for an un-controlled environment. To maintain compliance with FCC RF exposure compliance requirements, avoid direct contact to the transmitting antenna during transmitting.
Countermeasures if interference occurs
You are encouraged to do the following if interference occurs while you are operating the device:
Turn OFF the unit and unplug the AC adapter from the outlet to see if the interference disappears.
Connect the AC adapter to the outlet in another room and check if the interference still exists.
Use an outlet that is far away from the interfered appliance.
Re-orient your computer in respect to the interfered appliance to see if there is improvement.
If all of these failed, please call your supplier for help.
—————————————————————————————
Page 5 of 23
PEGASUS User Manual roda
—————————————————————————————
CE
This equipment complies with the requirements set out in the Council Direction on the Approximation of the laws of the Member States relating to
Electromagnetic Compatibility (89/336/EEC). For the evaluation regarding the electromagnetic compatibility, the following standards were applied:
Standards Specifications and Parameters
EN 301 489-17 1.2.1 ERM
(electromagnetic compatibility and radio spectrum matters):EMC (electromagnetic compatibility) standards for radio equipment and service-Part 17:
Specific conditions for wideband data and Hiperlan equipment
EN301 489-01 V1.4.1 (EMC standard for radio equipment), ETSI EN 300 328
V1.6.1 (2004-11), (EMC standard for using spread spectrum modulation techniques), ETSI EN301 511 V9.0.2
(2003-03) (GPRS)
LVD
EN55022 +A2: 2003 Class B EMI Conduction and
Radiation; EN61000-3-2 Harmonics
EN61000-3-3 +A1: 2001 Flicker (Voltage fluctuation)
EN55024 EMS; EN61000-4-2 +A2: 2001 ESD
(Electrostatic discharge); EN61000-4-3 +A1: 2002 RS
(Radio frequency electromagnetic field)
EN61000-4-4 +A2: 2001 EFT (Electrical fast transient/burst); EN61000-4-5 +A1: 2001 Surge
EN61000-4-6 +A1: 2001 CS (Conducted disturbances induced by radio frequency); EN61000-4-8 Power-
Frequency Magnetic Field; EN61000-4-11 +A1: 2001
Voltage Dips and Voltage Interruptions
EN60950: 2001 Safety of Information Technology
Equipment
UL, TÜV
AC Adapter (EN60950 LVD is included in T
ÜV)
Environmental Information, Material Safety and Recycling
Caution:
Risk of explosion if battery is replaced by an incorrect type. Dispose of used batteries according to the instructions.
All materials used in the construction of this equipment are recyclable or environmentally friendly. Please recycle the packing materials, and at the end of the product's life, all other materials by local regulations. Please refer
“Material and Recycling
” for the contents of the materials.
The equipment may still contain tiny amount of hazardous substances for health and environment, though those are below control level.
To avoid spreading such substances into the eco system, and to minimize the pressure on the natural, you are encouraged to use the appropriate take-back. Those will reuse or recycle most of the materials in a sound way after end life.
The crossed bin symbol indicates proper disposal is required.
For more information on collection, reuse and recycling, please consult local or regional waste administration.
You can also contact the supplier for more information on the environmental details of the equipment.
—————————————————————————————
Page 6 of 23
PEGASUS User Manual roda
—————————————————————————————
Table of contents
1 GETTING STARTED.................................................................................9
1.1 System Configurations....................................................................10
1.2 Preparing your 13.3
” Rugged Notebook Pe gasus..........................11
2 COMPONENTS AND FUNCTIONS ........................................................13
2.1
2.2
Front View.......................................................................................13
I/O Port View...................................................................................14
2.3
2.4
2.4.1
2.4.2
Stylus ..............................................................................................14
Making Connections .......................................................................15
USB (Universal Serial Bus) Ports ..........................................15
LAN Port.................................................................................15
2.4.3
2.4.4
2.4.5
2.4.6
Modem Port............................................................................15
Microphone-in Jack ................................................................15
RS232 Port.............................................................................15
Audio-out Jack .......................................................................15
2.4.7
2.4.8
DC-in Jack..............................................................................15
Optical Drive...........................................................................16
2.4.9 Kensington
® Lock Port
..........................................................16
2.4.10 PC Card Slot ..........................................................................16
2.4.11 Flash Memory Slot .................................................................16
2.4.12 Display output ........................................................................16
2.5
2.5.1
Power System.................................................................................17
Using AC Power.....................................................................17
2.5.2 Using Battery Power ..............................................................18
2.5.3
2.5.4
Installing and Removing the Battery Pack .............................18
To remove the battery pack: ..................................................19
2.5.5 Battery Care ...........................................................................19
3 Maintenance / Service .............................................................................21
3.1
3.2
3.2.1
3.2.2
Troubleshooting ..............................................................................21
Service ............................................................................................21
Service Supply Note...............................................................22
Downloads .............................................................................23
—————————————————————————————
Page 7 of 23
PEGASUS User Manual roda
—————————————————————————————
GETTING STARTED
—————————————————————————————
Page 8 of 23
PEGASUS User Manual roda
—————————————————————————————
1
GETTING STARTED
Congratulations on your purchase of a Pegasus 13.3
”
rugged notebook. The
13.3
” rugged notebook Pegasus is a fully functional PC with built-in wireless connectivity. You will be able to organize and access important business and personal information. In addition, you will be able to send and receive e-mail and access the Internet.
This Manual contains all the information you need to set up and use your 13.3
” rugged notebook. It describes all the features of the 13.3
”
rugged notebook in an easy-to-read yet thorough manner.
—————————————————————————————
Page 9 of 23
PEGASUS User Manual roda
—————————————————————————————
1.1 System Configurations
Processor: Intel U7500" Merom" Processor Support
Speed at 1.06GHz
Chipset: INTEL ICH-8M + 965GM Chipset
OS Support:
Microsoft Windows XP Edition OS Support
Display Screen Interface Support:
Standard Touch Screen
Sunlight readable screen
LCD Flat Panel Support:
13.3
” TFT,
1280x800 Resolution,
Storage Support:
HDD Support
2.5
”
SATA HDD
Capacity Points : 80GB 5400rpm (up to 250GB)
System Memory:
Single SO-DIMM Memory Slots
DDR2-667MHz
System Memory Upgradeable to 2GB
Expansion Slot:
connecter
USB 2.0 support
RS-232 support
PCMCIA & Flash memory slot
Optical Device
DVD S-MUTI DL 8X/6X/4X
Communication Devices Support:
Wireless LAN (WLAN) Intel 802.11A/B/G/N support:
Modem 56K
Bluetooth 2.1 + EDR
GPS
WWAN compliant
—————————————————————————————
Page 10 of 23
PEGASUS User Manual roda
—————————————————————————————
1.2 Preparing your 13.3” Rugged Notebook Pegasus
These are only quick instructions for using your 13.3
”
rugged notebook. Read the later pages for detailed information on using your 13.3
” rugged notebook.
1. Connect the AC Power Adapter
2. Install the battery pack
3. Turn ON the 13.3“ Rugged Notebook
IMPORTANT! When opening, do not force the display panel down to the table or else the hinges may break! Never lift the 13.3
” rugged note-book by the display panel!
—————————————————————————————
Page 11 of 23
PEGASUS User Manual roda
—————————————————————————————
COMPONENTS
AND
FUNCTIONS
—————————————————————————————
Page 12 of 23
PEGASUS User Manual roda
—————————————————————————————
2
GETTING STARTED
2.1 Front View
1. Five Way Control Key Up/Down , Left/Right & Enter Button
2. WiFi/BT Trigger Button
3. mouse button
4. Power Button
5. LCD Panel
6. Internal Microphone & Speaker
7. LED Status Indicator
8. Finger print
9. Volume control
10. Brightness control
—————————————————————————————
Page 13 of 23
PEGASUS User Manual roda
—————————————————————————————
2.2 I/O Port View
1
2
3
4
USB port
LAN port
Modem port
USB port
2.3 Stylus
5
6
7
8
RS232 port
Display output
Optical drive
Battery Slot
9
10
11
12
Kensington lock
MIC in & Headphone out
PCMCIA and flash memory
Power (DC) input
—————————————————————————————
Page 14 of 23
PEGASUS User Manual roda
—————————————————————————————
2.4 Making Connections
Your 13.3
” rugged notebook Pegasus is equipped with a full array of ports and connectors, including standard input/output (I/O) ports for quickly and easily adding peripheral devices such as printers, keyboards, and mice. Refer to documentation included with individual devices for details on connecting these devices to your 13.3
” rugged notebook
2.4.1 USB (Universal Serial Bus) Ports
The Universal Serial Bus (USB) is the latest standard for attaching monitors, input devices, scanners, and other devices to a PC. USB devices can be chained together on a single cable.
2.4.2 LAN Port
The RJ-45 LAN port with eight pins is larger than the RJ-11 modem port and supports a standard Ethernet cable for connection to a local network. The built-in connector allows convenient use without additional adapters
2.4.3 Modem Port
The RJ-11 modem port with two pins is smaller than the RJ-45 LAN port and supports a standard telephone cable. The internal modem supports up to 56K
V.90 transfers. The built-in connector allows convenient use without additional adapters.
2.4.4 Microphone-in Jack
Connect a microphone to this jack to record audio.
2.4.5 RS232 Port
The Connector is reserved for specific purpose which is used to connect to customer
’s device.
2.4.6 Audio-out Jack
Connect a stereo headset or external speakers to this jack to listen to multimedia.
2.4.7 DC-in Jack
Connect the DC power cable from the AC adapter to this jack.
—————————————————————————————
Page 15 of 23
PEGASUS User Manual roda
—————————————————————————————
2.4.8 Optical Drive
The Notebook PC comes in various models with different optical drives. The
Notebook PC
’s optical drive may support compact di scs (CD) and/or
digital video discs (DVD) and may have recordable (R) or re-writable (RW) capabilities. See the marketing.
2.4.9 Kensington® Lock Port
The Kensington
® lock port allows the Notebook PC to be secured using
Kensington
® com patible Notebook PC security products. These security products usually include a metal cable and lock that prevent the Notebook PC to be removed from a fixed object. Some may also include a motion detector to sound an alarm when moved.
2.4.10 PC Card Slot
One PCMCIA 2.1 compliant PC card socket is available to support on type I/II PC card. The socket supports 32-bit card Bus. This allows accommodation of
Notebook/PC expansion options such as memory cards, ISDN, SCSI, and Smart
Cards adapters.
2.4.11 Flash Memory Slot
Normally an external memory card reader must be purchased separately in order to use memory cards from devices such as/ digital cameras, MP3 players, mobile phones, and PDAs. This Notebook PC has a built-in high-speed memory card reader that can conveniently read
2.4.12 Display output
The 15-pin D-sub monitor port supports a standard VGA-compatible device such as a monitor or projector to allow viewing on a larger external display.
GPS Disclaimer
Underwriters Laboratories Inc. (
“UL”) has not tested the performance or reliability of the
Global
Positioning System (
“GPS”) hardware, operating software or other aspects of this product. UL has only tested for fire, shock or casualties as outlined in UL
’s Standard(s) for Safety.UL60950
-1
Certification does not cover the performance or reliability of the GPS hardware and GPS operating software. UL MAKES NO REPRESENTATIONS, WARRANTIES OR CERTIFICATIONS
WHATSOEVER REGARDING THE PERFORMANCE OR RELIABILITY OF ANY GPS RELATED
FUNCTIONS OF THIS PRODUCT.
—————————————————————————————
Page 16 of 23
PEGASUS User Manual roda
—————————————————————————————
2.5 Power System
2.5.1 Using AC Power
The Pegasus power is comprised of two parts, the power adapter and the battery power system. The power adapter converts AC power from a wall outlet to the
DC power required by the 13.3
” Rugged Notebook. Your 13.3”
Rugged notebook comes with a universal AC-DC adapter. That means that you may connect the power cord to any 100V-120V as well as 220V-240V outlets without setting switches or using power converters. Different countries may require that an adapter be used to connect the provided US-standard AC power cord to a different standard. Most hotels will provide universal outlets to support different power cords as well as voltages. It is always best to ask an experienced traveler about AC outlet voltages when bringing power adapters to another country.
TIP: You can buy travel kits for the 13.3” rugged notebook that includes power and modem adapters for almost every country.
With the AC power cord connected to the AC-DC converter, connect the AC power cord to an AC outlet (preferably with surge-protection) and then connect the DC plug to the 13.3
” Rugged Notebook. Connecting the AC
-DC adapter to the AC outlet first allows you to test the AC outlet
’s power and the AC
-DC converter itself for compatibility problems before connecting the DC power to the
13.3
” Rugged Notebook.
The power indicator on the adapter (if available) will light if the power is within accepted ranges.
—————————————————————————————
Page 17 of 23
PEGASUS User Manual roda
—————————————————————————————
IMPORTANT! Damage may occur if you use a different adapter to power the 13.3” Rugged notebook or use the 13.3” rugged notebook’s adapter to power other electrical devices. If there is smoke, burning scent, or extreme heat coming from the AC-DC adapter, seek servicing. Seek servicing if you suspect a faulty AC-DC adapter. You may damage both your battery pack(s) and the 13.3” rugged notebook with a faulty AC-DC adapter.
NOTE: This Pegasus notebook may come with either a two or threeprong plug depending on territory. If a three-prong plug is provided, you must use a grounded AC outlet or use a properly grounded adapter to ensure safe operation of the 13.3” rugged Notebook.
WARNING! THE POWER ADAPTER MAY BECOME WARM TO HOT WHEN
IN USE. BE SURE NOT TO COVER THE ADAPTER AND KEEP IT AWAY
FROM YOUR BODY.
2.5.2 Using Battery Power
The Pegasus is designed to work with a removable battery pack. The battery pack consists of a set of battery cells housed together. A fully charged pack will provide several hours of battery life, which can be further extended by using power management features through the BIOS setup. Additional battery packs are optional and can be purchased separately through a 13.3
”
Rugged notebook retailer.
2.5.3 Installing and Removing the Battery Pack
Your 13.3
” rugged notebook may or may not have its battery pack installed. If your Pegasus does not have its battery pack installed, use the following procedures to install the battery pack.
IMPORTANT! Never attempt to remove the battery pack while the 13.3” rugged notebook is turned ON, as this may result in the loss of working data.
—————————————————————————————
Page 18 of 23
PEGASUS User Manual roda
—————————————————————————————
2.5.4 To remove the battery pack:
IMPORTANT! Only use battery packs and power adapters supplied with this 13.3” rugged notebook or specifically approved by the manufacturer or retailer for use with this model or else damage may occur to the 13.3” rugged notebook.
2.5.5 Battery Care
The 13.3
” rugged notebook
’s battery pack, like al l rechargeable batteries, has a limit on the number times it can be recharged. The battery pack
’s useful life will depend on your environment temperature, humidity, and how your 13.3
” rugged notebook is used. It is ideal that the battery be used in a temperature range between -20
˚C and 60˚C. You must also take into account that the 13.3” rugged notebook
’s internal temperature is higher than the outside temperature. Any temperatures above or below this range will shorten the life of the battery. But in any case, the battery pack
’s usage time will eventually decrease and a new battery pack must be purchased from an authorized dealer for this 13.3
” rugged notebook. Because batteries also have a shelf life, it is not recommended to buy extras for storing .
—————————————————————————————
Page 19 of 23
PEGASUS User Manual roda
—————————————————————————————
MAINTENANCE /
SERVICE
—————————————————————————————
Page 20 of 23
PEGASUS User Manual roda
—————————————————————————————
3
Maintenance / Service
3.1 Troubleshooting
Should the computer fail to function properly, the troubleshooting steps below may be followed. (Please backup your data before troubleshooting)
Check AC adapter, battery, and the power source.
-
-
-
Press reset to re-boot the computer.
Remove the software suspected.
Press hard reset to re-boot the computer.
3.2 Service
If troubleshooting steps are unsuccessful, consult your supplier for RMA.
If troubleshooting steps are unsuccessful, consult your supplier for service.
If they can not help you please call roda Service Center.
Service address: Service: roda computer Center
Bredenhop 20
32609 H
üllhorst
Monday
–
Thursday 8:30 am - 12:30 pm
& 1:00 pm - 4:30 pm
Friday 8:30 am - 12:30 pm
& 1:00 pm - 3:00 pm
Phone: +49 5744-944 470
Fax: +49 5744-944 475
E-Mai: [email protected]
Note: The roda Service Center needs a detailed description of the problem and the serial number of the device.
If it is necessary to send in your computer for repairs, you can download a service waybill (Service Supply Note) on the roda homepage
( www.roda-computer.com
), which you have to fill in.
—————————————————————————————
Page 21 of 23
PEGASUS User Manual roda
—————————————————————————————
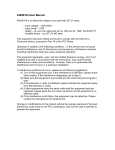
3.2.1 Service Supply Note
Include this sheet with the following information:
Name
Address
Serial number, Customer number, Article number
Place and date of purchase or the original invoice number
Date of failure
A DETAILED description of the problems you have encountered
A list of the hardware/ software configuration, if applicable
Figure 1: Service Supply Note (German Version)
—————————————————————————————
Page 22 of 23
PEGASUS User Manual roda
—————————————————————————————
3.2.2 Downloads
Check our website ( www.roda-computer-com ) for downloads:
-
-
-
-
Updates
Drivers
Manuals
Service Supply Note
—————————————————————————————
Page 23 of 23
advertisement
* Your assessment is very important for improving the workof artificial intelligence, which forms the content of this project
Related manuals
advertisement