
advertisement
▼
Scroll to page 2
of 11

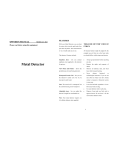
METAL DETECTOR OWNER’S MANUAL WARNING: Read carefully and understand all ASSEMBLY AND OPERATION INSTRUCTIONS before operating. Failure to follow the safety rules and other basic safety precautions may result in serious personal injury. Item# 43834 Thank you very much for choosing a Wel-Bilt product! For future reference, please complete the owner’s record below: Model: _______________ Purchase Date: _______________ Save the receipt, warranty and these instructions. It is important that you read the entire manual to become familiar with this product before you begin using it. This metal detector is designed for certain applications only. The distributor cannot be responsible for issues arising from modification. We strongly recommend this metal detector not be modified and/or used for any application other than that for which it was designed. If you have any questions relative to a particular application, DO NOT use the metal detector until you have first contacted the distributor to determine if it can or should be performed on the product. For technical questions please call 1-800-222-5381. FEATURES With your Metal Detector, you can hunt for coins, relics, jewelry, gold, and silver just about anywhere. This metal detector is very versatile and easy to use. • Earphone Jack • View Meter and Pointer • Waterproof Search Coil • Adjustable Stem GENERAL SAFETY RULES WARNING: Read and understand all instructions. Failure to follow all instructions listed below may result in serious injury. CAUTION: Do not allow persons to operate or assemble this Metal Detector until they have read this manual and have developed a thorough understanding of how the metal detector works. WARNING: The warnings, cautions, and instructions discussed in this instruction manual cannot cover all possible conditions or situations that could occur. It must be understood by the operator that common sense and caution are factors which cannot be built into this product, but must be supplied by the operator. SAVE THESE INSTRUCTIONS Page 2 of 11 IMPORTANT SAFETY CONSIDERATIONS USE AND CARE • Do not modify the Metal Detector in any way. Unauthorized modification may impair the function and/or safety and could affect the life of the equipment. There are specific applications for which the Metal Detector was designed. • Always check of damaged or worn out parts before using the Metal Detector. Broken parts will affect the Metal Detector operation. Replace or repair damaged or worn parts immediately. • Store idle Metal Detector. When Metal Detector is not in use, store it in a secure place out of the reach of children. Inspect it for good working condition prior to storage and before re-use. • The search coil IS waterproof but the control housing is NOT waterproof. Do not submerge under water. ADJUSTING THE STEM Follow these steps to adjust the metal detector’s stem. 1. Turn the stem’s lock nut clockwise until it loosens. 2. Lengthen or shorten the stem so when you stand upright with the detector in your hand, the search coil is level with and about 1/2 to 2 inches above the ground with your arm relaxed at your side. 3. Turn the stem’s lock nut counter clockwise to lock it in place. ADJUSTING THE SEARCH COIL Loosen the knobs at the search coil’s end, then adjust the search coil to the desired angle. (The search coil should be parallel with the ground.) Tighten the knobs just enough to keep the search coil from rotating or wobbling. INSTALLING BATTERIES You will need six AA batteries to power your detector. Page 3 of 11 Cautions: Use only fresh batteries of the required size and recommended type. Do not mix old and new batteries, different types of batteries (standard, alkaline, or rechargeable), or rechargeable batteries of different capacities. 1. If the detector is on, turn VOLUME on the control housing) to OFF. (The control clicks.) 2. Press on the battery compartment cover and slide the cover off in the direction of the arrow. 3. Insert the batteries into the compartment as indicated by the polarity symbols (+ and -) marked inside the compartment. 4. Replace the cover. Cautions: Always remove old or weak batteries; batteries can leak chemicals that can destroy electronic parts. If you do not plan to use the detector for a week or more, remove the batteries. Dispose of old batteries promptly and properly. You can extend battery life by using earphones, which require less power than the built-in speakers. See “Using Earphones” . TESTING THE BATTERIES If the detector does not turn on, has weak volume, will not tune properly, or has erratic operation, or drifts, test the battery power. Rotate VOLUME away from OFF and set OPERATE to BATT TEST. Page 4 of 11 If the pointer on the view meter is between 3 and 6 (green area), the batteries have enough power to operate the detector. If the pointer is not in the green area, replace the batteries. USING EARPHONES You can connect a pair of stereo earphones (not supplied) to the detector so you can listen to it privately. Using earphones also saves battery power and makes it easier to identify subtle changes in the sounds you hear, for better detection results. Your local electronics store has a wide selection of earphones. To connect earphones to the detector, insert the earphones’ 1/8-inch plug into the EAR jack on the side of the control housing. Note: The detector’s internal speaker disconnects when you connect earphones. Listening Safely To protect your hearing, follow these guidelines when you use earphones. Set the volume to the lowest setting before you begin listening. After you begin listening, adjust the volume to a comfortable level. Do not listen at extremely high volume levels. PREPARING THE DETECTOR Turning On the Detector Hold the detector in a comfortable position, and then rotate VOLUME away from OFF to the desired sound level. Set OPERATE/BATT TEST to OPERATE to detect. Tuning the Detector TUNE fine-tunes the balance between the detector’s receiver and transmitter circuitry to provide consistent pointer and tone indications. Follow these steps to set TUNE. 1. Rotate VOLUME to the 11 o’clock position. 2. Set DISCRIMINATION to its midpoint. Page 5 of 11 3. Hold the search coil about 1 foot away from the ground and any metal object, hold down the red button on the handle, and slowly rotate TUNE left and right until the pointer on the view meter rests at or near 0, then release the red button. As you search, you can fine-tune the detector using DISCRIMINATION (see “Fine-Tuning the Detector”). Note: Press the red button on the handle at any time during operation to automatically return the pointer to 0. TESTING AND USING THE DETECTOR To learn how the detector reacts to different metals, you should test it before you use it the first time. You can test the detector indoors or outdoors. Indoor Testing 1. Remove any watches, rings, or other metal jewelry you are wearing, and then place the detector on a wooden or plastic table. 2. Adjust the search coil’s angle so the flat part faces the ceiling. Note: Never test the detector on a floor inside a building. Most buildings have metal of some kind in the floor, which might interfere with the objects you are testing or mask the signal completely. 3. Rotate VOLUME to the 11 o’clock position. 4. Set DISCRIMINATION to its midpoint. 5. Move a sample of the material you want the detector to find (such as a gold ring or a coin) about 2 inches above the search coil. Notes: The search coil will not detect without motion. You must move the object since you are not sweeping with the detector at this time. If you are using a coin, the detector detects it more easily if you hold it so a flat side is parallel with the flat side of the search coil (not the edge). If the detector finds ferrous metal, it will be silent ,or machine sound will be lower than before, and at the same time, the pointer moves to the left. If the detector finds non-ferrous metal, it will sound one Page 6 of 11 tone, or machine sound will be louder than before, and at the same time, the pointer moves to the right. In this case, user just need to be careful when the sound is louder, and can neglect when it is silent or lower sound. If the detector does not detect the material, check the battery power and verify that the search coil is properly connected. Also, you might need to fine-tune the detector (see “Fine-Tuning the Detector” ). Outdoor Testing and Use 1. Find an area on the ground outside where there is no metal. 2. Place a sample of the material you want the detector to find (such as a gold ring or a coin) on the ground. (If you are using valuable metal such as gold to test the detector, mark the area where you placed the item, to help you find it later. Do not place it in tall grass or weeds.) 3. Rotate VOLUME about two-thirds clockwise. 4. Press and release the red button on the handle. Slowly rotate TUNE until the pointer is at or near 0. You should hear a constant tone. 5. While holding the search coil level and about 1-2 inches above the ground, slowly move the search coil over the area where you placed the sample, sweeping the search coil in a side-to-side motion. Search Coil Sweeping Hints: Never sweep the search coil as if it were a pendulum. Raising the search coil while sweeping or at the end of a sweep causes false readings. Sweep slowly – hurrying makes you miss targets. If the detector find ferrous metal, it will be silent, or machine sound will be lower than before, and at the same time, the pointer moves to the left. If the detector finds non-ferrous metal, it will sound one tone, or machine sound will be louder than before, and at the same time, the pointer moves to the right. In this case, user just need to be careful when the sound is louder, and can neglect when it is silent or lower sound. If the detector does not detect the material, make sure you are moving the search coil correctly or Page 7 of 11 try re-tuning your unit. Notes: The detector responds with a strong signal on the meter when it detects most valuable metal objects. If a signal does not repeat after you sweep the search coil over the target a few times, the target is probably junk metal. False signals can be caused by trashy ground, electrical interference, or large irregular pieces of junk metal. False signals are usually broken or non-repeatable. Try finding other metal in the area. When you find a metal item, wait a few seconds, to allow the detector time to reset (or, press the red button on the handle to return the pointer to the center of the view meter). FINE-TUNING THE DETECTOR After you become familiar with how your detector works, you can fine-tune it to make it more selective in what it finds. Discrimination is the detectors’ ability to differentiate between types of metal. The detector’s DISCRIMINATION setting determines whether the detector will distinguish between different types of ferrous and non-ferrous metals. You can set DISCRIMINATION to minimum (fully counterclockwise), to maximum (fully clockwise), or anywhere in between. As you set DISCRIMINATION to higher levels, the detector first does not detect small pieces of silver paper, then thick foil, and finally metal objects like pull tabs from aluminum cans. Note: Each time you use the detector in a different area, you must adjust DISCRIMINATION. Each search location presents new challenges. FALSE SIGNALS Because your detector is extremely sensitive, trash-induced signals and other sources of interference might cause signals that seem confusing. The key to handling these types of signals is to dig for only those targets that generate a strong, repeatable signal. As you sweep the search coil back and forth over the ground, learn to recognize the difference between signals that occur at random and signals that are stable and repeatable. To reduce false signals when searching very trashy ground, scan only a small area at a time using slow, short overlapping sweeps. DETECTION HINTS No detector is 100 percent accurate. Various conditions influence metal detection. The detector’s reaction depends on a number of things: Page 8 of 11 The angle at which the object rests in the ground The depth of the object The amount of iron in the object The size of the object PINPOINTING A TARGET Accurately pinpointing a target makes digging it up easier. Accurate pinpointing takes practice, and we suggest you practice finding and digging up small metal objects on your own property before you search other locations. Sometimes, targets are difficult to accurately locate due to the sweep direction. Try changing your sweep direction to pinpoint a target. Follow these steps to pinpoint a target. 1. When the detector detects a buried target, continue sweeping the search coil over the target in narrowing side-to-side motion. Make a visual note of the exact spot on the ground where the detector beeps. 2. Stop the search coil directly over this spot on the ground. Then move the search coil straight forward away from you and straight back toward you a couple of times. Make a visual note of the exact spot on the ground where the detector beeps. 3. Repeat Steps 1-2 at a right angle to the original search line, making an “X” pattern. The target should be directly below the “X” at the point of the loudest response. Note: If trash in an area is so heavy that you get false signals, slow your sweep speed and use shorter sweeps. Recently buried coins might not respond the same as coins buried for a long period of time because of oxidation. Some nails, nuts, bolts, and other iron objects (such as old bottle caps) oxidize and create a “halo” effect. A halo effect is caused by a mixture of natural elements in the ground and the oxidation created by different metals. Because of the metal mixtures, target signals might not be in a “fixed” position. This effect makes these objects very hard to detect accurately. (See “Fine-Tuning the Detector”. TROUBLESHOOTING If your detector is not working as it should, follow the suggestions below to see if you can eliminate the problem. Problem Suggestions Page 9 of 11 The detector displays false signals. The display does not show the correct metal type when the detector finds a target. You might be sweeping the detector’s search coil too fast or at the wrong angle. Sweep the search coil more slowly and hold the detector correctly. See “Testing and Using the Detector”. The detector might show a false signal if it detects heavily oxidized metals. Try pinpointing the target from several different angles (See “pinpointing a Target” ). If the detector does not display the same signal each time, the target is probably heavily oxidized metal. There might be more than one target in the area you are searching. The target might be a type of metal that the detector does not recognize. If the target is heavily oxidized, the detector might not display the correct metal type. This is not a malfunction. MAINTENANCE • Maintain your Metal Detector. It is recommended that the general condition of any Metal Detector be examined before it is used. Keep your Metal Detector in good repair by adopting a program of conscientious repair and maintenance. Have necessary repairs made by qualified service personnel. DIAGRAM & PARTS LIST Part# Description Qty. 1 Metal Detector 1 For replacement parts and technical questions, please call 1-800-222-5381. Page 10of 11 WARRANTY 1 year limited warranty. Distributed by Northern Tool + Equipment Co., Inc. Burnsville, Minnesota 55306 NorthernTool.com Made in China The device complies with Part 15 of the FCC Rules. Operation is subject to the following two conditions: (1) this device may not cause harmful interference, and (2) this device must accept any interference received, including interference that may cause undesired operation. Page 11of 11
advertisement
* Your assessment is very important for improving the workof artificial intelligence, which forms the content of this project
Related manuals


Download PDF
advertisement