advertisement

SATA RAID Drive Enclosure
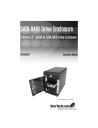
5 Drive 3.5” eSATA to SATA RAID Drive Enclosure
SAT3550ESR
Instruction Manual
Actual product may vary from photo
F CC om plliia nc atte me
This equipment has been tested and found to comply with the limits for a Class B digital device, pursuant to part 15 of the FCC Rules. These limits are designed to provide reasonable protection against harmful interference in a residential installation. This equipment generates, uses and can radiate radio frequency energy and, if not installed and used in accordance with the instructions, may cause harmful interference to radio communications. However, there is no guarantee that interference will not occur in a particular installation. If this equipment does cause harmful interference to radio or television reception, which can be determined by turning the equipment off and on, the user is encouraged to try to correct the interference by one or more of the following measures:
• Reorient or relocate the receiving antenna.
• Increase the separation between the equipment and receiver.
• Connect the equipment into an outlet on a circuit different from that to which the receiver is connected.
• Consult the dealer or an experienced radio/TV technician for help.
U se otth err P
Trra de arrk otte ctte d N s,, R am eg erre d T em arrk s,, a d me s a Sy mb
This manual may make reference to trademarks, registered trademarks, and other protected names and/or symbols of third-party companies not related in any way to
StarTech.com. Where they occur these references are for illustrative purposes only and do not represent an endorsement of a product or service by StarTech.com, or an endorsement of the product(s) to which this manual applies by the third-party company in question. Regardless of any direct acknowledgement elsewhere in the body of this document, StarTech.com hereby acknowledges that all trademarks, registered trademarks, service marks, and other protected names and/or symbols contained in this manual and related documents are the property of their respective holders.
Instruction Manual
T ab off C on s
Introduction . . . . . . . . . . . . . . . . . . . . . . . . . . . . . . . . . . . . . . . . . . . . . . . . . . . . .1
Features . . . . . . . . . . . . . . . . . . . . . . . . . . . . . . . . . . . . . . . . . . . . . . . .1
Before You Begin . . . . . . . . . . . . . . . . . . . . . . . . . . . . . . . . . . . . . . . . . . . . . . . . .1
System Requirements . . . . . . . . . . . . . . . . . . . . . . . . . . . . . . . . . . . . .1
Contents . . . . . . . . . . . . . . . . . . . . . . . . . . . . . . . . . . . . . . . . . . . . . . . .1
Installation . . . . . . . . . . . . . . . . . . . . . . . . . . . . . . . . . . . . . . . . . . . . . . . . . . . . . .2
Host Controller Installation . . . . . . . . . . . . . . . . . . . . . . . . . . . . . . . . . .2
SiI 4726 Manager GUI Installation . . . . . . . . . . . . . . . . . . . . . . . . . . . .2
Hardware Guide . . . . . . . . . . . . . . . . . . . . . . . . . . . . . . . . . . . . . . . . . .3
Hard drive installation . . . . . . . . . . . . . . . . . . . . . . . . . . . . . . . . . . . . . .4
Connecting the Drive Enclosure to the computer . . . . . . . . . . . . . . . .4
Configuration . . . . . . . . . . . . . . . . . . . . . . . . . . . . . . . . . . . . . . . . . . . . . . . . . . .5
Introduction . . . . . . . . . . . . . . . . . . . . . . . . . . . . . . . . . . . . . . . . . . . . .5
Status Window . . . . . . . . . . . . . . . . . . . . . . . . . . . . . . . . . . . . . . . . . . .6
Elements of the Status window . . . . . . . . . . . . . . . . . . . . .6
Basic Configuration . . . . . . . . . . . . . . . . . . . . . . . . . . . . . . . . . . . . . . .8
Advanced Configuration . . . . . . . . . . . . . . . . . . . . . . . . . . . . . . . . . .11
Multiple Volume Configuration . . . . . . . . . . . . . . . . . . . . . . . . . . . . . .13
Manage Configuration files . . . . . . . . . . . . . . . . . . . . . . . . . . . . . . . .16
Partition Configured Volumes . . . . . . . . . . . . . . . . . . . . . . . . . . . . . .18
Administering the SAT3550ESR Drive Enclosure . . . . . . . . . . . . . . . . . . . . .20
Configuring the SAFE Volume Rebuild Storage Policy . . . . . . . . . . .21
Email Notification . . . . . . . . . . . . . . . . . . . . . . . . . . . . . . . . . . . . . . . .22
Install New Firmware & Software . . . . . . . . . . . . . . . . . . . . . . . . . . .24
Editing the UserConfig.xml
Monitoring and Troubleshooting . . . . . . . . . . . . . . . . . . . . . . . . . . . . . . . . . . .27
Storage Policies Glossary . . . . . . . . . . . . . . . . . . . . . . . . . . . . . . . . . . . . . . . .31
Specifications . . . . . . . . . . . . . . . . . . . . . . . . . . . . . . . . . . . . . . . . . . . . . . . . . .33
Technical Support . . . . . . . . . . . . . . . . . . . . . . . . . . . . . . . . . . . . . . . . . . . . . . .33
Warranty Information . . . . . . . . . . . . . . . . . . . . . . . . . . . . . . . . . . . . . . . . . . . .33
i
Instruction Manual
nttrro du cttiio n
Thank you for purchasing a StarTech.com 5 Drive 3.5” eSATA to SATA RAID Drive
Enclosure. A cost-effective storage solution, SAT3550ESR provides enhanced data protection, high-performance storage and plug-and-play functionality, making it a simple solution for professional or home users to replicate data and maintain data security.
Features
• Five separate drive bays maximize external storage capacity
• Support for both 2.5” and 3.5” SATA hard drives
• Single rear eSATA interface to host to manage access to each hard drive
• Supports data transfer speeds up to 3 Gbps
• Each hard drive bay is hot swappable
• Dual 80mm internal fans for enhanced hard drive cooling
B effo e Y ou eg
System Requirements
• x86 platform: An Intel Pentium 3 500MHz equivalent or faster
• Mac platform: A Mac G4 500MHz or faster
• CD-ROM drive (driver installation)
• 64 MB RAM
• 250 MB of available hard drive space
• SVGA capable monitor
• Mouse/pointing device
• External SATA cable connection between Host computer and SAT3550ESR
• Microsoft Windows 2000/XP/Server 2003 or Mac OS X with latest updates
Package Contents
• 1 x External Drive Enclosure
• 1 x 2m eSATA Cable
• 1 x Instruction Manual
• 1 x Screw Kit
• 1 x Driver/Application CD
• 1 x Power Cord
• 1 x PCI-Express 1x Host RAID
Controller Card
1
Instruction Manual
IIn stta attiio n
Host Controller installation
In order to provide a software and hardware link between the host computer and the
SAT3550ESR Drive Enclosure, it is required that the included PCI Express Host
Controller be installed on the host computer. You may also use another Host Controller, provided it features port multiplier support, however it is not guaranteed that all host controllers with port multiplier support are compatible with the drive enclosure.
1. Insert the Driver CD into your CD/DVD-ROM drive
2. Power down the computer, ensuring the system is unplugged and you are grounded.
3. Remove the cover of your system (see your computer's user manual for details, if necessary) and gently turn your computer onto its side, so that the PCI Express expansion slot on the motherboard is facing upward.
4. Locate an empty PCI Express slot and remove the metal plate that covers the corresponding rear bracket. You may need a Phillips screwdriver to perform this step.
Retain the screw! You will need it to secure the card later.
5. Gently insert the card into the empty slot, making sure it is firmly seated.
6. Secure the card to the rear panel, using the screw you removed in Step 3.
7. Power on the computer. Once the operating system is fully booted, insert the Driver
CD (included) into the CD/DVD-ROM drive. You will notice several message balloons originating in the taskbar, indicating that the required drivers are being installed for the devices found.
Once the card has been properly installed, you can verify that it is detected by the operating system by browsing to the device manager (i.e. Start - Control Panel
- System - Hardware - Device Manager):
SiI 3132
SATALink
Controller
Sil 4726 Manager GUI installation
The SiI 4726 Manager GUI provides a convenient way to manage disks installed within the Drive Enclosure. To install the Sil 4726 Manager GUI:
1. Locate the Setup.exe file, by browsing to the BT3045_Manager\
SiI_4726_Graphic_User_Interface_V4.0.0.9 subfolder.
2. Double-click on the Setup.exe file to begin installation. Follow the on-screen prompts to complete installation.
2
Hardware Guide
Front Panel (closed)
Power
Button
Instruction Manual
Rear Panel
Power Port eSATA port
Front Panel (open)
Key Lock
Front Panel
Door
Drive
Bays
3
Error Condition Indicator
OK Indicator
Safety latch
Instruction Manual
Hard drive installation
1. Open the Front Panel Door, exposing the individual Drive Bays.
2. To remove one of the Drive Bays from the enclosure, slide the Safety Latch on the front panel of the bay, to the left. Gently press the cover of the Drive Bay until you hear a click, allowing the Retaining Arm to move freely. Grasp the Retaining Arm and pull the Drive Bay from the enclosure.
3. Align the screwholes provided on the base of the Drive Bay, with the screws provided on the base of the hard drive. Secure the hard drive to the metal base of the Drive
Bay removed in step 2, using the included screws as necessary.
4. Once the drive has been secured to the Drive Bay, replace the Drive Bay by gently sliding it into the empty slot, ensuring the Drive Bay is properly resting on the internal guide rails provided. The SATA data and power connectors located on the back of the hard drive should be in direct contact with the connectors located internally at the back of the enclosure.
5. Gently press the Retaining Arm (see step 2) until it locks back in place, now flush with the other drive bays.
6. Slide the Safety Latch to the right, to ensure that the installed drive is not accidentally released from the enclosure.
7. Repeat steps 1-6, for the remaining hard drives you wish to install.
8. Once you have secured each hard drive within the enclosure, close the Front Panel
Door. Optionally, you can lock the Front Panel Door in place, using the keys provided, by turning the lock 1/4 turn in a clockwise direction.
Connecting the Drive Enclosure to the computer
To connect the SAT3550ESR Drive Enclosure to the host computer: Connect one end of a standard eSATA cable to the port located on the rear panel of the Drive
Enclosure; connect the remaining end of the eSATA cable to the eSATA port provided by the the newly installed host controller on the host computer.
To power the SAT3550ESR Drive Enclosure: Connect the female portion of the included power cable to the male power port located on the rear panel of the Drive
Enclosure. Connect the remaining end of the power cable to an available power outlet.
Press and hold the Power button for three seconds, (located on the front of the Drive
Enclosure). Verify that the drives are detected by the operating system (in Windows, for example, browse to My Computer, where the newly attached drives should appear).
4
Instruction Manual
C on attiio n
Introduction
Windows
1. Click on the Start button, and select All Programs. Click on Sil 4726 Manager to launch the configuration program.
2. From the window that opens, you are able to monitor the status of the connected drives:
Mac OS X
1. Launch the Finder and locate the SiI 4726 program within the Applications - Utilities
- SteelVine folder. Click the SiI 4726 icon to start the SiI 4726 Manager. If the launch sequence does not locate an active Daemon, a warning will appear; click OK to advance past the warning.
2. You will be asked to enter the administrator password. Once you have done so, click
OK to proceed.
3. A notice will appear as the launch sequence attempts to start the Daemon. Click OK.
If the Daemon fails to start, an error message will be displayed. Please follow the recommendations in the error message to correct the problem.
4. The window that will open (Status Window) allows you to monitor the status of the installed drives.
5
Instruction Manual
Status Window
The Status Window provides basic information pertaining to the installed drives and their respective configuration:
1
2
3
4
1
2
3
4
Serial Number
System Status
Drive Status
Capacity Information
Elements of the Status window
System Status section
Temp : Indicates the current internal temperature of the SAT3550ESR Drive Enclosure
Fan Speed : Indicates the system fan status. Use this data to monitor possible malfunctions
Drive Status section
Box Status : Indicates the drive status: Normal, Rebuilding, Unplugged, Needs
Rebuild, New Drive, Wrong Slot
Drive S/N : Shows the unique serial number assigned by the disk manufacturer
Exp. S/N : Shows the expected serial number of the hard disk drive. The Daemon compares the expected and actual drive serial numbers to detect when a drive’s status changes.
6
Instruction Manual
Capacity Information section
Policy : Shows the storage policy configured for each volume.
Total : Shows the combined capacity of the volume.
Drive # : Shows capacity information for each hard disk.
Capacity : Shows the full amount of storage space (in GB) available on each hard disk.
Volume : Shows the total volume capacity and the drive capacities assigned to each volume.
File Menu
Change Password : Opens a dialog to establish a new password.
Scan Devices : Refreshes the status list details presented on the Status window.
Change Connections : Opens a dialog to establish remote connections.
Edit Menu
Configure Box : Opens the Basic Configuration Wizard. From here, you can access the
Advanced Configuration Wizard.
Specify Policy : Opens the Rebuild Policy dialog.
Specify Email Notification : Sends email notification for the selected items.
Event Log : Opens the Event Log viewer.
Specify Firmware : Opens the Firmware Selection dialog.
Toolbar button functions
Configure Box - Opens the Basic Configuration Wizard.
Specify Policy : Opens the Rebuild Policy dialog
Specify Email Notification : Sends email notification for the selected items
Event Log : Opens the Event Log viewer
Specify Firmware : Opens the Firmware Selection dialog
7
Instruction Manual
B as c C on attiio n
The following section details the Basic Configuration Wizard and explains how to configure volumes (virtual drives).
Basic Configuration Wizard
The SAT3550ESR Basic Configuration Wizard is accessible from the Status window and allows volume management. The Wizard defines volumes based on a selected storage policy. An end-user cannot modify volume counts or capacities. To protect against unintentional changes, the SAT3550ESR prompts for a password for first time access of the Wizard. The default password is admin. (For additional information on the default password, please see the section entitled Change Password.)
2
1
3
1
Storage Policy - Identifies available storage policies to assign to the
SAT3550ESR configuration.
2
3
Volume List -
Drive Graph -
Shows Volume, Mode (storage policy) and Size details for created volumes. The total GBs Left field (beneath the volume list) displays the remaining capacity in GBs, for all installed hard disks.
Displays disk space for each hard disk drive. All space allocated to the same volume appears in a matching color. A hatch pattern indicates a proposed configuration and a solid block represents an existing volume. The Cap field beneath each drive in the drive graph shows the maximum capacity in GBs for that hard disk.
Toolbar button functions
Read a configuration from a file Reads a saved configuration so the end user can apply the configuration to the SAT3550ESR
Drive Enclosure.
8
Instruction Manual
Write configuration from system to a file
Saves a configuration to a file on the host computer.
Restore configuration to last commit Cancels proposed changes
Command buttons on the Basic Configuration Wizard
To Advanced Mode : Opens the Advanced Configuration Wizard
Apply : Submits configuration changes to the Drive Enclosure, and closes the
Configuration Wizard.
Cancel : Aborts the changes and closes the Configuration Wizard.
Volume Configuration
1. Select Configure Box from the Edit menu or click the Configure
Box toolbar button to open the
Configuration
Wizard.
2. When prompted, enter the administrator password. The default password is Admin.
3. Select a storage policy in the
Storage Policy frame, based on the following definitions:
9
Instruction Manual
***Basic Storage Policy Options:
JBOD (bypass): Creates a logical volume for each physical hard disk.
SAFE (RAID 1): Creates two volumes. For each volume, one hard disk is mirrored onto a second drive. Makes the remaining drive the
Hot Spare for both volumes.
BIG (Span): Concatenates all hard disks into a single volume.
FAST (RAID 0) : Stripes Hard drives to increase storage operation speed.
SAFE and BIG : Concatenates half of the available space on four hard disk drives and mirrors that half to the second half of the available space. Makes the remaining drive the Hot Spare.
SAFE and FAST (RAID 1+0) : Creates one volume consisting of four hard drives (data is written to the mirrored disks in a striped format). Makes the remaining drive the
Hot Spare.
4. When prompted to acknowledge that the configuration change may result in data loss, click Yes to accept the configuration.
5. Select Save to Config File from the File menu to save the configuration.
6. Click Apply to create the selected configuration. The Volume display will close automatically and the Status window will refresh (within a minute or so).
7. Partition the configured volume(s) to complete the implementation. Please refer to the section entitled Partitioning Configured Volumes for further information.
10
Instruction Manual
A dv nc d C nffiig attiio n
The following section details how to use the Advanced Configuration Wizard to apply more than one storage policy to volumes in the SAT3550ESR Drive Enclosure.
While the Basic Configuration provides six predefined storage policies to quickly configure the Drive Enclosure, the Advanced Configuration Wizard allows you to configure up to ten volumes, each with different storage policies and capacities.
The Advanced Configuration Wizard is an extension of Basic mode that allows you to create two volumes (virtual drives) on each physical hard disk.
Storage
Policy
Drive
Graph
Volume
List
Advanced
Controls
Elements of the Advanced Configuration Wizard
Storage Policy : Displays available storage policies that you can assign to volumes. The options are enabled after you create a new volume or select an existing volume to edit.
Volume List : Displays Volume, Mode (storage policy) and size details for currently configured volumes. Select a volume to edit or delete. The Total GBs left field beneath the volume list displays the remaining capacity in gigabytes for all hard disks.
Drive Graph : Displays disk space for each installed hard disk. All space allocated to the same volume appears in a matching color. A hatch pattern indicates a proposed configuration and a solid block indicates an existing volume.
Advanced Controls : Permit volume creation and modification on each hard disk:
The Hot Spare check box indicates space on this drive is allocated as rebuild space for the selected SAFE volume.
11
Instruction Manual
The
Use check box indicates drive membership within a volume.
The Slider specifies capacity allocated to a volume.
Text Field displays the capacity specified by manipulating the slider.
The Cap field displays the maximum capacity for the hard drive
Vol# shows the virtual volume with which each hard disk drive is associated
Toolbar button functions
Read a configuration from a file
Reads a saved configuration into the Advanced
Configuration Wizard so you can apply the configuration to the Drive Enclosure. Available in Basic and Advanced modes.
Write system configuration to a file
Saves a configuration to a file on the host computer. Available in Basic and Advanced modes.
Restore configuration to last Commit
Cancels proposed changes. Available in
Basic and Advanced modes.
Create a new volume
Edit selected volume
Delete selected volume
Creates a new volume on which to set the storage policy and capacity. You can create up to 2 volumes on each hard disk drive (10 total).
Permits the storage policy and capacity of an existing volume to be modified.
Deletes the volume that is currently selected in the volume list.
Delete all volumes
Deletes all configured volumes.
Copy configuration from other device in the system
Copies the configuration of another SAT3550ESR to the current SAT3550ESR.
Command buttons on the Advanced Configuration Wizard
To Basic Mode : Opens the Basic Configuration Wizard.
Update Volume : Applies the selected storage policy to a specific portion of a hard disk, as a proposed configuration.
Cancel : Aborts the pending changes and returns the Wizard to the point where you can perform different advanced configuration functions.
12
Instruction Manual
Command buttons on the Advanced Configuration Wizard - Cont’d
Apply : Submits configuration changes to the Drive Enclosure, closes the Wizard, and displays the updated configuration on the Status Window.
Cancel : Aborts the in-progress changes and closes the Wizard.
M ullttiip ollu me Co nffiig attiio n
The Advanced Configuration Wizard allows many combinations of storage policies and capacities. This procedure shows how to modify a basic SAFE configuration so that it contains several volumes, each with different storage policies. This example illustrates one possible combination that allocates all of the system’s available capacity to:
One 50-gigabyte (GB) SAFE volume on drives 0 and 1, with no reserved space for a Hot
Spare.
One FAST volume that uses the remaining capacity on drives 0 and 1.
One BIG volume that uses all of the capacity on drives 2, 3, and 4.
The same sequence of steps applies to any configuration you choose to implement; only the storage policy and capacity allocation vary for different configuration options.
NOTE: Before reconfiguring an existing SAT3550ESR Drive Enclosure with a new configuration, backup the data. Use the Disk Management utility provided by your OS to delete all partitions - except the unallocated, un-initialized disk that represents the SteelVine processor. Once the configuration and partitioning of the new volumes has taken place, it is safe to restore the backed up data to the new configuration. See the section entitled Partitioning Configured
Volumes for details.
1. Click the Configure Box toolbar button to open the Basic Configuration Wizard.
2. Click To Advanced Mode to open the Advanced Configuration Wizard.
3. Select Delete all volumes from the toolbar.
Click Delete All
Volumes
4. When prompted to confirm the deletion of the volumes, click Yes.
5. Select Create a new volume from the toolbar.
Click Create a
new volume
13
Instruction Manual
Select SAFE (RAID1) as the Storage Policy. Click on the Use check boxes underneath
Drives 0 and 1. Move the slide to 50.
Safe
Mode
Uncheck
Hot Spare
Move
Slider
7. Click Update Volume.
8. When prompted whether to create a Hot Spare for the SAFE volume, click No. In some configurations, you may want the added redundancy of a Hot Spare. The goal of this example is to use all available system capacity to deliberately avoid the Hot
Spare.
9. Click the Create a New Volume toolbar button.
Crosshatches identify allocated space for updated volumes
Light, solid colors identify unallocated disk space
10. Select the FAST radio button in the Storage Policy section.
11. Select the Use check box beneath both Drive 0 and Drive 1.
14
Instruction Manual
12. Move the slider beneath Drive 0 all the way to the right to allocate the remaining capacity on the two drives to the FAST volume. If you wish, you can allocate less than the total remaining capacity to the new volume. However, doing so makes the unallocated capacity unavailable and unused.
13. Click Update Volume.
14. Click the Create a New Volume toolbar button.
15. Select the BIG radio button in the Storage Policy section.
16. Select the Use check box beneath Drive 2, Drive 3, and Drive 4 to allocate all of the remaining system capacity to the BIG volume.
17. Click Update Volume.
Please note: Only the last Volume listed (in the above example, Volume 2) can be edited. In order to edit Volume 1, Volume 2 must be deleted. In order to edit Volume 0, all Volumes must be deleted and the end-user will need to start with a New Volume.
18. Click the Write Configuration for System to a File toolbar button to save the configuration.
19. Click Update Volume to create the multi-volume configuration, close the Wizard, and will display the volumes in the Status window (within a minute or so):
11. Partition the configured volumes to complete the implementation. See the section entitled Partitioning Configured Volumes for details.
15
Instruction Manual
M an ge on attiio n ffiille
The Basic Configuration Wizard provides menus and icons to manage configuration files.
The Read Config File command from the File menu in the Basic Configuration Wizard imports a configuration file so that the end-user can restore a previously saved configuration (storage policy).
The Save to Config File command from the File menu in the Basic Configuration
Wizard exports an SAT3550ESR Drive Enclosure configuration to a file.
Each of the procedures in the Basic Configuration chapter prompts you to save a configuration file.
Import a configuration file
Please note: A configuration file must be saved and available, prior to being able to import it. Please see the section entitled Save a Configuration File for details.
1. Select Configure Box from the Edit menu or click the Configure Box toolbar button in the Status window to open the Basic Configuration Wizard.
2. Select Read Config File from the File menu in the Basic Configuration Wizard.
3. Navigate to the required file and click Open to import it. The Basic Configuration
Wizard provides notice of a successful import and graphically displays the imported volumes.
4. Click OK to implement the imported configuration.
16
Instruction Manual
Save a Configuration File
1. Select Configure Box from the Edit menu or click the Configure Box toolbar button in the Status window to open the Basic Configuration Wizard.
2. Select Save to Config File from the File menu in the Basic Configuration Wizard.
3. Navigate to the appropriate directory, specify a file name in the File Name text box, and click the Save button.
17
P arrttiittiio
Instruction Manual
Co nffiig urre d V ollu me
This chapter explains how to partition volumes after configuring them with the SiI 4726
Manager software. The end-user must partition volumes for the host computer’s operating system prior to storing data on the volumes. Please refer to the operating system documentation for further guidance.
Windows
Note: Before reconfiguring a volume, back up the data and delete previously defined partitions.
Do not, however, delete the partition that represents the
SteelVine processor (the “Not Initialized” disk with no capacity allocated to it).
After the new volumes are configured and partitioned, the backed up data can be restored to the new configuration.
1. Right-click the My Computer icon and select Manage from the pop-up window.
2. From the Computer Management window select Disk Management under Storage to open Windows Disk Manager.
Note: The Disk numbers in the Windows Disk Manager may be different from the Volume numbers shown in the SiI 4726 Manager Status window, the Basic Configuration
Wizard, and the Advanced Configuration Wizard. Be sure to select the correct disk based on the expected disk capacity to create a partition.
3. Right-click on the configured disk’s unallocated space and select New Partition. If the
New Partition option is not available, select the disk and initialize it first. To do this, right-click on the disk item and select Initialize Disk.
4. The Partition Wizard will launch. Click Next to begin.
5. Select the Primary or Extended option and click Next.
6. Specify the partition size. By default, the partition occupies the entire volume. Click
Next to proceed.
18
Instruction Manual
7. Assign a drive letter or mount path and click Next.
8. Select the appropriate file system, name the partition and click Next.
9. Review the file system settings and click Finish to create the logical partition.
10. Repeat steps 1 through 9 to partition any remaining disks you configured in the SiI
4726 Manager software. Remember, do not partition the disk that represents the
SteelVine processor.
Mac OS X
1. Launch Disk Utility from the Application > Utilities folder.
2. Select a configured disk and click the Partition tab.
Step
2
Step
3
3. Select 1 Partition from the Volume Scheme drop-down list.
4. Enter a name for the volume in the Name field.
5. Select Mac OS Extended (journaled) from the Format drop-down list.
6. Specify the size of the partition in the Size field.
7. Click the Partition button.
19
Step 4
Step 5
Step 6
Step 7
Instruction Manual
8. You will receive a warning that “ Partitioning a disk will destroy all information on the disk”. Click Partition to acknowledge the warning. Disk Utility mounts the created partition and represents it with an icon on the desktop. The icon is labeled with the partition name.
9. Repeat steps 1 through 8 to partition any remaining disks you configured in the SiI
4726 Manager software. Remember, do not partition the 320.0 KB Config Disk that represents the SteelVine processor.
A dm erriin g tth
Change Password
e S AT 55 ES e E nc su
The SiI 4726 Manager software limits configuration access with a password prompt. The password information is stored locally on the server running the Daemon. The default password is admin.
1. Select Change Password from the File menu.
2. Enter the current password (or use admin if the default password has not yet been changed).
3. Enter the new password of five or more characters in both fields.
4. Click OK to implement the new password.
Managing the Client Connection to the Daemon
The SiI 4726 Manager software consists of two modules, the Daemon and the User
Interface.
The Daemon monitors the status of the Drive Enclosure and performs SAFE volume rebuilds. By default, the user interface attaches to a Daemon running on the same host to display the information gathered by the Daemon. The interface can be configured to display information tracked by a Daemon running on a remote host. Having the user interface remote to the Daemon allows remote monitoring for system fan and hard disk drive failures. Identification of a failed part allows the necessary repairs or replacement to be made before further complications arise.
20
Instruction Manual
Set up a remote connection
Before a remote connection can be established, the following conditions must be true:
• The Daemon is installed and running on a host computer connected to the
Drive Enclosure
• The user interface is installed and running on a remote host computer.
• A TCP/IP connection can be established between the Daemon and the user interface. The Daemon listens for connections on TCP port 51115.
Do not change this port number.
1. In the Status window, select Change Connection from the File menu.
2. Enter the hostname or IP address of the PC hosting the Daemon. Click OK. The User
Interface will establish the requested connection and will display the information gathered by the remote Daemon in the Status window.
Configuring SAFE Volume Rebuild Storage Policy
A rebuild is initiated to restore data redundancy for a SAFE volume that has entered a vulnerable state. In a vulnerable state, one of the two mirrored disks goes offline or is inaccessible. Although the SAFE volume remains available during the rebuild process, the volume is susceptible to data loss through damage of the remaining disk until data redundancy is restored through a rebuild. Host access takes precedence over the rebuild process. If continuing to use the SAFE volume during the rebuild, the rebuild process will take a longer time to complete.
Please note that the Rebuild feature also applies to other SAFE policies such as SAFE and BIG, and SAFE and FAST.
What happens during a rebuild?
The rebuild process restores data redundancy by first utilizing space allocated for a Hot
Spare. In case Hot Spare space does not exist or has already been rebuilt, the SteelVine processor rebuilds to empty space on a hard disk, other than the one containing vulnerable data. Following a rebuild, it is not necessary to designate space to a Hot
Spare for a subsequent rebuild to occur.
With Automatic Rebuild and Immediate Rebuild options selected, the Daemon automatically initiates an immediate rebuild. If the end-user wants the Daemon to delay the rebuild until after the first write to the SAFE volume, select the Rebuild Only If
Needed option. The latter setup allows temporary removal of a hard disk drive without requiring a rebuild. To minimize the possibility of data loss, the rebuild process should be set up to start immediately. With Manual Rebuild selected, the end-user decides when to initiate rebuild following a rebuild prompt. Unless the SiI 4726 Manager and the Drive
21
Instruction Manual
Enclosure are actively monitored, the Automatic Rebuild should be set up to minimize the possibility of data loss.
Please Note: In case No is selected in response to a rebuild prompt, select Scan
Devices from the File menu of the Status window to trigger a new prompt.
Please Note: Once the Daemon rebuilds to a designated Hot Spare, a designated Hot
Spare will not exist.
Configure a rebuild
1. Select Specify Policy from the Edit menu of the Status window.
2. Select one of the following policy options:
• The Manual Rebuild radio button requires a user to manually initiate a rebuild of the volume
• The Automatic Rebuild option forces the Daemon to initiate the rebuild process automatically and minimize the possibility of data loss.
3. If the Automatic Rebuild option is selected, the end-user will have the following additional choices:
• Immediate Rebuild causes the Daemon to rebuild immediately following detection of an offline hard disk drive.
• Rebuild Only If Needed delays the rebuild for a SAFE volume with an offline hard disk drive until the write occurs to the SAFE volume.
4. Click the Accept button to commit the selected options.
Email Notification
The Email Notification feature allows an end-user or administrator to have the SiI 4726
Manager send an email if any of the following conditions/situations occur:
• Partition Rebuild Start
• System Fan Too Slow
• Partition Rebuild Complete
• Power Supply FanToo Slow
• Drive Inserted
• Partition Rebuild Resume
• Partition Verify Start
• No Boxes Found
• Partition Verify Complete
• Box Removed
• Drive Unplugged
• Temperature Too High
Each of the above conditions can be customized for sending options as well as the message that is sent. Please see an example of the Setup Email Notification screen on the following page.
22
Instruction Manual
Setup E-mail Notification
Setting-up Email Notification
1. The box available for the SMTP Server Name can be left blank. The SiI 4726 Manager software will perform a DNS lookup and automatically find the correct address.
2. The box available for the SMTP Server Port# uses Port 25 as a default.
3. The From, To, and CC boxes are for specifying the intended receivers of the condition notifications. Note: In the From: box, the end-user should type in his/her own email address.
4. Select Test Email at the bottom of the screen to verify that you have correctly set-up the email portions of this feature.
5. The Email Notification feature also allows an end-user to customize a message for each of the line items (of which each has its own default message already built in). For instance, if the end-user wants to edit the message for Drive Unplugged...
a) Click on the Message box: b) The following message will appear:
SiI4726: $B
Drive Slot: #$DN
Temperature: $T
System Fan Speed: $SF
Power-Supply Fan Speed: $PSF
The drive was unplugged.
23
Instruction Manual c) The message information can be customized to suit the end-user’s needs.
The Daemon can extract the following data from the SiI 4726 hardware:
$B - Box Serial Number
$DS - Drive Serial Number
$DN - Drive ID [slot #]
$V - Current Volume
$T - Current Temperature
$SF - System Fan OK Flag
$PSF - Power Supply Fan OK Flag d) If there is information that the end-user would like included in the error message, it can be entered by typing in a selected message code listed above.
For instance: to put in the Box Serial Number, type in the descriptive text followed by the message code as demonstrated below.
SiI4726: $B
Drive Slot: #$DN
Temperature: $T
System Fan Speed: $SF
Power-Supply Fan Speed: $PSF
Box Serial Number: $B
The drive was unplugged.
Install New Firmware & Software
Warning: Do not power off or access the Drive Enclosure while upgrading firmware. Please note that this process may take several minutes.
1. Click the Specify Firmware toolbar button or select Specify Firmware from the Edit menu of the Status window. The Firmware Selection dialog displays all of the
SAT3550ESR Drive Enclosures attached to the host, the integrated circuit (IC) revision, and the current firmware installed on each Drive Enclosure (assuming more than one SAT550ESR is in use).
2. Select the SiI 4726 Drive Enclosure that requires a firmware upgrade.
3. Click the Browse button next to the Update Firmware from File text box, navigate to the new firmware file you wish to load from a CD or hard disk drive, and select the .bin file.
4. Click Install Firmware to begin the upgrade.
24
Instruction Manual
5. Click OK to dismiss a message box that states the firmware was successfully downloaded.
Editing the UserConfig.xml
The UserConfig.xml file is used to define the Status Screen Title Bar and allow configuration of the Policy Change as well as the Advanced Configuration features.
The UserConfig.xml file can be found in the following location:
C:\Program Files\SiI4726\SiI 4726 Manager\SiI 4726 Config
To edit this file, Right Click on the file name, select Open With, and select Notepad.
Once opened, the following will be displayed:
As an example, to change the Status Screen Title Bar:
Change the line that reads:
<StatusScreenTitleBar>SiI 4726 Manager</StatusScreenTitleBar>
To:
<StatusScreenTitleBar>Your Company Name</StatusScreenTitleBar>
In order to display:
The‘AllowPolicyChanges’–True–turns on the Policy feature. If the end-user changes the
XML tag value to False, the Policy Icon will not appear in the GUI and the feature will not be available.
For example:
<AllowPolicyChanges>True</AllowPolicyChanges>
<AllowPolicyChanges>False</AllowPolicyChanges>
25
Instruction Manual
The ‘AllowAdvancedConfig’–True–turns on the Advanced Config feature. If the enduser changes the XML tag value to False, the general Configure feature will still be available, but the Advanced button (inside the Configuration feature) will not be available:
<AllowAdvancedConfig>True</AllowAdvancedConfig>
<AllowAdvancedConfig>False </AllowAdvancedConfig>
Please Note: If the file is missing from the working directory, the GUI will allow both policy changes and advanced mode, as well as the status screen title to be set to
“Sil4726”. If there are any errors in the XML tag value, the Advanced Configuration button will not be available in the Configuration Setup.
If there is an error in the XML tag value, a pop-up window will appear, displaying the error and the tag where it can be found.
Creating a Splash Screen
The Drive Enclosure/SiI 4726 Manager software can further be customized by creating a personalized splash screen:
1. Create the logo for your splash screen – there are no image size limitations.
2. Save the logo as ‘UserLogo.xpm’ (The .xpm file type is UNIX based)
3. Put the UserLogo.xpm file in the following location:
C:\Program Files\SiI4726\SiI 4726 Manager\SiI 4726 Config
The splash screen will come up each time the end-user starts the SiI 4726 Manager software. It will stay up for 2 seconds.
26
M on
Instruction Manual
orriin g a d T ub ho ottiin
Monitoring drive status
The color of the drives in the Status window indicates the status of the hard disk drives:
Color
Green
Red
Gray or
Red
Light Blue
Yellow
Purple
State
Normal
Needs Rebuild
Unplugged
New drive
Rebuilding
Wrong slot
Description
Drive is active.
Resolution
Drive is in a failed state. That is, a write has occurred to a
SAFE volume while the disk drive was offline.
Drive is offline or unplugged. The background will appear red after a write to the volume.
New drive.
Verify the disk is securely in the bay.
Otherwise, replace as necessary.
Drive is being rebuilt.
There is a mismatch between the Serial # and Expected Serial
# because a hard disk drive has been installed into the wrong bay.
Install the correct disk drive into the bay.
Monitoring temperature
The following colors indicate temperature status.
Color
Green
Yellow
Red
Description
Temperature is normal.
Resolution
Temperature is greater than
50°C (122° F).
Remove object(s) that interfere with airflow around the Drive
Enclosure
Temperature is greater than
53° C (127° F).
Ensure constant airflow around the Drive Enclosure. If there is no airflow, replace the fan. Identify the drive causing the temperature increase and replace it.
27
Instruction Manual
Monitoring fan status
Color Value Description Resoluti
Green System + PS
Both system and power supply fans are functioning within limits.
Red
Red
Red
Review Event Logs
System
PS
System + PS
The system fan is not spinning or spinning is slower than expected.
The power supply fan is not spinning spinning slower than expected.
Both system and power supply fans are not spinning or spinning slower than expected.
Repair required.
Event logs are helpful for troubleshooting and locating a system malfunction.
1. Select Event Log from the Edit menu in the Status window.
2. The Event Log screen displays a list of events in a tabular format. The Date column displays the date and time of the event. The Box SN and Drive SN columns display the respective serial numbers for the event. The Drive Manufacturer column displays vendor information. The Message column gives an event description.
3. Click Refresh to update the log or click Close to close the log.
28
Instruction Manual
Front Panel LED Indicators
Each disk drive and the host connection have two LEDs to indicate drive status and/or host communication status. LED 0 is on the left and is typically blue; LED 1 is on the right and is typically green. In addition, there is one error-condition LED, labeled ‘!’ and the SAT3550ESR power on indicator OK.
Error
Condition
OK
LED
LED 0 LED 1
When SAT3550ESR is powered on, the host scans the disks in sequence, as indicated by a brief flash of lights on LED 1. Once the host scan is complete, LED 1 is lit for each drive present. During disk operations, LED 0 flashes as data is transferred to and from the drive and the host.
If a SAFE volume is being rebuilt, LED 1 blinks slowly on both mirrored disks.
Table 15 Status Indicators for 0 and 1 LEDs
Off
Off
On
Blink
LED 0 LED 1
Off
On
Blink
Blink
Description
Power on, no device attached
PHY communication established
(Activity = LED0 On)
Rebuild
Error
29
Instruction Manual
Status Indicators for ! and OK LEDs
!
OK
Off
On
On
Description
Startup or ON indication. OK LED will flash during reset and will remain green in all other cases.
ERROR. The‘!’LED will light as a result of an EEPROM error during boot or following a runtime error.
30
orra ge olliic s G ss
Instruction Manual
SAT3550ESR provides the following storage policies, for mapping physical to virtual drives. You can use the Basic Configuration Wizard or the Advanced Configuration
Wizard to choose from these policies. It is important to choose a suitable policy to make the best use of available storage.
JBOD
SAFE
BIG
FAST
This storage policy grants the host computer direct access to a physical disk drive. With JBOD (Just a Bunch of Disks), the number of available virtual drives is equal to the number of physical drives. JBOD is also called the bypass mode because the host bypasses the virtualization engine to access the drive directly.
This storage policy stores all data in duplicate on separate hard disk drives in order to prevent data loss due to drive failure. At least two hard disk drives mirror each other at all times, equivalent to RAID 1. Every write operation goes to both drives. SAFE provides the highest level of data protection, but halves the amount of storage space because all data must be stored twice.
To implement the SAFE storage policy, the Basic
Configuration Wizard creates two volumes. Each volume consists of two hard disk drives that mirror each other. The remaining hard disk drive is specified as a Hot Spare for both volumes.
This storage policy concatenates multiple physical hard disk drives, treating them as one large volume, in turn allowing you to increase logical volume size beyond the capacity of individual hard disk drives.
BIG provides the maximum amount of storage space, but no additional data redundancy.
In the FAST storage policy, I/O processing is balanced evenly to all drives in a method known as striping, equivalent to RAID
0. Striping increases storage operation speed by using several disk drives in parallel, while each portion of data is divided into segments that are written to different disks simultaneously.
Striping provides improved performance but does not enhance reliability because there is no way to retrieve or reconstruct data stored on a failed drive. To implement the FAST storage policy, the Basic Configuration Wizard creates a single volume of four hard disk drives in a striped format. The remaining hard disk drive is designated as a standalone volume using the BIG storage policy.
31
SAFE and BIG
SAFE and FAST
Volume
Hot Spare
Daemon
Instruction Manual
A storage policy in which one-half of the available storage space is concatenated, while the other half mirrors the first half to provide full data redundancy.
In the SAFE and BIG storage policy, the Basic Configuration
Wizard mirrors the concatenated disks to create a volume consisting of four disk drives, designating the remaining hard disk drive as a Hot Spare.
Also classified as RAID 10 by some industry standards, a storage policy in which an array of stripes is created. Each strip consists of two mirrored drives. SAFE and FAST provide the
I/O load balancing features of striping and the added reliability of mirrored data, equivalent to RAID 1+0. Data are written to mirrored disks in a striped format.
In the SAFE and FAST storage policy, data is written to mirrored disks in a striped format. The Basic Configuration
Wizard creates a virtual drive consisting of four hard disk drives, designating the remaining drive as a Hot Spare.
One or more hard disk drives are unused during normal operation and are configured to be a spare. If an active drive in a SAFE volume fails, the data on the remaining hard disk drive is duplicated onto the Hot Spare to regain redundancy.
All SAFE volumes can have a designated Hot Spare
A virtual or logical drive comprised of one or more physical hard disk drives. Once you create a volume, the operation system uses and maintains the volume as if it were a single physical disk drive, allowing software to overcome size restrictions imposed by physical disk drives.
Component of the Controller Configuration Utility responsible for status tracking and SAFE volume rebuilds.
32
Instruction Manual
S pe ciiffiic on s
Regulatory Certifications
Bus Type
Form Factor
Connectors
LED indicators
Power
Controller Card
Maximum Data Transfer Rate
OS Support
Dimensions
Weight
FCC, CE, UL, RoHS eSATA
3.5 inch SATA HD Drive bays
Enclosure: eSATA 7 pin
One per Drive (presence and activity)
Host connection(presence & activity)
Fault indication
Power indication
Internal 200W Power Supply eSATA PCI-Express Host RAID card eSATA 3 Gb/s
Windows: 98SE (Setup driver CD incl.), ME, 2000,
XP, Vista MAC OS X (10.3.or later)
300 x 150 x 230 mm (L W H)
5 kg
T ec niic all S up orrtt
StarTech.com’s lifetime technical support is an integral part of our commitment to provide industry-leading solutions. If you ever need help with your product, visit
www.startech.com/support and access our comprehensive selection of online tools, documentation, and downloads.
W arrrra orrm attiio
This product is backed by a one-year warranty. In addition, StarTech.com warrants its products against defects in materials and workmanship for the periods noted, following the initial date of purchase. During this period, the products may be returned for repair, or replacement with equivalent products at our discretion. The warranty covers parts and labor costs only. StarTech.com does not warrant its products from defects or damages arising from misuse, abuse, alteration, or normal wear and tear.
Limitation of Liability
In no event shall the liability of StarTech.com Ltd. and StarTech.com USA LLP (or their officers, directors, employees or agents) for any damages (whether direct or indirect, special, punitive, incidental, consequential, or otherwise), loss of profits, loss of business, or any pecuniary loss, arising out of or related to the use of the product exceed the actual price paid for the product. Some states do not allow the exclusion or limitation of incidental or consequential damages. If such laws apply, the limitations or exclusions contained in this statement may not apply to you.
33
A bo arrT ec h..c
m
StarTech.com is “The Professionals’ Source for Hard-to-Find Computer
Parts”. Since 1985, we have been providing IT professionals with the quality products they need to complete their solutions. We offer an unmatched selection of computer parts, cables, server management solutions and A/V products and serve a worldwide market through our locations in the United States, Canada, the United Kingdom and Taiwan.
Visit www.startech.com for complete information about all our products and to access exclusive interactive tools such as the Parts Finder and the
KVM Reference Guide. StarTech.com makes it easy to complete almost any IT solution. Find out for yourself why our products lead the industry in performance, support, and value.
Revised: 28 September 2007
advertisement
* Your assessment is very important for improving the workof artificial intelligence, which forms the content of this project
Related manuals
advertisement