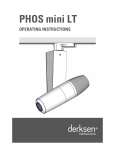
Derksen GoboTop+ Operating Instructions Manual
Add to my manualsadvertisement

Bedienungsanleitung
Operating instructions
Operating instructions
Lens
Projection head
Swivel arm with socket
Housing
2
Mounting plate
Fader Mounting plate release
Turning handle
Ventilation slots
Fading speed
On / off
Thank you for purchasing this high-quality product. GoboTopPlus is exclusively manufactured in Germany and meets the highest quality and safety standards. We are confident that you will be amazed by the crisp projections produced by this tiny but versatile projector.
Please read these operating instructions first in order to use the system effectively and safely!
Contents of package:
- Halogen projector GoboTopPlus including lamp MR 16, 12 V/ 50 W, 24°.
We reserve the right to make technical or design changes!
- Operating instructions
- Mounting kit (optional), including 2 screws and 2 wall anchors
Optional Accessories:
- Lamp MR 16, 12 V/ 50 W, 24°
- Lamp MR 16, 12 V/ 35 W, 24°
- Deflection mirror GoboTop, 90°
- Ceiling installation kit
- Custom made images (glass or metal gobos) to project your own designs.
Be inspired under: www.gobo.de
3
4
Warning Symbol
This symbol indicates that you will be informed about risks that may lead to injury to persons or damage to property. Users must read and observe these directions strictly in order to operate the system safely.
Information Symbol
This symbol indicates that you will receive additional information that will help you use your system more effectively.
Safety Precautions
Users must read and observe the safety precautions at the end of this booklet before operating the system.
Numbering
The highlighted numbers in the text ( ) refer to the numbering of illustrations.
Table of Contents
How to use GoboTopPlus effectively
Ambient light conditions
Suitable projection surfaces
Image sizes at increasing distances
Installation
Placement of unit
Wall or ceiling mount using power cord and plug
Wall or ceiling mount using insulating screw joints / spade connections
Inserting the gobo and assembly
General handling
Adjusting focus
Adjusting the fader
Replacing the lamp
Safety precautions
Safe placement and operating conditions
Power supply precautions
General handling precautions
Transportation, cleaning, repair
Technical specifications
Warranty conditions
17
18
18
20
14
16
16
16
21
22
23
24
10
12
8
8
6
7
6
6
5
6
How to use GoboTopPlus effectively
Ambient light conditions
The best and most brilliant image projections can be achieved in darkness or low ambient light. Daylight or direct sunlight are much brighter than artificial lighting and will outshine any projected image. Avoid directing spotlights or lamps at the projection surface for optimal results.
Suitable projection surfaces
With GoboTopPlus, it is possible to create front and rear projections. Surfaces for front projection must be opaque and light-coloured. Walls and floors with a white, matt surface are most suitable. Merchandise that is displayed for sale, decoration items or furniture can also be used as projection surfaces. Mirrors, glass panes or reflective metallic surfaces are not suitable for front projection. Coloured surfaces may have a negative effect on colour rendition of the image. For rear projections (translucent projection), semi-transparent materials, i. e.
frosted glass, milk glass, transparent tissue, paper, are required. For a translucent projection
GoboTopPlus must be placed behind the projection surface. The projected image is visible on both sides of the surface.
Image sizes at increasing distances
As a rule, image size increases with distance, whereas contrast and brightness decrease. In normal ambient light, GoboTopPlus displays images over short projection distances, from
0.5–1.5 meter. Greater projection distances can be achieved in low ambient light or darkness.
Image size can only be adjusted by varying the distance between projector and projection surface. Before permanent installation, make sure the image size meets your requirements.
in normal ambient light in low ambient light or darkness
0.35 m 0.70 m 1.05 m 1.40 m 1.75 m 2.10 m
Distance 0.5 m 1 m 1.5 m 2 m 2.5 m 3 m
7
8
Installation
Placement of unit
Choose a suitable place for GoboTopPlus and plug it into an outlet.
Now the system is ready for use.
Ceiling mount
Wall mount
Please note: When GoboTopPlus is mounted on the ceiling, vertical projections on the floor can only be created using the optional deflection mirror , otherwise the system may overheat. The specially designed deflection mirror can be ordered with part no.: 01023520.
9
10
Wall or ceiling mount using power cord and plug
1. Before mounting GoboTopPlus, find the best position for image projection. Switch the system on and arrange the projected image as accurately as possible.
2. Mark the position on the wall or ceiling.
3. Switch the system off and unplug the unit.
4. Detach the mounting plate from the housing. Pull the release and turn the housing counter clockwise. +
5. Place the mounting plate exactly on the marking on the wall or ceiling and mark the screw hole in the centre of the plate.
6. Put the mounting plate aside, drill the hole into the wall or ceiling and insert the wall anchor.
Always choose the most suitable mounting fixture for the type of wall or ceiling you are using!
The mounting plate is designed for lens head screws with a 4 – 5 mm diameter. Do not use counter-sunk screws because the mounting plate may be damaged.
7. Slightly tighten the screw in the centre, so that the mounting plate can still be adjusted.
8. Place GoboTopPlus on the mounting plate. Turn the housing clockwise, until it noticeably locks into place. Make sure, that the mounting plate is flush with the housing.
9. Switch GoboTopPlus on and arrange the projected image as accurately as possible.
10. Switch the system off again and unplug the unit.
11. Detach the housing from the mounting plate.
12. Tighten the screw by hand in order to attach the mounting plate to the wall or ceiling.
13. Place GoboTopPlus on the mounting plate. Turn the housing clockwise, until it noticeably locks into place. Make sure that the mounting plate is flush with the housing.
14. Make sure that the system is mounted firmly and safely.
11
12
Wall or ceiling mount using insulating screw joints / spade connections
Please note that the following articles pertains to the previous chapter “wall and ceiling mount, using power cord and plug”.
Unplug the system. Make sure that the providing circuit is volt-free.
1. Make sure that the cable leaves the wall or ceiling in the middle of the cable container on the bottom of the housing. We recommend small type insulating screw joints with integrated conductor protection.
2. Remove the mounting plate from the housing (see page 10, article 4).
3. Trim the power cord of GoboTopPlus so that it is flush with the housing.
4. Pull the power cord out of the cable duct on the bottom of the housing. Unstrip 30 mm of the outer insulation. Dismantle 7 mm of each conductor.
5. Use insulating screw joints that comply with EN60998-2-1 or EN60998-2-2.
6. If you use insulating screw joints without conductor protection, you must crimp 0.75 mm 2 ferrules on each conductor.
7. Mount the mounting plate.
8. Connect GoboTopPlus to the volt-free circuit.
9. Switch the system on and arrange the projected image as accurately as possible.
10. Switch the system off again and unplug it.
11. Detach the housing from the mounting plate.
12. Tighten the screw by hand in order to attach the mounting plate to the wall or ceiling.
13. Place GoboTopPlus on the mounting plate (see page 10, article 8).
14. Make sure that the system is mounted firmly and safely.
13
14
Inserting the gobo and assembly
Avoid touching the hot projection head, lamp, socket and swivel arm when the system is in operation. Switch it off and let it cool down for at least 15 minutes before you handle accessories, gobo or lamp.
1. Pull the projection head with the lamp carefully out of the socket.
2. Remove the fixing ring from the housing by turning it in direction of the arrow “open”.
3. Take out the multi-mirror lamp.
4. Remove the distance ring
5. Take out the image (glass or metal gobo).
6. Insert the new gobo and position it as follows: the image on the gobo must be mirrorinverted on the side of the lens. The image must be upside down.
7. Place the distance ring on the gobo.
8. Insert the multi-mirror lamp.
9. Hand-screw the fixing ring.
10. Insert the projection head with the lamp carefully into the socket until the lamp locks noticeably into the clamp. Do not push as far as it will go.
15
16
General handling
Avoid touching the hot projection head, lamp, socket and swivel arm when the system is in operation. Switch it off and let it cool down for at least 15 minutes before you handle accessories, gobo or lamp.
Adjusting the focus (see fig. page 15, ).
Adjusting the fader.
GoboTopPlus is equipped with an electronic fader, which can be adjusted using the pushbuttons.
The fading effect was designed for maximum perceptual results: the projected message fades out slowly and reappears quickly. The interval time of the fader can be adjusted in 6 steps in a range of 1 – 20 seconds.
Activating the fader
Adjusting the fader speed
Switching the system on / off
Replacing the lamp
Avoid touching the hot projection head, lamp, socket and swivel arm when the system is in operation. Switch it off and let it cool down for at least 15 minutes before you handle accessories, gobo or lamp.
Use only replacement lamps that are tested and approved by Derksen Lichttechnik.
If you operate GoboTopPlus with an unsuitable lamp, the system will be damaged.
Tested and approved lamps:
- PHILIPS Brillant Line Pro 12 V, 35 / 50 W 24°
- BLV Eurostar 12 V, 35 / 50 W 24°
- OSRAM Dekostar Titan 12 V, 35 / 50 W 24°
- Sylvania Superia 12 V, 35 / 50 W 24°
Please note that the angle of the reflected beam must be 24°!
Replacing the lamp:
1. Unplug the system or switch it off.
2. Pull the projection head with the lamp carefully out of the socket.
3. Remove the fixing ring from the housing by turning it in the direction of the arrow “open”.
4. Take out the multi-mirror lamp (see fig. page 15).
17
18
5. Insert the replacement lamp.
6. Hand-screw the fixing ring.
7. Insert the projection head with the lamp carefully into the socket until the lamp locks noticeably into the clamp. Do not push as far as it will go.
Safety Precautions
Safe placement and operating conditions
- GoboTopPlus is only suitable for dry indoor locations.
- Observe a minimum distance of 0.5 m between the projection head and any flammable materials and surfaces.
- Projection head, lamp, socket and swivel arm heat up during operation and may reach more than 100 °C. Wait approx. 15 minutes until the system has cooled down before you handle gobo, lamp, swivel arm or projection head.
- Use only replacement lamps that are tested and approved by Derksen Lichttechnik. If you operate GoboTopPlus with an unsuitable lamp, the system will be damaged.
- Do not cover the rear side of the lamp in order to avoid accumulation of heat.
- The system is designed to be used in normal room temperature. High temperatures or intense sunlight may cause damages.
- Do not obstruct the airflow to the system. The housing and the ventilation slots must not be covered.
- If the system is built into a closed wall, ceiling or cabinet, it must be sufficiently ventilated.
- Do not install the system near liquids. Do not place containers with liquid near the system, such as cups, vases and flower pots. Liquids that enter the system may cause electrical shock or fire.
- Do not place the system near flammable liquids like benzene, alcohol or thinners.
If the internal electrical parts come in contact with flammable liquids, fire or electric shock may result.
- Do not place the system on unstable stands or surfaces subject to frequent vibrations
- Please note: When GoboTopPlus is mounted on ceiling, vertical projections on the floor can only be created using the optional deflection mirror, otherwise the system may overheat.
(see fig. page 9)
- Never leave the system unattended in the presence of children.
- Only qualified technicians should install and service your system!
19
20
Power supply precautions
- The power cord must not be damaged! Avoid placing items on it. The power cord must not be bent, twisted or pinched. A damaged power cord may cause electric shock or fire and must be replaced immediately.
- Make sure that the voltage current matches the system. Please confirm voltage requirements with the label on the bottom of the housing.
- Operate the system only when the housing is closed.
- Prevent small metallic objects, such as necklaces, pins, and screws from entering the system through the ventilation slots. If such objects enter the system electric shock or fire may result.
- Do not place the system in humid environments, near spray water or dripping water in order to protect yourself from electric shock.
- If any objects or liquids enter the system, immediately unplug the unit and avoid touching the housing. Humidity or liquids inside the system may cause electric shock and injuries.
Let the system dry completely and remove any objects from inside before you switch it on.
- Unplug the system when it is out of operation for a long time.
- Never connect the system to a circuit utilizing a dimmer, as it may damage the electronic components.
General Handling Precautions
- Only use original accessories made by Derksen Lichttechnik, which are specially designed to be used with GoboTopPlus. When using incompatible accessories from other manufacturers, injury to persons or damage to property may result.
- Only insert glass or metal gobos. Never use other items such as colour slides or transparencies.
- Avoid touching the hot projection head, the lamp and the swivel arm when the system is in operation. Switch it off and let it cool down for at least 15 minutes before you handle accessories, gobo or lamp.
- Do not take apart or modify the system because it will not comply with the safety regulations and you will lose your warranty claim.
- If you hear unusual noise, observe smoke, feel excessive heat or smell anything unusual, immediately unplug the system and contact a qualified technician. Continued used may result in fire or electric shock.
21
22
Transport, cleaning, repair
- If available, use the original packaging for transport and shipping.
- Only clean the outer parts of the system with a water-moistened soft cloth that is well wrung out. Do not use any aggressive cleaners or thinners such as alcohol or benzene. Only use optical cleaning tissues for cleaning the lens and the image (glass or metal gobo).
- Ask a qualified technician for repair and cleaning of the inner parts. Systems can be sent directly to Derksen Lichttechnik for maintenance and repair.
Technical Specifications
Voltage type 230 V 115 V
Black
Silver
Part-no.: 09927620
Part-no.: 09927630
Power consumption: 55 VA
Power consumption in standby mode: 3 VA
Efficiency:
Mains frequence range:
Fuse:
Temperature fuse (built in): cos ø 0.95
45 – 66 Hz
1 A T (delay)
100 °C
Ambient temperature:
Weight:
Material:
Average lifetime of lamp,
MR 16, 12 V / 35 – 50 W, 24°
Colour temperature
25 °C
580 g
Plastic, stainless steel
5000 hours
3200 K
Part-no.: 09927720
Part-no.: 09927730
57 VA
3 VA cos ø 0.98
45 – 66 Hz
1.6 A T (delay)
100 °C
25 °C
630 g
Plastic, stainless steel
5000 hours
3200 K
The Gobo has a diameter of 37.5 mm, image size is 20 mm.
Operating with a non-sinusoidal power supply (e. g. a generator, frequency changer) may cause malfunctions.
23
24
Warranty Conditions
Derksen Lichttechnik GmbH warrants this product, the GoboTopPlus and all available accessories, to be in good working order during a period of 2 years from the date of purchase. Consumable parts, i.e. multi-mirror lamps, are excluded from warranty. Lamps must be replaced from time to time, depending on operation periods. Warranty repair service is excluded if damage or defects have been caused by improper use, incorrect storage, repairs, modifications or cleaning by unqualified technicians, not authorized by Derksen. Warranty repair service is excluded, if the operating instructions were not observed. The defective system can be returned within the warranty period to your dealer or to Derksen Lichttechnik GmbH with a copy of the invoice and a brief description of the problem.
Listings
xx
Serviceadresse
Service Contact
Derksen Lichttechnik GmbH
Sauerlandstraße 5
45889 Gelsenkirchen
Germany
T: +49 (0) 2 09 / 9 80 70-0
F: +49 (0) 2 09 / 9 80 70-60 [email protected]
www.derksen.de
advertisement
* Your assessment is very important for improving the workof artificial intelligence, which forms the content of this project
Related manuals


advertisement