advertisement

Getting started with Mousetrapper
SVENSKA | ENGLISH | DEUTSCH | FRANÇAIS | NEDERLANDS
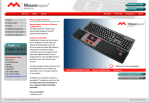
Left Click
Double Click
Zoom in
Cruise up
Scroll
Right Click
Zoom out
Mousetrapper prime
Copy
Cruise down
Paste
Svenska
1
Koppla in din Mousetrapper
Installation
Anslut den medföljande kabeln i uttaget på vänster sida på din Mousetrapper, samt andra änden i datorns USB-port. När den installerats fungerar din
Mousetrapper och dess knappar enligt anvisningar som står på undersidan av din Mousetrapper eller på bilden i kartongen.
Trådlös användning
Mousetrapper prime
Ta ur USB-dongeln på höger sida av produkten, sätt in den i en USB-port på datorn. Koppla sedan ur installationssladden.
Mousetrapper flexible
Ta ur dongeln som sitter på höger sida av produkten, sätt in den i en USB-port på datorn. Koppla sedan ur installationssladden. Håll sedan nere on/off knappen på din Mousetrapper i ca 3-5 sekunder.
2
Grundläggande tips
Placering
Placera din Mousetrapper mellan dig och ditt tangentbord. Mellanslagstangenten på tangentbordet bör ligga rakt ovanför styrmattan. Har du ett lågt tangentbord fäller du ut tangentbordsunderlägget som finns under din Mousetrapper och lägger tangentbordet på den. (Finns ej på Mousetrapper office eller Mousetrapper flexible).
Scrollning
Scrolla på styrmattan gör du genom att sätta fingret vid styrmattans högra kant. Du behöver inte trycka ner mattan utan bara dra fingret upp eller ner längs kanten beroende på hur du vill scrolla.
3
Skräddarsy upplevelsen
MT Keys
Förändra knapparnas funktioner genom att gå in på
Mousetrapper.com, klicka på Nedladdningar och välj sedan MT Keys för Windows eller OS X. Följ sedan instruktionerna.
När MT Keys är nedladdat kommer det en bild på produkten upp, det är samma bild som finns under din Mousetrapper. Gå med markören till den knapp du vill förändra. Klicka på den genom att lätt trycka på styrmattan en gång. Nu kommer du se en rullgardinsmeny, där kan du välja fritt vad du vill att knappen ska göra. Du kan göra allt från att lägga till extra vänsterklick, till att skapa kortkommandon eller lägga in texter som du sedan kan klistra in.
Har du en Mousetrapper office är MT Keys-funktionerna begränsade till att enbart flytta befintliga funktioner, du kan inte lägga till nya funktioner.
English
1
Connecting Mousetrapper
Installation
Connect the supplied cable to the socket on the left side of your Mousetrapper, and connect the other end to a USB port on the computer. Once installed, your
Mousetrapper and its buttons will operate as shown on the underside of your Mousetrapper, or the image in the box.
Wireless use
Mousetrapper prime
Remove the USB dongle from the right side of the product and insert it into a USB port on the computer.
Then disconnect the installation cable.
Mousetrapper flexible
Remove the dongle from the right side of the product and insert it into a USB port on the computer. Then disconnect the installation cable. Hold down the on/off button on your Mousetrapper for around 3–5 seconds.
2
Basic tips
Positioning
Position your Mousetrapper between you and your keyboard. The space bar on the keyboard should be directly above the control pad. If you have a low keyboard, unfold the keyboard support from underneath your Mousetrapper and place the keyboard on top of it. (Does not apply to Mousetrapper office or
Mousetrapper flexible.)
Scrolling
To scroll using the control pad, place your finger on the right edge of the control pad. There is no need to press on the control pad, simply slide your finger up or down the edge, depending on which way you want to scroll.
3
Customising
MT Keys
To customise the button functions, go to Mousetrapper.
com, click on Downloads, then choose MT Keys for
Windows or OS X. Then follow the instructions.
When you have downloaded MT Keys, an image of the product will appear that matches the image underneath your Mousetrapper. Position the cursor over the button you want to customise. Click on it by lightly pressing on the control pad once. You will now see a pull-down menu that lets you assign whichever action you want to that button. You can choose anything from adding a left-click, to creating shortcuts and inserting text that you can then paste at the press of a button.
If you have a Mousetrapper office the MT Keys functionality is limited to moving existing functions; you cannot add any new functions.
Deutsch
1
Mousetrapper anschließen
Installation
Schließen Sie das mitgelieferte USB-Kabel an den
Ausgang auf der linken Seite Ihres Mousetrappers an und das andere Ende an einen USB-Port am Computer.
Nach der Installation sind die Funktionen Ihres
Mousetrappers und dessen Tasten so zugeordnet, wie es auf der Unterseite Ihres Mousetrappers oder auf der
Abbildung auf der Verpackung angegeben ist.
Schnurlose Verwendung
Mousetrapper prime
Entfernen Sie den USB-Dongle an der rechten Seite des
Geräts und setzen Sie ihn in einen USB-Port am Computer ein. Entfernen Sie anschließend das USB-Kabel.
Mousetrapper flexible
Entfernen Sie den Dongle an der rechten Seite des Geräts und setzen Sie ihn in einen USB-Port am Computer ein. Entfernen Sie anschließend das
USB-Kabel. Halten Sie die Einschalttaste an Ihrem
Mousetrapper für ca. 3–5 Sekunden gedrückt.
2
Praktische Tipps
Positionierung
Platzieren Sie Ihren Mousetrapper zwischen sich und
Ihrer Tastatur. Die Leertaste der Tastatur sollte sich direkt oberhalb des Controlpads befinden. Wenn Sie eine niedrige Tastatur haben, klappen Sie die Tastaturablage auf, die unter Ihrem Mousetrapper platziert ist und legen
Sie die Tastatur darauf ab. (Gilt nicht für Mousetrapper office oder Mousetrapper flexible.)
Scrollen
Zum Scrollen verwenden Sie das Controlpad.
Platzieren Sie Ihren Finger an der rechten Kante des
Controlpads (es muss kein Druck auf das Controlpad ausgeübt werden) und führen Sie Ihren Finger einfach leicht nach oben oder unten an der Kante entlang, je nachdem, in welche Richtung Sie scrollen möchten.
3
Anpassen
MT Keys
Zum Anpassen der Tastenfunktionen gehen Sie auf Mousetrapper.com, klicken auf Downloads und wählen MT Keys für Windows oder OS X. Folgen Sie anschließend den Anweisungen.
Sobald MT Keys heruntergeladen ist, erscheint eine
Abbildung des Produkts, die der Abbildung auf der
Unterseite Ihres Mousetrappers entspricht. Positionieren
Sie den Cursor über der Taste, die Sie anpassen möchten. Klicken Sie die Taste an, indem Sie einmal leicht auf das Controlpad tippen. Darauf erscheint ein
Pull-Down-Menü, in dem Sie dieser Taste eine beliebige
Funktion zuweisen können. Sie können z. B. zwischen dem Hinzufügen eines Linksklicks, dem Erstellen von
Verknüpfungen und dem Einfügen von Text wählen, den
Sie darauf durch Betätigen der Taste einfügen können.
Beim Mousetrapper office ist die MT Keys Funktionalität eingeschränkt, d. h. dass Sie lediglich die Tastenbelegung der bestehenden Funktionen verändern können. Ein
Hinzufügen neuer Funktionen ist also nicht möglich.
Français
1
Connexion du Mousetrapper
Installation
Branchez le câble USB fourni sur la prise située sur le côté gauche de votre Mousetrapper, et l’autre extrémité du câble à un port USB de l’ordinateur.
Après installation, Mousetrapper et ses boutons vont fonctionner comme indiqué en dessous de votre
Mousetrapper ou sur l’image de la boîte.
Utilisation sans fil
Mousetrapper prime
Sortez le dongle USB du côté droit du produit et insérez-le dans un port USB de l’ordinateur.
Débranchez ensuite le câble USB.
Mousetrapper flexible
Sortez le dongle du côté droit du produit et insérez-le dans un port USB de l’ordinateur. Débranchez ensuite le câble USB. Pressez sur le bouton marche/arrêt de votre Mousetrapper pendant environ 3–5 secondes.
2
Conseils de base
Positionnement
Placez votre Mousetrapper entre vous et votre clavier.
La barre d’espace du clavier doit être située juste audessus du pavé de commande. Si vous avez un clavier surbaissé, dépliez le support de clavier du dessous de votre Mousetrapper et placez le clavier sur celui-ci.
(Ne concerne pas Mousetrapper office ou
Mousetrapper flexible.)
Défilement
Pour commander le défilement à l’aide du pavé de commande, placez les doigts sur la bordure droite du pavé de commande. Il n’est pas nécessaire de presser sur le pavé de commande, il suffit de glisser le doigt vers le haut ou vers le bas le long de la bordure, suivant le mode de défilement souhaité.
3
Personnalisation
MT Keys
Pour personnaliser les fonctions des boutons, allez sur Mousetrapper.com, cliquez sur Téléchargements, puis sur MT Keys pour Windows ou OS X. Appliquez ensuite les instructions.
Une fois que vous avez téléchargé MT Keys, une image du produit va apparaître, semblable à celle qui est en dessous de votre Mousetrapper. Placez le curseur sur le bouton que vous souhaitez personnaliser. Cliquez dessus en pressant une fois légèrement sur le pavé de commande. Vous voyez maintenant apparaître un menu déroulant qui vous permet d’attribuer à ce bouton la fonction que vous souhaitez. Vous pouvez choisir n’importe quelle fonction, de l’ajout d’un clic gauche à la création de raccourcis ou l’insertion de texte que vous pouvez ensuite coller en appuyant sur un bouton.
Si vous avez un Mousetrapper office, la fonctionnalité de MT Keys est limitée aux fonctions de déplacement existantes et vous ne pouvez ajouter aucune fonction nouvelle.
Nederlands
1
Mousetrapper aansluiten
Installatie
Sluit de meegeleverde USB-kabel links aan op de
Mousetrapper en sluit het andere uiteinde aan op een
USB-poort op de computer. Na installatie werken uw
Mousetrapper en de knoppen zoals aangegeven onder op de Mousetrapper of op de afbeelding in de doos.
Draadloze toepassing
Mousetrapper prime
Verwijder de USB-dongle van de rechterkant van het product en steek deze in een USB-poort op de computer. Koppel vervolgens de USB-kabel los.
Mousetrapper flexible
Verwijder de dongle van de rechterkant van het product en steek deze in een USB-poort op de computer.
Koppel vervolgens de USB-kabel los. Houd de aan/uitknop van uw Mousetrapper ca. 3–5 seconden ingedrukt.
2
Basistips
Plaatsing
Plaats de Mousetrapper tussen uzelf en uw toetsenbord. De spatiebalk op het toetsenbord moet zich direct boven de stuurpad bevinden. Als u met een plat toetsenbord werkt, vouwt u de toetsenbordmat van uw Mousetrapper uit en plaats u uw toetsenbord hierop. (Niet van toepassing op Mousetrapper office of
Mousetrapper flexible.)
Scrollen
Om te scrollen met de stuurpad, plaatst u uw vinger rechts op de stuurpad. U hoeft de stuurpad niet in te drukken, schuif uw vinger naar boven of beneden, afhankelijk van de gewenste scrollrichting.
3
Aanpassen
MT Keys
Voor aanpassing van de knopfuncties gaat u naar
Mousetrapper.com, klikt u op Downloads en kiest u vervolgens MT Keys voor Windows of OS X. Volg daarna de instructies.
Na het downloaden van MT Keys wordt er een afbeelding van het product getoond die overeenkomt met de afbeelding onder op uw Mousetrapper. Plaats de cursor op de knop die u wilt aanpassen. Klik erop door de stuurpad één keer licht in te drukken.
Er verschijnt dan een vervolgkeuzelijst waarin u de actie kunt toewijzen die u aan de knop wilt geven.
Voorbeelden van acties die u kunt toewijzen: klikken met de linkermuisknop, snelkoppelingen maken en het invoegen van tekst die u vervolgens kunt plakken met
één druk op de knop.
Bent u in het bezit van een Mousetrapper office, dan is de MT Keys-functionaliteit beperkt tot het wijzigen van bestaande functies; u kunt geen nieuwe functies toevoegen.
mousetrapper.com
DISCLAIMER AND LIMITATION OF LIABILITY
This product (the product) has been manufactured by or on behalf of Trapper data AB, Swedish Reg. No. 556872-7597 And its group companies (trapper data). As between trapper data and the user, the following shall – to the fullest extent permitted by applicable law – apply: The product is provided “as is” without warranty of any kind (either express or implied), including but not limited to any implied warranties of merchantability and fitness for a specific or general purpose and those arising by statute or by law, or from a cause of dealing or usage of trade. Trapper data shall have no obligations whatsoever to repair, replace or service the product in any manner or to provide the user with any future upgrades to the product, if any. The user is solely responsible for the use of the product. In no event, regardless of cause, shall trapper data be liable for any direct, indirect, special, incidental, punitive or consequential damages of any kind, whether arising under breach of contract, tort (including negligence), strict liability or otherwise, and whether based on agreement or otherwise, even if advised of the possibility of such damages. Trapper data makes no claim or representation that the product will prevent, cure, or mitigate any medical condition, disease, injury, pain or discomfort for all users.
advertisement
* Your assessment is very important for improving the workof artificial intelligence, which forms the content of this project
Key Features
- Super-slim, ergonomic design
- Control pad with click and scroll functions
- Option to work wirelessly
- 8 programmable buttons for customisation to your needs, using MT Keys
- Wrist supports can be cleaned with surface disinfectants
- Replaceable wrist supports
- Height adjustment with folding non-slip surface
- 4 months of battery life between charges
- Rechargeable battery
- 2000 dpi