advertisement

CDR 20 CDRecorder
OWNER'SMANUAL
harman/kardon
5TOP pLky FkUSE
©©©__
FREY.
NEXT DIIAL
DISFLAy
©
Retard CDSync Dubbin0 Erase
©©©©©©
Rnelze Speed pM phonl|
©©
DIgRelIn
DISpLky
harman/kardon
_
Power for the digital revolution.
TM
CDR 20 Compact Disc Recorder
3 introduction
3 importantinformationon CDRecording
4 Safetyinformation
5 Front-PanelControls
7 Front-PanelinformationDisplay
10 RemoteControlFunctions
12 Installationand Connections
14 CD RecordingBasics
14 DiscTypes
14 CDRTerminologyand DisplayMessages
15 PlaybackBasics
15 Loadingand UnloadingDiscs
15
16
16
Usingthe Remote
NormalPlay
Search
16
17
17
17
Track
Skip
Dual-PlayMode
DuabDeckOperation
TimeDisplay
17 HeadphoneListening
18 ProgramPlay
18 ProgrammingPlayLists
18 Checking,Editingand Clearing
ProgrammedPlayLists
18 RepeatProgrammedPlay
20 CD Recording
20 DiscDubbing
21
21
CDSyncRecording
Recordingfrom an ExternalSource
22
22
22
FinalizingCD-Rand CD-RWDiscs
Unfinalizingand ErasingDD-RWDiscs
Unfinalizinga CD-RWDisc
22
22
Erasingan Entire CD-RWDisc
Erasinga SingleBack
23 TroubleshootingGuideandError Messages
24 ]echnicalSpecifications
Typographical Conventions in order to help you usethis manual with the remotecontrol,front-panel controls andrear-panel connections,certain convenBonshavebeenused,
EXAMPLE (bold type) indicatesa specificremotecontrol or front-panelbutton, or rear-panel
connectionjack
EX AMtsL E (OCRtype) indicatesa messagethat is visibleon the front-panel informationdisplay
X,,M (outlinedtype) indicatesa lit indicator in the front-panel informationdisplay
[] (numberin a square)indicatesa specificfront-panel control
O (numberin an oval) indicatesa but[on or indicator on the remote
O - (numberin a circle)indicatesa rear-panelconnection
[] (letter in a square)indicatesan indicator in the front-panel display
2 TABLE OF CONTENTS
Introduction
Thank you for choosing Harman Kardon.
product, designednot only to play back your existing libraryof compactdiscs,but alsoto recordcompactdiscsfrom either analog or digital programs,You mayfeed signals(for recording)to the CDR20 from externalsourcessuch as an A/V receiveca tune[, a tape deckor a CD playel,or you maysimplyplace a CD in one deck, and makea copyusing a recordableCD in the other deck
Designedand engineeredby HarmanKardon, the CDR20 is amongthe first audio CD recorderswith x4 speedcapabilityThis means
60-minute disc
TheCDR20 not only recordswith the highest speedandquality availablebut it is also an audiophileCDplayenThroughthe useof audiophile-gradedigital-to-analogconverters
(DACs),the CDR20'sperformancerivalsthe most sophisticatedhigh-endplayeis Should you wish to bypassthe internal DACsand use an externaldigital processor,coaxand optical digital outputs are available,Tilanksto the CDR
20's dual-tray design,you may evenplay back two separatediscsat the sametime, for parties or multi-room applications,To makeCD playback more enJoyable,the CDR20 also features a wide rangeof programand repeatfunctions
SinceCDrecordersare a relativelynew technology, this may be yourfirst CD-Rproduct,
Although CDrecordersresembleplay-onlyCD machinesin manyways,there are someimportant differencesbetweena standardCD anda
CD-R,In addition, making a CD-Rrecordingis also a different processthan what you may be familiar with for makingaudiotape or cassette recordings,Forthat reason,we encourageyou to read through this manual so that you are fully acquaintedwith the way CDrecording works,Thissmall investmentin yourtime will pay major dividendsin the enjoymentthat will result from proper useof the CDR20
If you haveadditional questionsabout this product its installationor operation that are not answeredin this manual,pleasecontact your deale_,who is your best sourceof local information,You mayalso contactHarman
Kardonvia e-mail through our Website at www harmankardon,com,
Special Features
• Dual-Deck CD Player and CD-PJCD-RW
Recorder
• X4 Dub Speed for Both CD-R and
ErasableCD-RW Discs
• Audiophile-Grade Digital-to-Analog
Converters for Highest Audio Quality
• Dual-Play Capability
• ExtensivePlayback Programming
Capabilities
• Coaxial and Optical Digital Inputs and
Outputs
• Front-Panel Coaxial Digital Input for
Usewith Portable Devices
• Sample-Rate Converter Allows Use of
DATPlayers as Digital Source
• ErgonomicRemote Control
CAUTION
CAUTION: To prevent electric shock, do not use this (polarized) plug with an extension cord, receptacle or other outlet unless the blades can be fully inserted to prevent blade exposure.
within an equilateral triangle, is intended to e_c]osure
The lightning
¸'dangerous flash with voltage" arrowhead symbol,
within the product's that may be Of sufficient risk of eleclric shock to persons fnag_itude to constitule a
Eiteratuleaccompa_ylng the appliance
Important Information About CD
Recording
In orderto get the mostenJoymentfrom your new CD-Rrecordmrpleasepay specialattention to the following sectionsof the manualthat provideinformationabout the specialfeatures andcapabilitiesof CDRecorders,
• Tile CDR20 playsall standardCDaudio discs but for recording,the CDR20 uses specialCD-Rand CD-RWdiscsdesigned only for audiouse.CD-Rdiscsdesignedfor computerusewill not work in the CDR20
Seepage 14 for more informationon which types of discsare usedwith the CDR20,
•
Thelast step in makinga CD-Rrecordingis the finalization processUnlessthis step is properlydone,the disc will not work in other players.Seepage 22 for informationon finalizing discs
•
Oncefinalized,CD-Rdiscswill play in any
CD player,but CD-RWdiscswill only play in the CDR20 and certainother machines,
Checkthe specificationsof your CDplayerif you havequestionsabout compatibilitywith
CD-RWdiscs
•
As with all CDplayers,exceptthose designedspecificallyfor portableuse,you should nevermovea CDplayerwhile there is a disc insideone of the decks.NEVER
movethe CDR20 until discshavebeen removedfrom both decks
I
3 INTRODUCTION
Safety Information
Important Safety Information
Verify Line Voltage Before Use
YourCDR20 has beendesignedfor usewith
I00- to 240-voltAC current.Connectionto a linevoltageother than that for which it is intendedcan createa safetyand fire hazard and maydamagethe unit,
If you haveany questionsabout the voltage requirementsfor your specificmodel,or about the line voltage in yourarea, contactyour selling dealerbeforeplugging the unit into a wall outlet,
Do Not Use Extension Cords
We do not recommendthat extensioncordsbe usedwith this product As with all electrical devices,do not run power cordsunderrugsor carpetsor place heavyobjectson them,
Damagedpower cordsshould be replaced immediatelyby an authorizedservicedepot with cordsmeetingfactory specifications,
Handle the AC Power Cord Gently
When disconnectingthe power cordfrom an
AC outlet, alwayspull the plug, neverpull the cord If you do not intendto usethe unit for any considerablelength of time,disconnectthe plug from the AC outlet,
Do Not Open the Cabinet
There are no usef-sei]/iceable components insidethis product,OpeningBle cabinetmay presenta shockhazard,and any modification to the productwill void your guarantee if water or any metal objectsuchas a paperclip, wire or a stapleaccidentallyfalls insidethe unit, disconnectit flora the AC power sourceimmediately, andconsultan authorizedservicestation,
CAUTION:TheCDR20 usesa lasersystemfo
preventdirect exposureto the laserbeam,do not open the cabinetenclosureor defeat any of the safetymechanismsprovidedfor your protection DO NOr STAREINTOTHELASERBEAM,
Toensureproper useof this product, please read this owner'smanualcarefullyand retain it for future use Shouldthe unit require maintenanceor repairrpleasecontact your local
HarmanKardonservicestation Referservicing to qualified personnelonly
Installation Location
• Toassureproper operationand to avoid the potential for safetyhazards,placethe unit on a firm and levelsurface Whenplacing the unit on a shelt]be certainthat the shelf andany mounting hardwarecan supportthe weight of the product,
• Makecertainthat properspaceis provided both aboveand below the unit for ventilation If this productwill be installedin a cabinetor other enclosedarea, makecertain that there is sufficientair movementwithin the cabinet,
• Do not place the unit directly on a carpeted surface
• Avoid installation in extremelyhot or cold locations,or an area that is exposedto direct sunlightor heating equipment
•
Avoid moist or humid locations,
•
Do not obstructthe ventilation slotson the top of the unit, or placeobjectsdirectlyover them
Cleaning
Whenthe unit gets dirty,wipe it with a clean, soft d_ycloth If necessary,wipe it with a soft cloth dampenedwith mild soapywater,then a flesh cloth with clean wate_Wipe dry immediately with a dry cloth, NEVERusebenzene, aerosolcleaners,thinne_,alcoholor any other volatile cleaningagent Do not useabrasive cleaners,asthey maydamagethe finish of metal parts,Avoid sprayinginsecticidenear the unit, anteethat harmfulinterferencewill not occurin a particularinstallation,if this equipmentdoes causeharmfulinterferenceto radio or television reception,which can be determinedbyturning the equipmentoff andon, the userisencouragedto t_yto correctthe interferenceby oneor
•
Reorientor relocatethe receivingantenna
• Increasethe separationbetweenthe equipmentand receiver
•
Connectthe equipmentinto an outlet on a circuit different flora that to which the receiveris connected
•
Consultthe dealeror an experienced radio/TVtechnicianfor help
Thisdevicecomplieswith Part 15 of the FCC
Rules.Operationis subjectto the following two conditions:(1)this devicemaynot causeharmful interference,and (2) this devicemustaccept interferencereceived,includinginterferencethat may causeundesiredoperation
NOTE:Changesor modificationsmay cause
this unit to fail to complywith Part 15 of the
FCCRulesand mayvoid the user'sauthorityto operatethe equipment
Unpacking
Thecarton andshippingmaterialsusedto protect your new receiverduring shipmentwere speciallydesignedto cushionit fiom shockand vibration We suggestthat you savethe carton and packingmaterialsfor usein shippingif you move,or shouldthe unit everneedrepair
Moving the Unit
Beforemovingthe unit, be certain to disconnect any interconnectioncordswith other components,and makecertainthat you disconnect the unit from the AC outlet,
IMPORTANTNOTE:To avoid damageto the
CDR20 which may not be coveredby the warranty,be certainthat all discsare removedfrom the unit before it is moved,Oncethe CDR20 is installedrdiscsmay be left in the unit when it is turned off, but the unit shouldNEVERbe movedwith discsleft in either deck
Important Information for the User
Thisequipmenthasbeentested andfound to complywith the limits for a ClassBdigital device,pursuantto Part15 of the FCCRules.
Thelimits are designedto providereasonable protectionagainstharmfulinterferencein a residentialinstallationThisequipmentgenerates, usesandcan radiateradio frequencyenergyand, if not installedandusedin accordancewith the instructions,may causeharmfulinterferenceto radio communicationHowever,there is no guar-
Tominimizethe sizeof the carton in storage, you may wish to flatten it, This isdoneby carefully slitting the tape seamson the bottom and collapsingthe carton down to a moretwodimensionalappearanceOthercardboard insertsmay be stored in the samemannen
Packingmaterialsthat cannot be collapsed shouldbe savedalongwith the carton in a plastic bag,
If you do not wish to savethe packagingmaterials, pleasenotethat the carton and other sections of the shippingprotection are recydable,
Pleaserespectthe environmentand discard those materialsat a local recyclingcente_
4 SAFETYINFORMATION
I
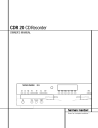
Front-Panel Controls
D
[] PowerSwitch
[] Status-ModeIndicator
[] PlayDeck
[] HeadphoneJack
[] HeadphoneLevelControl
[] Digital Input
[] Play-DeckOpen
[] RecordButton
[] CDSync
[] Dubbing
[] Erase
[] Finalize
[] Speed
[] Record-DeckOpen
[] RecordDeck
[] Analog RecordLevelControl
[] Record-DeckStop
[] Record-DeckPlay/Select
[] Record-DeckPause
[] Record-DeckNext
[] Record-DeckPrevious
[] Input Select
[] Record-DeckDisplaySelect
[] Information Display
[] RemoteSensor
[] Play-DeckDisplaySelect
[] Dual-PlaySelector
[] Play-DeckNext
[] Play-DeckPrevious
[] Play-DeckPause
[] Play-DeckPlay
[] Play-DeckStop
[]
Power Switch: Pressthis switch to apply
powerto the CDR20, Whenthe unit isfirst turned on, the Status-Mode Indicator [] surroundingthe switch will turn green,Once the unit has beenturnedon with this switch,it may be operatedfrom either the front panelor remotecontrol Pressthe switch again to turn the unit completelyoff
[]
Status-Mode Indicator: Whenthe CDR
20 is in the ON mode,this indicatorwill glow green Whenthe unit has been placedin the
Standbymodeby pressingthe Power-Off button I_ on the remote,the indicatorwill glow ambecindicatingthat the unit is still connected to the AC main supplyand is readyto be turned on from the remotecontrol,
[]
Play Deck:[his disc deck is usedto play
backconventionalCD discsandCD-Ror
CD-RWdiscsthat havebeenfinalized,
[]
HeadphoneJack:Connectstandardhead-
phonesto thisjack for privatelistening
[]
Headphone Level Control: Turnthis
control to adjustthe volumelevelto the headphones,Notethat the useof this control will not changethe analog output levelsat the rear-panelaudio outputs O0
[]
Digital Input: Thiscoaxialdigital input
may be usedto connecta portabledigital audio playerto the CDR20 for digital recording,
Whenan activedigital signal is connectedto both the front- and rear-panelcoaxialinputs, the sourceconnectedto the front-panel input will be selectedfor recording,
[]
Play-Deck Open: Pressthis button to
openthe PlayDeck[]
[]
Record Button: Pressthis button to begin
the recordingprocessSeepages20-22 for more informationon CDrecording
[]
CD Sync:Pressthis button onceto begin
an automatedrecordingof a singletrackfrom an externalCDplayerwhen a digital connection is used,Pressit twice to beginautomated recordingof an entire disc,Seepage 21 for more informationon CDSyncrecording,
[]
Dubbing: Pressthis button to beginthe
processof makinga completecopyof the disc in the PlayDeck[] to a CD-R or CD-RWdisc in the RecordDeck[], Seepage 20 for more informationon dubbing,
[]
Erase:Pressthis button to eraseoneor
more tracksor the entirecontents of an unfindized CD-RWdisc,When a CD-RWdisc has alreadybeenfinalizedyou may erasethe entire disc or you may "unfinalize" the disc by erasing the T 0 C data, Seepage22 for more information on erasingCD-RWdiscs
I
5 FRONT-PANELCONTROLS
Front-Panel Controls
[]
Finalize: Pressthis button when a record-
ing is completeto initiate the finalization process,The Play/Select Button []_) must be pressedwithin three secondsto activate finalization. Until this button is pressed and the finalizationprocessis complete,CD-R discs maynot be playedon conventionalCD machines.Seepage22 for more informationon finalization,
[]
Speed: Pressthis button to selectthe
recordingspeedfor internal dubs Seepage 20 for more informationon selectingthe proper speed
[]
Record-DeckOpen: Pressthis button to
open the RecordDeck[],
[]
Record Deck: ThisDiscDeckis usedto
recordor play backCD,CD-Rand CD-RWdiscs
[]
Analog-RecordLevel Control:The con-
trol is usedto adjustthe input levelwhen making recordingsfrom analog sourcessuchas cassettes,or when CDsarerecordedin an analog mode.See page22 for more information on record levels,
[]
Record-DeckStop: Pressthis button to
stop the CD in the RecordDeck,
[]
Record-DeckPlay/Select:This button
has two functions It maybe pressedwhen a standardCD is in the RecordDeckto put the machinein play,or it may be usedto enter a selectionor start certain recordfunctions
[]
Record-DeckPause:Whenthe Record
Deckis in the Playmode,pressingthis button will pausethe disc, Lfthe disc has previously been paused,pressingthis button will restart the playback
[]
Record-Deck Next: When a disc is play-
ing in the RecordDeck
_r pressand hold this button to play the disc in a fast4orwardmode to quicklylocatea desired passage,At any time, tapping the button andquicklyreleasingit will moveto the next track on a disc in play
[]
RecordDeck Previous:This button has
two functions When a disc is playingin the
RecordDeck[], pressandhold this button to play the disc in a fast reversemode to quickly locatea desiredpassageAt any time,tapping the button and quicklyreleasingit will moveto the beginningof the currenttrack,and the next presswill moveto the previoustrack When a disc is stopped,eachpresswill movebackone for programmingor playwhen the disc is stopped,Oncea track is entered,it maybe playedby simplypressingthe Play button []_}),
[]
Input Select: Pressthis button to select
the inputsource(analogor digital coax)for recording.Seepage 22 for more informationon inputselection,
[]
Record-DeckDisplaySelect: Pressthis
button to cyclethrough the time displayoptions for the RecordDeck,Seepage17 for more informationon the time display
[] Information Display:Theindicatorsin the InformationDisplayprovide statusreports on the operationof the CDR20. Seepage7 for completeexplanationsof eachindicator
[]
Remote Sensor:The IRsensorthat
receivesthe commandsfrom the remotecontrol is behindthis area, Do not coveror obscurethis part of the front panelto avoid any malfunction with the remote
[]
Play-Deck Display Select: Pressthis but-
ton to cyclethrough the time displayoptions for the PlayDeck Seepage 17 for more information on the time display
[]
Dual-Play Selector: Pressthis button to
enable both CDdecksto play at the sametime units In this mode it is also possibleto record from an externalsourcewhile the PlayDeckis functioningas a standardCD playecSeepage
[]
Play-Deck Next: Whena disc isplayingin
the PlayDeck
_r pressandhold this button to play the disc in a fasbforwardmodeto quickly locatea desiredpassageAt any time,tapping the button and quicklyreleasingit will moveto the next track on a disc in play
[]
Play-Deck Previous:Thisbutton has two
functions.When a disc is playingin the Play
Deck[kl, pressand hold this button to playthe disc in a fasbreversemode to quicklylocatea desiredpassage,At anytime, tapping the button andquicklyreleasingit will moveto the beginningof the currenttrack,and the next presswill moveto the previoustrack When a disc is stopped,eachpresswill movebackone track for programmingor playwhen the disc is stopped,Oncea track is entered,it maybe playedby simplypressingthe Play button
[]
Play-Deck Pause:When the PlayDeckis
running, pressingthis button will pausethe disc,if the disc haspreviouslybeen paused, pressingthis button will restartthe playback,
[]
Play-Deck Play: Pressthis button to begin
playbackof a CDin the PlayDeckor the dubbing process
[]
Play-Deck Stop: Pressthis button to stop
the CD in the PlayDeck,
6 FRONT-PANELCONTROLS
I
Front-Panel Information Display
R-RW TRACK TOTAL
REMAIN
TIME
RANDOM PROG REPEAT1 A-B
ALL
[] []
[3 []
[] RandomIndicators
[] ProgramIndicators
[] LevelIndicators
[] RepeatIndicators
[] Repeat-StatusIndicators
[] SpeedIndicators
[] Copy-ProhibitIndicator
[] DubbingIndicator
[] SyncIndicator
[] Dual-PlayIndicator
[] InformationDisplays
[] hme Indicators
[] Remaining-TimeIndicators
[] [oral-Time Indicators
[] track-TimeIndicators
[] R/RWIndicator
[] Play/PauseIndicators
[] Sample-RateConverter
[]
[]
[]
[]
[]
[]
[]
CD Indicators
RecordIndicator
FinalizeIndicator
EraseIndicator
Auto Indicator
Analog Indicator
Digital Indicator
Status,Time,TotalTimeandTrackTime.In addition, there is a separateinformation Display,Play/Pauseindicatorand CD indicatorfor eachdeck As the function of theseindicatorsis identicalfor both decks,they aredescribedin this manual with a commonlettenWhen the CDR20 is playingor recordinga disc,any indicatorsthat light on the left sideof the displaydescribethe statusof the PlayDeck,while those that light on the right sideof the display describethe statusof the RecordDeck Dependingon the activity of the unit andthe settingsyou select,different indicatorsmay light on the two sidesat the sametime,
[]
Random Indicators: Theseindicatorslight
when randomplaybackhas beenprogrammed for oneof the CDdecks,Seepage16 for more informationon random play
[]
Program Indicators: Theseindicatols
light when oneof the CDdecksis being programmedfor playbackoptions,Seepage 18 for more informationon programmedplay
[] Level Indicators: TheseLEDsdisplaythe input levelduring an analogrecording,and the output levelduring playback,Seepage22 for more informationon record levels,
[]
Repeat Indicators: Theseindicatorslight
when a repeatfunction is beingused Seepage
18 for more informationon repeatplay,
[]
Repeat-Status Indicators: Theseindica-
tors displaythe type of repeatfunction being used Seepage 18 for more informationon repeat status
[] Speed Indicators: Theseindicatorsshow which recordspeedhasbeenseJectedfor dub recordings,Seepage 20 for more information on record-speedselection
[] Copy-Prohibit Indicator: Thisindicator lightswhen a recordingis not possible due to the interventionof the SerialCopy
ManagementSystem(SCMS)See page20 for more informationon SCMS
[]
Dubbing Indicator: Thisindicator lights
when a dub is in progressbetweenthe two CD
Decks,Seepage20 for more information on CD dubbing
[] Sync Indicator: Thisindicator lights when the unit hasbeen programmedfor a CDSync recording,Seepage 21 for more informationon
CDSyncrecordings,
[] Dual-Play Indicator: Thisindicator lights when the unit is playingin the Dual mode, which allows both CDdecksto act as playback decksat the sametime,Seepage 17 for more informationon the dual-playmode
[]
Information Displays: Thesedisplays
servetwo functions,showingthe time displays for discsplayingrand displayingmessages about discsor recordings
7 FRONT-PANELINFORMATION DISPLAY
Front-Panel Information Display
[] Time Indicators: Theseindicatorslight in conjunctionwith oneof the time indicators r_ll_lr_ to showwhich of the time status modesis active
[]
Remaining-Time Indicators: Theseindica-
tors light when the InformationDisplay[] showsthe time remainingon a disc,
[] Total Time: Theseindicatorslight when the
Information Display[] showsthe total time of all trackson a disc,
[] Track Time: Theseindicatorslight when the
Information Display[] showsthe runningtime of the individualtrack being played,
[] R/RW Indicator: Thisindicator showswhich type of recordabledisc is presentin the Record
Deck[] Whena CD-Rdisc is present,onlythe
R is lit TheRWlights when an erasableCD-RW disc is in use,
[]
Play/Pause Indicators: Theseindicators
showthe statusof the individualCDdecks The
• lightswhen the CDis playing,and the •11
[]
Sample-Rate Converter: Thisindicator
lights when the Sample-RateConverteris in use to changethe digital samplerate when the incomingsignal is not the standard44,1kHz usedbystandardCDs Thisis an automaticfunction and doesnot requireany userintervention
[]
CD Indicators: Theseindicatorslight when
a standardCD is playingin either deck [] or
[],
[]
Record Indicator: Thisindicator lights
when the unit is makinga recordingand flashes during the preparationsfor recording,
[]
Finalize Indicator: Thisindicator lights
when the unit is in the Finalizationprocess, which is requiredbeforea CD-Rdisc may be playedon a standard CDmachine.Seepage 22 for more informationon Finalization,
[] Erase Indicator: Thisindicator lights when a CD-RWdisc is beingerased Note that only
CD-RWdiscsmay be erased:it is not possibleto erasea CD-Rdisc,Seepage22 for more information on erasingdiscs
[] Auto Indicator: Thisindicator lights when the automaticmethodof incrementingtracksis selectedfor a recordingsession,Seepage 21 for more informationon t_ackincrements
[]
Analog Indicator:This indicator lights
when an analogsourceis being recorded
Seepage21 for more informationon source selection
[]
Digital Indicator: Thisindicator lights when
a digital sourceis beingrecorded Seepage 21 for more informationon sourceselection,
8 FRONT-PANELINFORMATION DISPLAY I
Rear-Panel Connections
/I
® m
m_uummu_.
o
®
I
.....
I
I
°O° Po
0
PlayDeck(CDP)Analog Output
O RecordDeck(CDR)Analog Output
RecordDeck (CDR)Analog Dput
O PlayDeck(CDP)CoaxiabDigitalOutput
RecordDeck(CDR)CoaxiabDigitalOutput
RecordDeck(CDR)CoaxiabDigitalInput
RecordDeck(CDR)Optical-DigitalDput
_) PlayDeck(CDP)Optical-DigitalOutput
_) RemoteIRInput
_) RemoteIROutput
AC PowerCord
0
Play Deck (CDP) Analog Output: These jacks carrythe analog audiooutput signalfrom the Play Deck [_'1,Connectthem to the CD
RecordDeck (CDR)Analog Output:
Thesejacks carrythe output signalfrom the
Record Deck _-'_,Connectthem to the Tape
Play/In inputjacks on a receivecpreampor processon
RecordDeck (CDR)Analog Input: These
jacks acceptthe analog signalsthat are used for CDrecordingsConnectthem to the rape
Rec/Playoutputs on a receiver,preampor processon
O Play Deck (CDP) Coaxial-Digital
Output: Thisjack carriesthe digital-audio out-
put signal flora the Play Deck _J, Connectit to a coaxial-digitalinput on a receiver,processor or digital decoder
_) RecordDeck (CDR) Coaxial-Digital
Output: Thisjack carriesthe digital audio out-
put signal from the RecordDeck [] Connect it to a coaxial digital input on a receive=, processoror digital decode=
RecordDeck (CDR) Coaxial-Digital
Input: Thisjack acceptsthe digital-audio input
signal from a compatibledigital audio product and shouldbe connecteddirectlyto a digital playeror to a coaxiabdigita]output on a CDor
DVDplayeror an AN receiveror processor
IMPORTANTNOTE:Thecoaxialdigital inputs
shouldonly be connectedto digital inputor output jacks Eventhough they usethe same
RCAtype connectorasstandardanalog audio connections,DO NOTconnectthem to conventional analog input or output jacks,
0
Record Deck (CDR)Optical-Digital
Input: Thisjack acceptsthe digital-audio input signal from a compatibledigital audio product, and shouldbe connectedto the optical-digital output on a CDor DVDplayeror an AN receiveror processor
Play Deck (CDP) Optical-Digital
Output: Thisjack carriesthe optical digital
output signal from the Play Deck _J, Connect it to an optical digital input on a receive_, processoror digital recorderThiswill typically be connectedto the "CD" input,
_) Remote IR Input: Connectthe output of a remote infraredsensoror the remotecontrol output of another compatibleHarmanKardon productto thisjack, Thiswill enablethe remote control to operate evenwhen the front-panel
Remote Sensor []
is blocked,Thisjack may also be usedwith compatibleIR remotecontrol basedautomationsystems,
Remote IR Output: Connectthisjack
to the IR inputjack of anothercompatible
HarmanKa=donremote controlledproductto havethe built-in remotesensor[] on the
CDR20 provide IR signalsto other compatible products.
_) AC Power Cord: Connectthis plug to an
ACoutlet, If the outlet is switch controlled, makecertainthat it is in the ON position,
I
9 REAR-PANELCONNECTIONS
Remote Control Functions
O Power-OnButton t_ PlayDeck(CDP)DisplayControl t_1 PlayDeck(CDP)Open
O
PlayDeck(CDP)Select t_1 Program t_1 ReverseSearch
0 Single t_ ProgramCheck li_ Play/Select t_1 RandomPlay
Dub
I_ Automatic/Manual1lack IncrementSelector
Ii_ frack Increment
Finalize
NumericKeys li_ A-BRepeat
!i_
Repeat
SpeedSelect
I_) RecordButton
I_ EraseButton
I_ Input Select
CDSync
Stop t!_ Pause
NextTrack/Skip
,_j
Dual-DeckPlayback
ForwardSearch
RecordDeck(CDR)Select
I_) RecordDeck(CDR)Open
RecordDeck(CDR)DisplayControl
I_ PowerOff
I_ C4ear
IMPORTANTNOTE:Some of the remote's functions, including Play, Pause,Stop,
Search, Next and PreviousTrack, are
shared between the two decks.Always
remember to pressthe CDP Select button
O to use the remote to control the Play
Deck, or pressthe CDRSelect button
to control the RecordDeck. When you
press one of these buttons, an indication of CDP or C])R will appear in the appro- priate Information Display r_.
10 REMOTECONTROLFUNCTIONS
I
Remote Control Functions
O
Power-On Button: Pressthis button to
turn the CDR20 on Notethat in order for this control to function, the Front-Panel Power
Switch [] must first be pressedso that the unit isin the Standbymode
O
Play Deck (CDP) Display Control: Press
this button to cyclethrough the varioustime displayoptions for the disc in the Play Deck
L_'I See page17 for more information on timedisplayoptions.
Play Deck (CDP) Open: Pressthis button
to open the Play Deck i_'l,
O
Play Deck (CDP) Select: Pressthis button to control or programthe functionsof the disc inthe Play Deck L_'I
Program: Pressthis button to beginthe
programmingsequencefor oneof the CD programmingthe CDR20
Reverse Search: Pressthis button to play
the selecteddisc in reverseto locatea desired passage
O
Single: Whenthis button is pressed,the
CDR20 will function asa two-disc CDplayed changer In the Single mode,the audio output wifl be routed to all output jacks OOO_ regardlessof which CDdeckis actuafly playing,Seepage 17 for more informationon the Single-Playmode
Program Check: Pressthis button to
checkor edit a programmedplaybacksequence, grammedplayback,
Previous-TrackSkip: Pressthis button to
skip backwardsto the beginningof the track currentlybeing played,Pressit a secondtime to move backto the beginningof eachprevious t_ack,
Play/Select: Thisbutton hastwo functions. It wifl mostoften be usedas a standard play button, but when setting up certainrecord functions,it is also usedas an Enteror Select button,
Random Play: Whenthe CDdeck is stopped,pressthis button to begin randomplay of all trackson a disc
Dub: Pressthis button to begin a dub See
page 20 for more informationon dubbing
Automatic/Manual Track Increment
Selector: Pressthis button to selectbetween automaticand manualtrack incrementsduring a recordingsession Seepage 21 for more information on track increments,
TrackIncrement: Whenthe Manual
modefor track incrementsis selectedduring recording,pressthis button to increasethe track numbel.NOTE:Thisfunction doesnot operateduring CDSyncor dub recording,
Finalize: Pressthis button when a record-
ing iscompleteto initiatethe finalization
process.ThePlay/Select button []_ must be pressedwithin three secondsto activate finalization Until this button is pressedandthe finalizationprocessis completerCD-Ror CD-RW discsmay not be playedon conventionalCD machines,Seepage 22 for more information on Finalization,
Numeric Keys:Pressthesebuttons to
accessa specifictrackfor playbackor during the programmingprocessSeepage18 for more informationon programmedplayback,
A-B Repeat: Pressthis button to specifya segmentof a discfor repeatplay,Seepage 18 for more information on repeatplay,
Repeat: Pressthis button onceto repeat
the currentt_ack,Torepeatan entire disc,press the button twice qi_ Speed Select: Pressthis button to select the recordingspeedfor internal dubs,See page
20 for more informationon selectingthe proper speed,
_)
RecordButton: Pressthis button to
begina manualrecording
Erase Button: Pressthis button to initiate the erasureof a track or of an entire CD-RW disc or to Unfinafizea disc Note that erasureis only possibleon CD-RWdiscs,Seepage 22 for more informationon erasingdiscs
Input Select: Pressthis button to select the inputsource(analogor digital-coax)for input selection
CD Sync:Pressthis button onceto begin an automatedrecordingof a single trackfrom an externalCDplayerwhen a digital connection
isused Pressit twice to begin automated
recordingof an entire disc,Seepage21 for more informationon CDSyncrecording,
Stop: Pressthis button to stop playbackor
recording
Pause: Pressthis button to momentarily pauseplayback,Pressit againto resume playback,
Next Track/Skip: Pressthis button to skip forwardto the next track on a disc,
,_j Dual Deck Playback: Pressthis button to enableboth CD decksto play back at the sametime andfunction asseparate,independent CDunits, In this mode it is also possibleto recordfrom an externalsourcewhile the Play
Deckis functioning asa standardCDplayenSee page 17 for more informationon dual-play capability,
Forward Search: Pressthis button to
playa disc in a fast-forward mode
Record Deck (CDR)Select: Pressthis
button to control or programthe functionsof the disc in the RecordDeck[]
I_) RecordDeck (CDR) Open: Pressthis button to openthe Record Deck []
Record Deck (CDR)Display Control:
Pressthis button to cyclethrough the various time-displayoptions for the disc in the Record
Deck [],
Seepage17 for more information on time-displayoptions,
Power-Off: Pressthis button to placethe unit in a Standbymode
Clear: Pressthis button to clearan item in a programsequence,Seepage18 for more information
I 11 REMOTECONTROLFUNCTIONS
Installation and Connections
Important Note: To preventpossibledamage to your speakersor other componentsin your audio system,we strongly recommendthat ALL systemcomponents,includingthe CDR20, be turned off and unpluggedfrom their AC power sourcewhen any connectionsare made or a new componentis installed,
Locating the CDR20
Sincethe CD transportsin the CDR20 are precision instruments,they are subjectto interferencefrom vibration,fo minimizethe possibility of skippingduring playbackor recording,it is recommendedthat the unit be placedon a level,solid, vibration-freesurface
Play-Deck Connections
Therear-panelconnectionslabeled"CDP" refer to the outputs of the Play Deck I_l, which functions asa standardCD playecConnectthe analog left/right CDPoutputs O to the CD inputson your receive_,preampor surround processo_Forbest playbackresults,a digital connectionisrecommended,usingthe coaxial or optical 0_ outputs,Connectthem to the matchingdigital inputsof yourreceive_,preamp, processoror externaldigital decodenNote that you may haveto changea setting on the receiveror processorto link the digital inputto the "CD" button or inputselectonConsultthe owner'smanual on that devicefor details,as this configurationmay varyfrom unit to unit
Record-DeckConnections
Therea=-panelconnectionslabeled"CDR" refer to the inputs andoutputs for the Record Deck
[] Dependingon the capabilitiesof your tight space,aNvaysmakecertain that there is enoughroom in front of the unit for the disc drawersto openfully, andthat there isenough spaceabovethe unit so that discsmayeasily be insertedin the disc drawers
In addition to the safetyconsiderationsoutlined on page 4, it isalso recommendedthat the
CDR20 not be placedin a locationthat is subject to direct sunlightor extremeheator cold, as theseconditionsmaydamagethe discsused in the playe_,or the playeritself Note that audio amplifiersor high-powerreceivers,as well as certainother electronicproducts,may generatesignificantheat Forthat reason,do not placethe CDR20 directlyon top of an amplifier`receive_,or other heat source,Always allow at least one inchof flee spaceon all sidesof the CDR20, as well as other electronic products,to allow for properventilation convenientto connectthe analog inputsand outputs to the jacks markedfor a tape recorder
As the CDR20'sfunctions resemblethose of a standardtaperecorde_,this might make it easierto selectit as an input on your receiver or preamp,Connectthe analog CDR-Outjacks
O to the Play/Injacksof a TapeorAux input on your receiveror preamp Connectthe CDR-In jacks I_} to the rape RedOutjacks on your receiveror preamp
Theunit shouldalso be kept away from sources of water or damp conditions,
Connectionsto Your Audio System
When connectingthe CDR20, think of the processas if yourwere connectinga standard
CD playeranda tapeor cassetterecorder`with the addition of the digital connections
1o playthe output of the RecordDeckthrough the digital decoderin your receiveror an external processor,connectthe CDRCoax-Out jacks to the matchingdigital-inputjacks on your receiveror processorNote that you may haveto changea settingon the receiveror processorto link the digital inputto the "Tape" button or the specificinput selectorassociated with the digital inputs Consultthe owner's manual on yourreceiveror processorfor details,asthis configurationmayvary from unit to unit,
1o makerecordings%m externaldigital sources,suchasa CD,DVDor MD player,connectthe CDR Coax-In jacks _!_
IMPORTANTNOTESON DIGITAL
CONNECTIONS: or CDR
Optical In Jack O on the CDRto the digital outputjacks on your receiveror processo_If your receiverdoesnot havedigital-outputjacks, you mayconnectthe CDRCoax In jacks
_!_
or CDROptical In Jack_ playeror other digital device on the CDR
20 directlyto the digital outputs on your CD
Connectionsto a portabledigital CDor MD playermay also be made byconnectingthe
CoaxDigital Output of the playerto the Front-
PanelDigital Input [] on the CDR20
Note that when both the front and rear panel digital inputs areconnectedto externalsources, the CDR20 will give priority to the front-panel input [], If it is impracticalto disconnectthe front-panelinput when you needto usethe rear-paneljack, simplyturn off the deviceconnectedto the front-panel input Thiswill stop the digital signal,and permit the rear-panel jack to be used,
Althoughdigital-coaxconnectionsusethe same type of "RCA"phonojack asstandardanalog signals,pleasetake spedd careto connectdigital signalsonly to digitaljacks, In manycases, the digitaljacks may be identified by an orange<oloredinsert ring aroundthe centerof the jack When makingdigital connections,be sureto usecoax-interconnectcables,suchas the one suppliedwith the CDR20 or cables intendedfor video applications,Eventhough they havethe correcttype of RCAconnector,do not useaudio-interconnectcablesthat have twisted-pair construction,asthey are not appropriatefor digital signaluse, If you have anyquestionsabout the type of cablesto use with the CDR20, consultyour deale_
12 INSTALLATIONAND CONNECTIONS I
Installation and Connections
Batteries
Insertthe two AA batteriessuppliedwith the
CDR20's remoteby turning the remoteover so that the bottom of the remote is facingtowards you, Gendylift the plastictab on the battery coverup andaway flom you, and lift the lid off.
Insertthe batteriesin the remOterbeingcareful to follow the + and polarity indicationsin the bottom of the compartment Replacethe cover by first seatingthe two smalltabs into the mating holesat the top of the remote,andthen gently pushthe coverdown until the latch snapsinto place with an audible click
{}
IR Remote Connections
If the CDR20 is installedbehinda cabinet or other obstructionthat may block the path betweenthe front-panel RemoteSensor[] and the locationwhereyou will use the remote, an optional external]Rsensormay be used,
Connectthe sensorto the Remote IR In Jack on the rear-panelThisjack may also be connectedto the ]ROutputjack of another compatibleHarmanKardoncomponentor a compatibleIRsystemremoteproduct
You mayalso use the IRSensorin the CDR20 to sendcommandsto other compatibleremote products Connectthe Remote IR Out Jack to the inputof the other productor system,
Power Connections
Connectthe AC Power Cord _) to an AC power source the CDR20 usessensitive,highperformancecomputer-gradeCD drives,andto protectthem we recommendthat you consider for a computen
If the real-panelAC oudet on a receiveror other productis used,makecertainthat it providesat least 28 watts, andthat the total power of all productsconnecteddoesnot exceedthe maximumrated output of the product containingthe outlets,if the CDR20 is connectedto a switchedoudet, rememberto turn on the outlet or productcontrolling it in order for the CDR20 to operate
NOTE:Whenreplacingbatteries,it alwaysa good ideato replaceboth at the sametime
When the remotewill not be usedfor an extendedperiod of time,it is alsoa good idea to removethe batteriesto avoid the possibility of damagedueto corrosion,Batteriescontain chemicalsubstancesand we recommendthat you disposeof them properlyand in compliance
I
13 INSTALLATION
AND CONNECTIONS
CD Recording Basics
CDRecorders(CDRs)are similarto standardCD players,with the addition of the featuresand controls neededfor recording Functionssuch as play,searchand programmingfor playback will be familial, but the recorderwill function slightlydifferentlythan what you may be used to for magnetictape recorders,
Disc Types
Unlikea conventionalCD playe_,the CDR20 usesthree types of discs,and it is importantto understandhow eachoneplays back any conventionalCDthat bearsthis logo, recordedon onetime, andwhen they arefinalizedthey will playin either deck in the CDR20 or in any conventionalCD playecincluding home,car andportable modelsThe Record
Deck [] on the CDR20 may also be used to recoidon thesediscs,and it will play
CD-R/Audiodiscsevenif they havenot been finalized,
Discsthat bearthis logo may be
Discsthat bearthis logo may be used for recordingon the CDR20, andthey may also be erasedand reused.Theymaybe recordedon or playedon the RecordDeck [] of the
CDR20 and in other CD-RWrecordersor
CD-RWcompatibleplaye=sTheywill NOTplay back in mostcurrent CDplayersunlessthe playeris CD-RWcompatible CD-RWAudio discswill play on most DVDplayersoncethey havebeen finalized,
CDR20, providedthat they havebeen properly finalizedin accordancewith audio standard
IEC958
_ Discsdesignedfor usein computerCD-Rdrivesmay not be usedfor recordingin the CDR20 Onlydiscsspecifically designedfor use in consumerCDaudio recordersmay be used If you attempt to use a blank-computerrtyperecordabledisc for recordingon the CDR20 you will seea
NO AU DT O messagein the Information
Display []
arid recordingwill not be possible,
However,discsthat havebeenrecoidedin the
CD-Rdriveof a computermaybe playedin the
Notethat the CDR20 is specificallydesigned for the recordingand playbackof consumer audio discs,andcannot be usedto copydata discs,DVDdiscs,or other optical discsusedby video- or computeFgamesystems
CDRTerminology and Display Messages
Compactdisc recordinghasits own special terminology,andsomeof the messages displayedby the CDR20 may be new to you
Beforeusingthe CDR20, you may wish to familiarizeyourselfwith someof the terms used by the CDR20, Additional error messagedisplaysmay also appeanPleaseseepage 23 for a completeexplanationof error messages
F i n a 1 i z e: Thisterm refersto the process that completesthe recordingof a disc by recordinga final Tableof Contentsand preparingthe disc sothat it maybe playedon other machinesA CD-Rdisc may not be playedon other CDplayersuntil it is finalized Howevei, oncethe finalization processis complete,a
CD-Rdisc may not be recordedon again, Only
CD-RWdiscs may be "Unfina]ized,"so that additional tracksmay be recordedon a disc
T 0 C: Standsfor Tableof Contentsand it refersto the data recordedon eachCDthat tells the playerhow manytracksare on the disc,the total time of the disc andthe running time of eachindividualtrack, Eachtime a disc of any sort is placedin the CDR20, you will see a T 0 C to indicatethat the unit is readingthis data from the disc.Thisis requiredto copythe track informationto any recording,
0 P C: Standsfor OpticalProcessing
Calibration When you seethis messagein the
Information Displayfor the Record Deck
[],
it meansthat the lasertransportinsidethe
unit is makingthe calibrationsand adjustments neededsothat the recordingprocessis optimized for the specificdisc in use
BU SY: Whenyou seethis message,it means that the RecordDeckis completingpart of the recordoperation Whenyou see this message, do not pressany buttons;simplywait until the messageclearsfrom the display,
DI SC F UL L: Whenthere are onlyfour secondsof recordtime remainingon a blank disc,a DISC FULL messagewill appear in the Information
Display _. Whenyou
seethis message,you will needto stop the recordingprocessand,when a CD-Risbeing recorded,inserta new blank disc o_,when a
CD-RWisin use,either usea new discor erase existing tracksfollowing the instructionson page 22
14 CD RECORDINGBASICS
I
Playback Basics
Playbackof CDson the CDR20 resemblesthat for traditionalCD playerswith a few exceptions to accommodatethe availabilityof two separate playbackdecks,Beforeusing the CDR20, power-upthe unit by pressingin the Main
Power Switch L"l, Note that the Status-
Mode Indicator []
will turn green,indicating that the unit ison andfunctioning,At the same time,the InformationDisplay[] will illuminate and the legendsbehindthe front-panel controls
Loada disc in the traywith the printed (label) side facingup Oncethe disc is seated,make certain that it is properlycenteredwithin the t_ay When using3" discs,take extra careto within the smallerridgesin the disc tray
Oncethe Main Power Switch [] hasbeen turned on, the CDR20 may be powered-on or -off using the remotecontrol. Pressingthe
Power-Off button _
on the remotewill place the unit in a Standbymode,as indicated by the ambercolor of the Status-Mode
Indicator [], Toturn the unit on using the remote,simplypressthe Power-On
/
Labeled
Surface
Notethat when the unit isin the Standbymode, it isstill drawing power %m the AC main outlets fo turn the unit completelyoff, press the Main Power Switch [], Whenthe
Status-Mode Indicator [] goesout, the
CDR20 is off and not drawingany powen
When you will not be usingthe unit for an extendedperiod of time,suchas during a vacation,we recommendusingthe Main
Power Switch []
to turn the unit completelyoff
Although compactdiscsarevery reliable,rough handling may damagethem Avoid scratching the bottom (nonpdnted)sideof the discs,as this will affect playbackof standardCDsand interferewith the recordingof CD-Rand
CD-RWdiscs ]t is alsoa good ideato always handle discsby their edgesto avoid fingerprints which may also interferewith playbackquality and possiblycausedamageto the laserand lensassembly, loading and Unloading Discs
1o load a disc,first openthe desiredCDdeck by pressingthe appropriateOpen/Close button _'][_lJOI_ Theword 0 is E N will appear in the Information Display I_,
Alwaysmakecertain that there is sufficient room in front of the unit for the disc drawersto open, Note that if either disc draweris blocked, the drawerwill stop at the blockedpositionand an E RR 0 R messagewill appea_Pressthe appropriateOpenlCIose button []i'_]O
_1 to reopenthe drawe_ lo closethe drawer,pressthe appropriate
Open/Close button t'][_lJ_)
or gently presson the outsideof the front coverof the disc tray,Whenthe draweris dosedthe word
C L 0 SE will appearmomentarilyin the
Information Display I_, andthe letters
T 0 C will beginto flash in the displayoncethe drawer iscompletelyclosed
If the disc isa standard CDor a finalizedCD-R or CD-RWdisc,TOC will flash while the unit readsthe disc'sTableof Contentsinformation
Oncethat data is read, the Information
Display [] will show the total number of t_acksandthe total time of all trackson the disc TheCD Indicator [] will alsolight to indicatethat a standardCD isin use
When an unfinalizedCD-Ror CD-RWdisc is placedin the Record Deck
_r the letters
0 P C will flash oncethe fable of Contentshas been read,Thisindicatesthat the unit isoptimizing its circuitsfor maximumcompatibility with the specificrecordabledisc in use The number andtotal runningtime of anytracks that havealreadybeenrecordedwill appearin the Information
Display[],
andthe appropriate hldicator [E41[]will light to tell you if a
CD-Ror CD-RWdisc is in use,
If a computerdatadisc is placedin the CDR20, a DATA DISC or DISC ERROR messagewill appear,dependingOil whetheror not the data disc is finalized Data discswill not play and cannot be recordedor dubbedon the
CDR20,
Using the Remote
TheCDR2O'sinfrared remotecontrol is controlthe playbackprogrammingandrecord functions.To allow for efficientuse of the remote,its operationis different from standard
CDplayers.Somebuttons are dedicatedto one specificCD deck,while others are shared betweenthe two decks,
No matter which deckis playing,the Play
Deck (CDP) and RecordDeck (CDR)
Display _
_]_ and Open/Closebuttons
_) will alwayssenda commandto their respectivedeck,Theother transportand pro-
_r grammingfunctions, howevecare shared[o useany of the transport controls,suchas Play
Pause _)
or the Search
Stop
_r and Skip buttons Oq_])_)_, tile
Numeric Keys _
or the Programming
Keys
__r first presseither the
CDPbutton _ to commandthe Play Deck
[] or the CDRbutton _ to commandthe
RecordDeck _'4_,When the button is pressed,
a messagereadingCDPor CDRwill appear in the appropriateInformation
Display []
to confirmthe selection, lo switch the remotefrom controlling onedeck to controllingthe other,simplypressthe Select button _
t_) for tile deckyou wish to con-
tfol at any time,
Note that featuresrelating to the recording process,suchasSpeed @ andthe double row of record4uncdonbuttons in the centerof the remote __)_ andthe Single/Dual buttons _,_iP are dedicatedfeaturebuttons that do not require anyspedal selection,
I
15 PLAYBACKBASICS
Playback Basics
Normal Play
Toplay a diSCrfirst makecertainthat the unit is properlyinstalledandthat the Main Power
Switch []
is turned on Turnthe CDR20 on by pressingthe Power-On button O on the remoteand note that the front-paneldisplay will illuminate, inserta disc following the instructionsshown on the previouspage Tostart the playback, pressthe Playbutton on the front panelfor the appropriatedeck _]_1_'_or pressthe Selectbutton on the remotefor the desireddeck and then pressthe Playbutton on the remote _), ThePlay/Pause Indicator [] will show a right pointing triangle _ and the
Information Display [] will show the track number beingplayedandthe runningtime of the track Aseachnew track beginsto play,the tracktime will resetto 00:00 andbegin to count up for the new track
NOTE:Rememberthat UnfinalizedCD-Ror
CD-RWdiscswill only play in the Record
Deck _'_, If you attempt to play an Unfinaiized
disc in the Play Deck IE1,a DTSC
ERR 0 R messagewill appearto remindyou to playthe disc in the other deck
Togo directlyto a specifictrack on a disk,enter the tracknumber using the Numeric Keys
Note that when selectinga two digit track numbe_,the seconddigit mustbe enteredwithin three secondsafter the first NumericKeyis pressed,
Toplay all of the trackson a disc in random order,pressthe Select Button I_1 I_) for the desireddeck,and then pressthe Random button _ Theunit will brieflyexamineall of the trackson the disc andthe Random
Indicator [] will illuminate Eachtrackwill be playedin a randomorder until all trackson the disc havebeenplayed Note that there will be a brief pausein between eachtrack asthe unit searchesfor the next trackto play During the search,the left two positionsin the
Information Display [] will show a clockwise circleto confirm the search
Tomomentarilystop the disc at any time,press the Pausebutton _E'_'i_, deck in use
When a disc is paused,the Play/PauseIndicator [] will add two verticallinesto indicatea pauseddisc.
Presseither the Play button _)i]_l_'_ or the
Pausebutton _E'_'i_
to resumeplayback at the point where the discwas paused
Whenthere is only one disc in the unit, it will automaticallystop when all trackson a disc haveplayedthrough fo stop playbackat any time, pressthe Stop button _"J_,_ for the
Whenthere is a disc in eachdeck,the player will respondin oneof two ways,dependingon which way the dual-playsettingis activated,In normaloperation,when the disc in one drawer finishes,the disc in the other drawerwill begin to play.Whenthe Dual button _"_ is pressedsothat the Dual-Play Indicator [] is lit, eachdeck will operateasa separate,singleplay CDunit without regardto the statusof the other deck Forcompleteinformationon Dual-
Deckand Dual-Playoperation,seepage 17
At the end of a listeningsession,removethe discsfrom the decksbyfollowing the instructions shownon the previouspage Do not leave the disc drawersopen when the unit is not in useto preventdust and dirt from entering the unit and to preventdamageto the discdrawert_ay
Toplace the unit in the
Standby modeat the end of a listeningsession,pressthe Power-
Off button _, Theword OFF will appear briefly in the Information Display I_, any open disc trayswill automaticallyclose,andthe
Status-Mode Indicator [] will turn amber
Search
You mayquickly scanthrough the contentsof a disc while listeningto the playbackat high speedin forward or reverse,To moveforwmd through a disc,pressthe Forward Search button _ on the remote or pressand hold the
Next button []_r_ on the front panelthat is appropriatefor the deckin use Tomove backwardsthrough a disc,pressthe Reverse
Search button O on the remote,or press and hold the Previous button _'rl_'] on the front panelthat isappropriatefor the deck in use When usingthe remote,alwaysremember to makecertain that you haveselectedthe deck you wish to control by pressingthe appropriate selectorbutton O_) beforeenteringthe desiredremotecommand,
TrackSkip
Tomovefrom onetrack on a disc directlyto another,enter the numberfor the desiredtrack with the Numeric Keys _, Thedisc will pausebrieflyto locatethe track,and then immediatelyplay it, Whenentering a two digit track numbe_,the seconddigit mustbe entered within three secondsof the first digit,
Tomoveto the next trackon a disc by cycling through the individua]tracks,pressthe Next button _ on the remote,or the appropriate front-panel Next button _Z'il_l_for the deck in use Additional pressesof the button will move forward through the trackson the disc
When a disc is playing,pressthe Previous button _]P_'rl_'] to returnto the beginningof the track beingplayed Additional pressesof the Previousbutton will movebackwards through the trackson the disc
When a disc is stopped,you may pressthe Next or Previousbuttons to locatea specifictrack that you wish to play Whenthe desiredtrack number appearsat the left sideof the appropriate Information Display []r pressthe Play button _})i]_1_'1 to hearthat track
16 PLAYBACKBASICS
I
Playback Basics
Dual-Play Mode
Sincethe CDR20 has more than one CDdeCkr you may play a disc in either drawe_When only one deckis playingrthe unit is in the Single mode, In the Singlemode,the audio output will be fed to all digital and analogjacks for both decks,Thismeansyou may selectthe input on your receiver,preampor processorfor either deck, Forexample,if you havethe PlayDeck connectedto "CD" and the RecordDeckconnectedto "Tape,"when only one deck is playing, either input may be selected
Dual-Deck Operation
Sincethe CDR20 has two separateCDdecks,it may be usedas a two-discchanger,sothat you can continuallyplaytwo discs,
When the CDR20 is in the Single-Playmode, as shown bythe Dual-Play Indicator []
NOTbeing lit, when the disc in one deckhas playedthrough to the end,the disc in the other deck will automaticallybeginto play,Eachdisc will playthrough, andwhen onedeck is finishedthe other will start.Tostop playback, pressthe Stop button _'_'_ for the deck it is also possibleto playtwo discs at once, using the Dualmode Toinitiate dual-mode playback,pressthe Dual button on the front panelor remote_']_ Whenthe Dual-Play
Indicator [] is lit, you mayplay a different disc in both decksat the sametime,The output of eachdeckwill be sent to the appropriate outputjacksr and you will needto seJectthe deck you wish to listen to using the input selectors on your receive_,preampor processonYou may also usethe output of onedeck to feed your main-roomsystem,while the seconddeck is usedto feed a remote room
As long as the Dual-Play Indicator []
islit,
eachdeck functionsasa separateCDplayer, and will respond to its own set of controlson the front panelfor eitherthe Play Deck
_r_l_"ll_{'_n_,_ or RecordDeck using the remote,rememberto first pressthe
Selectorbutton for either the Play/CDPDeck
O or the Record/CDR Deck ql_, and then pressthe desiredcommandfunction,
NOTE:When in the Dualmode,you may return to Single playmode by pressingthe Single button on the remote O or the Dual button
[] on the front panel,However,pressingthe
Single button while both decksare playing, will automaticallystop playbackof the disc in the Record Deck [] while the discin the
Play Deck []
continuesto play Theoutput of the play deckwill be sent to both setsof output jacks
]o havethe CDR20 function astwo separate
CD players,wherethe deck in usestopsat the end of a disc,pressthe Dual button ,_j[] until the Dual-Play Indicator [] lights Inthe
Dualmode,eachdeckacts independentlyof the other andwhen the disc in onedeck finishes,it stops unlessone of the Repeatfunctionshas been activated,
Time Display
TheCDR20'stime displayis capableof showing a wide rangeof informationabout the contents of a CD
Oncethe disc's]able of Contentsor TOCdata has beenread, the Information Display [] for any deck that hasa CDinsidewill showtile number of trackson the disc in the two left digits of the display,and the total running time of the disc, Whenthe disc is playingrthe tracks will count up as eachnewtrack is reached,and time displaywill show the elapsedtime for the track beingplayed played,pressthe Display button O
[]_r_ for the deck in use sothat the
REMAINING TIME
Indicatorsi'_ll]l
illuminateTheInformation Display []
will
COU_ dO_ t_ _l_e re_J_l_g _ t_ _ra_k
r
and at the start of the next trackthe counter will start to count down the running time of that track
]o view the total time remainingon the disc, pressthe Display Button _ _i)FJ_F_r_for the deck in use sothat the Total Time
Indicators [][] illuminate TheInformation
Display [] will show the total time remaining for aft trackson the disc andcount down until the disc has finishedplaying,Whenthe disc has playedall the way through,the total numberof tracksandthe total runningtime of the disc will be displayed
Headphone Listening
You may listento the output of the CDR20 through headphonesat anytime by simply plugging the headphonesinto the Front-Panel may be adjustedwith the Headphones Level
Control [], Note that changesto the head-
phone levelwifl not alter the output settingsto the analog outputs Thoselevelsarefixed, and the volumeshouldbe adjustedusingyour receiver,preampor processor
Notethat when only one deck is playingbacka disc in the Single-Playmode,the output of that deck will be fed to the headphone]ackWhen the unit is in the Dual-Playbackmode,onlythe output of the Play Deck [] will be fed to the headphonejack
I
17 PLAYBACKBASICS
Program Play
TheCDR20's advancedprogrammingsystem enablesyou to programthe order in which tracksare played,to repeatone trackor all tracks,or to repeat anysegmentof a disc without regardto track numbers
Programming Play Lists
Toprogramthe order of playbackfor the tracks on a disc,insertthe disc,let the unit read the
1ableoFContentsinFormation,and wait until the disc has stoppedand the numberof tracks and total running time is displayed Next,select the deckthat will be programmedby pressing the CDP Select button _t on the remotefor the Play Deck [] or the CDR Select button on the remoteForthe Record Deck []
Tobeginthe programmingsequence,press the Program button _ and note that the
PR 0 IS Indicator [] will illuminateand the Information Display [] will show
DO DO
: DO,
Next,enter the track numbersto be playedby pressingthe Numeric Keys @ Fortwo-digit track numbers,be certainto enter the second digit within three secondsaFterthe first number isentered As eachtrack is entered,the display will blink three times,alternatingbetweentwo displaysThefirst displaywifl show the track numberjust enteredon the left side oFthe
Information Display [] underthe Track
Indicator ril, while the right sidewifl flash the numberoFstepsthat havebeenprogrammed,For examplerafter programmingthe fi=ststep to be track number3, the displaywill flash
03 P-01
Alternating with the tracknumberand program step will be a displayof the track andthe total running time oFall tracksthat havebeen programmedso FanFor example,a displayof
B6 11 ; 2 S will indicatethat track number six was the last trackprogrammed,and that the total time oFall trackssoFaris 11 minutesand
25 seconds,TheTotal Time Indicators I_lm will flashwith this displayto remindyou of the display'scontents,
Thesedisplayswill alternatethree times,and then show a steadydisplayoFthe total time and last trackprogrammed
Continueto add tracksin the orderyou wish to havethem playeduntil the programmingsession is completeYou may add up to 20 tracks, repeatinga track if desired,aslong asthe total number doesnot exceed20 IFyou exceedthe
20 track limit, the displaywill read FULL
1racksmayalso be added using the Next
_".m_l_
andPrevious buttons t_l_'l_b"_ to locatethe track,and the Program button t_1 to enter that trackto the programmed sequence,
Whenthe completelist oFtrackshas been entered,pressthe Play button I_)[]1_[I
Thetrackswill then play in the order they have been entered.Note that a programmedlist of tracksmay alsobe recordedif the disc being programmedis in the Play Deck [], Follow the instructionson page20 Forcomplete informationon recordingand dubbing,
Checking, Editing and Clearing
Programmed Play Lists
Onceyou haveentereda programlist it wifl remainin the unit'smemoryuntil the disc is removedor the unit is turned of[ Thus,if you play through a programlist, simplypressthe
Play button I_)[]k"l[I
againto replaythe list
IFyou find that you wish to checkthe list or makechanges,that is alsopossibleby following a few simplesteps
Toscrollthrough a programlist, pressthe
Program Check button t_1. EachpressoFthe button will movethrough the tracksthat have been programmed,Thedisplaywill alternate betweenthe track numberoFthe programstep number (eg,, 1,;s P
- 03 tells you that track
12 on the disc is the 3rd programstep) andthe track numberandthe total runningtime so far in the program (eg,, 1,;s 1,6 : 0 4 tells you that at this point you haveprogrammeda total of 16 minutesand 4 secondsof matedal)
At any point in the list you may insert a new track bysimplyenteringthe track number using the Numeric Keys @ Simplypressthe buttons that correspondto the numberoFthe track you wish to add,Any tracksthat are in the program will remain
Toremovea step in the program,first usethe
Program Check button t_1 to locatethe trackyou wish to delete Next,pressthe Clear button I_), TheinFormationin the displaywill blink andthe step will be removedfrom the programlist, Programstepsneednot be deleted in any order;as long asyou havelocateda step in the programlist, it may be erased,
Tocancelan entire programlist while the program is playing,pressthe Program button and note that the Program Indicator [] will go out,To removea total programlist when the disc is stopped,simplyopen and closethe disc drawerWhenevera disc is removedor the unit is turned of[ the program list is erased
Repeat Programmed Play
TheCDR20's programmingsystemenablesyou to repeat either a singletrack on a disc,the entire disc,or a speciallyprogrammedpassage that you select,
Repeat One Track
Torepeatthe track you are currentlylistening to, pressthe Repeat button !_) and note that the Repeat Indicator [] andthe Repeat-
Status Indicator [] will both light 1. If the track is changedby using the Next/Previous
Skip button _[]_'rl_l_b'l while the
Repeat 1 modeis active,the new track will now be repeated,
OnceRepeat1 playbackhas beenstarted, it will continue until the unit is stoppedbypressingthe Stop button l_i'_"_k"_, or the disc deck is openedby pressingthe appropriate
Open/Close button _']i'_lJ_ I_), When playbackisstopped,the Repeatsequenceis erasedand mustbe reenteredif you wish to repeata trackon another disc,
Repeat All Tracks
Torepeataft the trackson a disc in o_de_,press the Repeat button !_) twice while the disc is playingand note that the Repeat Indicator
[] and the ALL Repeat-Status Indicator
[] will light Oncethe Play button I_)[]1_'1 is pressed,the discwill playthrough from beginningto end continuously,until the Stop button _}bi'_k"_ is pressed.TheRepeatAll
function may be cancelledat any time by pressingthe Repeat button !_) onceuntil both the
Repeat Indicator [] and ALL Repeat-
Status Indicators [] go out.TheRepeatAll
Functionis also canceledwhen the discdrawer isopened
18 PROGRAM PLAY I
Program Play
Repeat A-B
TheCDR20 may be programmedto repeatany sectionwithin a track, or a completepassage that includesmaterialfrom a seriesof consecutive tracks,
1o programthe unit for A-B Repeatplay,first play the disc and locatethe pointwhere you wish to beginthe repeatedsection At the start point, pressthe A-B Repeat button I_ and note that the Repeat Indicator [] and the
Repeat-Status Indicator []
will show an A and flash Let the disc playuntil the point at which the sectionto be repeatedwill end,At that end point, pressthe A-B Repeat button
I_ again and notethat the Repeat-Status
Indicator [] will stop flashingandwill light showing Repeat A-B, sectionyou haveprogrammed,and continually repeat it
Note: Theprogrammaterialselectedfor
A/B Repeat mustbe at least 4 secondslong for this featureto function
]o resumenormal play,pressthe A-B Repeat button I_. The Repeat A-B Indicators
[]rml will go out, andthe disc will continue playingthrough to the end, Stoppingthe disc or openingthe disc drawerwill automatically cancelthe RepeatA-Bprogramming,
I 19 PROGRAMPLAY
CD Recording
Makingrecordingson the CDR20 is simple and easyonceyou becomeaccustomedto the basicsof CDRecording.Beforemakingyour
first recording,pleasetake a momentto review the CDRBasicson page 14, in particula, you will needto becomefamiliar with the types of discsthat mayor may not be usedin the
CDR20 in addition, someterms usedin the following pagesmay be new to you.Thefollowing definitionsand informationwill help you to makeCDrecordingsusingthe CDR20's many features:
• Tile CDR20 acceptsanalog inputs anddigital coax or optical inputs Beforemakinga recording,be certainthat you haveselected the correctinput,
• After a disc is recorded,it mustbe finalized
Thisprocessaddsa table of contentsdata to the disc and makesit playableon other machines.UnBIa disc is properlyfinalized,it may not be playedon standardCD players,
• TheCDR20 may recordon either CD-Ror
CD-RWdiscs,but they mustbe of the type specificallydesignedfor usein consumeraudio CDrecorders,Thesediscs may be recognizedby looking for the words "Digital
Audio" in the compactdisc logo on the blank disc or itspackaging Discswith the logo readingonly "Compact DisdRecordable"are designedfor computerdata recording,and they will NOTwork in the CDR20
• CD-Rdiscsmay not be erasedor have materialadded to them oncethey havebeen finalized.
• At least four (4)secondsof blank recording time mustremainon an unfinalizeddisc for recordingto take place,
• Themaximumnumberof tracksthat may be recordedon a disc is 99 discs maybe usedfor single-speedrecordings only If you use a disc with sucha warning, makecertain not to makea dub at x2 or x4 speed However,the CDR20 has beentested for compatibilitywith a wide rangeof blank discsBorn manufacturersthroughout the world In mostcases,blank discswill produce high-qualityrecordingsat anydub speed,
• In somerare cases,a CD playermay not be compatiblewith CD-Rdiscs If you find that a
CD-Rdisc playsin someplayersbut not in others,the fault is most likelywith the player, not with the recordeddisc or the CDR20,
Rememberthat CD-RWdiscs madein the
CDR20 will play onlyin CDplayersthat are speciallydesignedto accommodateCD-RW discs,Note that mostDVDplayersare compatible with finalizedCD-RWdiscs
• SomecommerdalCDdiscsmay containa copy protectiondata bit that will preventa digital copyof the disc to be dubbed, in that case,the Copy Prohibit Indicator [] will light to remindyou that the inability to record is intentional,and not the resultof a problem with the CDR20,
• Thisproduct is equippedwith the SerialCopy
ManagementSystem(SCMS)to protectthe rights of copyrightownersAlthough it is possibleto makea copy of mostCDsfor your own personaluse,it isnot possibleto makea digital copy from another digital copy but it is possibleto makean analog copyof a digital copy
RECORDINGSMAY BE MADE FOR
PERSONALUSEONLY,AND ANY
UNAUTHORIZEDCOPYINGIS SUBJECT
TO THEAPPLICABLELAW.
• TheCDR20 will not copyDVDdiscs,computerdata discs,CD-basedcomputeror video-game discs,or digital audio discswith a samplerate that is not compatiblewith the rangeof the
CDR20's sample-rateconverter
Recordingson the CDR20 may be made in a number of ways:
• Discsmay be dubbedusing the playback deck on the CDR20 as a sourceThesecopies may be madein realtime,at twice normal speed,or at four times normal playback speed
• Recordingsmay be madefrom an external
CD playeror other digital sourcethat is synchronizedwith the dub beingmade in the
CDR20
• Recordingsmay be madefrom any compatible externaldigital source
• Recordingsmay be made from an external analog source
• CD-RWdiscsmay not be erasedand reused more than 99 times.This isa limitation of the
CD-RWformat, not a fault of the CDR20
Disc Dubbing
Tile easiestway to makea copy of an entire disc is to usethe CDR20's internal dub capability,
First,inserta blank or unformatteddisc in the
Record Drawer _'_, When the disc is inserted, the CDR20 will examineit to determineif it isa CD-Ror CD-RWdisc,andoptimize itself for the best possiblerecording,Thisis indicated by OPC messagein the Information
Display iTS,
Placethe discto be dubbedin tile Play
Drawer []
and wait until the Tableof
Contentsdata is read and the Information
Display []
showsthe trackand runningtime data for the disc
Next,selecta dub speedThe default speedis a real-time dub,wherethe recordingtakesas
However,with the CDR20 you mayalso select x2 dubbingor x4 dubbing Pressthe Speed button _i"]_ to selecta speedasindicated by the x2/x4 Indicators [] Whenno Speed
Indicatorlights,the unit is set to real-time recording Notethat the slowerthe record-dub speed,the moretolerant the unit is of errors on the blank disc HoweveLwith most high-quality blank discs,the 2x and 4x speedsshouldnot presenta problem
Beforebeginninga dub, makecertain that there issufficient blank spaceon the recorddisc [o do this, first determinethe time availableon the blank disc by subtractingthe time of previouslyrecordedmaterial,if any,that is shown in the recordsideInformation Display [], from the total time availableon the disc That number shouldbe greaterthan the total time of the disc to be dubbed,which is shown in the play side Information Display [],
Whenyou areready to start the dub,pressthe
Dubbing Button _i"_
Duringthis process the Dubbing Indicator [] will light, the
Record Indicator []
will flash and a BUSY messagewill flash in the RecordDeck's
Information Display[], When both
InformationDisplayIndicatorsreturnto normal, with indicationsof 01 BB
".
DO
r
pressthe
Play/Select Button _]_'1 to startthe dub
While the dub is in progress,you will seethe track numbersand runningtime increaseas the disc is copiedThe LevelIndicatorswill also flash but this is onlyfor your reference,as recordlevelsmay not be adjustedduring digital recordingsIt is possibleto listen to the source disc while it is being dubbedbyselectingthe appropriateinput on your receiver,preampor processor
Important Note: When a high-speed(x2 or
x4) dub is being made,you will hearthe playback from the CDPoutputs O0_ at the faster speed,Fastspeedplaybackincreasesthe pitch of a sound,and when playedback at high volume levelsthis may damageyour speakers
DONOr usehigh volumelevelswhen listening to high-speeddubswhile they are in progress
Thedub will stop automaticallywhen the sourcedisc hasplayedthrough to the end,After the dub is finished,the information Displaywill show an UP I) AT E message,andthen return to normaloperation,To manuallystop a dubbing operation,pressthe Stop button
_'_k"_ for either deck,
20 CD RECORDING I
CD Recording
disc must be finalizedbeforeit can be playedin other machinesSeepage 22 for instructionson disc finalization,
Notes on Dubbing:
• If you wish to makea dub with the t_acksin a different orderfrom the original disc,omit t_ackson a disc,or makea dub that mixes t_acksfrom different discs,createa Program-
PlaybackListbeforepressingthe Play/Select button I_)i_ to start the dub Instructions for creatinga ProgramListmay be found on page18 NOTE:Dubscontaining Program
Listsmay be made at eitherthe xl or x2 speed,If you attempt to makea Programmed
Dubat the x4 speed,the unit will automaticallyselectthe x2 speed
• ThePausebuttons do not operatewhile a dub is in progress,
• ]rackswill be added automaticallyto mirror the track structureof the original disc
• TheTotalTimeindicationof the recordedCD mayvary slightlyfrom the original due to variationsin the spin speedof eachdrive,but this is normal,No informationhas beenlost in the recordingprocess
• If the original disc being dubbedis a digital copyor if it containscopy-prohibitsignals,the unit will automaticallymakean analogcopy
CD Sync Recording
CDSyncrecordingallows you to makean automatic digital recordingfrom an externalCD playeror MD DuringCDSyncRecording,the
0record unit startsin syncwith the source,and tracksare addedautomatically,
1o makea CD Syncrecording:First,makecertain your playbacksourceis selectedand cued to the correctstaring point Next, selectthe appropriatedigital input by pressingthe Input button I_'_ until the desiredCOAX or
0 P T T C AL indication appearsin the Record
Deck Information DisplayI_, CD Sync
recordingsmay not be madefiom an analog
input
Next,makecertainthat there is a fresh disc in the RecordDrawerfor the recording,Pressthe
CD Sync button _l_J and note that the
Sync Indicator [] will light andthe Record
Indicator []
will flash Selecttile type of recordingto be made:
• ]o recordonly the first track from the source playe_,pressthe CDSyncButton onceso that i TRK appearsin the RecordDeck
Information Display I_,
• ]o recordthe entire disc or tape,pressthe CD
SyncButton twice so that A L L appearsin the RecordDeck Information Display [_'_.
When the desiredmodehas been selected, start the playbackfrom the sourcemachine The
CDR20 will automaticallyrecognizethe incoming digital data andbegin recording,if the souice materialis a CD,the track numbering from the original discwill be carriedoverto the dub if the playbacksourceis NOFa CD, you will haveto incrementthe tracksmanually
Therecoidingwill continue until the CDR20 sensesthat the playbackis finishedwhen there in no incomingsignalfor morethan three seconds At that point the recordingwill stop You may also stop the recordingat any time by pressingthe RecordDeck Stop button
_i_, Whenthere are onlyfour seconds remainingon a blank disc,])IS{ FULL messagewill appearin the Information
Display _ Whenyou seethis message,you will needto stop the recordingprocessand, when a CD-Ris beingrecorded,insert a new blank discor,when a CD-RWis in use,either use a new disc or eraseexistingtracksfollowing the instructionson page 22
After the recordingis complete,an U P]) AT E messagewill appearbriefly,and the unit will then return to normaloperation Rememberto finalize the recordeddiscso that it may be used in other machines
Recording from an External Source
]o recordfrom an externalsource,fiist placea
CD-Ror CD-RWaudio disc in the Record
Deck []
Next, selectthe inputto be usedby pressingthe Input button _'_ Pressingthe button will cyclebetween the input choices, which will be shown in the Information
Display[]
as COAX, 0PTTCAL or
AN AL 0 G, In addition, the Digital Indicator
[] will light when the coax input is selected, and the Analog Indicator [] will light when the analog inputsare selected
Notethat when the digital input is selected, the connectionmaybe madeto either the rear panel Coax Input _ or the Front-Panel
Digital Input I_, If a signalis presentat both coax inputswhen a recordingis made,the front-panel input will be usedas the source,
Pressthe Auto/Manual button I_ to select how t_ackswill be numberedon the recorded disc
• Thedefault modeis Manual In that modefor eitherdigital or analog recordings,you must addtrack numbersmanuallyby pressingthe
Track Increment button _ when you wish to increasethe tracknumber Thismode is recommendedfor recordingsmade from analogsources.
• TheAuto mode will add track numbersautomatically,in one of two ways.When track data is presentfrom a digital recording,it will be carriedoverto the new copydisc Thus, when the CDbeing playedmovesfrom one track to the next track,the copy discwill also increasethe track numberby one Activate the Auto modeby pressingthe Auto/Manual button I_ onceand note that the Auto
Indicator [] will light,
• In the Auto modefor recordingsfrom an analog sourceor a digital sourcewith no track data,the track numberwill be increased when the CDR20 receivessilencefor 3 seconds.After 5 secondsof silence,the recording will stop,To activatethe Auto mode,pressthe
Auto/Manual button I_ onceand note that the Auto Indicator [] will light
]o preparefor a recording,pressthe Record button I_!'_1, The RecordIndicator [] will flash,and the word B US Y will brieflyappear in the Information Display [], When the
Displayreturnsto the track andrunning4ime information,the unit is readyto record,
Oncethe sourcematerialis playing,start the actualrecordingby pressingthe Play/Select button I_)[], Note that the Record
Indicator [] will stop flashingandthe
Information Display [] will begin to show the runningtime of the recordingand the track data Dependingon which mode of track increment hasbeen selectedas describedabove, track numbersmust be increasedmanuallyor they will be added automatically,Regardlessof which mode has beenselected,a t_ackmay be addedat any time by pressingthe Track
Increment button 41_
Note: if there is a pausein the playbacksignal for more than 5 secondsfor digital recoidings or 10 secondsfor analog recordingSrthe
CDR20 will stop the recording.Also,when the
Pausebutton is pressedduring a recording,the track numberwill increaseby one numberand the recordingwin stop and must be restarted bypressingthe Play/Select button I_)[]
Whenthe recordingis finished,pressthe Stop button i_l_l,
Unlikeconventionalanalog tape recorders,the
CDR20 doesnot requirelevelsetting when recordingsaremade from a digital source
I
21 CD RECORDING
CD Recording
Although the Level Indicator [] will operate, this is only informativeandthe levelmay not are makinga recordingfrom an externalanalog sourcesuchas a cassetterecolder or the analog output of a receiveror preampryou should adjustthe inputlevelsusingthe Record-level
Control i'_, AdJustthe levelsso that the b4ue/whitesegmentsof the displayare almost all lit, andthe red segmentsflash only occasionally If the red segmentsare constantlylit, the recordingwill be distortedand produce unacceptablequality
Tostop the recording,pressthe Stop button
_i"_ Therecordingwill automaticallystop if it takesmore spacethan isavailableon the
CD-R/RWdisc.A ])TSC FULL message will appearto remindyou that a new disc is needed,
At the end of a recording,a B US Y message and an U P]) AT E messagewill appearbriefly, and the unit will return to normaloperation,
Rememberto finalize the disc after recordingso that it may be usedin other players.
Finalizing CD-R and CD-RW Discs
Finalizingisa simple processthat completes the recordingof a disc so that it maybe usedin other players,Whena recordingisfinished,a disc must be finalized Oncethat is donera
CD-Rdisc may not be changedor added to
CD-RWdiscsare "locked" oncethey arefinaliZedrbut they may be unfinalizedto permit additional recordingor erasure,
Tofinalize a disc,place it in the Record
Drawer []
Oncethe disc's]able of Contents informationhas been readand the OPCprocess has beencompleted,pressthe Finalize button
_i"_ and notethat the Finalize Indicator
[] will begin to flash Within three seconds, pressthe Select button _[] and note that the Finalize Indicator [] will stop flashing,
Thefinalization processwill take up to two minutes,dependingon the lengthof material recordedon the disc,Duringthe finalization processthe RecordDeckwill not acceptany operatingcommands
Whenthe finalization processis completethe
Finalize Indicator []
will go out, and the
R/RW Indicator [] will also go out as an indicationthat the disc is now playableon other players,Tile CD Indicator [] will remainlit
Unfinalizing and Erasing CD-RW Discs
CD-RWdiscsare unique in that they are both recordableand rewritable Thismeansthat you may usethem overagain like a cassettetape
However,the processof reusinga CD-RWdisc isslightly differentfrom that usedwith tapes
Unfinalizing a CD-RWDisc
Tokeepthe materialthat is alreadyrecordedon a CD-RWdisc but to add an additional track and erasesingle tracks,you mustfirst unfinalize the disc ]o do that, placethe CD-RWdisc in the Record Deck [] andwait until the Table of Contentsdata has beenread
Pressthe Erase button 41_i"i1 twice and checkto makesurethat the Erase Indicator
[] flashesand the word T O C appearsin the
Record Deck Information Display I_,
button _)[] to start tbe process,The Erase
Indicator [] will remainlit andstop flashing, and the Information Display [] will switch to OPC and then backto TOC
Whenthe processis finished,the Erase
Indicator [] will go out, and the displaywill return to normal,Thedisc is now ready to have sing4etracksremovedor additional tracks added
Erasing an Entire CD-RW Disc
Erasingthe entire contentsof a disc issimple, and it doesnot matter if the disc has been finalizedor not,To erasethe disc,pressthe
Erase button 41_i'fl twice if the disc has
NOTbeen finalizedandonceif it hasbeen finalized,sothat the word DISC appearsin the Information Display [] and the Erase
Indicator [] flashesTostart the erasure, pressthe Select button _[] and note that the Erase Indicator [] will stop flashing,The erasureprocesstakes about a minute, and it is completewhen the informationDisplayresets to OO BB:E]B and the Erase Indicator [] goesout Thedisc is now totally erasedand may be reused
Erasing a Single Track
Theindividualtrackson a CD-RWdisc may be erasedoneat a time, starting with the last track on the disc,or you may erasemorethan one track,Note that beforeindividualtracks may be erasedthe disc mustbe unfinalized,If the disc is finalized,follow the instructions abovefor unfinalizingbeforeproceedingwith thesesteps
Toeraseonly the lasttrack, pressthe Erase button _i'fl, Note that the Information
Display [] will display O'l, TRK and the
Erase Indicator [] will flash Pressthe
Play/Select button _)[] within three secondsand note that the EraseIndicatorwill stop flashing When the Erase Indicator [] goes out the Information Display [] will show the total numberof tracksthat now remainon the disc
You mayerasemore than onetrack,counting backwardsfrom the last track,First,pressthe
Erase button 41_i'fl Notethat the informationDisplaywill disp4ay[3"1,T R K and the Erase Indicator [] will flash, Pressthe
Next button _il or Previous button ql_'rl until the numberof tracksto be erased appearsin the Information Display [], For example,when O6 TRK appearsin the display a total of six trackswill be erased,counting backfrom the last trackon the disc Next, pressthe Play/Select button _)[] within three secondsof makingthe trackselectionand note that the Erase Indicator [] will stop flashing When the Erase Indicator [] goes out the Information Display [] will show the total numberof tracksthat now remainon the disc
Important Note: TIacksat the beginningor in the middleof the disc may not be eraseduntil all of the tracksafter them havebeenerased,
Important Note on Erasureand
Finalization Times: Regardlessof the speed
at which a disc was recorded,the CDR20 will eraseandfinalize discsat the x4 speedto minimize the length of the process,However,in somecases,it may be necessaryfor the unit to repeatthe erasureor finalizationdueto the nature of an individualdisc Forthat reason,it is normalfor the time requiredto complete thesestepsto vary from onedisc to another
22 CD RECORDING
I
Troubleshooting Guide and Error Messages
TROUBLESHOOTING GUIDE
SYMPTOM POSSIBLECAUSE
Unit doesnot operatewhen Standbyswitch or remote Power-Onis pressed
• No AC power
• Main PowerSwitchis off
Remotedoesnot function
• Wrong deckselected
• Deadbatteries
• Sensorblocked
Discdoesnot erase
RecordedCDR discdoesnot play in anotherCDplayerorDISC messageappearsin PlayDeck
ERROR
Recordingsuddenlystops
• CDR disc in use
• CDR disc not finalized
•
Input sourcestoppedor paused
SOLUTION
• MakecertainAC power co_dis pluggedinto a live outlet
• Checkto seeiFACoutlet is switch controlled
• lurn on Main Power
• Pressthe CDPbutton to control the PlayDeck; pressthe CDRbutton to control the RecordDeck
• Replaceboth batteries
• Removeobstructionsfrom front panelor connecta remote sensorto the RemotednJack
• CDR discsdo not erase only CDRW discsmay be erased
• Finalizethe CDR disc in the CDR20s RecordDeck
(seepage22)
• Recordingswill stop when the input sourceis paused for more than 3 secondsfor digital recordings and 10 secondsForanalog recordings
ERRORMESSAGES
CHECK DISC
DATA
DISC
DISC
ERROR
FAILED
DISC
ERROR
FULL
EXPLANATIONAND PROBABLECAUSE
• A recordrelated button has been pressedwhen a
Finalizeddisc is in the RecordDeck[]
• A record relatedbutton has been pressedwhen a standard CDis in the RecordDeck[]
• A non audio CDROM or a CDVideodisc has been placedin the machine
SOLUTION
• Unfinalizetile disc to addtracksto a CDRW disc
• Replacethe disc with a blank CDR or CDRW disc
• Replacethe disc with a blank CDR or CDRW disc
• OnlyCDAudio and DTSdiscswill play in the CDR20; replacethe disc
• An Unfinalizeddisc has beenplacedin the PlayDeck[]
• A DVDdisc hasbeen placedin the unit
• Finalizethe disc (seepage22)
• Replacethe disc the CDR20 doesnot play or dub DVDdiscs
• Thereare onlyfour secondsof recordtime remaining on the disc being recorded
• Useanother blank CDR or CDRW disc
• Eraseone or more trackson a CDRW disc
•
Thedisc isnot seatedproperly
• Thereis a problemwith the disc
• A dub has not beencompletedproperly
• Morethan 99 trackshavebeen recorded
• Openthe drawerand checkto seethat the disc is properlyseated
• lry another disc
• Checkthe play disc
• Repeatthe dubprocess
• TheCDR20 doesnot recordmore than 99 trackson a disc
FULL
NO AUDIO
• A recordrelated button has been pressedwhen a non audio disc is in the RecordDrawer[]
• Replacethe disc with a blank CDR or CDRW Audiodisc
SVC-1
• Thereis an internal problemwith the CDR20 • Contactan authorizedHarmanKardonservicedepot
I
23
TROUBLESHOOTING GUIDE
Technical Specifications
SignalFormat
PlaybackSamplingFrequency
D/AConvemion
Oversampling
Playback Specifications
RequencyResponse
PlaybackS/N
PlaybackDynamicRange
PlaybackTHD
AnalogAudio Output
Digital-CoaxialOutput
HeadphoneOutput
Record Specifications
Digital input SampleRates
RecordingS/N:Analog
RecordingS/N:Digital DubMode
RecordingS/N:Digital ExternalSource
RecordingDynamicRange
RecordingTHD
Analog input Sensitivity
Digital inputs (DirectRecording)
General
PowerRequirement
PowerConsumption
Dimensions
Width
Height
Weight
Depth
44 lkHz
96kHz,Multi-Bit Delta-SigmaConversion
128 Times
2Hz - 20,050Hz
105dB
105dB
0 005%/ 88dB
2V RMSr+ 2dB
O 5Vpp/75_
1V RMS/32_ Load
32kHz 96kHz
91dB
Equalto Source
Source lOdB
91dB
O005%/ 85dB
330mV RMS47k£2 OdB
44 lkHz, +100 ppm/min
100- 240VAC/50- 60EIz
28 Watts
17 3"/440mm
44"/112mm
14 2"/363mm
Depthmeasurementincludesknobs,buttons and connectionjacks,
Height measurementincludesfeet andchassis
All featuresandspecificationsaresubjectto changewithout notice
HarmanKardonis a registeredtrademark,and
Powerfor the digital revolutionis a trademark,of HarmanKardon,Inc,
harman/kardon
H A Harmsn IntermJ_ru_l
250 Crossways Pa/k Drive Woodbury New Yolk 11797 www harrnar_kardoncorn
@ 2000 Hamqar]KaTdon htco(1)ora/ed
Part #3828R DO09A
advertisement
* Your assessment is very important for improving the workof artificial intelligence, which forms the content of this project
Related manuals
advertisement