advertisement

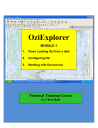
OziExplorer
MODULE 1
1. Down Loading Ozi from a disk
2. Configuring Ozi
3. Working with Ozi tool bar
Practical Training Course
by Chris Rule
1
INTRODUCTION
The purpose of this manual is to serve as a teaching guide for students who want to learn
Oziexplorer.
This is not a complete guide to OZI. The student is expected to take the fundamentals acquired and to go on, on their own to learn the program more in depth.
OZI is being continually upgraded so any manual produced is quickly out dated.
There seems to be no end to what OZI can do, moving map on Palm Pilots, OZI 3D, OZI used for Automatic Radio Position Systems, OZI linked with digital cameras, and the list grows day by day.
2
OZI
Down Loading Ozi from a disk.
Initial loading step
Down load as per instructions on CD case.. You should end up with a file on the C drive called Oziexplorer and an Icon on the desk top.
At some point you will be asked to “enter registration code”. If you are not prompted to then go to OZI menu bar and click on “HELP”.
Go to the last entry and click on
“enter registration code”.
3
Enter Registration Key – enter User Name and Key code from the package the OZI CD came in.
Click “Save”
Note: Some other boxes may come up prompting you to enter the User Name and Key
Code. There is one box you can check off saying “don’t show this again”
CONGRATULATIONS, you have now installed and have a working OZI program.
4
Configuring Ozi
The next thing to do is to “configure” OZI , or establish where maps are stored, what units of measure will be used and other settings. But before we do that let us set up the files OZI will need.
Find Oziexplorer in the C: drive and go in and create some files and name them Waypoints,
Routes, Tracks, Maps, Data, Photos, Events
Go to the OZI menu bar and click on “File” and near the bottom of the drop down box click on “Configuration”
5
The following setting are just to get you started. You will change them later as required
Notice all the tabs in the box. We will go through each one and set our “Configuration” to all the same settings for now.
SYSTEM TAB
At Startup
check off - Show Map View and Show Zoom Window
Window Position Maximized
Data File Datum WGS 84
File Paths Map File Path
Data File Path c:\oziexplorer\maps c:\oziexplorer\data
Click “SAVE”
6
MAPS TAB
Distance Units
Speed Units
Altitude Units
Distance Calc kilometers
KPH feet
Ellipsoid
Country or Region North & West
Lat/Long Display Deg. Min
Blank Map Datum WGS84
Map Load Options check off - Keep map objects, Keep Zoom level
Create Map Thumbnail
leave blank
Alternate grid
check off only - UTM
Click “SAVE”
7
GPS TAB
GPS Make
GPS Model
select - GARMIN select - GPS 12 (symbols)
GPS Upload/Download Datum
select - WGS 84
GPS NMEA Output Datum
select- WGS 84
GPS Symbol Set Garmin 16
GPS Parameters
should be automatically set
Click “SAVE”
8
COMM TAB
Com Port
Parity
Advanced Comm Time out
Upload/Download Baud Rate
NMEA Baud Rate
1
None
65
9600
4800
(may have to change if using 9 pin cable)
Auto Plot Output
Com Port 1
Active
leave blank
Baud Rate 4800 Parity - None
Click “SAVE”
9
WAYPOINTS TAB
Lower 0
Upper 0
Click “SAVE”
10
TRACK TAB
Default Track Color
Default Track Width
Track Control red
2
Initial size
leave blank
Click “SAVE”
11
MOVING MAP TAB
Screen Update Rate 5
Store Track point interval 0.05
Always Check Detail Map Check Intervals
Auto Log Track to File
Track Tail Length
Dock Controls
Current Map Path
Scroll Method
Pointer
Scale
Pointer color
Pointer Solid Color
NMEA Check Sun
leave blank
50 check mark
leave blank
1.5
Red
leave blank leave blank
60 and a check mark
Load Map Centred On Position
Arrow 1
Click “SAVE”
12
NAVIGATION TAB
Show Log Detail
Project Track Line
Leg Distance Color
Line Width
Route Waypoint Proximity 300 meters
Line Color
Alarm Duration
check mark check mark
Yellow
1
Red
20
Show Line From Position check off
Compass
for now do not activate
Click “SAVE”
13
To set up COMPASS ROSE
Show Compass Rose
Compass Size
Cross Length
Direction
Circle Color
Line Color
Circle Line Width
Line Width
“Close” to save click on Icon check mark
120
50
Magnetic North
1
1
Red
Blue
14
GPS SIMULATOR TAB
Units
Initial Zoom
Kilometers
100
Waypoint Show Format Numbers
Click “SAVE”
Congratulations your OZI has been downloaded and configured”!!
15
WORKING WITH OZI TOOL BAR
* Note: this is not a current example as OZI is often upgraded, however the basics remain the same, usually only new features are added.
File
View
Map
– you are familiar with as we have been using parts of it
- allows us to use various waypoint, route and track control boxes, most are repeated as icons in the next tool box
– allows you to create a blank map, set up grids, or clear waypoint routes
Options
tracks etc from the map
– changes screen color for night and does area calculations
Moving map – for setting up moving map
Navigation
– used with GPS Simulation
Garmin
Help
- or selected GPS- used for uploading/down loading to and from the GPS
– as you know is where you enter the registration code.
16
ICON TOOL BAR
Quit
Load
Save
Waypoint
- is when you want to exit OZI
- is to load maps, waypoints, routes, tracks and things
- is for saving maps, waypoints, routes, tracks and things
- is for creating waypoints. They are self numbering and
EVT
are set wherever you click.
- is for an event which places a symbol on the map which can be edited.
Blue circle with a number - is a map feature. It can have a comment, picture and a
Green box with a C
Track box
+
symbol
- is a comment box which can be placed anywhere and edited
- click on it and you can create a track on the map
- is to mark positions and distance and bearing will appear
°
Red dot and box with 3 dots
Blue line and word show
- is to create a point. Right click on the point and select
Show Compass, a compass rose will appear. Right click again and deselect to remove.
– show/ hide track control. This allows you
Red circle with box and 3 dots
3 dots and the word show hand with pointer and number 1
to work with tracks
– will show or hide the tracks on the map
– show or hide point control
– shows or hides points on the map
3 yellow squares and the word show the number one and a list
– is the route editor. This is where you down/up load routes to and from a GPS
- shows or hides routes on the map
– shows the waypoint list
the number 1 in yellow square with red arrows – will show distance between waypoints
the word line in blue box with red arrows
Magnifying glass
Map symbol
Zoom
Drag
Info
4 arrows
– shows a line between position and cursor
– shows distance and bearing between clicks
– turns on and off the mag window
– turns on and off the insert map
– self explanatory
– click on it to get the hand and drag the map
– shows some setting from the configuration
– click on the arrow shows a list of maps next to the one you have on screen, the center dot will list other maps you may have for same location, the red X locks OZI to look for maps using the current path
Map, waypoint, event track route boxes, if they are red it means you have not saved the information, if they are grey the data has been saved.
NOTE: as you move the cursor the Lat & Long and UTM is displayed.
17
advertisement
* Your assessment is very important for improving the workof artificial intelligence, which forms the content of this project
Related manuals
advertisement