TC-Helicon Sound and Vocal Effects Online Broadcaster Platform Benutzerhandbuch
Annons
Annons
Quick Start Guide
GO XLR
Revolutionary Online Broadcaster Platform with 4-Channel Mixer,
Motorized Faders, Sound and Vocal Effects
V 1.0
A54-00002-87361
2 GO XLR
Important Safety
Instructions
Terminals marked with this symbol carry electrical current of sufficient magnitude to constitute risk of electric shock. Use only high-quality professional speaker cables with ¼" TS or twist-locking plugs pre-installed.
All other installation or modification should be performed only by qualified personnel.
This symbol, wherever it appears, alerts you to the presence of uninsulated dangerous voltage inside the enclosure
- voltage that may be sufficient to constitute a risk of shock.
This symbol, wherever it appears, alerts you to important operating and maintenance instructions in the accompanying literature. Please read the manual.
Caution
To reduce the risk of electric shock, do not remove the top cover (or the rear section). No user serviceable parts inside.
Refer servicing to qualified personnel.
Caution
To reduce the risk of fire or electric shock, do not expose this appliance to rain and moisture. The apparatus shall not be exposed to dripping or splashing liquids and no objects filled with liquids, such as vases, shall be placed on the apparatus.
Caution
These service instructions are for use by qualified service personnel only. To reduce the risk of electric shock do not perform any servicing other than that contained in the operation instructions.
Repairs have to be performed by qualified service personnel.
1. Read these instructions.
2. Keep these instructions.
3. Heed all warnings.
4. Follow all instructions.
5. Do not use this apparatus near water.
6. Clean only with dry cloth.
7. Do not block any ventilation openings. Install in accordance with the manufacturer’s instructions.
8. Do not install near any heat sources such as radiators, heat registers, stoves, or other apparatus (including amplifiers) that produce heat.
9. Do not defeat the safety purpose of the polarized or grounding-type plug. A polarized plug has two blades with one wider than the other.
A grounding-type plug has two blades and a third grounding prong. The wide blade or the third prong are provided for your safety. If the provided plug does not fit into your outlet, consult an electrician for replacement of the obsolete outlet.
10. Protect the power cord from being walked on or pinched particularly at plugs, convenience receptacles, and the point where they exit from the apparatus.
11. Use only attachments/accessories specified by the manufacturer.
12. Use only with the cart, stand, tripod, bracket, or table specified by the manufacturer, or sold with the apparatus. When a cart is used, use caution when moving the cart/ apparatus combination to avoid injury from tip-over.
13. Unplug this apparatus during lightning storms or when unused for long periods of time.
14. Refer all servicing to qualified service personnel. Servicing is required when the apparatus has been damaged in any way, such as power supply cord or plug is damaged, liquid has been spilled or objects have fallen into the apparatus, the apparatus has been exposed to rain or moisture, does not operate normally, or has been dropped.
15. The apparatus shall be connected to a MAINS socket outlet with a protective earthing connection.
16. Where the MAINS plug or an appliance coupler is used as the disconnect device, the disconnect device shall remain readily operable.
17. Correct disposal of this product: This symbol indicates that this product must not be disposed of with household waste, according to the
WEEE Directive (2012/19/EU) and your national law. This product should be taken to a collection center licensed for the recycling of waste electrical and electronic equipment (EEE).
The mishandling of this type of waste could have a possible negative impact on the environment and human health due to potentially hazardous substances that are generally associated with EEE. At the same time, your cooperation in the correct disposal of this product will contribute to the efficient use of natural resources. For more information about where you can take your waste equipment for recycling, please contact your local city office, or your household waste collection service.
18. Do not install in a confined space, such as a book case or similar unit.
19. Do not place naked flame sources, such as lighted candles, on the apparatus.
20. Please keep the environmental aspects of battery disposal in mind.
Batteries must be disposed-of at a battery collection point.
21. This apparatus may be used in tropical and moderate climates up to 45°C.
LEGAL DISCLAIMER
Music Tribe accepts no liability for any loss which may be suffered by any person who relies either wholly or in part upon any description, photograph, or statement contained herein. Technical specifications, appearances and other information
are subject to change without notice.
All trademarks are the property of their respective owners. Midas,
Klark Teknik, Lab Gruppen, Lake,
Tannoy, Turbosound, TC Electronic,
TC Helicon, Behringer, Bugera,
Oberheim, Auratone and Coolaudio are trademarks or registered trademarks of Music Tribe Global Brands Ltd.
© Music Tribe Global Brands Ltd.
2021 All rights reserved.
LIMITED WARRANTY
For the applicable warranty terms and conditions and additional information regarding Music Tribe’s Limited
Warranty, please see complete details online at musictribe.com/warranty.
Instrucciones de seguridad
Las terminales marcadas con este símbolo transportan corriente eléctrica de magnitud suficiente como para constituir un riesgo de descarga eléctrica. Utilice solo cables de altavoz profesionales y de alta calidad con conectores TS de 6,3 mm o de bayoneta prefijados. Cualquier otra instalación o modificación debe ser realizada
únicamente por un técnico cualificado.
Este símbolo, siempre que aparece, le advierte de la presencia de voltaje peligroso sin aislar dentro de la caja; este voltaje puede ser suficiente para constituir un riesgo de descarga.
Este símbolo, siempre que aparece, le advierte sobre instrucciones operativas y de mantenimiento que aparecen en la documentación adjunta. Por favor, lea el manual.
Atención
Para reducir el riesgo de descarga eléctrica, no quite la tapa (o la parte posterior).
No hay piezas en el interior del equipo que puedan ser reparadas por el usuario. Si es necesario, póngase en contacto con personal cualificado.
Atención
Para reducir el riesgo de incendio o descarga eléctrica, no exponga este aparato a la lluvia, humedad o alguna otra fuente que pueda salpicar o derramar algún líquido sobre el aparato. No coloque ningún tipo de recipiente para líquidos sobre el aparato.
Atención
Las instrucciones de servicio deben llevarlas a cabo exclusivamente personal cualificado. Para evitar el riesgo de una descarga eléctrica, no realice reparaciones que no se encuentren descritas en el manual de operaciones. Las reparaciones deben ser realizadas exclusivamente por personal cualificado.
1. Lea las instrucciones.
2. Conserve estas instrucciones.
3. Preste atención a todas las advertencias.
4. Siga todas las instrucciones.
5. No use este aparato cerca del agua.
6. Limpie este aparato con un paño seco.
7. No bloquee las aberturas de ventilación. Instale el equipo de acuerdo con las instrucciones del fabricante.
8. No instale este equipo cerca de fuentes de calor tales como radiadores, acumuladores de calor, estufas u otros aparatos (incluyendo amplificadores) que puedan producir calor.
9. No elimine o deshabilite nunca la conexión a tierra del aparato o del cable de alimentación de corriente.
Un enchufe polarizado tiene dos polos, uno de los cuales tiene un contacto más ancho que el otro. Una clavija con puesta a tierra dispone de tres
Quick Start Guide 3 contactos: dos polos y la puesta a tierra. El contacto ancho y el tercer contacto, respectivamente, son los que garantizan una mayor seguridad. Si el enchufe suministrado con el equipo no concuerda con la toma de corriente, consulte con un electricista para cambiar la toma de corriente obsoleta.
10. Coloque el cable de suministro de energía de manera que no pueda ser pisado y que esté protegido de objetos afilados. Asegúrese de que el cable de suministro de energía esté protegido, especialmente en la zona de la clavija y en el punto donde sale del aparato.
11. Use únicamente los dispositivos o accesorios especificados por el fabricante.
12. Use
únicamente la carretilla, plataforma, trípode, soporte o mesa especificados por el fabricante o suministrados junto con el equipo. Al transportar el equipo, tenga cuidado para evitar daños y caídas al tropezar con algún obstáculo.
13. Desenchufe el equipo durante tormentas o si no va a utilizarlo durante un periodo largo.
14. Confíe las reparaciones
únicamente a servicios técnicos cualificados. La unidad requiere mantenimiento siempre que haya sufrido algún daño, si el cable de suministro de energía o el enchufe presentaran daños, se hubiera derramado un líquido o hubieran caído objetos dentro del equipo, si el aparato hubiera estado expuesto a la humedad o la lluvia, si ha dejado de funcionar de manera normal o si ha sufrido algún golpe o caída.
15. Al conectar la unidad a la toma de corriente eléctrica asegúrese de que la conexión disponga de una unión a tierra.
16. Si el enchufe o conector de red sirve como único medio de desconexión, éste debe ser accesible fácilmente.
4 GO XLR
17. Cómo debe deshacerse de este aparato: Este símbolo indica que este aparato no debe ser tratado como basura orgánica, según lo indicado en la Directiva WEEE (2012/19/
EU) y a las normativas aplicables en su país. En lugar de ello deberá llevarlo al punto limpio más cercano para el reciclaje de sus elementos eléctricos / electrónicos (EEE). Al hacer esto estará ayudando a prevenir las posibles consecuencias negativas para el medio ambiente y la salud que podrían ser provocadas por una gestión inadecuada de este tipo de aparatos. Además, el reciclaje de materiales ayudará a conservar los recursos naturales. Para más información acerca del reciclaje de este aparato, póngase en contacto con el Ayuntamiento de su ciudad o con el punto limpio local.
18. No instale esta unidad en un espacio muy reducido, tal como encastrada en una librería o similar.
19. No coloque objetos con llama, como una vela encendida, sobre este aparato.
20. Tenga presentes todas las advertencias relativas al reciclaje y correcta eliminación de las pilas.
Las pilas deben ser siempre eliminadas en un punto limpio y nunca con el resto de la basura orgánica.
21. Puede usar este aparato en lugares con climas tropicales y moderados que soporten temperaturas de hasta 45°C.
NEGACIÓN LEGAL
Music Tribe no admite ningún tipo de responsabilidad por cualquier daño o pérdida que pudiera sufrir cualquier persona por confiar total o parcialmente en la descripciones, fotografías o afirmaciones contenidas en este documento.
Las especificaciones técnicas, imágenes y otras informaciones contenidas en este documento están sujetas a modificaciones sin previo aviso. Todas las marcas comerciales que aparecen aquí son propiedad de sus respectivos dueños. Midas,
Klark Teknik, Lab Gruppen, Lake,
Tannoy, Turbosound, TC Electronic,
TC Helicon, Behringer, Bugera,
Oberheim, Auratone y Coolaudio son marcas comerciales o marcas registradas de Music Tribe Global
Brands Ltd. © Music Tribe Global
Brands Ltd. 2021 Reservados todos los derechos.
GARANTÍA LIMITADA
Si quiere conocer los detalles y condiciones aplicables de la garantía así como información adicional sobre la Garantía limitada de Music Tribe, consulte online toda la información en la web musictribe.com/warranty.
Consignes de sécurité
Les points repérés par ce symbole portent une tension électrique suffisante pour constituer un risque d’électrocution. Utilisez uniquement des câbles d’enceintes professionnels de haute qualité avec fiches Jack mono
6,35 mm ou fiches à verrouillages déjà installées. Toute autre installation ou modification doit être effectuée uniquement par un personnel qualifié.
Ce symbole avertit de la présence d’une tension dangereuse et non isolée à l’intérieur de l’appareil - elle peut provoquer des chocs électriques.
Attention
Ce symbol signale les consignes d’utilisation et d’entre ! Tien importantes dans la documentation fournie. Lisez les consignes de sécurité du manuel d’utilisation de l’appareil.
Attention
Pour éviter tout risque de choc électrique, ne pas ouvrir le capot de l’appareil ni démonter le panneau arrière. L’intérieur de l’appareil ne possède aucun élément réparable par l’utilisateur. Laisser toute réparation à un professionnel qualifié.
Attention
Pour réduire les risques de feu et de choc
électrique, n’exposez pas cet appareil
à la pluie, à la moisissure, aux gouttes ou aux éclaboussures. Ne posez pas de récipient contenant un liquide sur l’appareil (un vase par exemple).
Attention
Ces consignes de sécurité et d’entretien sont destinées à un personnel qualifié. Pour éviter tout risque de choc électrique, n’effectuez aucune réparation sur l’appareil qui ne soit décrite par le manuel d’utilisation.
Les éventuelles réparations doivent
être effectuées uniquement par un technicien spécialisé.
1. Lisez ces consignes.
2. Conservez ces consignes.
3. Respectez tous les avertissements.
4. Respectez toutes les consignes d’utilisation.
5. N’utilisez jamais l’appareil à proximité d’un liquide.
6. Nettoyez l’appareil avec un chiffon sec.
7. Veillez à ne pas empêcher la bonne ventilation de l’appareil via ses ouïes de ventilation. Respectez les consignes du fabricant concernant l’installation de l’appareil.
8. Ne placez pas l’appareil à proximité d’une source de chaleur telle qu’un chauffage, une cuisinière ou tout appareil dégageant de la chaleur (y compris un ampli de puissance).
9. Ne supprimez jamais la sécurité des prises bipolaires ou des prises terre. Les prises bipolaires possèdent deux contacts de largeur différente.
Le plus large est le contact de sécurité.
Les prises terre possèdent deux contacts plus une mise à la terre servant de sécurité. Si la prise du bloc d’alimentation ou du cordon d’ali-
mentation fourni ne correspond pas à celles de votre installation électrique, faites appel à un électricien pour effectuer le changement de prise.
10. Installez le cordon d’alimentation de telle façon que personne ne puisse marcher dessus et qu’il soit protégé d’arêtes coupantes. Assurez-vous que le cordon d’alimentation est suffisamment protégé, notamment au niveau de sa prise électrique et de l’endroit où il est relié à l’appareil; cela est également valable pour une
éventuelle rallonge électrique.
11. Utilisez exclusivement des accessoires et des appareils supplémentaires recommandés par le fabricant.
12. Utilisez exclusivement des chariots, des diables, des présentoirs, des pieds et des surfaces de travail recommandés par le fabricant ou livrés avec le produit.
Déplacez précautionneusement tout chariot ou diable chargé pour éviter d’éventuelles blessures en cas de chute.
13. Débranchez l’appareil de la tension secteur en cas d’orage ou si l’appareil reste inutilisé pendant une longue période de temps.
14. Les travaux d’entretien de l’appareil doivent être effectués uniquement par du personnel qualifié.
Aucun entretien n’est nécessaire sauf si l’appareil est endommagé de quelque façon que ce soit (dommages sur le cordon d’alimentation ou la prise par exemple), si un liquide ou un objet a pénétré à l’intérieur du châssis, si l’appareil a été exposé à la pluie ou
à l’humidité, s’il ne fonctionne pas correctement ou à la suite d’une chute.
15. L’appareil doit être connecté à une prise secteur dotée d’une protection par mise à la terre.
16. La prise électrique ou la prise
IEC de tout appareil dénué de bouton marche/arrêt doit rester accessible en permanence.
Quick Start Guide respectifs. Midas, Klark Teknik,
Lab Gruppen, Lake, Tannoy,
Turbosound, TC Electronic, TC Helicon,
Behringer, Bugera, Oberheim, Auratone et Coolaudio sont des marques ou marques déposées de Music Tribe
Global Brands Ltd. © Music Tribe Global
Brands Ltd. 2021 Tous droits réservés.
5
17. Mise au rebut appropriée de ce produit: Ce symbole indique qu’en accord avec la directive DEEE
(2012/19/EU) et les lois en vigueur dans votre pays, ce produit ne doit pas être jeté avec les déchets ménagers.
Ce produit doit être déposé dans un point de collecte agréé pour le recyclage des déchets d’équipements
électriques et électroniques (EEE).
Une mauvaise manipulation de ce type de déchets pourrait avoir un impact négatif sur l’environnement et la santé
à cause des substances potentiellement dangereuses généralement associées à ces équipements. En même temps, votre coopération dans la mise au rebut de ce produit contribuera à l’utilisation efficace des ressources naturelles.
Pour plus d’informations sur l’endroit où vous pouvez déposer vos déchets d’équipements pour le recyclage, veuillez contacter votre mairie ou votre centre local de collecte des déchets.
18. N’installez pas l’appareil dans un espace confiné tel qu’une bibliothèque ou meuble similaire.
19. Ne placez jamais d’objets enflammés, tels que des bougies allumées, sur l’appareil.
20. Gardez à l’esprit l’impact environnemental lorsque vous mettez des piles au rebus. Les piles usées doivent être déposées dans un point de collecte adapté.
21. Cet appareil peut être utilisé sous un climat tropical ou modéré avec des températures de 45°C maximum.
DÉNI LÉGAL
Music Tribe ne peut être tenu pour responsable pour toute perte pouvant
être subie par toute personne se fiant en partie ou en totalité à toute description, photographie ou affirmation contenue dans ce document. Les caractéristiques, l’apparence et d’autres informations peuvent faire l’objet de modifications sans notification. Toutes les marques appartiennent à leurs propriétaires
GARANTIE LIMITÉE
Pour connaître les termes et conditions de garantie applicables, ainsi que les informations supplémentaires et détaillées sur la Garantie Limitée de
Music Tribe, consultez le site Internet musictribe.com/warranty.
Wichtige
Sicherheitshinweise
Vorsicht
Die mit dem Symbol markierten Anschlüsse führen so viel Spannung, dass die
Gefahr eines Stromschlags besteht.
Verwenden Sie nur hochwertige, professionelle Lautsprecherkabel mit vorinstallierten 6,35 mm
MONO-Klinkensteckern oder
Lautsprecherstecker mit
Drehverriegelung. Alle anderen
Installationen oder Modifikationen sollten nur von qualifiziertem
Fachpersonal ausgeführt werden.
Achtung
Um eine Gefährdung durch Stromschlag auszuschließen, darf die
Geräteabdeckung bzw.
Geräterückwand nicht abgenommen werden. Im Innern des Geräts befinden sich keine vom Benutzer reparierbaren
Teile. Reparaturarbeiten dürfen nur von qualifiziertem Personal ausgeführt werden.
6 GO XLR
Achtung
Um eine Gefährdung durch Feuer bzw.
Stromschlag auszuschließen, darf dieses Gerät weder Regen oder
Feuchtigkeit ausgesetzt werden noch sollten Spritzwasser oder tropfende Flüssigkeiten in das Gerät gelangen können. Stellen Sie keine mit Flüssigkeit gefüllten Gegenstände, wie z. B. Vasen, auf das Gerät.
Achtung
Die Service-Hinweise sind nur durch qualifiziertes
Personal zu befolgen. Um eine
Gefährdung durch Stromschlag zu vermeiden, führen Sie bitte keinerlei
Reparaturen an dem Gerät durch, die nicht in der Bedienungsanleitung beschrieben sind. Reparaturen sind nur von qualifiziertem
Fachpersonal durchzuführen.
1. Lesen Sie diese Hinweise.
2. Bewahren Sie diese Hinweise auf.
3. Beachten Sie alle Warnhinweise.
4. Befolgen Sie alle
Bedienungshinweise.
5. Betreiben Sie das Gerät nicht in der Nähe von Wasser.
6. Reinigen Sie das Gerät mit einem trockenen Tuch.
7. Blockieren Sie nicht die
Belüftungsschlitze. Beachten
Sie beim Einbau des Gerätes die
Herstellerhinweise.
8. Stellen Sie das Gerät nicht in der
Nähe von Wärmequellen auf. Solche
Wärmequellen sind z. B. Heizkörper,
Herde oder andere Wärme erzeugende
Geräte (auch Verstärker).
9. Entfernen Sie in keinem Fall die Sicherheitsvorrichtung von
Zweipol- oder geerdeten Steckern. Ein
Zweipolstecker hat zwei unterschiedlich breite Steckkontakte. Ein geerdeter
Stecker hat zwei Steckkontakte und einen dritten Erdungskontakt.
Der breitere Steckkontakt oder der zusätzliche Erdungskontakt dient
Ihrer Sicherheit. Falls das mitgelieferte
Steckerformat nicht zu Ihrer Steckdose passt, wenden Sie sich bitte an einen Elektriker, damit die Steckdose entsprechend ausgetauscht wird.
10. Verlegen Sie das Netzkabel so, dass es vor Tritten und scharfen Kanten geschützt ist und nicht beschädigt werden kann. Achten Sie bitte insbesondere im Bereich der Stecker,
Verlängerungskabel und an der Stelle, an der das Netzkabel das Gerät verlässt, auf ausreichenden Schutz.
11. Das Gerät muss jederzeit mit intaktem Schutzleiter an das Stromnetz angeschlossen sein.
12. Sollte der Hauptnetzstecker oder eine Gerätesteckdose die
Funktionseinheit zum Abschalten sein, muss diese immer zugänglich sein.
13. Verwenden Sie nur Zusatzgeräte/
Zubehörteile, die laut Hersteller geeignet sind.
14.
Verwenden
Sie nur Wagen,
Standvorrichtungen, Stative,
Halter oder Tische, die vom Hersteller benannt oder im Lieferumfang des
Geräts enthalten sind. Falls Sie einen
Wagen benutzen, seien Sie vorsichtig beim Bewegen der
Wagen- Gerätkombination, um Verletzungen durch Stolpern zu vermeiden.
15. Ziehen Sie den Netzstecker bei
Gewitter oder wenn Sie das Gerät längere Zeit nicht benutzen.
16. Lassen Sie alle Wartungsarbeiten nur von qualifiziertem Service-
Personal ausführen. Eine Wartung ist notwendig, wenn das Gerät in irgendeiner Weise beschädigt wurde
(z. B. Beschädigung des Netzkabels oder Steckers), Gegenstände oder
Flüssigkeit in das Geräteinnere gelangt sind, das Gerät Regen oder Feuchtigkeit ausgesetzt wurde, das Gerät nicht ordnungsgemäß funktioniert oder auf den Boden gefallen ist.
17.
Korrekte
Entsorgung dieses
Produkts: Dieses Symbol weist darauf hin, das
Produkt entsprechend der WEEE Direktive (2012/19/EU) und der jeweiligen nationalen Gesetze nicht zusammen mit Ihren Haushaltsabfällen zu entsorgen. Dieses Produkt sollte bei einer autorisierten Sammelstelle für
Recycling elektrischer und elektronischer Geräte (EEE) abgegeben werden. Wegen bedenklicher
Substanzen, die generell mit elektrischen und elektronischen
Geräten in Verbindung stehen, könnte eine unsachgemäße Behandlung dieser
Abfallart eine negative Auswirkung auf
Umwelt und Gesundheit haben.
Gleichzeitig gewährleistet Ihr Beitrag zur richtigen Entsorgung dieses
Produkts die effektive Nutzung natürlicher Ressourcen. Für weitere
Informationen zur Entsorgung Ihrer
Geräte bei einer Recycling-Stelle nehmen Sie bitte Kontakt zum zuständigen städtischen Büro,
Entsorgungsamt oder zu Ihrem
Haushaltsabfallentsorger auf.
18. Installieren Sie das Gerät nicht in einer beengten Umgebung, zum
Beispiel Bücherregal oder ähnliches.
19. Stellen Sie keine Gegenstände mit offenen Flammen, etwa brennende
Kerzen, auf das Gerät.
20. Beachten Sie bei der Entsorgung von Batterien den Umweltschutz-
Aspekt. Batterien müssen bei einer
Batterie-Sammelstelle entsorgt werden.
21. Dieses Gerät ist in tropischen und gemäßigten Klimazonen bis
45° C einsetzbar.
HAFTUNGSAUSSCHLUSS
Music Tribe übernimmt keine Haftung für Verluste, die Personen entstanden sind, die sich ganz oder teilweise auf hier enthaltene Beschreibungen,
Fotos oder Aussagen verlassen haben.
Technische Daten, Erscheinungsbild und andere Informationen können ohne vorherige Ankündigung geändert werden. Alle Warenzeichen sind Eigentum der jeweiligen
Inhaber. Midas, Klark Teknik, Lab
Gruppen, Lake, Tannoy, Turbosound,
TC Electronic, TC Helicon, Behringer,
Bugera, Oberheim, Auratone und
Coolaudio sind Warenzeichen oder
eingetragene Warenzeichen der
Music Tribe Global Brands Ltd.
© Music Tribe Global Brands Ltd.
2021 Alle Rechte vorbehalten.
BESCHRÄNKTE GARANTIE
Die geltenden Garantiebedingungen und zusätzliche Informationen bezüglich der von Music Tribe gewährten beschränkten
Garantie finden Sie online unter musictribe.com/warranty.
Instruções de
Segurança Importantes
Aviso!
Terminais marcados com o símbolo carregam corrente elétrica de magnitude suficiente para constituir um risco de choque elétrico. Use apenas cabos de alto-falantes de alta qualidade com plugues TS de ¼" ou plugues com trava de torção pré-instalados.
Todas as outras instalações e modificações devem ser efetuadas por pessoas qualificadas.
Este símbolo, onde quer que o encontre, alerta-o para a leitura das instruções de manuseamento que acompanham o equipamento. Por favor leia o manual de instruções.
Atenção
De forma a diminuir o risco de choque eléctrico, não remover a cobertura
(ou a secção de trás). Não existem peças substituíveis por parte do utilizador no seu interior. Para esse efeito recorrer a um técnico qualificado.
Atenção
Para reduzir o risco de incêndios ou choques eléctricos o aparelho não deve ser exposto à chuva nem à humidade.
Além disso, não deve ser sujeito a salpicos, nem devem ser colocados em cima do aparelho objectos contendo líquidos, tais como jarras.
Atenção
Estas instruções de operação devem ser utilizadas, em exclusivo, por técnicos de assistência qualificados. Para evitar choques eléctricos não proceda a reparações ou intervenções, que não as indicadas nas instruções de operação, salvo se possuir as qualifi-cações necessárias. Para evitar choques eléctricos não proceda a reparações ou intervenções, que não as indicadas nas instruções de operação. Só o deverá fazer se possuir as qualificações necessárias.
1. Leia estas instruções.
2. Guarde estas instruções.
3. Preste atenção a todos os avisos.
4. Siga todas as instruções.
5. Não utilize este dispositivo perto de água.
6. Limpe apenas com um pano seco.
7. Não obstrua as entradas de ventilação. Instale de acordo com as instruções do fabricante.
8. Não instale perto de quaisquer fontes de calor tais como radiadores, bocas de ar quente, fogões de sala ou outros aparelhos (incluindo amplificadores) que produzam calor.
9. Não anule o objectivo de segurança das fichas polarizadas ou do tipo de ligação à terra. Uma ficha polarizada dispõe de duas palhetas sendo uma mais larga do que a outra.
Uma ficha do tipo ligação à terra dispõe de duas palhetas e um terceiro dente de ligação à terra. A palheta larga ou o terceiro dente são fornecidos para sua segurança. Se a ficha fornecida não encaixar na sua tomada, consulte um electricista para a substituição da tomada obsoleta.
10. Proteja o cabo de alimentação de pisadelas ou apertos, especialmente nas fichas, extensões, e no local de saída da unidade. Certifique-se de que o cabo eléctrico está protegido.
Quick Start Guide 7
Verifique particularmente nas fichas, nos receptáculos e no ponto em que o cabo sai do aparelho.
11. O aparelho tem de estar sempre conectado à rede eléctrica com o condutor de protecção intacto.
12. Se utilizar uma ficha de rede principal ou uma tomada de aparelhos para desligar a unidade de funcionamento, esta deve estar sempre acessível.
13. Utilize apenas ligações/acessórios especificados pelo fabricante.
14.
Utilize apenas com o carrinho, estrutura, tripé, suporte, ou mesa especificados pelo fabricante ou vendidos com o dispositivo.
Quando utilizar um carrinho, tenha cuidado ao mover o conjunto carrinho/ dispositivo para evitar danos provocados pela terpidação.
15. Desligue este dispositivo durante as trovoadas ou quando não for utilizado durante longos períodos de tempo.
16. Qualquer tipo de reparação deve ser sempre efectuado por pessoal qualificado. É necessária uma reparação sempre que a unidade tiver sido de alguma forma danificada, como por exemplo: no caso do cabo de alimentação ou ficha se encontrarem danificados; na eventualidade de líquido ter sido derramado ou objectos terem caído para dentro do dispositivo; no caso da unidade ter estado exposta
à chuva ou à humidade; se esta não funcionar normalmente, ou se tiver caído.
17.
Correcta eliminação deste produto: este símbolo indica que o produto não deve ser eliminado juntamente com os resíduos domésticos, segundo a
Directiva REEE (2012/19/EU) e a legislação nacional. Este produto deverá ser levado para um centro de recolha licenciado para a reciclagem de resíduos de equipamentos eléctricos e electrónicos
(EEE). O tratamento incorrecto deste tipo de resíduos pode ter um eventual
8 impacto negativo no ambiente e na saúde humana devido a substâncias potencialmente perigosas que estão geralmente associadas aos EEE. Ao mesmo tempo, a sua colaboração para a eliminação correcta deste produto irá contribuir para a utilização eficiente dos recursos naturais. Para mais informação acerca dos locais onde poderá deixar o seu equipamento usado para reciclagem,
é favor contactar os serviços municipais locais, a entidade de gestão de resíduos ou os serviços de recolha de resíduos domésticos.
18. Não instale em lugares confinados, tais como estantes ou unidades similares.
19. chama, tais como velas acesas, sobre o aparelho.
20. ambientais de descarte de bateria.
Baterias devem ser descartadas em um ponto de coletas de baterias.
21.
GO XLR
Não coloque fontes de
Favor, obedecer os aspectos
Esse aparelho pode ser usado em climas tropicais e moderados até 45°C.
LEGAL RENUNCIANTE
O Music Tribe não se responsabiliza por perda alguma que possa ser sofrida por qualquer pessoa que dependa, seja de maneira completa ou parcial, de qualquer descrição, fotografia, ou declaração aqui contidas. Dados técnicos, aparências e outras informações estão sujeitas a modificações sem aviso prévio.
Todas as marcas são propriedade de seus respectivos donos. Midas,
Klark Teknik, Lab Gruppen, Lake, Tannoy,
Turbosound, TC Electronic, TC Helicon,
Behringer, Bugera, Oberheim, Auratone e Coolaudio são marcas ou marcas registradas do Music Tribe Global Brands
Ltd. © Music Tribe Global Brands Ltd.
2021 Todos direitos reservados.
GARANTIA LIMITADA
Para obter os termos de garantia aplicáveis e condições e informações adicionais a respeito da garantia limitada do Music Tribe, favor verificar detalhes na íntegra através do website musictribe.com/warranty.
Informazioni importanti
Attenzione
I terminali contrassegnati con il simbolo conducono una corrente elettrica sufficiente a costituire un rischio di scossa elettrica.
Usare unicamente cavi per altoparlanti
(Speaker) d’elevata qualità con connettori jack TS da ¼" pre-installati.
Ogni altra installazione o modifica deve essere effettuata esclusivamente da personale tecnico qualificato.
Attenzione
Questo simbolo, ovunque appaia, avverte della presenza di una tensione pericolosa non isolata all'interno dello chassis, tensione che può essere sufficiente per costituire un rischio di scossa elettrica.
Attenzione
Questo simbolo, ovunque appaia, segnala importanti istruzioni operative e di manutenzione nella documentazione allegata. Si invita a leggere il manuale.
Attenzione
Per ridurre il rischio di scosse elettriche, non rimuovere il coperchio superiore (o la sezione posteriore). All'interno non ci sono parti riparabili dall'utente. Per la manutenzione rivolgersi a personale qualificato.
Attenzione
Per ridurre il rischio di incendi o scosse elettriche, non esporre questo apparecchio a pioggia e umidità.
L'apparecchio non deve essere esposto a gocciolio o schizzi di liquidi e nessun oggetto contenente liquidi, come vasi, deve essere collocato sull'apparecchio.
Attenzione
Queste istruzioni di servizio sono destinate esclusivamente a personale qualificato.
Per ridurre il rischio di scosse elettriche non eseguire interventi di manutenzione diversi da quelli contenuti nel manuale di istruzioni. Le riparazioni devono essere eseguite da personale di assistenza qualificato.
1. Leggere queste istruzioni.
2. Conservare queste istruzioni.
3. Prestare attenzione a tutti gli avvisi.
4. Applicare tutte le istruzioni.
5. Non utilizzare questo dispositivo vicino l'acqua.
6. Pulire esclusivamente con un panno asciutto.
7. Non bloccare le aperture di ventilazione. Installare in conformità con le istruzioni del produttore.
8. Non installare vicino a fonti di calore come radiatori, termoregolatori, stufe o altri apparecchi (inclusi amplificatori) che producono calore.
9. Non escludere la sicurezza fornita dalla spina polarizzata o con messa a terra. Una spina polarizzata ha due lame, una più larga dell'altra. Una spina con messa a terra ha due lame e un terzo polo di messa a terra. La lama larga o il terzo polo sono forniti per la vostra sicurezza. Se la spina fornita non si adatta alla presa, consultare un elettricista per la sostituzione della presa obsoleta.
10. Proteggere il cavo di alimentazione dal calpestio o essere schiacciato in particolare alle spine, prese di corrente e il punto in cui esce dall'apparecchio.
11. Utilizzare esclusivamente dispositivi/accessori specificati dal produttore.
12. Utilizzare solo carrelli, supporti, treppiedi, staffe o tavoli indicati dal produttore o venduti con l'apparecchio. Utilizzando un carrello, prestare attenzione quando si sposta la combinazione carrello/ apparecchio per evitare lesioni dovute al ribaltamento.
13. Scollegare questo apparecchio durante i temporali o se non è utilizzato per lunghi periodi di tempo.
14. Per tutte le riparazioni rivolgersi a personale qualificato. La manutenzione
è necessaria quando l'apparecchio
è danneggiato in qualsiasi modo, come danneggiamento del cavo di alimentazione o della spina, versamento di liquido o oggetti caduti nell'apparecchio, se l'apparecchio è stato esposto a pioggia o umidità, se non funziona normalmente o è caduto.
15. L'apparecchio deve essere collegato a una presa di corrente elettrica con messa a terra di protezione.
16. e la spina o una presa del dispositivo è utilizzata come dispositivo di disconnessione, deve essere facilmente utilizzabile.
17.
Smaltimento corretto di questo prodotto: questo simbolo indica che questo dispositivo non deve essere smaltito insieme ai rifiuti domestici, secondo la
Direttiva RAEE (2012/19 / UE) e la vostra legislazione nazionale. Questo prodotto deve essere portato in un centro di raccolta autorizzato per il riciclaggio di rifiuti di apparecchiature elettriche ed elettroniche (RAEE). La cattiva gestione di questo tipo di rifiuti potrebbe avere un possibile impatto negativo sull'ambiente e sulla salute umana a causa di sostanze potenzialmente pericolose che sono generalmente associate alle apparecchiature elettriche ed elettroniche. Nello stesso tempo la vostra collaborazione al corretto smaltimento di questo prodotto contribuirà all'utilizzo efficiente delle risorse naturali. Per ulteriori informazioni su dove è possibile trasportare le apparecchiature per il riciclaggio vi invitiamo a contattare l'ufficio comunale locale o il servizio di raccolta dei rifiuti domestici.
18. Non installare in uno spazio ristretto, come in una libreria o in una struttura simile.
19. Non collocare sul dispositivo fonti di fiamme libere, come candele accese.
20. Per lo smaltimento delle batterie, tenere in considerazione gli aspetti ambientali. Le batterie devono essere smaltite in un punto di raccolta delle batterie esauste.
21. Questo apparecchio può essere usato in climi tropicali e temperati fino a 45°C.
DISCLAIMER LEGALE
Music Tribe non si assume alcuna responsabilità per eventuali danni che possono essere subiti da chiunque si affidi in tutto o in parte a qualsiasi descrizione, fotografia o dichiarazione contenuta qui. Specifiche tecniche, aspetti e altre informazioni sono soggette a modifiche senza preavviso.
Tutti i marchi sono di proprietà dei rispettivi titolari. Midas, Klark
Teknik, Lab Gruppen, Lake, Tannoy,
Turbosound, TC Electronic, TC Helicon,
Behringer, Bugera, Oberheim, Auratone e Coolaudio sono marchi o marchi registrati di Music Tribe Global Brands
Ltd. © Music Tribe Global Brands Ltd.
2021 Tutti i diritti riservati .
GARANZIA LIMITATA
Per i termini e le condizioni di garanzia applicabili e le informazioni aggiuntive relative alla garanzia limitata di Music
Tribe, consultare online i dettagli completi su musictribe.com/warranty.
Quick Start Guide
Belangrijke veiligheidsvoorschriften
9
Waarschuwing
Aansluitingen die gemerkt zijn met het symbool voeren een zodanig hoge spanning dat ze een risico vormen voor elektrische schokken. Gebruik uitsluitend kwalitatief hoogwaardige, in de handel verkrijgbare luidsprekerkabels die voorzien zijn van ¼" TS stekkers.
Laat uitsluitend gekwalificeerd personeel alle overige installatie- of modificatiehandelingen uitvoeren.
Dit symbool wijst u altijd op belangrijke bedienings
- en onderhoudsvoorschriften in de bijbehorende documenten. Wij vragen u dringend de handleiding te lezen.
Attentie
Verwijder in geen geval de bovenste afdekking (van het achterste gedeelte) anders bestaat er gevaar voor een elektrische schok. Het apparaat bevat geen te onderhouden onderdelen.
Reparatiewerkzaamheden mogen uitsluitend door gekwalificeerd personeel uitgevoerd worden.
Attentie
Om het risico op brand of elektrische schokken te beperken, dient u te voorkomen dat dit apparaat wordt blootgesteld aan regen en vocht. Het apparaat mag niet worden blootgesteld aan neerdruppelend of opspattend water en er mogen geen met water gevulde voorwerpen – zoals een vaas – op het apparaat worden gezet.
Attentie
Deze onderhoudsinstructies zijn uitsluitend bedoeld voor gekwalificeerd onderhoudspersoneel.
Om elektrische schokken te voorkomen, mag u geen andere
10 GO XLR onderhoudshandelingen verrichten dan in de bedieningsinstructies vermeld staan. Reparatiewerkzaamheden mogen alleen uitgevoerd worden door gekwalificeerd onderhoudspersoneel.
1. Lees deze voorschriften.
2. Bewaar deze voorschriften.
3. Neem alle waarschuwingen in acht.
4. Volg alle voorschriften op.
5. Gebruik dit apparaat niet in de buurt van water.
6. Reinig het uitsluitend met een droge doek.
7. Let erop geen van de ventilatieopeningen te bedekken. Plaats en installeer het volgens de voor- schriften van de fabrikant.
8. Het apparaat mag niet worden geplaatst in de buurt van radiatoren, warmte-uitlaten, kachels of andere zaken (ook versterkers) die warmte afgeven.
9. Maak de veiligheid waarin door de polarisatie- of aardingsstekker wordt voorzien, niet ongedaan.
Een polarisatiestekker heeft twee bladen, waarvan er een breder is dan het andere. Een aardingsstekker heeft twee bladen en een derde uitsteeksel voor de aarding. Het bredere blad of het derde uitsteeksel zijn er voor uw veiligheid. Mocht de geleverde stekker niet in uw stopcontact passen, laat het contact dan door een elektricien vervangen.
10. Om beschadiging te voorkomen, moet de stroomleiding zo gelegd worden dat er niet kan worden over gelopen en dat ze beschermd is tegen scherpe kanten. Zorg zeker voor voldoende bescherming aan de stekkers, de verlengkabels en het punt waar het netsnoer het apparaat verlaat.
11. Het toestel met altijd met een intacte aarddraad aan het stroomnet aangesloten zijn.
12. Wanneer de stekker van het hoofdnetwerk of een apparaatstopcontact de functionele eenheid voor het uitschakelen is, dient deze altijd toegankelijk te zijn.
13. Gebruik uitsluitend door de producent gespeci- ficeerd toebehoren c.q. onderdelen.
14. Gebruik het apparaat uitsluitend in combinatie met de wagen, het statief, de driepoot, de beugel of tafel die door de producent is aangegeven, of die in combinatie met het apparaat wordt verkocht. Bij gebruik van een wagen dient men voorzichtig te zijn bij het verrijden van de combinatie wagen/apparaat en letsel door vallen te voorkomen.
15. Bij onweer en als u het apparaat langere tijd niet gebruikt, haalt u de stekker uit het stopcontact.
16. Laat alle voorkomende reparaties door vakkundig en bevoegd personeel uitvoeren. Reparatiewerk-zaamheden zijn nodig als het toestel op enige wijze beschadigd is geraakt, bijvoorbeeld als de hoofd-stroomkabel of -stekker is beschadigd, als er vloeistof of voorwerpen in terecht zijn gekomen, als het aan regen of vochtigheid heeft bloot-gestaan, niet normaal functioneert of wanneer het is gevallen.
17.
Correcte afvoer van dit product: dit symbool geeft aan dat u dit product op grond van de
AEEA-richtlijn
(2012/19/EU) en de nationale wetgeving van uw land niet met het gewone huishoudelijke afval mag weggooien. Dit product moet na afloop van de nuttige levensduur naar een officiële inzamelpost voor afgedankte elektrische en elektronische apparatuur (AEEA) worden gebracht, zodat het kan worden gerecycleerd.
Vanwege de potentieel gevaarlijke stoffen die in elektrische en elektronische apparatuur kunnen voorkomen, kan een onjuiste afvoer van afval van het onderhavige type een negatieve invloed op het milieu en de menselijke gezondheid hebben.
Een juiste afvoer van dit product is echter niet alleen beter voor het milieu en de gezondheid, maar draagt tevens bij aan een doelmatiger gebruik van de natuurlijke hulpbronnen. Voor meer informatie over de plaatsen waar u uw afgedankte apparatuur kunt inleveren, kunt u contact opnemen met uw gemeente of de plaatselijke reinigingsdienst.
18. Installeer niet in een kleine ruimte, zoals een boekenkast of iets dergelijks.
19. Plaats geen open vlammen, zoals brandende kaarsen, op het apparaat.
20. Houd rekening met de milieuaspecten van het afvoeren van batterijen. Batterijen moeten bij een inzamelpunt voor batterijen worden ingeleverd.
21. Dit apparaat kan worden gebruikt in tropische en gematigde klimaten tot 45 ° C.
WETTELIJKE ONTKENNING
Music Tribe aanvaardt geen aansprakelijkheid voor enig verlies dat kan worden geleden door een persoon die geheel of gedeeltelijk vertrouwt op enige beschrijving, foto of verklaring hierin. Technische specificaties, verschijningen en andere informatie kunnen zonder voorafgaande kennisgeving worden gewijzigd. Alle handelsmerken zijn eigendom van hun respectievelijke eigenaren. Midas, Klark Teknik, Lab
Gruppen, Lake, Tannoy, Turbosound,
TC Electronic, TC Helicon, Behringer,
Bugera, Oberheim, Auratone en
Coolaudio zijn handelsmerken of gedeponeerde handelsmerken van Music Tribe Global Brands Ltd.
© Music Tribe Global Brands Ltd.
2021 Alle rechten voorbehouden.
BEPERKTE GARANTIE
Voor de toepasselijke garantievoorwaarden en aanvullende informatie met betrekking tot de beperkte garantie van Music Tribe, zie de volledige details online op musictribe.com/warranty.
Viktiga säkerhetsanvisningar
Varning
Uttag markerade med symbolen leder elektrisk strömstyrka som är tillräckligt stark för att utgöra en risk för elchock. Använd endast högkvalitativa, kommersiellt tillgängliga högtalarkablar med förhandsinstallerade ¼" TSkontakter. All annan installering eller modifikation bör endast utföras av kompetent personal.
Den här symbolen hänvisar till viktiga punkter om användning och underhåll i den medfölljande dokumentationen. Var vänlig och läs bruksanvisningen.
Försiktighet
Minska risken för elektriska stötar genom att aldrig ta av höljet upptill på apparaten (eller ta av baksidan).
Inuti apparaten finns det inga delar som kan repareras av användaren.
Endast kvalificerad personal får genomföra reparationer.
Försiktighet
För att minska risken för brand och elektriska stötar ska apparaten skyddas mot regn och fukt. Apparaten går inte utsättas för dropp eller spill och inga vattenbehållare som vaser etc. får placeras på den.
Försiktighet
Serviceinstruktionen
är enbart avsedd för kvalificerad servicepersonal.
För att undvika risker genom elektriska stötar, genomför inga reparationer på apparaten, vilka inte
är beskrivna i bruksanvisningen.
Endast kvalificerad fackpersonal får genomföra reparationerna.
1. Läs dessa anvisningar.
2. Spara dessa anvisningar.
3. Beakta alla varningar.
4. Följ alla anvisningar.
5. Använd inte apparaten i närheten av vatten.
6. Rengör endast med torr trasa.
7. Blockera inte ventilationsöppningarna.
Installera enligt tillverkarens anvisningar.
8. Installera aldrig intill värmekällor som värme- element, varmluftsintag, spisar eller annan utrustning som avger värme (inklusive förstärkare).
9. Ändra aldrig en polariserad eller jordad kontakt. En polariserad kontakt har två blad – det ena bredare
än det andra. En jordad kontakt har två blad och ett tredje jordstift. Det breda bladet eller jordstiftet är till för din säkerhet. Om den medföljande kontakten inte passar i ditt uttag, ska du kontakta en elektriker för att få uttaget bytt.
10. Förlägg elkabeln så, att det inte
är möjligt att trampa på den och att den är skyddad mot skarpa kanter och inte kan skadas. Ge i synnerhet akt på områdena omkring stickkontakterna, förlängningskablarna och på det ställe, där elkabeln lämnar apparaten,
är tillräckligt skyddade.
11. Apparaten måste alltid vara ansluten till elnätet med intakt skyddsledare.
12. Om huvudkontakten, eller ett apparatuttag, fungerar som avstängningsenhet måste denna alltid vara tillgänglig.
13. Använd endast tillkopplingar och tillbehör som angetts av tillverkaren.
14. Använd endast med vagn, stativ, trefot, hållare eller bord som angetts av tillverkaren, eller som sålts till-sammans med apparaten. Om du använder en vagn, var försiktig, när du förflyttar kombinationen vagn-apparat, för att förhindra olycksfall genom snubbling.
Quick Start Guide 11
15. Dra ur anslutningskontakten und
åskväder eller när apparaten inte ska användas under någon längre tid.
16. Låt kvalificerad personal utföra all service. Service är nödvändig när apparaten har skadats, t.ex. när en elkabel eller kontakt är skadad, vätska eller främmande föremål har kommit in i apparaten, eller när den har fallit i golvet.
17.
Kassera produkten på rätt sätt: den här symbolen indikerar att produkten inte ska kastas i hushållssoporna, enligt WEEE direktivet (2012/19/EU) och gällande, nationell lagstiftning.
Produkten ska lämnas till ett auktoriserat återvinningsställe för elektronisk och elektrisk utrustning
(EEE). Om den här sortens avfall hanteras på fel sätt kan miljön, och människors hälsa, påverkas negativt på grund av potentiella risksubstanser som ofta associeras med EEE.
Avfallshanteras produkten däremot på rätt sätt bidrar detta till att naturens resurser används på ett bra sätt.
Kontakta kommun, ansvarig förvaltning eller avfallshanteringsföretag för mer information om återvinningscentral där produkten kan lämnas.
18. Installera inte i ett trångt utrymme, t.ex. i en bokhylsa eller liknande enhet.
19. Placera inte källor med öppen eld, t.ex. tända ljus, på apparaten.
20. Tänk på miljöaspekterna vid kassering av batterier.
Batterier måste kasseras på ett batteriuppsamlingsställe.
21. Denna apparat kan användas i tropiska och måttliga klimat upp till 45 ° C.
12 GO XLR
FRISKRIVNINGSKLAUSUL
Music Tribe tar inget ansvar för någon förlust som kan drabbas av någon person som helt eller delvis förlitar sig på någon beskrivning, fotografi eller uttalande som finns här.
Tekniska specifikationer, utseenden och annan information kan ändras utan föregående meddelande. Alla varumärken tillhör respektive ägare.
Midas, Klark Teknik, Lab Gruppen,
Lake, Tannoy, Turbosound, TC
Electronic, TC Helicon, Behringer,
Bugera, Oberheim, Auratone och
Coolaudio är varumärken eller registrerade varumärken som tillhör
Music Tribe Global Brands Ltd.
© Music Tribe Global Brands Ltd.
2021 Alla Rättigheter reserverade.
BEGRÄNSAD GARANTI
För tillämpliga garantivillkor och ytterligare information om Music
Tribes begränsade garanti, se fullständig information online på musictribe.com/warranty.
Ważne informacje o bezpieczeństwie
Uwaga
Terminale oznaczone symbolem przenoszą wystarczająco wysokie napięcie elektryczne, aby stworzyć ryzyko porażenia prądem. Używaj wyłącznie wysokiej jakości fabrycznie przygotowanych kabli z zainstalowanymi wtyczkami
¼" TS. Wszystkie inne instalacje lub modyfikacje powinny być wykonywane wyłącznie przez wykwalifikowany personel techniczny.
Ten symbol informuje o ważnych wskazówkach dotyczących obsługi i konserwacji urządzenia w dołączonej dokumentacji. Proszę przeczytać stosowne informacje w instrukcji obsługi.
Uwaga
W celu wyeliminowania zagrożenia porażenia prądem zabrania się zdejmowania obudowy lub tylnej ścianki urządzenia.
Elementy znajdujące się we wnętrzu urządzenia nie mogą być naprawiane przez użytkownika. Naprawy mogą być wykonywane jedynie przez wykwalifikowany personel.
Uwaga
W celu wyeliminowania zagrożenia porażenia prądem lub zapalenia się urządzenia nie wolno wystawiać go na działanie deszczu i wilgotności oraz dopuszczać do tego, aby do wnętrza dostała się woda lub inna ciecz. Nie należy stawiać na urządzeniu napełnionych cieczą przedmiotów takich jak np. wazony lub szklanki.
Uwaga
Prace serwisowe mogą być wykonywane jedynie przez wykwalifikowany personel.
W celu uniknięcia zagrożenia porażenia prądem nie należy wykonywać żadnych manipulacji, które nie są opisane w instrukcji obsługi.
Naprawy wykonywane mogą być jedynie przez wykwalifikowany personel techniczny.
1. Proszę przeczytać poniższe wskazówki.
2. Proszę przechowywać niniejszą instrukcję.
3. Należy przestrzegać wszystkich wskazówek ostrzegawczych.
4. Należy postępować zgodnie z instrukcją obsługi.
5. Urządzenia nie wolno używać w pobliżu wody.
6. Urządzenie można czyścić wyłącznie suchą szmatką.
7. Nie zasłaniać otworów wentylacyjnych. W czasie podłączania urządzenia należy przestrzegać zaleceń producenta.
8. Nie stawiać urządzenia w pobliżu źródeł ciepła takich, jak grzejniki, piece lub urządzenia produkujące ciepło (np. wzmacniacze).
9. W żadnym wypadku nie należy usuwać zabezpieczeń z wtyczek dwubiegunowych oraz wtyczek z uziemieniem. Wtyczka dwubiegunowa posiada dwa wtyki kontaktowe o różnej szerokości. Wtyczka z uziemieniem ma dwa wtyki kontaktowe i trzeci wtyk uziemienia. Szerszy wtyk kontaktowy lub dodatkowy wtyk uziemienia służą do zapewnienia bezpieczeństwa użytkownikowi. Jeśli format wtyczki urządzenia nie odpowiada standardowi gniazdka, proszę zwrócić się do elektryka z prośbą o wymienienie gniazda.
10. Kabel sieciowy należy ułożyć tak, aby nie był narażony na deptanie i działanie ostrych krawędzi, co mogłoby doprowadzić do jego uszkodzenia.
Szczególną uwagę zwrócić należy na odpowiednią ochronę miejsc w pobliżu wtyczek i przedłużaczy oraz miejsce, w którym kabel sieciowy przymocowany jest do urządzenia.
11. Urządzenie musi być zawsze podłączone do sieci sprawnym przewodem z uziemieniem.
12. Jeżeli wtyk sieciowy lub gniazdo
ZASTRZEŻENIA PRAWNE sieciowe w urządzeniu pełnią funkcję wyłącznika, to muszą one być zawsze łatwo dostępne.
13. Używać wyłącznie sprzętu dodatkowego i akcesoriów zgodnie z zaleceniami producenta.
14.
Używać jedynie zalecanych przez producenta lub znajdujących się w zestawie wózków, stojaków, statywów, uchwytów i stołów. W przypadku posługiwania się wózkiem należy zachować szczególną ostrożność w trakcie przewożenia zestawu, aby uniknąć niebezpieczeństwa potknięcia się i zranienia.
15. W trakcie burzy oraz na czas dłuższego nieużywania urządzenia należy wyjąć wtyczkę z gniazdka sieciowego.
16. Wykonywanie wszelkich napraw należy zlecać jedynie wykwalifikowanym pracownikom serwisu. Przeprowadzenie przeglądu technicznego staje się konieczne, jeśli urządzenie zostało uszkodzone w jakikolwiek sposób (dotyczy to także kabla sieciowego lub wtyczki), jeśli do wnętrza urządzenia dostały się przedmioty lub ciecz, jeśli urządzenie wystawione było na działanie deszczu lub wilgoci, jeśli urządzenie nie funkcjonuje poprawnie oraz kiedy spadło na podłogę.
17. Prawidłowa utylizacja produktu:
Ten symbol wskazuje, że tego produktu nie należy wyrzucać razem ze zwykłymi odpadami domowymi, tylko zgodnie z dyrektywą w sprawie zużytego sprzętu elektrycznego i elektronicznego
(WEEE) (2012/19/EU) oraz przepisami krajowymi. Niniejszy produkt należy przekazać do autoryzowanego punktu zbiórki zużytego sprzętu elektrycznego i elektronicznego. Niewłaściwe postępowanie z tego typu odpadami może wywołać szkodliwe działanie na środowisko naturalnej i zdrowie człowieka z powodu potencjalnych substancji niebezpiecznych zaliczanych jako zużyty sprzęt elektryczny i elektroniczny. Jednocześnie, Twój wkład w prawidłową utylizację niniejszego produktu przyczynia się do oszczędnego wykorzystywania zasobów naturalnych. Szczegółowych informacji o miejscach, w których można oddawać zużyty sprzęt do recyklingu, udzielają urzędy miejskie, przedsiębiorstwa utylizacji odpadów lub najbliższy zakład utylizacji odpadów.
18. Nie instaluj w ograniczonej przestrzeni, takiej jak półka na książki lub podobny zestaw.
19. Nie stawiaj na urządzeniu źródeł otwartego ognia, takich jak zapalone świece.
20. Należy pamiętać o środowiskowych aspektach utylizacji baterii. Baterie należy utylizować w punkcie zbiórki baterii.
21. To urządzenie może być używane w klimacie tropikalnym i umiarkowanym do 45 ° C.
ZASTRZEŻENIA PRAWNE
Music Tribe nie ponosi odpowiedzialności za jakiekolwiek straty, które mogą ponieść osoby, które polegają w całości lub w części na jakimkolwiek opisie, fotografii lub oświadczeniu zawartym w niniejszym dokumencie. Specyfikacje techniczne, wygląd i inne informacje mogą ulec zmianie bez powiadomienia.
Wszystkie znaki towarowe są własnością ich odpowiednich właścicieli. Midas, Klark Teknik,
Lab Gruppen, Lake, Tannoy,
Turbosound, TC Electronic, TC Helicon,
Behringer, Bugera, Oberheim,
Auratone i Coolaudio są znakami towarowymi lub zastrzeżonymi znakami towarowymi firmy Music
Tribe Global Brands Ltd. © Music Tribe
Global Brands Ltd. 2021 Wszystkie prawa zastrzeżone.
Quick Start Guide 13
OGRANICZONA GWARANCJA
Aby zapoznać się z obowiązującymi warunkami gwarancji i dodatkowymi informacjami dotyczącymi ograniczonej gwarancji Music Tribe, zapoznaj się ze wszystkimi szczegółami w trybie online pod adresem musictribe.com/warranty.
14 GO XLR
Welcome
About this document
This Quick Start Guide will help you set up, connect and begin operating your GO XLR.
GO XLR App
The GO XLR app is REQUIRED to operate your GO XLR.
GO XLR app key features include:
• • EQ, Compress and Gate your mic
• • Set up and dei ne mixer controls
• • Change button/screen colors
• • Create and manage samples
• • Save voice FX settings
• • Direct access to product manuals
• • Access to TC Helicon support
Processing
PC-based Hardware
-Core 2 DUO CPU
-Ethernet port
-1 GB RAM
Recommended Operating Systems:
Windows*
-Windows 7, 32-bit or 64-bit
-Windows 8, 32-bit or 64 bit
-Windows 10, 32-bit or 64-bit
*Windows is either a registered trademark or trademark of Microsoft Corporation in the United States and/or other countries.
Download the app
1. Download the GO XLR app: a. Go to the GO XLR product page at tc-helicon.com/ products/goxlr.
b. Click on the Downloads tab.
c. Click on the download icon for the latest version of the
GO XLR app.
d. Follow the onscreen installation instructions.
2. You may be asked to reboot your computer.
3. Connect the GO XLR USB cable to your computer when app installation is complete.
4. Power up GO XLR.
5. Dominate the Interwebs!
Get the Reference Manual
A full reference manual for GO XLR is also available on the
Minimum Hardware: downloads tab at tc-helicon.com/ products/goxlr.
Quick Start Guide 15
Controls
(4) (5) (6)
(1)
(2)
(3)
(13) (12)
(1)
SCRIBBLE STRIPS for naming channels.
(2)
CHANNEL FADERS control individual channel levels in your mix.
(3)
CHANNEL MUTE switches of the matching channel in the mixer.
(4)
VOICE FX PRESETS allow you to store up to six effects presets.
(5)
VOICE FX CONTROLS allow real-time control of the assigned effects parameter.
(6)
MEGAPHONE button adds distortion to your voice like a megaphone.
(7) ROBOT button transforms your voice into a machinelike robot.
(8)
HARDTUNE tunes your voice to the sound of your music or game.
(9)
FX turns on or of all voice FX.
(10)
!@#$* button lets you instantly censor and “bleep out” your mic.
(11)
“COUGH” mutes your microphone while the button is held.
(12)
SAMPLE PADS hold selected samples and bumpers for instant recall. Hold a button to record a new sample, and then press to play back. Press CLEAR and then one of the four sample pads to clear that sample.
(13) SAMPLE BANK organizes samples and bumpers into groups for instant recall.
(7)
(8)
(9)
(10)
(11)
16 GO XLR
Controls
(14) (15) (16) (17) (18) (19) (20) (21)
(14) XLR MIC INPUT for audio input from professional microphones.
For condenser-style microphones that require “phantom power”, go to the AUDIO tab in the GO XLR app and activate the
“Condenser” setting under MIC TYPE.
(15) LINE IN for audio input from devices such as phones, tablets, computers, etc.
(16) MIC input for connection to headset microphones. Typically, this headset connection will be a pink connector.
NOTE: If you intend to use the popular Blue Yeti* microphone, which has its own built-in headphone output, you should run that built-in headphone output into the GO XLR’s MIC input. For Blue Yeti mics powered via USB, plug the USB connector directly into your computer for power, but do not select the Blue Yeti as an audio source on the computer. Instead, the Blue Yeti’s headphone output will be the audio source for mixing inside GO XLR.
(17) PHONES output jack for your headphones. Typically, the headphone connector will be a green connector.
(18) LINE OUT contains an exact copy of your broadcast stream audio.
This connection can be used to connect to a dedicated streaming computer or other devices like speakers.
(19) USB input for PC connection, i rmware updates and remote control with GO XLR app.
(20) OPTICAL input for connection to SONY PlayStation† or Microsoft
Xbox ‡ consoles.
(21) DC IN accepts power connection through the included 12 V adapter.
*Yeti is a registered trademark of Blue Microphones.
†PlayStation is a registered trademark or trademark of Sony Interactive Entertainment
Inc. SONY is a registered trademark of Sony Corporation.
‡Xbox is either a registered trademark or trademark of Microsoft Corporation in the
United States and/or other countries.
Connection Diagram
Quick Start Guide 17
Studio Vocal Mic
External Audio Device
(if applicable)
Stream alerts
Gaming Headset with Mic
Stream broadcast
Gaming Console
Dedicated Streaming
Computer (if applicable)
Gaming/Streaming
Computer
Audio out to GO XLR via headphone output
Power via
USB (no audio)
Blue Yeti Mic Recommended Connection
Blue Yeti Microphone Computer
18 GO XLR
Please register your GO XLR
To register your GO XLR using the GO XLR app, launch GO XLR and click on the ACCOUNT button.
Registration of your product is NOT required to use GO XLR, update
Firmware or contact support.
Getting support
If you still have questions about GO XLR af ter reading this Quick
Start Guide and the Reference Manual, please get in touch with
TC Helicon:
@Helicon_Gaming
TC_Helicon_Gaming
TC_Helicon_Gaming https://discord.gg/8Ebg3Sp
TC_Helicon_Gaming tc-helicon.com/brand/tchelicon/support
Specifications
Analog Connections
XLR In
Phantom power
Line In
Mic
Phones
Line Out
Digital Connections
USB
Optical
Controls
Motorized faders
Backlit LCD scribble strips
Rotational encoders
Lighting
Buttons
System / Processing
A/D – D/A conversion
Effects
Frequency response
Dynamic range
S/N ratio
Power Supply / Voltage
Power input
Adapter
Power consumption
Dimensions / Weight
Dimensions (H x W x D)
Weight
1 x XLR, balanced
+48 V, switchable via control app
1 x 1/₈" TRS, stereo
1 x 1/₈" TRS, biased for computer microphone input
1 x 1/₈" TRS, stereo
1 x 1/₈" TRS, stereo
1 x USB 2.0, type B
1 x Toslink
4
4
4
RGB
24
24-bit @ 48 kHz
Reverb, echo, pitch shifting, gender (formant shifting), megaphone, robot, hardtune, sampler
10 Hz to 20 kHz, +0/-2 dB
> 110 dB
> 101 dB
Standard 12 V DC, center negative
< 1 A (power supply included)
12 V DC / 1 A
10 W
82 x 285 x 174 mm (3.2 x 11.2 x 6.9")
1.55 kg (3.41 lbs)
Quick Start Guide 19
20 GO XLR
Bienvenido
Acerca de este documento
Esta Guía de inicio rápido lo ayudará a configurar, conectar y comenzar a operar su GO XLR.
Aplicación GO XLR
Se REQUIERE la aplicación GO XLR para operar su GO XLR.
Las características clave de la aplicación GO XLR incluyen:
• • Ecualiza, comprime y cancela tu micrófono
• • Configurar y definir los controles del mezclador
• • Cambiar colores de botón / pantalla
• • Crear y administrar muestras
• • Guardar la configuración de efectos de voz
• • Acceso directo a manuales de productos
• • Acceso al soporte de TC Helicon
Procesando
Hardware basado en PC
-Core 2 CPU DUO
-Puerto Ethernet
-1 GB de RAM
Sistemas operativos recomendados:
Windows*
-Windows 7, 32 bits o 64 bits
-Windows 8, 32 bits o 64 bits
-Windows 10, 32 bits o 64 bits
* Windows es una marca comercial registrada o una marca comercial de Microsoft
Corporation en los Estados Unidos y / o en otros países.
Descargar la aplicación
1. Descarga la aplicación GO XLR: a. Vaya a la página del producto GO XLR en tc-helicon.
com/products/goxlr.
b. Haga clic en la pestaña Descargas.
c. Haga clic en el icono de descarga para obtener la última versión de la aplicación GO XLR.
d. Siga las instrucciones de instalación en pantalla.
2. Es posible que se le solicite que reinicie su computadora.
3. Conecte el cable USB GO XLR a su computadora cuando se complete la instalación de la aplicación.
4. Encienda el GO XLR.
5. ¡Domina las Interwebs!
Obtenga el manual de referencia
También se encuentra disponible un manual de referencia completo para GO XLR en la pestaña de descargas de Hardware mínimo en tc-helicon.com/products/goxlr.
Quick Start Guide 21
Controles
(4) (5) (6)
(1)
(2)
(3)
(7)
(8)
(9)
(10)
(11)
(13) (12)
(1)
TIRAS PARA ESCRIBIR para nombrar canales.
(2)
FADERS DE CANAL controle los niveles de canales individuales en su mezcla.
(3)
CANAL MUTE conmuta el canal correspondiente en el mezclador.
(4)
VOZ FX PRESETS le permite almacenar hasta seis presets de efectos.
(5)
CONTROLES DE VOZ FX permiten el control en tiempo real del parámetro de efectos asignado.
(6)
MEGÁFONO El botón agrega distorsión a su voz como un megáfono.
(7) ROBOT El botón transforma su voz en un robot parecido a una máquina.
(8)
HARDTUNE sintoniza su voz con el sonido de su música o juego.
(9)
FX enciende o de todos los efectos de voz.
(10)
!@ # $* El botón te permite censurar instantáneamente y
“apagar” tu micrófono.
(11)
“TOS” silencia el micrófono mientras se mantiene presionado el botón.
(12)
ALMOHADILLAS DE MUESTRA Mantenga las muestras seleccionadas y los parachoques para una recuperación instantánea. Mantenga presionado un botón para grabar una nueva muestra y luego presione para reproducir.
Presione CLEAR y luego uno de los cuatro pads de muestra para borrar esa muestra.
22 GO XLR
Controles
(14) (15) (16) (17) (18) (19) (20) (21)
(13)
BANCO DE MUESTRAS organiza muestras y protectores en grupos para recuperarlos instantáneamente.
(14)
ENTRADA DE MICRÓFONO XLR para entrada de audio de micrófonos profesionales. Para micrófonos de tipo condensador que requieren “alimentación fantasma”, vaya a la pestaña AUDIO en la aplicación GO XLR y active la configuración “Condensador” en TIPO DE MICRÓFONO.
(15)
EN LINEA para la entrada de audio de dispositivos como teléfonos, tabletas, computadoras, etc.
(16)
MIC entrada para conexión a micrófonos de diadema.
Normalmente, esta conexión de auriculares será un conector rosa.
NOTA: Si tiene la intención de utilizar el popular micrófono
Blue Yeti *, que tiene su propia salida de auriculares incorporada, debe ejecutar esa salida de auriculares incorporada en la entrada MIC del GO XLR. Para los micrófonos Blue Yeti alimentados a través de USB, conecte el conector USB directamente a su computadora para obtener energía, pero no seleccione el Blue Yeti como fuente de audio en la computadora. En cambio, la salida de auriculares del Blue Yeti será la fuente de audio para mezclar dentro del GO XLR.
(17)
LOS TELEFONOS toma de salida para sus auriculares.
Normalmente, el conector de auriculares será un conector verde.
(18) SALIDA DE LÍNEA contiene una copia exacta de su transmisión de audio. Esta conexión se puede utilizar para conectarse a una computadora de transmisión dedicada u otros dispositivos como altavoces.
(19)
USB Entrada para conexión a PC, actualizaciones de i rmware y control remoto con la aplicación GO XLR.
(20)
ÓPTICO entrada para la conexión a las consolas SONY
PlayStation † o Microsoft Xbox ‡.
(21)
DC EN acepta la conexión de energía a través del adaptador de 12 V incluido.
*Yeti is a registered trademark of Blue Microphones.
Diagrama de conexión
Quick Start Guide 23
Studio Vocal Mic
External Audio Device
(if applicable)
Stream alerts
Gaming Headset with Mic
Stream broadcast
Gaming Console
Dedicated Streaming
Computer (if applicable)
Gaming/Streaming
Computer
Audio out to GO XLR via headphone output
Power via
USB (no audio)
Conexión recomendada de Blue Yeti Mic
Blue Yeti Microphone Computer
24 GO XLR
Registre su GO XLR
Para registrar su GO XLR usando la aplicación GO XLR, inicie GO XLR y haga clic en el botón CUENTA.
NO es necesario registrar su producto para utilizar GO XLR, actualizar el firmware o ponerse en contacto con el soporte.
Conseguir apoyo
Si todavía tiene preguntas sobre GO XLR después de leer esta Guía de inicio rápido y el Manual de referencia, póngase en contacto con TC Helicon:
@Helicon_Gaming
TC_Helicon_Gaming
TC_Helicon_Gaming https://discord.gg/8Ebg3Sp
TC_Helicon_Gaming tc-helicon.com/brand/tchelicon/support
Bienvenue
À propos de ce document
Ce guide de démarrage rapide vous aidera à configurer, connecter et commencer à utiliser votre GO XLR.
GO XLR App
L’application GO XLR est REQUISE pour utiliser votre GO XLR.
Les principales fonctionnalités de l’application GO XLR incluent:
• • Égalisez, compressez et portez votre micro
• • Configurer et définir les commandes du mélangeur
• • Changer les couleurs des boutons / écrans
• • Créer et gérer des échantillons
• • Enregistrer les paramètres des effets vocaux
• • Accès direct aux manuels des produits
• • Accès au support TC Helicon
En traitement
Matériel basé sur PC
-Core 2 DUO CPU
-Ethernet port
-1 GB RAM
Recommended Operating Systems:
Windows*
-Windows 7, 32 bits ou 64 bits
-Windows 8, 32 bits ou 64 bits
-Windows 10, 32 bits ou 64 bits
* Windows est une marque déposée ou une marque commerciale de Microsoft
Corporation aux États-Unis et / ou dans d’autres pays.
Quick Start Guide 25
Téléchargez l’appli
1. Téléchargez l’application GO XLR: a. Accédez à la page produit GO XLR à tc-helicon.com/ products/goxlr.
b. Cliquez sur l’onglet Téléchargements.
c. Cliquez sur l’icône de téléchargement pour la dernière version de l’application GO XLR.
d. Suivez les instructions d’installation à l’écran.
2. Vous serez peut-être invité à redémarrer votre ordinateur.
3. Connectez le câble USB GO XLR à votre ordinateur lorsque l’installation de l’application est terminée.
4. Mettez le GO XLR sous tension.
5. Dominez les Interwebs!
Obtenez le manuel de référence
Un manuel de référence complet pour GO XLR est également disponible sur l’onglet Matériel minimum: téléchargements sur tc-helicon.com/products/goxlr.
26 GO XLR
Réglages
(4) (5) (6)
(1)
(2)
(3)
(7)
(8)
(9)
(10)
(11)
(13) (12)
(1)
BANDES SCRIBBLE pour nommer les canaux.
(2)
FADERS DE CANAL contrôler les niveaux de canaux individuels dans votre mix.
(3)
CANAL Commutateurs MUTE du canal correspondant dans la console de mixage.
(4)
VOIX FX PRESETS vous permet de stocker jusqu’à six préréglages d’effets.
(5)
CONTRÔLES DES EFFETS VOCAUX permettent le contrôle en temps réel du paramètre d’effets affecté.
(6)
MÉGAPHONE Le bouton ajoute une distorsion à votre voix comme un mégaphone.
(7) ROBOT Le bouton transforme votre voix en un robot semblable à une machine.
(8)
HARDTUNE ajuste votre voix au son de votre musique ou de votre jeu.
(9)
FX active ou de tous les effets vocaux.
(10)
!@#$* Le bouton vous permet de censurer instantanément et de «biper» votre micro.
(11)
“LA TOUX” coupe votre microphone lorsque vous maintenez le bouton enfoncé.
(12)
ÉCHANTILLONS DE PLAQUETTES maintenez les
échantillons et les bumpers sélectionnés pour un rappel instantané. Maintenez un bouton enfoncé pour enregistrer un nouvel échantillon, puis appuyez sur pour le lire. Appuyez sur CLEAR puis sur l’un des quatre pads d’échantillons pour effacer cet échantillon.
Quick Start Guide 27
(14) (15) (16) (17) (18) (19) (20) (21)
(13)
BANQUE D’ÉCHANTILLONS organise les échantillons et les pare-chocs en groupes pour un rappel instantané.
(14)
ENTRÉE MICRO XLR pour l’entrée audio des microphones professionnels. Pour les microphones à condensateur qui nécessitent une «alimentation fantôme», accédez
à l’onglet AUDIO de l’application GO XLR et activez le paramètre «Condenseur» sous TYPE DE MICRO.
(15)
FAIRE LA QUEUE pour l’entrée audio d’appareils tels que téléphones, tablettes, ordinateurs, etc.
(16)
MIC entrée pour la connexion aux microphones du casque. En règle générale, cette connexion casque sera un connecteur rose.
REMARQUE: Si vous avez l’intention d’utiliser le populaire microphone Blue Yeti *, qui possède sa propre sortie casque intégrée, vous devez exécuter cette sortie casque intégrée dans l’entrée MIC du GO XLR. Pour les micros
Blue Yeti alimentés via USB, branchez le connecteur USB directement sur votre ordinateur pour l’alimentation, mais ne sélectionnez pas le Blue Yeti comme source audio sur l’ordinateur. Au lieu de cela, la sortie casque du Blue Yeti sera la source audio pour le mixage à l’intérieur de GO XLR.
(17)
TÉLÉPHONE (Sprise de sortie pour vos écouteurs. En règle générale, le connecteur du casque sera un connecteur vert.
(18)
SORTIE DE LIGNE contient une copie exacte de votre flux audio de diffusion. Cette connexion peut être utilisée pour se connecter à un ordinateur de diffusion dédié ou à d’autres appareils tels que des haut-parleurs.
(19)
USB entrée pour la connexion PC, les mises à jour du micrologiciel et le contrôle à distance avec l’application
GO XLR.
(20)
OPTIQUE entrée pour la connexion aux consoles SONY
PlayStation † ou Microsoft Xbox ‡.
(21)
DC IN accepte une connexion électrique via l’adaptateur
12 V inclus.
* Yeti est une marque déposée de Blue Microphones.
28 GO XLR
Diagramme de connexion
Studio Vocal Mic
External Audio Device
(if applicable)
Stream alerts
Gaming Headset with Mic
Stream broadcast
Gaming Console
Dedicated Streaming
Computer (if applicable)
Gaming/Streaming
Computer
Audio out to GO XLR via headphone output
Power via
USB (no audio)
Connexion recommandée du Blue Yeti Mic
Blue Yeti Microphone Computer
Veuillez enregistrer votre GO XLR
Pour enregistrer votre GO XLR à l’aide de l’application GO XLR, lancez GO XLR et cliquez sur le bouton COMPTE.
L’enregistrement de votre produit n’est PAS nécessaire pour utiliser GO XLR, mettre à jour le micrologiciel ou contacter l’assistance.
Quick Start Guide
Obtenir de l’aide
Si vous avez encore des questions sur GO XLR après avoir lu ce guide de démarrage rapide et le manuel de référence, veuillez contacter TC Helicon:
29
@Helicon_Gaming
TC_Helicon_Gaming
TC_Helicon_Gaming https://discord.gg/8Ebg3Sp
TC_Helicon_Gaming tc-helicon.com/brand/tchelicon/support
30 GO XLR
Willkommen
Über dieses Dokument
This Quick Start Guide will help you set up, connect and begin operating your GO XLR.
GO XLR App
Die GO XLR-App ist erforderlich, um Ihre GO XLR zu betreiben.
Zu den Hauptfunktionen der GO XLR-App gehören:
• • EQ, Compress und Gate deines Mikrofons
• • Mischersteuerung einrichten und definieren
• • Ändern Sie die Farben der Schaltflächen / Bildschirme
• • Erstellen und verwalten Sie Beispiele
• • Speichern Sie die Sprach-FX-Einstellungen
• • Direkter Zugriff auf Produkthandbücher
• • Zugriff auf TC Helicon-Unterstützung wird bearbeitet
PC-basierte Hardware
-Kern 2 DUO CPU
-Ethernet Anschluss
-1 GB RAM
Empfohlene Betriebssysteme:
Windows*
-Fenster 7, 32-Bit oder 64-Bit
-Fenster 8, 32-Bit oder 64-Bit
-Fenster 10, 32-Bit oder 64-Bit
* Windows ist entweder eine eingetragene Marke oder eine Marke der Microsoft
Corporation in den USA und / oder anderen Ländern.
Laden Sie die App herunter
1. Laden Sie die GO XLR App herunter: a. Besuchen Sie die GO XLR-Produktseite unter tc-helicon.
com/products/goxlr.
b. Klicken Sie auf die Registerkarte Downloads.
c. Klicken Sie auf das Download-Symbol, um die neueste
Version der GO XLR-App anzuzeigen.
d. Befolgen Sie die Installationsanweisungen auf dem
Bildschirm.
2. Möglicherweise werden Sie aufgefordert, Ihren Computer neu zu starten.
3. Schließen Sie das GO XLR USB-Kabel an Ihren Computer an, wenn die App-Installation abgeschlossen ist.
4. Schalten Sie GO XLR ein.
5. Beherrsche die Interwebs!
Holen Sie sich das
Referenzhandbuch
Ein vollständiges Referenzhandbuch für GO XLR finden Sie auch auf der Registerkarte Minimum Hardware: Downloads unter tc-helicon.com/products/goxlr.
Quick Start Guide 31
Bedienelemente
(4) (5) (6)
(1)
(2)
(3)
(7)
(8)
(9)
(10)
(11)
(13) (12)
(1)
SCRIBBLE STRIPS zum Benennen von Kanälen.
(2)
CHANNEL FADERS Steuern Sie einzelne Kanalpegel in
Ihrem Mix.
(3)
KANAL MUTE -Schalter des passenden Kanals im Mixer.
(4)
STIMME Mit FX PRESETS können Sie bis zu sechs
Effektvoreinstellungen speichern.
(5)
VOICE FX-STEUERUNGEN Ermöglichen die
Echtzeitsteuerung des zugewiesenen Effektparameters.
(6)
MEGAPHON Die Taste verzerrt Ihre Stimme wie ein
Megaphon.
(7)
ROBOTER Die Taste verwandelt Ihre Stimme in einen maschinenähnlichen Roboter.
(8)
HARDTUNE Stimmt Ihre Stimme auf den Klang Ihrer Musik oder Ihres Spiels ab.
(9)
FX schaltet oder von allen Voice FX ein.
(10)
!@#$* Mit der Taste können Sie Ihr Mikrofon sofort zensieren und “piepen”.
(11)
“HUSTEN” schaltet Ihr Mikrofon stumm, während die
Taste gedrückt gehalten wird.
(12)
BEISPIELPADS Halten Sie ausgewählte Proben und
Stoßstangen für den sofortigen Abruf. Halten Sie eine
Taste gedrückt, um ein neues Sample aufzunehmen, und drücken Sie dann, um es wiederzugeben. Drücken
Sie CLEAR und dann eines der vier Sample-Pads, um das
Sample zu löschen.
32 GO XLR
Bedienelemente
(14) (15) (16) (17) (18) (19) (20) (21)
(13)
BEISPIELBANK organisiert Proben und Stoßstangen in
Gruppen für den sofortigen Rückruf.
(14)
XLR MIC EINGANG Für Audioeingänge von professionellen
Mikrofonen. Für Mikrofone im Kondensatorstil, die
„Phantomspeisung“ benötigen, gehen Sie in der GO
XLR-App zur Registerkarte AUDIO und aktivieren Sie die
Einstellung „Kondensator“ unter MIC TYPE.
(15)
LINE IN für Audioeingaben von Geräten wie Telefonen,
Tablets, Computern usw.
(16)
MIC Eingang zum Anschluss an Headset-Mikrofone. In der
Regel handelt es sich bei dieser Headset-Verbindung um einen rosa Anschluss.
HINWEIS: Wenn Sie das beliebte Blue Yeti * -Mikrofon verwenden möchten, das über einen eigenen integrierten
Kopfhörerausgang verfügt, sollten Sie diesen integrierten
Kopfhörerausgang in den MIC-Eingang des GO XLR einspeisen. Schließen Sie bei Blue USB-Mikrofonen, die
über USB mit Strom versorgt werden, den USB-Anschluss direkt an Ihren Computer an, um ihn mit Strom zu versorgen. Wählen Sie den Blue Yeti jedoch nicht als
Audioquelle am Computer aus. Stattdessen ist der
Kopfhörerausgang des Blue Yeti die Audioquelle für das
Mischen in GO XLR.
(17)
TELEFONE Ausgangsbuchse für Ihre Kopfhörer. In der
Regel ist der Kopfhöreranschluss ein grüner Anschluss.
(18)
LINE OUT enthält eine genaue Kopie Ihres Broadcast-
Stream-Audios. Diese Verbindung kann verwendet werden, um eine Verbindung zu einem dedizierten
Streaming-Computer oder anderen Geräten wie
Lautsprechern herzustellen.
(19)
USB Eingang für PC-Verbindung, Hardware-Updates und
Fernbedienung mit GO XLR App.
(20)
OPTISCH Eingabe für die Verbindung zu SONY PlayStation † oder Microsoft Xbox ‡ Konsolen.
(21)
DC IN Akzeptiert den Stromanschluss über den mitgelieferten 12-V-Adapter.
* Yeti ist eine eingetragene Marke von Blue Microphones.
Quick Start Guide 33
Schaltplan
Studio Vocal Mic
External Audio Device
(if applicable)
Stream alerts
Gaming Headset with Mic
Stream broadcast
Gaming Console
Dedicated Streaming
Computer (if applicable)
Gaming/Streaming
Computer
Audio out to GO XLR via headphone output
Power via
USB (no audio)
Blue Yeti Mic Empfohlener Anschluss
Blue Yeti Microphone Computer
34 GO XLR
Bitte registrieren Sie Ihre GO XLR
Um Ihre GO XLR mit der GO XLR-App zu registrieren, starten Sie
GO XLR und klicken Sie auf die Schaltfläche KONTO.
Die Registrierung Ihres Produkts ist NICHT erforderlich, um GO XLR zu verwenden, die Firmware zu aktualisieren oder den Support zu kontaktieren.
Unterstützung bekommen
Wenn Sie nach dem Lesen dieser Kurzanleitung und des
Referenzhandbuchs noch Fragen zu GO XLR haben, wenden Sie sich bitte an TC Helicon:
@Helicon_Gaming
TC_Helicon_Gaming
TC_Helicon_Gaming https://discord.gg/8Ebg3Sp
TC_Helicon_Gaming tc-helicon.com/brand/tchelicon/support
Bem-vinda
Sobre este documento
Este Guia de início rápido ajudará você a configurar, conectar e começar a operar seu GO XLR.
GO XLR App
O aplicativo GO XLR é NECESSÁRIO para operar seu GO XLR.
Os principais recursos do aplicativo GO XLR incluem:
• • EQ, comprimir e ativar seu microfone
• • Configure e dê os controles do mixer
• • Alterar as cores do botão / tela
• • Criar e gerenciar amostras
• • Salvar configurações de FX de voz
• • Acesso direto aos manuais do produto
• • Acesso ao suporte TC Helicon
Em processamento
Hardware baseado em PC
-Core 2 DUO CPU
-Conexão de Rede
-1 GB RAM
Sistemas operacionais recomendados:
Windows*
-Windows 7, 32 bits ou 64 bits
-Windows 8, 32 bits ou 64 bits
-Windows 10, 32 bits ou 64 bits
* Windows é uma marca registrada ou marca comercial da Microsoft Corporation nos
Estados Unidos e / ou outros países.
Quick Start Guide 35
Baixe o aplicativo
1. Baixe o aplicativo GO XLR: a. Vá para a página do produto GO XLR em tc-helicon.
com/products/goxlr.
b. Clique na guia Downloads.
c. Clique no ícone de download da versão mais recente do aplicativo GO XLR.
d. Siga as instruções de instalação na tela.
2. Você pode ser solicitado a reiniciar o computador.
3. Conecte o cabo USB GO XLR ao seu computador quando a instalação do aplicativo for concluída.
4. Ligue o GO XLR.
5. Domine as Interwebs!
Obtenha o Manual de Referência
Um manual de referência completo para GO XLR também está disponível na guia Hardware mínimo: downloads em tc-helicon.com/products/goxlr.
36 GO XLR
Controles
(4) (5) (6)
(1)
(2)
(3)
(7)
(8)
(9)
(10)
(11)
(13) (12)
(1)
TIRAS DE SCRIBBLE para nomear canais.
(2)
CHANNEL FADERS controle os níveis de canais individuais em sua mixagem.
(3)
CANAL MUTE muda do canal correspondente no mixer.
(4)
VOZ FX PRESETS permitem que você armazene até seis presets de efeitos.
(5)
CONTROLES DE VOICE FX permitem o controle em tempo real do parâmetro de efeitos atribuído.
(6)
MEGAFONE O botão adiciona distorção à sua voz como um megafone.
(7)
ROBÔ botão transforma sua voz em um robô semelhante a uma máquina.
(8) HARDTUNE ajusta sua voz ao som de sua música ou jogo.
(9)
FX liga ou desliga todos os efeitos de voz.
(10)
!@# $* O botão permite que você censure instantaneamente e “desligue” o microfone.
(11)
“TOSSE” silencia o microfone enquanto o botão é pressionado.
(12) AMOSTRA DE ALMOFADAS segure samples e bumpers selecionados para recuperação instantânea. Segure um botão para gravar uma nova amostra e pressione para reproduzir. Pressione CLEAR e, em seguida, um dos quatro blocos de amostra para limpar essa amostra.
(13)
SAMPLE BANK organiza samples e bumpers em grupos para recuperação instantânea.
(14)
XLR MIC INPUT para entrada de áudio de microfones profissionais. Para microfones tipo condensador que requerem “phantom power”, vá para a guia AUDIO no aplicativo GO XLR e ative a configuração “Condenser” em
MIC TYPE.
Quick Start Guide 37
Controles
(14) (15) (16) (17) (18) (19) (20) (21)
(15)
ENTRADA DE LINHA para entrada de áudio de dispositivos como telefones, tablets, computadores, etc.
(16)
Microfone entrada para conexão a microfones de fone de ouvido. Normalmente, esta conexão de fone de ouvido será um conector rosa.
NOTA: Se você pretende usar o popular microfone Blue
Yeti *, que possui sua própria saída de fone de ouvido integrada, você deve executar essa saída de fone de ouvido integrada na entrada MIC do GO XLR. Para microfones
Blue Yeti alimentados por USB, conecte o conector USB diretamente em seu computador para alimentação, mas não selecione o Blue Yeti como uma fonte de áudio no computador. Em vez disso, a saída de fone de ouvido do
Blue Yeti será a fonte de áudio para mixagem dentro do
GO XLR.
(17)
TELEFONES conector de saída para seus fones de ouvido.
Normalmente, o conector do fone de ouvido será um conector verde.
(18)
LINE OUT contém uma cópia exata do áudio do seu stream de transmissão. Esta conexão pode ser usada para conectar a um computador de streaming dedicado ou outros dispositivos como alto-falantes.
(19)
USB entrada para conexão de PC, atualizações de i rmware e controle remoto com aplicativo GO XLR.
(20)
ÓPTICO entrada para conexão a consoles SONY PlayStation
† ou Microsoft Xbox ‡.
(21)
DC IN aceita conexão de energia por meio do adaptador de 12 V incluído.
* Yeti é uma marca registrada da Blue Microphones.
‡ Xbox é uma marca registrada ou marca comercial da Microsoft Corporation nos
Estados Unidos e / ou outros países.
38 GO XLR
Diagrama de ligação
Studio Vocal Mic
External Audio Device
(if applicable)
Stream alerts
Gaming Headset with Mic
Stream broadcast
Gaming Console
Dedicated Streaming
Computer (if applicable)
Gaming/Streaming
Computer
Audio out to GO XLR via headphone output
Power via
USB (no audio)
Conexão recomendada do Blue Yeti Mic
Blue Yeti Microphone Computer
Registre seu GO XLR
Para registrar seu GO XLR usando o aplicativo GO XLR, inicie o GO
XLR e clique no botão CONTA.
O registro do seu produto NÃO é necessário para usar o GO XLR, atualizar o Firmware ou entrar em contato com o suporte.
Quick Start Guide 39
Obtendo suporte
Se você ainda tiver dúvidas sobre o GO XLR depois de ler este Guia de início rápido e o Manual de referência, entre em contato com
TC Helicon:
@Helicon_Gaming
TC_Helicon_Gaming
TC_Helicon_Gaming https://discord.gg/8Ebg3Sp
TC_Helicon_Gaming tc-helicon.com/brand/tchelicon/support
40 GO XLR
Benvenuto
Informazioni su questo documento
Questa Guida rapida ti aiuterà a configurare, connettere e iniziare a utilizzare il tuo GO XLR.
GO XLR App
L’app GO XLR è NECESSARIA per utilizzare il GO XLR.
Le caratteristiche principali dell’app GO XLR includono:
• • Equalizzazione, compressione e gate del microfono
• • Impostare e de nire i controlli del mixer
• • Cambia i colori dei pulsanti / dello schermo
• • Crea e gestisci campioni
• • Salva le impostazioni degli effetti vocali
• • Accesso diretto ai manuali dei prodotti
• • Accesso al supporto TC Helicon in lavorazione
Hardware basato su PC
-Core 2 DUO CPU
-Ethernet port
-1 GB RAM
Recommended Operating Systems:
Windows*
-Windows 7, 32 bit o 64 bit
-Windows 8, 32 bit o 64 bit
-Windows 10, 32 bit o 64 bit
* Windows è un marchio registrato o un marchio di Microsoft Corporation negli Stati
Uniti e / o in altri paesi.
Scarica l ’ app
1. Scarica l’app GO XLR: a. Vai alla pagina del prodotto GO XLR su tc-helicon.com/ products/goxlr.
b. Fare clic sulla scheda Download.
c. Fare clic sull’icona di download per l’ultima versione dell’app GO XLR.
d. Segui le istruzioni di installazione sullo schermo.
2. È possibile che ti venga chiesto di riavviare il computer.
3. Collega il cavo USB GO XLR al computer al termine dell’installazione dell’app.
4. Accendi GO XLR.
5. Domina gli Interweb!
Ottieni il Manuale di riferimento
Un manuale di riferimento completo per GO XLR è disponibile anche nella scheda Hardware minimo: download su tc-helicon.
com/products/goxlr.
Quick Start Guide 41
Controlli
(4) (5) (6)
(1)
(2)
(3)
(7)
(8)
(9)
(10)
(11)
(13) (12)
(1)
STRISCE SCRIBBLE per denominare i canali.
(2)
FADER DI CANALE controllare i livelli dei singoli canali nel mix.
(3)
CANALE Interruttori MUTE del canale corrispondente nel mixer.
(4)
VOCE I PRESET FX consentono di memorizzare fino a sei preset di effetti.
(5)
CONTROLLI VOCALI FX consentire il controllo in tempo reale del parametro degli effetti assegnati.
(6)
MEGAFONO Il pulsante aggiunge distorsione alla tua voce come un megafono.
(7) ROBOT Il pulsante trasforma la tua voce in un robot simile a una macchina.
(8)
HARDTUNE sintonizza la tua voce al suono della tua musica o del tuo gioco.
(9)
FX accende o di tutti gli effetti vocali.
(10)
!@#$* Il pulsante ti consente di censurare e “emettere un segnale acustico” istantaneamente sul microfono.
(11)
“TOSSE” disattiva il microfono mentre si tiene premuto il pulsante.
(12)
SAMPLE PADS trattenere campioni e bumper selezionati per un richiamo immediato. Tenere premuto un pulsante per registrare un nuovo campione, quindi premere per riprodurre. Premere CLEAR e quindi uno dei quattro sample pad per cancellare quel campione.
(13)
BANCA CAMPIONE organizza campioni e bumper in gruppi per un richiamo immediato.
42 GO XLR
Controlli
(14) (15) (16) (17) (18) (19) (20) (21)
(14)
INGRESSO MICROFONICO XLR per l’ingresso audio da microfoni professionali. Per microfoni a condensatore che richiedono “alimentazione phantom”, vai alla scheda AUDIO nell’app GO XLR e attiva l’impostazione
“Condenser” in TIPO MIC.
(15)
LINE IN per l’ingresso audio da dispositivi come telefoni, tablet, computer, ecc.
(16)
MIC ingresso per il collegamento ai microfoni delle cuffie. In genere, questa connessione auricolare sarà un connettore rosa.
NOTA: Se intendi utilizzare il famoso microfono Blue
Yeti*, che ha la sua uscita per cuffie incorporata, dovresti eseguire tale uscita per cuffie incorporata nell’ingresso
MIC di GO XLR. Per i microfoni Blue Yeti alimentati tramite
USB, collegare il connettore USB direttamente al computer per l’alimentazione, ma non selezionare Blue Yeti come sorgente audio sul computer. Invece, l’uscita per le cuffie del Blue Yeti sarà la sorgente audio per il missaggio all’interno di GO XLR.
(17)
TELEFONI jack di uscita per le cuffie. In genere, il connettore delle cuffie sarà un connettore verde.
(18)
LINE OUT contiene una copia esatta dell’audio in streaming della trasmissione. Questa connessione può essere utilizzata per connettersi a un computer di streaming dedicato o altri dispositivi come altoparlanti.
(19)
USB ingresso per connessione PC, aggiornamenti i rmware e controllo remoto con app GO XLR.
(20)
OTTICO ingresso per il collegamento alle console SONY
PlayStation † o Microsoft Xbox ‡.
(21)
DC IN accetta il collegamento di alimentazione tramite l’adattatore da 12 V incluso.
* Yeti è un marchio registrato di Blue Microphones.
‡ Xbox è un marchio registrato o un marchio di Microsoft Corporation negli Stati Uniti e / o in altri paesi.
Diagramma di connessione
Quick Start Guide 43
Studio Vocal Mic
External Audio Device
(if applicable)
Stream alerts
Gaming Headset with Mic
Stream broadcast
Gaming Console
Dedicated Streaming
Computer (if applicable)
Gaming/Streaming
Computer
Audio out to GO XLR via headphone output
Power via
USB (no audio)
Blue Yeti Microphone
Connessione consigliata per il microfono Blue Yeti
Computer
44 GO XLR
Registra il tuo GO XLR
Per registrare il tuo GO XLR utilizzando l’app GO XLR, avvia GO XLR e fai clic sul pulsante ACCOUNT.
La registrazione del prodotto NON è necessaria per utilizzare GO
XLR, aggiornare il firmware o contattare l’assistenza.
Ottenere supporto
Se hai ancora domande su GO XLR dopo aver letto questa Guida rapida e il Manuale di riferimento, contatta TC Helicon:
@Helicon_Gaming
TC_Helicon_Gaming
TC_Helicon_Gaming https://discord.gg/8Ebg3Sp
TC_Helicon_Gaming tc-helicon.com/brand/tchelicon/support
Welkom
Over dit document
Deze snelstartgids helpt je bij het installeren, aansluiten en gebruiken van je GO XLR.
GO XLR App
De GO XLR-app is VEREIST om je GO XLR te bedienen.
De belangrijkste kenmerken van de GO XLR-app zijn:
• • EQ, comprimeer en gate je microfoon
• • Mixerbediening instellen en dei neren
• • Wijzig knop- / schermkleuren
• • Maak en beheer samples
• • Sla Voice FX-instellingen op
• • Directe toegang tot producthandleidingen
• • Toegang tot TC Helicon-ondersteuning
Verwerken
PC-gebaseerde hardware
-Core 2 DUO CPU
-Ethernet port
-1 GB RAM
Aanbevolen besturingssystemen:
Windows*
-Windows 7, 32-bits of 64-bits
-Windows 8, 32-bits of 64 bits
-Windows 10, 32-bits of 64-bits
* Windows is een gedeponeerd handelsmerk of handelsmerk van Microsoft
Corporation in de Verenigde Staten en / of andere landen.
Quick Start Guide 45
Download de app
1. Download de GO XLR-app: a. Ga naar de GO XLR-productpagina op tc-helicon.com/ products/goxlr.
b. Klik op het tabblad Downloads.
c. Klik op het downloadpictogram voor de nieuwste versie van de GO XLR-app.
d. Volg de installatie-instructies op het scherm.
2. Mogelijk wordt u gevraagd uw computer opnieuw op te starten.
3. Sluit de GO XLR USB-kabel aan op uw computer wanneer de installatie van de app is voltooid.
4. Start GO XLR op.
5. Domineer de Interwebs!
Download de referentiehandleiding
Een volledige referentiehandleiding voor GO XLR is ook beschikbaar op het tabblad Minimum hardware: downloads op tc-helicon.com/products/goxlr.
46 GO XLR
Bediening
(4) (5) (6)
(1)
(2)
(3)
(7)
(8)
(9)
(10)
(11)
(13) (12)
(1)
SCRIBBLE STRIPS voor het benoemen van kanalen.
(2)
KANAAL FADERS controle individuele kanaalniveaus in uw mix.
(3)
KANAAL MUTE -schakelaars van het bijpassende kanaal in de mixer.
(4)
STEM Met FX PRESETS kunt u maximaal zes effect presets opslaan.
(5)
VOICE FX-BESTURING maken real-time controle van de toegewezen effect parameter mogelijk.
(6)
MEGAFOON knop voegt vervorming aan uw stem toe als een megafoon.
(7) ROBOT knop verandert je stem in een machine-achtige robot.
(8)
HARDTUNE stemt uw stem af op het geluid van uw muziek of game.
(9) FX schakelt alle voice FX in of uit.
(10)
!@#$* Met de knop kun je je microfoon onmiddellijk censureren en “bliep uit”.
(11)
“HOESTEN” dempt uw microfoon terwijl de knop wordt ingedrukt.
(12)
VOORBEELDEN houd geselecteerde samples en bumpers vast voor onmiddellijke oproep. Houd een knop ingedrukt om een nieuwe sample op te nemen, en druk vervolgens op om af te spelen. Druk op CLEAR en vervolgens op een van de vier sample-pads om die sample te wissen.
(13)
VOORBEELDBANK organiseert samples en bumpers in groepen voor onmiddellijke oproeping.
(14)
XLR MIC-INGANG voor audio-invoer van professionele microfoons. Voor condensatormicrofoons die
“fantoomvoeding” vereisen, gaat u naar het tabblad
AUDIO in de GO XLR-app en activeert u de instelling
“Condensator” onder MIC TYPE.
Quick Start Guide 47
(14) (15) (16) (17) (18) (19) (20) (21)
(15)
LIJN BINNEN voor audio-invoer van apparaten zoals telefoons, tablets, computers, enz.
(16)
MIC ingang voor aansluiting op headsetmicrofoons.
Meestal is deze headset-aansluiting een roze connector.
OPMERKING: Als je van plan bent de populaire Blue Yeti*
-microfoon te gebruiken, die zijn eigen ingebouwde hoofdtelefoonuitgang heeft, moet je die ingebouwde hoofdtelefoonuitgang in de MIC-ingang van de GO XLR laten lopen. Voor Blue Yeti-microfoons die via USB worden gevoed, steekt u de USB-connector rechtstreeks in uw computer voor stroomvoorziening, maar selecteert u de
Blue Yeti niet als audiobron op de computer. In plaats daarvan zal de hoofdtelefoonuitgang van de Blue Yeti de audiobron zijn voor het mixen in GO XLR.
(17) TELEFOONS uitgangsaansluiting voor uw hoofdtelefoon.
Meestal is de hoofdtelefoonconnector een groene connector.
(18)
LIJN UIT bevat een exacte kopie van de audio van uw uitgezonden stream. Deze verbinding kan worden gebruikt om verbinding te maken met een speciale streamingcomputer of andere apparaten zoals luidsprekers.
(19)
USB ingang voor pc-verbinding, i rmware-updates en afstandsbediening met GO XLR-app.
(20)
OPTISCH ingang voor aansluiting op SONY PlayStation † of
Microsoft Xbox ‡ consoles.
(21)
DC IN accepteert stroomaansluiting via de meegeleverde
12 V-adapter.
* Yeti is een geregistreerd handelsmerk van Blue Microphones.
48 GO XLR
Verbindingsdiagram
Studio Vocal Mic
External Audio Device
(if applicable)
Stream alerts
Gaming Headset with Mic
Stream broadcast
Gaming Console
Dedicated Streaming
Computer (if applicable)
Gaming/Streaming
Computer
Audio out to GO XLR via headphone output
Power via
USB (no audio)
Blue Yeti Mic aanbevolen verbinding
Blue Yeti Microphone Computer
Registreer uw GO XLR
Om uw GO XLR te registreren met de GO XLR-app, start u GO XLR en klikt u op de ACCOUNT-knop.
Registratie van uw product is NIET vereist om GO XLR te gebruiken, firmware bij te werken of contact op te nemen met ondersteuning.
Quick Start Guide
Ondersteuning krijgen
Als je na het lezen van deze snelstartgids en de referentiehandleiding nog vragen hebt over GO XLR, neem dan contact op met TC Helicon:
49
@Helicon_Gaming
TC_Helicon_Gaming
TC_Helicon_Gaming https://discord.gg/8Ebg3Sp
TC_Helicon_Gaming tc-helicon.com/brand/tchelicon/support
50 GO XLR
Välkommen
Om detta dokument
Denna snabbstartsguide hjälper dig att ställa in, ansluta och börja använda din GO XLR.
GO XLR-appen
GO XLR-appen krävs för att använda din GO XLR.
GO XLR-appens nyckelfunktioner inkluderar:
• • EQ, komprimera och stäng din mikrofon
• • Ställ in och dei ne mixer kontroller
• • Ändra knappar / skärmfärger
• • Skapa och hantera prover
• • Spara röst FX-inställningar
• • Direkt åtkomst till produkthandböcker
• • Tillgång till TC Helicon-stöd
Bearbetning
PC-baserad hårdvara
-Core 2 DUO CPU
-Ethernet port
-1 GB RAM
Rekommenderade operativsystem:
Windows*
-Windows 7, 32-bit eller 64-bit
-Windows 8, 32-bit eller 64 bit
-Windows 10, 32-bitars eller
64-bitars
Ladda ner appen
1. Ladda ner GO XLR-appen: a. Gå till GO XLR-produktsidan på tc-helicon.com/ products/goxlr.
b. Klicka på fliken Nedladdningar.
c. Klicka på nedladdningsikonen för den senaste versionen av GO XLR-appen.
d. Följ installationsanvisningarna på skärmen.
2. Du kan bli ombedd att starta om datorn.
3. Anslut GO XLR USB-kabeln till din dator när appinstallationen är klar.
4. Starta GO XLR.
5. Dominerar interwebs!
Hämta referenshandboken
En fullständig referenshandbok för GO XLR finns också på fliken Minsta maskinvara: nedladdningar på tc-helicon.com/ products/goxlr.
Quick Start Guide 51
Kontroller
(4) (5) (6)
(1)
(2)
(3)
(7)
(8)
(9)
(10)
(11)
(13) (12)
(1)
SKRIFTLIGA STRIPPAR för namngivning av kanaler.
(2)
CHANNEL FADERS kontrollera enskilda kanalnivåer i din mix.
(3)
KANAL MUTE växlar för matchande kanal i mixern.
(4)
RÖST Med FX PRESETS kan du lagra upp till sex förinställningar för effekter.
(5)
RÖST FX-KONTROLLER tillåta realtidsstyrning av den tilldelade effektparametern.
(6)
MEGAFON -knappen ger din röst snedvridning som en megafon.
(7)
ROBOT -knappen förvandlar din röst till en maskinliknande robot.
(8)
HARDTUNE ställer in din röst efter ljudet av din musik eller ditt spel.
(9) FX slår på eller av alla röst FX.
(10)
!@#$* -knappen låter dig omedelbart censurera och “pipa ut” din mikrofon.
(11)
“HOSTA” stänger av mikrofonen medan knappen hålls nedtryckt.
(12)
PROVSTYRNINGAR hålla valda prover och stötfångare för omedelbar återkallelse. Håll ned en knapp för att spela in ett nytt exempel och tryck sedan på för att spela upp.
Tryck på CLEAR och sedan på en av de fyra provkuddarna för att rensa provet.
(13)
PROVBANK organiserar prover och stötfångare i grupper för omedelbar återkallelse.
(14)
XLR MIC-INGÅNG för ljudingång från professionella mikrofoner. För mikrofoner i kondensatorstil som kräver
“fantommatning”, gå till fliken AUDIO i GO XLR-appen och aktivera inställningen “Kondensor” under MIC TYPE.
52 GO XLR
Kontroller
(14) (15) (16) (17) (18) (19) (20) (21)
(15)
RAD IN för ljudingång från enheter som telefoner, surfplattor, datorer etc.
(16)
MIC ingång för anslutning till headsetmikrofoner.
Vanligtvis blir denna headsetanslutning en rosa kontakt.
NOTERA: Om du tänker använda den populära Blue Yeti *
-mikrofonen, som har sin egen inbyggda hörlursutgång, bör du köra den inbyggda hörlursutgången till GO XLR: s
MIC-ingång. För Blue Yeti-mikrofoner som drivs via USB, anslut USB-kontakten direkt till din dator för ström, men välj inte Blue Yeti som en ljudkälla på datorn. Istället kommer Blue Yetis hörlursutgång att vara ljudkällan för att blanda inuti GO XLR.
(17)
TELEFONER utgång för dina hörlurar. Vanligtvis blir hörlursuttaget en grön kontakt.
(18)
LINJE UTinnehåller en exakt kopia av ditt sändningsströmljud. Denna anslutning kan användas för att ansluta till en dedikerad strömmande dator eller andra enheter som högtalare.
(19)
USB ingång för PC-anslutning, i rmware-uppdateringar och fjärrkontroll med GO XLR-appen.
(20)
OPTISK ingång för anslutning till SONY PlayStation † eller
Microsoft Xbox ‡ -konsoler.
(21)
DC IN accepterar strömanslutning via den medföljande
12 V-adaptern.
* Yeti är ett registrerat varumärke som tillhör Blue Microphones.
‡ Xbox är antingen ett registrerat varumärke eller varumärke som tillhör Microsoft
Corporation i USA och / eller andra länder.
Quick Start Guide 53
Kopplingsschema
Studio Vocal Mic
External Audio Device
(if applicable)
Stream alerts
Gaming Headset with Mic
Stream broadcast
Gaming Console
Dedicated Streaming
Computer (if applicable)
Gaming/Streaming
Computer
Audio out to GO XLR via headphone output
Power via
USB (no audio)
Blue Yeti Mic rekommenderad anslutning
Blue Yeti Microphone Computer
54 GO XLR
Registrera din GO XLR
För att registrera din GO XLR med GO XLR-appen, starta GO XLR och klicka på KONTO-knappen.
Registrering av din produkt krävs INTE för att använda GO XLR, uppdatera firmware eller kontakta support.
Getting support
Om du fortfarande har frågor om GO XLR efter att ha läst den här snabbstartsguiden och referenshandboken, kontakta TC Helicon:
@Helicon_Gaming
TC_Helicon_Gaming
TC_Helicon_Gaming https://discord.gg/8Ebg3Sp
TC_Helicon_Gaming tc-helicon.com/brand/tchelicon/support
Witamy
O tym dokumencie
Ta skrócona instrukcja obsługi pomoże skonfigurować, podłączyć i rozpocząć obsługę urządzenia GO XLR.
GO XLR App
Aplikacja GO XLR jest WYMAGANA do obsługi urządzenia GO XLR.
Najważniejsze funkcje aplikacji GO XLR obejmują:
• • EQ, kompresuj i bramkuj swój mikrofon
• • Ustaw i zdefiniuj elementy sterujące miksera
• • Zmień kolory przycisków / ekranu
• • Twórz próbki i zarządzaj nimi
• • Zapisz ustawienia efektów głosowych
• • Bezpośredni dostęp do instrukcji produktów
• • Dostęp do wsparcia TC Helicon
Przetwarzanie
Sprzęt komputerowy
-Core 2 DUO CPU
-Port Ethernet
-1 GB pamięci RAM
Zalecane systemy operacyjne:
Windows*
- Windows 7, 32-bitowy lub
64-bitowy
- Windows 8, 32-bitowy lub
64-bitowy
- Windows 10, 32-bitowy lub
64-bitowy
Quick Start Guide
Pobierz aplikację
1. Pobierz aplikację GO XLR: a. Przejdź do strony produktu GO XLR pod adresem tc-helicon.com/products/goxlr.
b. Kliknij kartę Pobrane.
c. Kliknij ikonę pobierania, aby wyświetlić najnowszą wersję aplikacji GO XLR.
d. Postępuj zgodnie z instrukcjami instalacji wyświetlanymi na ekranie.
2. Możesz zostać poproszony o ponowne uruchomienie komputera.
3. Podłącz kabel GO XLR USB do komputera po zakończeniu instalacji aplikacji.
4. Włącz GO XLR.
5. Zdominuj Interwebs!
55
Pobierz podręcznik użytkownika
A full reference manual for GO XLR is also available on the
Minimum Hardware: downloads tab at tc-helicon.com/ products/goxlr.
GO XLR
Sterowanica
(4) (5) (6)
(1)
(2)
(3)
(7)
(8)
(9)
(10)
(11)
(13) (12)
(1)
PASKI PASOWE do nadawania nazw kanałom.
(2)
SUWAKI KANAŁÓW kontroluj poziomy poszczególnych kanałów w swoim miksie.
(3)
KANAŁ MUTE przełącza pasującego kanału w mikserze.
(4)
GŁOS FX PRESETS umożliwia przechowywanie do sześciu presetów efektów.
(5)
STEROWANIE VOICE FX pozwalają na kontrolę w czasie rzeczywistym przypisanego parametru efektów.
(6)
MEGAFON przycisk dodaje zniekształcenia do twojego głosu jak megafon.
(7)
ROBOT przycisk przekształca Twój głos w robota podobnego do maszyny.
(8)
HARDTUNE dostraja Twój głos do dźwięku Twojej muzyki lub gry.
(9) FX włącza lub wyłącza wszystkie efekty głosowe.
(10)
!@#$* Przycisk umożliwia natychmiastowe cenzurowanie i wyciszanie mikrofonu.
(11)
“KASZEL” wycisza mikrofon, gdy przycisk jest przytrzymany.
(12)
PRZYKŁADOWE PODKŁADKItrzymaj wybrane próbki i zderzaki do natychmiastowego przywołania. Przytrzymaj przycisk, aby nagrać nową próbkę, a następnie naciśnij, aby odtworzyć. Naciśnij CLEAR, a następnie jeden z czterech padów samplowych, aby wyczyścić tę próbkę.
(13)
PRZYKŁADOWY BANK organizuje próbki i zderzaki w grupy w celu natychmiastowego przywołania.
(14)
WEJŚCIE MIKROFONOWE XLR dla wejścia audio z profesjonalnych mikrofonów. W przypadku mikrofonów pojemnościowych, które wymagają „zasilania phantom”, przejdź do zakładki AUDIO w aplikacji GO XLR i aktywuj ustawienie „Condenser” w opcji MIC TYPE.
Quick Start Guide 57
(14) (15) (16) (17) (18) (19) (20) (21)
(15)
WYRYSOWAĆ do wejścia audio z urządzeń takich jak telefony, tablety, komputery itp.
(16)
MIC wejście do podłączenia mikrofonów zestawu słuchawkowego. Zazwyczaj to połączenie zestawu słuchawkowego będzie różowym złączem.
UWAGA: Jeśli zamierzasz używać popularnego mikrofonu
Blue Yeti *, który ma własne wbudowane wyjście słuchawkowe, powinieneś podłączyć to wbudowane wyjście słuchawkowe do wejścia MIC w GO XLR. W przypadku mikrofonów Blue Yeti zasilanych przez USB podłącz złącze USB bezpośrednio do komputera w celu zasilania, ale nie wybieraj Blue Yeti jako źródła dźwięku w komputerze. Zamiast tego wyjście słuchawkowe Blue
Yeti będzie źródłem dźwięku do miksowania wewnątrz
GO XLR.
(17)
TELEFONY gniazdo wyjściowe do słuchawek. Zazwyczaj złącze słuchawkowe będzie zielonym złączem.
(18)
ZAKREŚLAĆ zawiera dokładną kopię dźwięku ze strumienia transmisji. To połączenie można wykorzystać do podłączenia do dedykowanego komputera do przesyłania strumieniowego lub innych urządzeń, takich jak głośniki.
(19)
USB wejście do podłączenia komputera, aktualizacje oprogramowania i zdalne sterowanie za pomocą aplikacji
GO XLR.
(20) OPTYCZNY wejście do połączenia z konsolami SONY
PlayStation † lub Microsoft Xbox ‡.
(21) DC IN akceptuje podłączenie zasilania przez dołączony adapter 12 V.
* Yeti jest zastrzeżonym znakiem towarowym firmy Blue Microphones.
† PlayStation jest zastrzeżonym znakiem towarowym lub znakiem towarowym firmy firmy Sony Corporation.
‡ Xbox jest zastrzeżonym znakiem towarowym lub znakiem towarowym firmy
Microsoft Corporation w Stanach Zjednoczonych i / lub innych krajach.
58 GO XLR
Diagram połączeń
Studio Vocal Mic
External Audio Device
(if applicable)
Stream alerts
Gaming Headset with Mic
Stream broadcast
Gaming Console
Dedicated Streaming
Computer (if applicable)
Gaming/Streaming
Computer
Audio out to GO XLR via headphone output
Power via
USB (no audio)
Zalecane połączenie Blue Yeti Mic
Blue Yeti Microphone Computer
Zarejestruj swój GO XLR
Aby zarejestrować urządzenie GO XLR za pomocą aplikacji GO XLR, uruchom GO XLR i kliknij przycisk KONTO.
Rejestracja produktu NIE jest wymagana do korzystania z GO
XLR, aktualizacji oprogramowania sprzętowego lub kontaktu z pomocą techniczną.
Quick Start Guide
Uzyskanie wsparcia
Jeśli po przeczytaniu niniejszej skróconej instrukcji obsługi i instrukcji obsługi nadal masz pytania dotyczące GO XLR, skontaktuj się z TC Helicon:
59
@Helicon_Gaming
TC_Helicon_Gaming
TC_Helicon_Gaming https://discord.gg/8Ebg3Sp
TC_Helicon_Gaming tc-helicon.com/brand/tchelicon/support
60 GO XLR
FEDERAL COMMUNICATIONS
COMMISSION COMPLIANCE
INFORMATION
GO XLR
Responsible Party Name: Music Tribe Commercial NV Inc.
Address: 5270 Procyon Street,
Las Vegas NV 89118,
United States
Phone Number: +1 702 800 8290
GO XLR
This equipment has been tested and found to comply with the limits for a Class B digital device, pursuant to part 15 of the FCC Rules. These limits are designed to provide reasonable protection against harmful interference in a residential installation. This equipment generates, uses and can radiate radio frequency energy and, if not installed and used in accordance with the instructions, may cause harmful interference to radio communications. However, there is no guarantee that interference will not occur in a particular installation. If this equipment does cause harmful interference to radio or television reception, which can be determined by turning the equipment off and on, the user is encouraged to try to correct the interference by one or more of the following measures:
• •
Reorient or relocate the receiving antenna.
• • Increase the separation between the equipment and receiver.
• •
Connect the equipment into an outlet on a circuit different from that to which the receiver is connected.
• • Consult the dealer or an experienced radio/TV technician for help.
This device complies with Part 15 of the FCC rules. Operation is subject to the following two conditions:
(1) this device may not cause harmful interference, and
(2) this device must accept any interference received, including interference that may cause undesired operation.
Important information:
Changes or modifications to the equipment not expressly approved by
Music Tribe can void the user’s authority to use the equipment.
Hereby, Music Tribe declares that this product is in compliance with
Directive 2014/35/EU,Directive 2014/30/EU, Directive 2011/65/EU and
Amendment 2015/863/EU, Directive 2012/19/EU, Regulation 519/2012
REACH SVHC and Directive 1907/2006/EC.
Full text of EU DoC is available at https://community.musictribe.com/
EU Representative: Music Tribe Brands DK A/S
Address: Ib Spang Olsens Gade 17, DK - 8200 Aarhus N, Denmark
Quick Start Guide 61
62 GO XLR
Quick Start Guide 63
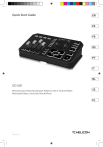
Ladda ner
Offentlig länk uppdaterad
Den offentliga länken till din chatt har uppdaterats. You may view and manage your chat links after registration here.
Offentlig länk till dokument
Annons