advertisement

> Home D
> Home GB
> Service
> Back
| E-Mail Formular | Webmaster | Impressum | ©JOBO AG
Service Analog
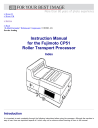
Instruction Manual for the Fujimoto CP51
Roller Transport Processor
Index
Introduction
It is important to read completely through the following instructions before using the processor. Although the machine is easy to use, there are important aspects of it which may not be obvious without learning of them in this manual.
The Main Body plus either the Wash Dry Module or the Stabilize Dry Module make up a complete dry-to-dry print processor. However, the Main Body can be used alone, followed by manually washing and drying the prints after they come out of the Bleach/Fix.
Features of CP-51 Processor
Consistent print development is ensured due to automatic chemical replenishment measuring both width and length of the paper, as well as automatic temperature control of solution temperatures.
Print sizes from 3 x 4" to 20 x 30" can be processed.
Once the light-tight cover of the processor has been closed, development can take place in daylight.
Each solution bath needs only 6 liters of chemicals, keeping solution costs low.
The roller-transport system enables quick and smooth print processing.
Long life is assured for both the chemicals and rollers by a ventilation fan preventing excess condensation.
Standby circuitry reduces aeration of the solutions while protecting the rollers, and magnetic circulation pumps minimizing oxidation by intermittently turning off the processor during unused periods of operation.
Index
Main Body
1. Unpacking
2. Specifications
3. Pre-Installation
4. Installation
5. Operation
6. Troubleshooting
7. Processing Data
Wash / Dry Module
1. W/D Features and Specifications
2. Installation of W/D
3. Testing for Operation
4. Preparation for Operation
5. Maintenance
Stabilize / Dry Module
1. S/D Features and Specifications
2. Installation of S/D Module
3. Testing for Operation
4. Preparation for Operation
5. Maintenance
> Home D
> Home GB
> Service
> Back
| E-Mail Formular | Webmaster | Impressum | ©JOBO AG
Service Analog
Instruction Manual for the Fujimoto CP51
Roller Transport Processor
Main Body
Index
1. Unpacking
2. Specifications
3. Pre-Installation
4. Installation
5. Operation
6. Troubleshooting
7. Processing Data
Unpacking 1
1.1
.
Unpacking Your CP51 Processor
Your Fujimoto processor MB will arrive in a sealed carton. The shipping weight of the unit is approximately 112 pounds.
Due to its physical size and weight, it is advisable to have at least two people move the processor, when necessary.
The processor may arrive secured to a pallet depending on whether you ordered additional modules.
Once the carton is located near the installation site, carefully cut the packing tape and open all four flaps completely.
The racks and accessories for your processor are packed in separate boxes and are located on the top (Figure 2).
Remove all of the smaller boxes and place them aside until you have exposed the main body. Save all the packing materials.
The main body will be wrapped in plastic and surrounded by padded cardboard inserts that secure the main body from damage. Before you can remove the main body from the shipping carton, all accessory boxes must be removed.
Once all accessory boxes are removed, lift the flaps that cover the main body (Figure 3). Remove the spare parts box
(labeled "parts"), set it aside, and then remove the two inserts by pulling them straight up. The main body is now ready to be removed from its carton.
It does not matter from which side the processor is lifted. It is important, however, that two people remove the processor from its carton to avoid personal injury as well as damage to the processor. When removing the processor, be sure it is lifted from the bottom. You may find it easier to remove the plastic around the processor first in order to avoid having the processor slip while it is being removed from its carton (Figure 4).
Once the processor has been removed from its carton, place it on the surface where you intend to operate it. (See the chart in Chapter 3.5 referring to minimum table/counter sizes.) Check all packing materials for any small parts that may have fallen out of place during shipping.
1.2 Hidden Damage
Check the processor for any damage and, if found, immediately contact the shipping company that delivered the unit or the dealer from whom you purchased the unit.
1.3 Packing Material
It is advisable to retain and store the carton and packing material for future shipping and/or moving of your processor to prevent damage in transit.
Back to Top
Specifications 2
2.1 CP51 Main Body Specifications
Paper Compatibility RC paper. Maximum size of 510 mm wide by 610 mm long. (20 inches wide by 24 inches long) Minimum size of 76 mm wide by 100 mm long. (3 inches wide by 4 inches long)
Transport System Roller Transport System
Processing Time 45 seconds to 5 minutes (per bath)
Transport Speed 52 - 350 mm per minute (2-14 in./min.); transport speed is digitally displayed up to 3 figures, and adjustable by a single knob control.
Acceptable Processes RA-4, EP-2, B&W
Power Requirements Single Phase, 200/220/240 volts, 50-60 Hz, 600/680/800 watts
Processing Baths 2; solution capacity of 6 liters each
Chemical Circulation 1st and 2nd baths use magnetic drive pumps and built-in chemical filters
Replenishment 6 infrared sensors calculate paper's area (both length and width) and activate the replenishment pumps to provide individually accurate chemical replenishment for the surface area measured.
Temperature Control Temperature control is digitally displayed for each solution tank in the MB. In addition, the following additional information is displayed; heater "on" lamp, overheat warning lamp. Temperatures are programmable up to a maximum of 50o C, and accurate to ±0.1o C.
Dimensions 815 mm long, 645 mm wide, 300 mm high (approximately 32" L x 25" W x 12" H)
Hose Dimensions Replenishment pipe: 8mm (5/16") O.D. Overflow hoses: 15mm (9/16") O.D. Drain hoses:
8mm (5/16") I.D.
Shipping Weight 52 kg, (112 lbs.)
Other Features---
Standby Function If, after 45 minutes, paper has not been inserted into the processor, the circulation pump and roller transport motor automatically stop their "full-time" operation. While in this energy saving Standby mode, they turn on for approximately 4 seconds and off for approximately 10 seconds until paper is inserted into the processor, or the power switched off and on again. Then the CP51 resumes normal operation.
Ventilation Fan This fan has been designed to help prevent crystallization and condensation of chemicals.
Safety Device A built-in, overheat sensing switch shuts down the heating system, if an overheat condition is detected.
2.2 CP51 Main Body Parts Check List
3
2
1
1
2
1
1
1
1
2
1
Quantity Description
1
1
CP51 Main Body
Top Cover/ Light-tight Cover
Chemical recirculation filters
Inlet Rack (with 6 IR sensors)
Main Body Rack #1
Main Body Rack #2
Part No.
411405
65132
65120
65224
65130
65381
5 Amp fuse
Funnels
65102
65307
Extension hoses for overflow
Drain overflow hoses
65268 + 65380
(Call)
Wrench for adjusting leveling legs 65280
100 ml Graduated cylinder
This instruction manual
3303
66049
Please check to make sure that you received all of the parts listed above. If something is missing, contact the JOBO
Customer Service Department at 734-677-6989, extension 4721.
2.3 CP51 Main Body Parts and Functions
(in alphabetical order)
Name / Function
1st Rack This is the developer rack in the 1st solution bath.
2nd Rack This is the rack in the 2nd solution bath, normally used for bleach/fix or fixer, depending on the specific process in use.
2nd Bath Water Supply Hose Incoming water connection for conversion of MB 2nd bath to a flowing water wash.
Adjustable Power Switch Changes circuitry among 200/220/240 volt settings.
Control Drawer This houses the main PC Board for control of the speed of the processor, replenishment rates and other functions.
Drain Hose There is a drain hose for emptying each bath
Drive Shaft Transmits rotation of drive motor to each rack.
Fuse Normally rated 5 amps.
Gearbox Drain Hose Drains built-up water or chemicals from gearbox (drive shaft area).
Inlet Rack This is the small rack which receives the incoming sheets of paper, equipped with IR sensors to measure the surface area.
Inlet Rack Connector Provides electrical connection for IR sensors of inlet rack
Light-tight Cover After paper has been inserted into the processor and the cover closed, this cover protects the paper so room lights can be switched on.
Main Gear The primary gear attached to each rack which rests on the Worm Gears of the Drive Shaft.
Operation Control Panel Displays temperature, has "hidden" contact buttons for programming high and low temperatures.
Rack Assembly of rollers, springs and gears which transports the paper through each individual bath.
Replenishment Hose Supplies fresh replenisher to each solution bath.
Ventilation Fan Evacuates condensation and heat from the processor.
Water Supply Pipe Incoming water connection for conversion of MB 2nd bath to a flowing water wash.
W/D, S/D Connector Wire Signal wire which sends signal from Inlet Rack to activate Dryer when paper is inserted into processor and also sends information to activate replenisher system.
Worm Gear Corkscrew shaped gear(s) on drive shaft that turns Main Gear of individual solution racks
Back to Top
Pre-Installation 3
3.1 Proper Conditions For Setting Up The CP51 Processor
Light-tight darkroom
Adequate ventilation
Nearby water supply and drain for use with W/D Module
Safe electrical conditions. We strongly recommend the use of a Ground Fault Circuit Interrupt (GFCI) in the wiring for your CP51. It detects possible shock hazards and shuts off the current in a fraction of a second, to protect you from possible harmful shocks.
Air conditioning/heating (as needed)
NOTE: Room temperature should be at least 5o C (9o F) lower than the programmed temperature of the CP51 processor. i.e. If the CP51 is set for 30o C (86o F), then the room temperature should be at or below 25o C (77o F).
This is necessary because the circulating pumps and other components will give off some heat as the solutions pass
through them.
3.2 Water Supply Requirements In Use With W/D Module
Water Temperature 30-35o C/86-95o F (for RA-4; for other processes see chemical instructions)
Water Pressure 1.5-5 Kg/cm2 (21-70 psi)
Water Volume 1.5 liters per minute (approx. 1/3 gallon per minute)
Water pipe inside diameter 13 mm (1/2")
Filter recommendation 50 micron or smaller (as low as 5 microns) mounted in building's plumbing system near darkroom.
3.3 Drain Requirements For W/D Module
Drain flow at least 1.5 liters per minute (approx. 1/3 gallon per minute)
Drain overflow hose inside diameter 13mm (1/2")
Pipe material Do not use copper or brass due to corrosiveness of effluent.
3.4 Weights of Processor Components
Consider the weight of the modules as shown below, when you are deciding where to locate your processor. Be certain the supporting surface can handle the weight load.
Table of Processor Weights
Modules
MB
Weight Empty Weight with Solutions
51 Kg (112 lbs.) 63 Kg (139 lbs.)
MB + W/D 96 Kg (211 lbs.) 120 Kg (264 lbs.)
MB + S/D 102 Kg (224 lbs.) 126 Kg (277 lbs.)
3.5 Table and Counter Surface Dimensions
The figures in the chart below represent the surface dimensions needed on a free-standing table to support the adjustable feet of the CP51. Counters will need an additional 7-8 inches in depth due to chassis size and space needed for hoses behind the modules.
Support Dimensions
Modules
MB
Table Dimensions
580 x 600 mm (23 x 24")
Counter Dimensions
580 x 800 mm (23 x 32")
MB + W/D or S/D 1050 x 600 mm (42 x 24") 1050 x 800 mm (42 x 32")
3.6 Power Requirements
The Main Body and W/D (or S/D) each have their own power cords. You will need to have 2 NEMA code 6-20-R sockets to power the processor.
We strongly recommend that the circuit be Ground Fault Circuit Interrupt (GFCI) protected. In case of electrical shock hazard it will shut off the power in a fraction of a second to protect you. from danger.
The single phase "220" volt current most often found in the U.S.A. is generally either 208 or 240 volts. Either will be acceptable. In the chart below, the amperage has been calculated for 208 volts, providing a greater margin of safety for other voltage levels.
Power Requirements
Module Voltage Wattage Amperage
Main Body 208-240 810 3.9
W/D Module 208-240 2,200
S/D Module 208-240 2,900
10.6
14
To determine the minimum circuit amperage needed, add the amperage of the various modules to be used. Add a safety factor of 25% to the sum of the amperages to determine a minimum load-handling capability needed for your circuit. (i.e. MB 3.9A + W/D 10.6A = 14.5A +25% (3.625A) = minimum circuit of 18.125 amps, or rounded up to a 20 amp circuit.)
Back to Top
Installation 4
4.1 CP51 Installation
Remove the Main Body from its packaging. Get assistance since the Main Body is quite heavy. Check all packing materials carefully for any components. Funnels, a graduate, the leveling wrench and other small parts may be concealed inside some cardboard packing materials.
Place the MB on a table or counter. Do not "power up" your processor without liquid in the baths! Failure to have liquid properly in each bath may burn out the heaters and/or heater safety systems, and possibly void the warranty. Avoid installing the racks until you get to step 4.4.2. They will get in the way prior to that step.
Level the MB using the wrench supplied in package. Place your level on the chrome rails to check lateral level.
(See illustration number 5.) Place the level on the dividing wall between the 1st and 2nd baths to determine side-to-side level. This is very important for quality processing.
Pull out the drain hoses from their storage within the lower compartment of the MB. When you see the colored tapes wrapped around the hoses emerge from the MB, stop pulling out the hoses. The tapes are a warning that you have pulled them far enough!
Remove any additional W/D or S/D modules from their packaging and place them to the left of the MB.
Adjust the leveling legs of the additional module. First adjust the height to match that of the MB. Then level each module. It is very important that both modules are level and at the same height. Otherwise the drive shafts of the individual modules will not align properly. When the drive shaft couplings meet easily, then you know the modules are aligned well. You can visually check the height of the modules by comparing the black "waistbands" of each unit.
Insert one of the supplied funnels into the drain hole at the bottom of the bath. Pour warm water into the funnel until the spray bar starts to emit water. Then you can pour in the rest of the water without using the funnel. This procedure is essential to prime the circulation pumps. IT MUST BE DONE EVERY TIME YOU FILL THE
CHEMICAL BATHS! Fill each bath up to the line (several inches below the top of the dividing wall.) Do not
"power up" the processor yet.
CAUTION : Do not use water hotter than 50o C/ 122o F. Hot water is not necessary at this point in the preliminary installation.
Adjust the processor legs if necessary and check with your level to ensure the water surface is exactly on the line in the separate modules.
4.2 Preparation of the Environment
Prepare plastic containers for replenishment and overflow for each module. CAUTION: always store the plastic containers lower than the CP51 itself, such as under the table supporting the processor.
Fill the replenisher containers with water (for testing and calibrating.)
Run hoses from the overflow lines to overflow containers to catch effluent chemicals.
Use the provided extension hoses as needed. Remember to remove the extensions when storing the drain hoses, inside the processor's lower housing.
Connect W/D overflow hoses to a drain line capable of handling the 1.5 liter per minute flow rate of the wash water which will come from the W/D in use.
4.3 Filter Setup
With the power OFF (!) remove the filter chamber lid and insert the filter. Replace the lid on the chamber.
CAUTION! Whenever you remove the filter chamber lid, at any time in the life of the CP51 processor, be sure to have the power off, or you will have quite a mess as the chemical is pumped up from the filter chamber.
There are also small filters mounted in-line on the replenisher hoses. The replenisher hose should be removed from the replenisher storage vessel before opening the in-line filter housing. But also be ready to catch the liquid draining from the end of the hose in a suitable container.
4.4 Test Run
After pouring water into each bath (using the funnels as described above), turn the power on at the main body.
While there are no racks in the baths, check that the spray bars are working normally; water should be coming out of each hole in the bar. If the water is not flowing from the spray bar, switch off the main body, open the filter chamber lid, and close it again. Switch the power back on again. This procedure gets rid of any air trapped inside the circulation system, which can interfere with proper solution circulation. (When there is an air lock in the circulation system, you will usually hear a screeching sound that may cause you to think the bearings of the pump motor have been ruined. Normally, this is not indicative of damage to the bearings if you shut off the processor quickly, and correct the circulation problem as described above.)
Insert each rack. The worm gear on the drive shaft, and the main rack gear should mesh properly. Plug in the connector of the inlet rack to the receptacle on the end of the main body.
CAUTION!
The power MUST be switched OFF when there is no liquid in the chemical baths. Operating the processor with "empty" baths can severely damage the machine.
4.5 Chemical Temperature Setup for MB
In the following section, HIGH SET refers to a temperature 0.5o C above the "target " temperature of the process you will run. For example, 35.5o C (96o F) when the process will be run at 35.0o C (95o F). The purpose of HIGH SET is to program a temperature that will activate an "overheat" warning LED on the processor. LOW SET refers to the actual temperature that is to be set for the process. In the example above this would be 35.0o C (95o F). The LOW SET is used to program the actual process temperature. Any temperature between the HIGH SET and LOW SET programmed temperatures, is considered an "acceptable" temperature range for processing, but the processor will normally hold the low-set temperature to ±0.1o C.
In the following section, four single letters are used to represent function buttons on the control panel of the CP51 MB.
[S] represents "set". [D] represents "down". [U] represents "up". [R] represents "reset". (See illustration number 6.)
Push the [S] pad on the control panel for the first bath for at least 2 seconds. The 1st bath display will show
HIGH SET and 50o C, which is the maximum programmable temperature.
Push the [D] and set the temperature 0.5o C higher than the "target" temperature for this process. (35.5o C for
RA-4.)
Push the [S] pad. This will lock in the temperatures for the HIGH SET. Now the display will show LOW SET and
-20o C. (Please note: MINUS 20o C)
Push [U] on the display setting pad, and program the LOW SET for the "target temperature". (35o C for RA-4.)
When the set pad [S] is pushed, a triangular arrow and the actual bath temperature will be shown in the display.
This indicates the temperature programming has been completed for the 1st bath.
Repeat the entire procedure for the second (Bleach) bath.
4.6 Warning Lamp
A warning lamp will come on if the chemical temperature of the first bath goes higher than the HIGH SET programmed temperature. The lamp tells you the temperature of the 1st bath is too high. If this lamp comes ON, turn off the power switch and wait for the temperature to go down.
4.7 Reset Switch
If the programming cannot be done properly, or the operation control panel should show something wrong during programming of the temperatures, push the RESET button to go back to the default settings. Push RESET [R] and the
Fujimoto &127 symbol at the same time. Then start the temperature programming sequence for that bath from the beginning again.
4.8 Operation Control Panel
Green Lamp -- When a print is entering the processor, a green lamp will illuminate behind "Paper" on the display panel. After the print has passed through the inlet rack the green lamp will switch off. Wait a few seconds before feeding another print into the processor, to allow the first print to pass through the inlet rack completely.
Warning Lamp -- If the warning lamp illuminates, the temperature is too high. Turn off the power and open the entire top cover of the processor to allow the temperatures to cool.
4.9 Setting the Paper Transport Speed
The transport speed control is located in the control drawer. The speed is displayed in millimeters per minute. Refer to the chart in chapter 7.1 to determine which speeds to set for different developing times. For RA-4 set 347 mm/min. to get 45 seconds in each bath.
4.10 Insertion
Place the rack in the solution slowly and carefully to avoid any spills. Be certain to properly align the main gear of the rack with the worm gear of the drive shaft. Check to see the sensor connector of the inlet rack is firmly plugged into its socket. CAUTION! Be careful to avoid ANY moisture reaching the IR sensors of the inlet rack. They are extremely susceptible to damage from liquids. When pouring liquids, remove the inlet rack from the area where liquids could possibly splash. After placing the racks in the solution baths check the machine again to be sure the processor is properly leveled.
4.11 Replenisher Rate Adjustment (Control Drawer)
Dial No. 1 adjusts the replenishment rate for the 1st bath.
Dial No. 2 adjusts the replenishment rate for the 2nd bath.
Dial Setting ml/minute repl.
1 5 ml
2 10 ml
5
6
3
4
7
8
9
15 ml
20 ml
25 ml
30 ml
35 ml
40 ml
45 ml
Each increment on the dial scale increases the replenishment rate by approximately 5 ml. Please refer to the table in chapter 7.3 for a breakdown of different chemicals and replenishment levels. If you are trying to set 38 ml, then set the
dial to the nearest ml increment, i.e. setting #8 which is approximately 40 ml. The CP51 automatically calculates the replenishment amounts for each paper size, based on both the width and length, as measured by the six IR sensors of the input rack. The replenishment values of the scale must be considered approximate, since the actual delivery rate may be affected by such things as the length of the replenisher hose, and the Hz value of the current powering the processor.
For precise replenishment control it is best to test the actual delivery rate of replenisher. Fill a graduate (such as the
100 ml graduate supplied with the CP51) with 100 ml of developer replenisher. (Water has a higher viscosity than developer. It is more accurate to test with the actual solution when you have finally set up the processor with working chemicals than it is to test with water. But checking it first with water will get you very close to your final setting.) Make sure the replenisher line has already been "primed" so it is ready to pump replenisher when you place it in the graduate. Place the replenisher hose into the graduate and insert a single sheet of 8x10" paper into the processor. It is best to insert it with the 10 inch edge going in first. After it has passed through the intake roller, wait one full minute before removing the replenisher hose from the graduate to read the remaining volume of solution. Actual replenishment rates will vary from one chemical manufacturer to another. At the time these instructions were prepared, Tetenal RA-4 developer, from JOBO, had a replenishment rate of 8.25 ml per 8x10" print. Therefore you would adjust the replenisher control dial until the actual replenisher volume removed from the graduate was 8.25 ml. Do the same for the Bleach/Fix according to the chemical manufacturer's instructions. The Bleach/Fix rate may be different than the developer.
Installation and Testing are now complete !
Drain the MB
Turn off the main body power switch. Remove the drain hose cap so the water can drain from the bath(s). Replace the cap after you have drained the solution(s).
CAUTION : Before draining, make certain the power switch is OFF , otherwise the heater and the agitation pump can be seriously damaged!
Back to Top
Operation 5
5.1 Loading the MB with Chemicals
Remove the racks from each bath. Remove the inlet rack so it will not get splashed. Insert a funnel into the drain in the bottom of the 2nd bath.
Pour in 6 liters of the appropriate chemical (bleach/fix for RA-4). While pouring, look to see that the solution is coming out of the holes in the spray bar. Carefully lower the 2nd rack into the 2nd bath. Then carefully check and clean (if necessary) any droplets or spills of bleach/fix that may have gotten into the empty 1st bath.
CAUTION: Even small amounts of bleach/fix will affect developer. Avoid splashing or spilling, but if necessary, clean the spill immediately and thoroughly. NOTE: The reason for filling the 2nd bath first, is to allow you the opportunity to clean any spills which might otherwise ruin the developer. While you don't want to spill developer in the bleach/fix either, tiny amounts mixed into the entire 6 liter bath will have much less effect on the bleach/fix, than bleach/fix would have on the developer.
Insert the other funnel into the drain in the bottom of the 1st bath. Pour in 6 liters of working strength developer.
While pouring, look to see that the solution is coming out of the holes in the spray bar. Carefully lower the 1st rack into the 1st bath. Then clean up any droplets or spills that might have occurred while pouring.
Fill the replenisher vessels (not supplied with the CP51 processor) with replenisher. Insert the developer hose into the developer replenisher vessel and make sure the tube at the end of the hose reaches the bottom of the vessel. Do the same for the bleach/fix (or second bath) replenisher vessel.
Set up vessels to catch the overflow from the 1st bath and 2nd bath. They should be AT LEAST as large as the replenisher supply vessels.
Turn the power switch ON. If you hear any screeching sound, IMMEDIATELY turn the power switch OFF. The screeching sound is typical if you have an air-lock in the circulation pump system. With the power switch OFF , briefly open and close the chemical filter chamber to release any air trapped within. Switch the power on again to check the circulating system.
Press the manual replenishment buttons in the control drawer intermittently and check whether replenisher is
being pumped up properly through the replenisher hose. You can check it by either viewing the clear replenisher hose, or noticing the solution exiting through the overflow hoses when the solution baths are full. (The manual replenishment buttons are located in the control drawer, on the underside of the chamber above the removable control drawer. The first button you reach activates the 1st bath replenisher pump. The second button activates the 2nd bath replenisher pump.) If you have extreme difficulty getting either solution to begin pumping properly, raise the replenisher supply vessel higher than the processor. Then press the manual replenishment button again. Once the replenisher pump begins drawing the solution properly, place the replenisher supply vessel below the processor again.
Install the top cover over the processor.
Check the temperature displays. If the displays show the programmed temperatures, then you are ready to begin.
Check the control drawer to see that you have set the correct mm/minute speed for processing. (See the chart in chapter 7.1 for speed selections.) The speed shown in the mm/minute display of the control drawer, will fluctuate easily. Therefore it is not critical to be "exactly" at 347 mm/min. You will not see any difference at ±5 mm/min when using speeds over 150 mm/min. Close the control drawer before processing. The LED's showing paper speed could otherwise fog your color paper.
Open the light-tight cover in the darkroom. Insert an exposed sheet of paper, emulsion side down on the stainless steel feeder tray. Use the edge of the tray to align the paper. Gently slide the paper down the feeder tray until you feel the lead edge of the paper being grabbed by the intake rack. Then let go and let the processor advance the print. Close the light-tight cover, and turn on the room lights.
CAUTION : Remember when test printing, do not use prints smaller than 40 x 100 mm (1-5/8 x 4 inches). Use of smaller prints may cause the processor to jam. Insert prints properly "squared up" by aligning the paper with the edge of the feeder tray. When processing prints 8x10" or smaller, you can maximize the processor's throughput by alternating the prints on either side of the feeder tray.
When paper enters the inlet rack, a green lamp will turn on behind the word "paper". Once the paper has passed through the inlet rack, the lamp will turn off. This means the print is now passing through the processor and has cleared past the IR sensors of the inlet rack. Please check the paper indicator lamp each time you feed prints into the processor. Once the indicator lamp is illuminated you can close the light-tight cover. After the light-tight cover has been closed, you can turn on the room lights if needed and begin working on the next print. Please wait 5-10 seconds after the paper lamp has turned off before inserting the next print.
IMPORTANT
Even though the paper indicator lamp is off do not open the light-tight cover in "daylight". Only open the light-tight cover with the room lights off if there is any paper still in the MB! The paper indicator light only indicates the print is passing the IR sensors. If you open the light-tight cover while paper is still in the MB, light can reach into the 1st or 2nd bath and ruin any prints still there.
If you don't have a W/D or S/D module connected to your MB, please wash your print immediately after it has been processed.
If you have prepared a stack of prints to be processed, feed them into the processor as described above. Wait 5-10 seconds after the paper indicator lamp has gone out before feeding the next print. This allows a small gap between prints to prevent them from interfering with each other. If you are feeding a lot of prints into the processor you may need to slightly increase the heat setting for the W/D or S/D module to assure that the prints are dry when they emerge. This is because normally the dryer will have at least some recovery time between prints. When a large quantity of prints is being sent through the processor, there is virtually no recovery time available for the dryer between prints.
5.2 Maintenance After Use
Turn OFF the power switch on the MB.
Do not drain the chemicals from their baths.
Remove the complete top cover to avoid a buildup of moisture.
Remove the 1st bath rack and then the 2nd bath rack being careful to avoid dripping solutions from either rack into the other bath. Clean the racks being certain to rotate the main gear to turn the rollers for a thorough rinse under running water. Hang the racks to allow them to dry.
Cover the remaining solutions in the 1st and 2nd baths with the optional floating lids. (Part No. 411423)
CAUTION: The inlet rack has many electronic components. DO NOT clean the inlet rack with water. If needed, please wipe the rollers with a damp cloth.
5.3 Maintenance Before the Next Use
Check the replenisher level in the replenisher supply vessels. If there isn't enough replenisher, the hose will suck up air and there will be an air lock in the hose and the replenishment pump.
Check the overflow catch vessels. Empty them as needed.
Gently and carefully place the 2nd and 1st racks back into their respective baths. This time you may want to cover the "other" bath with a sheet of plastic while you are lowering the rack into "this" bath to prevent any possible splashing from contaminating the chemicals.
If the solution level has dropped slightly in the 1st or 2nd baths, add water to bring the solution level back up to the level line, to make up for evaporation.
Turn the power switch ON and wait until the chemical temperature reaches the programmed temperature. Now the CP51 is ready to start work.
5.4 Shut Down for Longer than One Week
Turn the power switch OFF.
Drain all chemicals.
Remove each rack and wash thoroughly. Remember to rotate the main gear of each rack to eliminate any
"hidden" chemicals between rollers. Leave the racks on a bench or hang them to dry naturally.
Place warm water in each bath and turn the power switch ON for approximately 30 minutes. This allows the water to thoroughly clean throughout the processor, including inside the pumps and heaters.
Remove the replenishment hoses from their respective replenisher supply vessels and insert them into separate water containers. (If you use a single water container for both replenisher lines, you may cause contamination.)
Push the manual replenishment buttons (located inside the control drawer housing) intermittently for each bath.
This will clean and flush out a buildup of chemicals in the hose. Repeat this step at least 3 times. Finally leave some water in the replenishment pumps to keep the valves lubricated.
Turn the power switch OFF. Drain the water from the baths. Remove the circulation filters from their chambers and store them in separate containers of water. (Mark the containers for DEVELOPER and BLEACH/FIX so that there will be no future chance of contamination.) If the filters dry out with even a trace of the chemicals in them, they may become blocked and useless.
Wipe down the processor with a clean dry cloth.
5.5 Regular Maintenance Schedule
Weekly Maintenance
Remove the top cover and clean it inside and outside.
Wipe each roller on each rack with a damp cloth.
Clean the area around each bath.
When not in use, remove the top cover to avoid condensation buildup.
Monthly Maintenance
Drain all chemicals and clean the 1st and 2nd baths and racks.
Clean holes on agitation pipe thoroughly.
Check the replenishment and circulation filters to make sure there is no buildup of crystals or dirt. Replace if dirty.
If you are using a W/D or S/D module, add a drop of oil to the worm gear that drives the dryer rack. All the main gears and worm gears are silicone impregnated, but the heat from the dryer, evaporates the silicone from the set closest to the heat.
5.6 Optional Monthly Maintenance Program
Use of JOBO Processor Clean II will do a remarkable job of cleaning your CP51 with little or no "elbow grease" required. It is available in two sizes; a 4 oz. pouch or a 4.7 lb. jar. The 4oz. pouch is too small to be practical for the
CP51. The quantity of powder in the 4.7 lb. jar (part no. 4135) is sufficient to clean the processor approximately 8 times. It will clean the rollers, baths, pumps, heaters, etc. by running the processor for at least 8 hours, or overnight.
Drain all chemicals (you can save them for reuse after the cleaning) and fill the 1st and 2nd baths with water.
Remove the replenisher filters from their housings, and store them in their own marked containers. Remove the replenisher lines from their supply vessels, and put them in separate vessels of water.
Turn the power switch ON and let the processor run for 10-15 minutes to flush out any remaining chemicals within the baths and their hoses.
While the water is circulating in the baths, press the manual replenisher buttons to clear any chemicals from the replenisher lines.
Turn the power switch OFF. Drain the water from the baths and partly fill them with about 3 liters of water.
Remove the circulation filters and if they are dirty dispose of them. If they seem clean, store them in their own marked containers filled with water, for reuse later.
Mix the Processor Clean II. Mix 6-3/4 oz., by volume, (about 200 ml) of the powder with about 2 liters of water.
Pour this into the 1st bath and top off with additional water until the solution just barely reaches the overflow drain.
Mix 4-1/2 oz. (about 135 ml) of the powder with about 2 liters of water. Pour it into about 3 liters of water already in the 2nd bath, and top off with additional water until it just barely reaches the overflow drain.
Turn the power switch ON and let the processor operate at normal working temperature for at least 8 hours.
Longer is okay. The processor will go into its standby mode after 45 minutes. This is okay and will still give the cleaning that you want. If you have the W/D or S/D module you can unplug from its power source to make sure it does not operate during this time, since the dryer is not needed for the cleaning function.
After at least 8 hours, turn the power switch OFF. Remove the racks and wipe the rollers with a clean cloth or paper towel. This is especially helpful on the 1st rack where silver may tend to accumulate if it has not been cleaned weekly.
Return each rack to its bath. Turn the power switch ON and let it run for another 15-30 minutes. Then wipe the rollers on each rack again.
Turn the power switch OFF. Drain the solutions from the baths and refill the baths with water. Let the water circulate for 10-15 minutes.
Repeat step 10 at least two more times.
Install clean filters into the circulation filter chambers. Refill the baths with their chemicals. Remember to fill the
2nd bath first, using the funnel and then clean up any spills or droplets before filling the 1st bath with developer using its funnel.
Turn the power switch ON and when the solutions are up to the programmed temperatures, begin processing.
Back to Top
Troubleshooting 6
CP51 power switch is on but machine isn't working.
Check plug.
Check that the breaker in the power box is on and has not blown.
Check the main fuse on the CP51 MB.
CP51 Power switch is on but chemicals don't circulate.
The circulation hose may be air locked. Turn the power switch OFF.
Remove the circulation filter chamber lid to release air.
Replace the lid.
Turn the power switch ON.
Paper doesn't come out.
Paper doesn't come out.
If paper is smaller than 100 mm / 4 inches long, lift up the lid and take out the paper. It is too small.
Make sure the main gear of each rack is properly seated on the matching worm gear on the drive shaft.
Make sure the standby function is off. (Turn the power switch OFF. Wait a few seconds and turn the power switch back ON.)
When density is too light (prints from negatives)
Check the developer temperature. Make sure it's not too low.
Make sure of the developing time. Check the mm/minute display in the control drawer to be sure it is appropriate for the chemicals in use.
Make sure the developer solution isn't too weak from age or under-replenishment, or if it's freshly mixed, make sure it was mixed accurately.
Make sure the replenishment rate is set accurately and delivering accurately.
When density is too dark (prints from slides)
Check the developer temperature. Make sure it's not too low.
Make sure of the developing time. Check the mm/minute display in the control drawer to be sure it is appropriate for the chemicals in use.
Make sure the developer solution isn't too weak from age or under-replenishment, or if it's freshly mixed, make sure it was mixed accurately.
Make sure the replenishment rate is set accurately and delivering accurately.
When paper becomes scratched
Is something stuck in the paper guide or inlet rack guide?
Has each rack been installed properly?
Are there any crystals or unwanted substances on the rollers?
When developer is not being replenished
Check the replenishment dial in the control drawer. It should not be on zero.
Make sure the paper processed was not smaller than 76 mm / 3 inches wide. (Less than this width may pass between the IR sensors without activating the replenisher pumps. This could also cause the dryer not to run, and the processor could go into its standby mode.)
Make sure the replenisher filter is clean.
Make sure the replenisher filter chamber is tightly closed.
Is the replenishment check valve in good condition?
Make sure the replenisher hose is not bent severely; a collapsed hose can stop the flow of replenisher.
Uneven development (lines on prints)
If the size of the paper was small, make sure the processor was not in standby mode. The 15 second cycle of turning on and off will cause the lines.
Make sure the power switch has not accidentally been switched off.
Make sure the rollers are rotating smoothly.
Check that the main gear and worm gear are properly interlocked.
Check that the processor is properly leveled.
Cloud marks on paper
If inlet rack rollers are wet, please wipe dry. If they have ever gotten developer on them, remove the rollers from the inlet rack. Clean them thoroughly with a damp cloth and re-install them in the inlet rack after you have thoroughly dried them.
Dirty paper
Run 2-3 test prints all across the width of the processor, to get rid of unwanted substances on the rollers.
If the prints are still dirty, please clean the rack rollers.
Make sure the W/D water is clean and flowing.
Paper is fogged
Was the light switched on accidentally while processing?
Is the top cover resting properly on the main body?
Make sure the paper wasn't exposed to the temperature control setting lamp on the operation control panel for too long.
Are there any LED's in the darkroom anywhere. LED's have a remarkable intensity and can easily fog color photographic paper. Make sure the control drawer is closed; its LED's could fog color paper.
When the warning lamp remains on
Room temperature is too high. (Room temperature should be at least 5 C lower than the 1st bath programmed temperature. The motors and pumps of the processor generate some heat and warm the solutions slightly.)
Chemical solutions may not be circulating properly. Check for an airlock in the lines. Turn OFF the power switch.
Remove the circulation filter chamber lid and put it back on. Turn the power switch back ON.
Back to Top
Processing Data 7
7.1 Process Time and Transport Speed
If you would like to calculate your own transport speed, there is a simple formula to assist you. 15,600 divided by the desired processing time in seconds equals the transport speed in mm/minute, which is the number you will need to set on the speed setting in the control drawer of the MB. For instance, if you are looking for a developing time of 2 minutes
30 seconds (150 seconds) simply divide 15,600 by 150. The answer is 104 mm/minute.
The chart that follows will simplify this for most developing times, but you can use the formula if the developing time you want is not in the chart.
PROCESSING TIME / TRANSPORT SPEED REFERENCE CHART
Processing Time in each bath
45 seconds
1 minute
1 minute 30 seconds
2 minutes
2 minutes 30 seconds
3 minutes
3 minutes 30 seconds
4 minutes
5 minutes
Transport Speed setting in control drawer (mm/min.)
347
260
173
130
104
87
74
65
54
7.2 Hourly Processing Capacity
The following chart illustrates approximately how many prints of each size can be processed per hour at the various transport speeds shown.
Hourly Processing Capacity by Size and Speed
Print Size 45 sec/bath 60 sec/bath 90 sec/bath 210 sec/ bath
20x24"
16x20"
11x14"
8x10"
(347 mm/min) (260 mm/min) (173mm/min) (74 mm/min)
31
45
23
33
16
23
6
9
61
166
46
124
30
84
13
34
7.3 RA-4 Processing Data
Process Brand Developer temp/
Kodak RA-4
Bleach/Fix temp/ Super Stabilizer/ replenishment rate
35o C ± 0.3o
replenishment rate
32-38o C replenishment rate
30-37o C
Tetenal RA-4
Fuji CP40FAII
38 ml/min
35o C ± 0.3o
21 ml/min
Konica CPK-20QA 35o C ± 0.3o
29 ml/min
35o C ± 0.2o
Agfa AP94
35 ml/min
35o C ± 0.2o
28 ml/min
38 ml/min
32-38o C
29 ml/min
30-36o C
38 ml/min
33-37o C
40 ml/min
30-36o C
38 ml/min
79 ml/min
30-37o C
34 ml/min
30-37o C
45 ml/min
33-37o C
120 ml/min
30-37o C
79 ml/min
Replenishment rate is based on maximum paper width.
All brands run at 347 mm/minute (45 seconds per bath)
7.4 Black & White Processing
Set temperature at 28o C for developer and fixing baths. (Use rapid fixer.) Set transport speed at 347mm/minute (45 seconds each bath). It is important to know that you cannot process at room temperature. Heat given off by the motors and circulating pumps in the CP51 will heat the solutions generally 2-4o C above room temperature. Most RC papers will process well at 28o C. (The CP51 is not designed for processing fiber-based papers. They are too thick for the rack design and may jam and cause damage.) Replenishment rates will vary by developer.
> Home D
> Home GB
> Service
> Back
| E-Mail Formular | Webmaster | Impressum | ©JOBO AG
Service Analog
Instruction Manual for the Fujimoto CP51
Roller Transport Processor
Stabilize / Dry Module
Contents
1. S/D Features and Specifications
2. Installation of S/D Module
3. Testing for Operation
4. Preparation for Operation
5. Maintenance
S/D Features and Specifications 1
The S/D Module is used for washing and drying prints using waterless type chemicals. (Super Stabilizer)
1.1 CP51 S/D Module Specifications
Function
Product Type
Transportation/
Types of Paper
Power
Number of baths
Bath Capacity
Chemical Circulation
Temperature Control
Replenishment
Dryer Temperature
Dimensions
Shipping Weight
Description
Waterless Washer/Dryer (connects to CP51 Main Body)
Same as CP51 MB
200/220/240 volts, 2350/2900/3400 watts, 50/60 MHz (adjustable)
2 baths
1st bath = 5.2 liters; 2nd bath = 5.4 liters
Magnetic pump circulation
Temperature control dial in S/D control drawer sets temperature for both baths. Chemical temperature adjustment is between 20o -40o C. Accuracy range is ± 0.2o C
IR sensors on the entry rack in the MB send a signal to the S/D Module to supply the correct amount of replenisher to the baths. Fresh replenisher flows into the 2nd bath and counterflows into the 1st bath of the S/D Module.
Adjustable from 20-80o C
767mm D x 480 W x 405 H (approx. 30 ¼ " D x 19" W x 16" H)
40 Kg (approx. 88 lbs.)
Safety Systems
Other features
Accessories 1
1
1
1
2
Overheat safety device on temperature control of solution heater and on dryer heater.
Drive motor in main body switches to standby operation after 45 minutes of inactivity.
Dryer standby timer is adjustable from 5 minutes to 55 minutes for electrical economy.
Main Body Connector
1st Rack
2nd Rack
15 Amp Fuse
Drain Extension Hoses
1.2 CP51 MB and S/D Module
1. Paper Outlet
2. S/D Module
3. Adjustable Voltage Switch
4. S/D On/Off Power Switch
5. Fuse 1.5 A
6. Control Drawer (and Manual Replenishment Switch on S/D)
7. Drain Hoses
8. Operation Control Panel
9. Ventilation Fan
10. Main Body Power Switch
11. Inlet Rack Connector Socket
12. Main Body Control Drawer
13. Main Body Adjustable Voltage Switch
14. Main Body
15. Light-Tight Cover
16. Top Cover
1.3 CP51 MB and S/D Module a. Top Cover b. 5 A Fuse c. 220 Volt Power Cord d. Replenishment Hose e. Gearbox Drain Hose f. Water Supply Hose g. Overflow Hose h. Connecting Cord
i. S/D Module Overflow Hose j. Drain and Replenishment Tank k. Dryer Drain Hose l. S/D Module Replenishment Hose m. RS Filter n. S/D Module Power Cord o. Air Filter p. S/D Module 15A Fuse
1.4 S/D - Module
A. Dryer Rack
B. 2nd Rack
C. 1st Rack
D. Worm Gear
E. Temperature Ventilation Outlet
F. Drive Shaft
G. 1st Bath
H. 2nd Bath
1.5 Paper Transport Path a. 1st Bath of MB b. 2nd Bath of MB c. 1st Bath of S/D d. 2nd Bath of S/D e. Dryer
1.6 Alphabetical Listing of Parts and Their Functions
Part Name / Function
1st Wash Bath 1st of two baths to wash prints before drying
2nd Wash Bath 2nd of two baths to wash prints before drying
Adjustable Voltage Switch Sets voltage for correct rating
Air Filter Cleans air for intake of dryer fan
Control Drawer Set dryer temperature, temperature of solution, replenishment rate and standby time for dryer
Drain Hose Drains each bath
Dryer Drain Hose Drains water or Super Stabilizer away from dryer rack
Dryer Rack Roller system removes excess liquid and dries prints
Fuse, Large 15 Amps
Fuse, Small 1.5 Amps
Main Gear Primary drive gear of each rack, which rests on drive shaft
Overflow Hose Drains overflow of water or excess chemical from baths
Power Cord Connects to 200, 220 or 240 volt single phase line
Replenishment Hose Supplies replenisher to each bath
Thermostat Attached to dryer
Top Cover To hold paper once dry
Ventilation Fan Draws air through lower chamber to prevent condensation and to cool electronics
Back to Top
Installation of S/D Module 2
2.1 Installation of S/D Requires Proper Conditions
Light-tight darkroom
Adequate ventilation
Safe electrical conditions. The S/D Module will need a NEMA socket 6-20-R (see illustrations #3, 4) of its own, in addition to the one needed for the MB. We strongly recommend the use of a Ground Fault Circuit Interrupt
(GFCI) in the wiring for your CP51.
Air conditioning/heating (as needed)
NOTE : The pumps and electronic components will heat up the solutions 2-4o C above room temperature even when the heaters are not running. Room temperature should be at least 5o C (9o F) lower than the programmed temperature of the CP51 processor. i.e. If the CP51 is set for 30o C (86o F), then the room temperature should be at or below 25o
C (77o F).
2.2 Additional Requirements for S/D Module
Replenisher supply container for fresh Super Stabilizer replenisher
Overflow container to catch used Super Stabilizer. The overflow container should be at least as large as the
Super Stabilizer replenisher container. The rate of replenishment for most brands of Super Stabilizer is generally about twice the replenishment rate of the RA-4 Developer. (See the chemical manufacturer's instructions for specific information.)
2.3 Installation Dimensions
Please leave space around the processor as indicated in the drawing. It is necessary for access to the control drawer of the MB and S/D, the air filter of the S/D, and for the various intake and overflow hoses of the processor.
A. After the MB has been checked with a level, match the S/D with the height of the MB and then check it for level.
Lock the positioning pin on the MB to the S/D module. At the same time, attach the Connecting Sleeve of the S/D
Module drive shaft to the MB drive shaft.
B. Pour warm water into each bath (about 33o C / 90o F) in the S/D Module. Be sure to use the supplied funnels positioned directly into the intakes at the bottom of each bath to assure proper priming of the circulation pumps. (This is the same technique as needed in the MB.)
C. Prepare replenisher and waste containers according to the diagram. If the dryer drain hose or overflow hose is too short use the provided extension hose. Normally place the replenisher containers under the processor. If you have difficulty getting the replenisher pumps to take up the solution, temporarily raise the fresh replenisher container higher than the processor. When the pumps have the solution flowing properly, then return the container to a position lower than the processor.
D. Attach the connecting cable from the MB to the S/D module as shown in Diagram #2. This wire carries the signal from the IR sensors to turn on the dryer and to indicate to the replenisher pumps, the amount of replenisher needed for the current print being processed.
E. Adjust the voltage setting on the S/D to match the voltage in your location. You should already have done this for
the MB. Now is a good time to check both settings.
Back to Top
Testing for Operation 3
3.1 Powering Up
Turn on the power switch on the MB. Check to see that water is flowing properly through all circulated baths. (MB and
S/D) If the water is not flowing through the spray bars properly, TURN OFF THE MB POWER SWITCH IMMEDIATELY!
If the circulating pumps are not primed properly, you will probably hear a noisy screeching, indicating that the pumps are "dry" and in need of proper priming. Remove some of the water and pour it in again being sure to use the supplied funnels to prime the pumps. Also while the power is switched off, open and re-close the filter chamber caps to allow air to escape. (If you try this while the power is on you will have quite a mess to clean up!)
CAUTION!
Be sure the power switch is OFF when there are no chemicals or water in any of the baths or you may cause serious damage to the heaters, pumps and other components of the processor MB or S/D Modules.
3.2 Modules
S/D Modules control their temperature with thermostats, heaters and circulating pumps. They are pre-set at the factory for approximately 35o C. Usually this temperature is appropriate for Super Stabilizer.
If it is necessary to adjust the temperature turn the temperature setting dial in the S/D Module Control Drawer clockwise to increase the temperature, or counterclockwise to decrease the temperature. Pour warm water into the 1st bath. Ensure the water is 1-2o C lower than Super Stabilizer working temperature. Check it with a thermometer. With the processor switched on, adjust the temperature setting dial with a screwdriver. Stop turning when the LED indicator comes on. Then turn the temperature setting dial counterclockwise to turn the LED off. The temperature will then be set. Wait 2-3 minutes. Then check with a thermometer again.
3.3 Replenishment
To set the replenishment rate, pull out the S/D control drawer. (Refer to the control drawer diagram.) Each increment on the S/D replenishment control dial represents an increase of 15 ml.
1 = 15 ml
2 = 30 ml
3 = 45 ml
9 = 135 ml
Setting the replenishment amount is otherwise the same as the CP51 MB. The CP51 automatically calculates the replenishment amounts for each paper size, based on both the width and length, as measured by the six IR sensors of the input rack. The replenishment values of the scale must be considered approximate, since the actual delivery rate may be affected by such things as the length of the replenisher hose, and the Hz value of the current powering the processor.
The manual replenishment button is located in the control drawer, on the underside of the chamber above the removable circuit board drawer. Manual replenishment should be done when cleaning or when pouring the chemical solutions. If you have difficulty getting solution to begin pumping properly, raise the replenisher supply vessel above the processor. Then press the manual replenishment button again. Once the replenisher pump begins drawing the solution properly, place the replenisher supply vessel below the processor again. Place the racks in the solution slowly and carefully to avoid any chemical spills. Be certain to properly align the main gear of the rack with the worm gear of the drive shaft.
3.4 Illustration of S/D Module Control Drawer
1. Chemical temperature LED (L1)
2. Chemical temperature control dial
3. Dryer standby control dial
4. Dryer Heater temperature control dial
5. Replenishment volume control dial
3.5 Dryer/Heater Checkpoints
1. Adjust the dryer/heater temperature control dial to 5 or 6
2. Take the main gear off the worm gear on the inlet sensor rack of the MB. Leave it plugged in so it is active.
3. Insert a white piece of paper into the sensor rack
4. Check to make sure the dryer/heater switch is "on".
5. Check dryer standby timing. The dryer/heater is designed to automatically turn off when not being used. The dryer/heater has been set at "0" (at the factory), meaning that the timer will turn off automatically 5 minutes after the last edge of the paper has entered the inlet rack. With each additional increment of the dryer standby control dial, the dryer will run for an additional 5 minutes.
Scale No. Heated Time Suggested Process
0 5 minutes RA-4
2 15 minutes
(0:45 per bath)
2 Minute Process
3 20 minutes
(2:00 per bath)
EP-2
(3:00 per bath)
After the above steps (3.1-3.5) have been completed, turn off the power and remove the S/D racks and drain the baths.
CAUTION!
For ventilation purposes, turn off the main power switch ONLY after the dryer/heater standby timer has turned off.
Back to Top
Preparation for Operation 4
4.1 Pouring the Super Stabilizer
Be sure the power switch is OFF when there are no chemicals or water in the baths or you may cause damage to the heaters, pumps and other components of the processor.
Insert one of the supplied funnels into the drain hole at the bottom of the bath. 11 liters of super stabilizer are needed to fill the total of the two baths. Once the super stabilizer is flowing from the spray bar, then you can continue pouring without the funnel.
4.2 Rack Loading
When the solution is up to the ridge around the bath, then gently lower the racks into place. Be careful not to splash the solutions outside of the baths. Clean up any spills and replace the top cover.
NOTE : When not actually using the processor, leave the top cover off both modules. This helps to prevent excessive condensation buildup.
4.3 Dryer Check
Check the dryer temperature control dial in the control drawer. Make sure that the dial is set at 5 or 6 as a starting point. Insert paper into the MB. Change the dial setting to different levels and check that the temperature changes accordingly.
Back to Top
Maintenance 5
1. Make sure replenisher is in each replenishment container.
2. Make certain the effluent container is ready.
3. Once a week, drain the Super Stabilizer from the baths. (You can save it for use after the cleaning if you are replenishing it.) Fill the baths with water, let them circulate for 10-15 minutes, drain out the water and repeat.
Then pour the Super Stabilizer back in for further use. Once a month you may want to use Processor Clean II for a thorough cleaning. See the MB instructions for further details.
4. Clean the air filter of the dryer once or twice a month.
5. Run one or more sheets of paper through the S/D Module to get rid of unwanted substances which may have become stuck on the rollers. It may be advisable to use "cleanup film" from time to time for best cleaning results.
These films are available from both Kodak and Fuji Film.
6. Once a month add a single drop of oil (such as 3 in 1 "blue") to the main drive gear of the dryer rack. All the main drive gears of the various racks are silicone impregnated so they should not need lubrication, but the main drive gear of the dryer rack is exposed to a high level of heat and needs additional lubrication.
> Home D
> Home GB
> Service
> Back
| E-Mail Formular | Webmaster | Impressum | ©JOBO AG
Service Analog
Instruction Manual for the Fujimoto CP51
Roller Transport Processor
Wash / Dry Module
Contents
1. W/D Features and Specifications
2. Installation of W/D
3. Testing for Operation
4. Preparation for Operation
5. Maintenance
W/D Module Features and Specifications 1
The W/D Module is used for washing and drying prints using a flowing water wash through two baths in counter-flow design for efficient use of the water.
1.1 CP51 W/D Module Specifications
Function
Product Type
Transportation/
Types of Paper
Power
Number of baths
Bath Capacity
Constant Flow Valve
Wash Water
Description
Washer/Dryer (connects to CP51 Main Body)
Same as CP51 MB
200/220/240 volts, 1750/2300/2500 watts, 50/60 MHz (adjustable)
2 baths
1st bath = 5.2 liters; 2nd bath = 5.4 liters
5.2 liter per minute flow rate
Wash water temperature controlled by external water temperature control panel (such as
Temperature
Dryer/Heater
Temperature
Dimensions
Shipping Weight
Safety Systems
Other features
Accessories
JOBO art. no. 4190) Water temperature will be 25o C or higher for BW; 35o C for RA-4.
Adjustable from 45-80o C
767 mm D x 480 W x 405 H (approx. 30 ¼ " D x 19" W x 16" H)
34 Kg (approx. 75 lbs.)
Overheat safety device on temperature control of dryer heater.
Drive motor in main body switches to standby operation after 45 minutes of inactivity.
2
1
1
1
1
1
1
1
1
Dryer standby timer is adjustable from 5 minutes to 55 minutes for electrical economy.
Drain Pipe Joint
Main Body Connector Cable
Hose clamps
1st Wash Rack
2nd Wash Rack
Dryer Rack
15 Amp Fuse
1 Amp Fuse
Drain Extension Hose
1.2 CP51 M/B and W/D Module (See illustration # 1)
1. Paper Outlet
2. W/D Module
3. Adjustable Voltage Switch
4. W/D On/Off Power Switch
5. 1Amp Fuse
6. Control Drawer
7. Drain Hoses
8. Operation Control Panel
9. Main Body Power Switch
10. Ventilation Fan
11. Inlet Rack Connector
12. Main Body Control Drawer
13. Main Body Adjustable Voltage Switch
14. Main Body
15. Light-Tight Cover
16. Top Cover
CP51 MB and W/D Module (See illustration # 2) a. Top Cover b. 1 A Fuse c. 220 Volt Power Cord d. Replenishment Hose e. Gearbox Drain Hose f. Water Supply Hose g. Overflow Hose h. Connecting Cord i. W/D Module Overflow Hose j. Dryer Drain Hose k. W/D Module Power Cord l. Air Filter m. W/D Module 15A Fuse n. Water Supply Inlet Pipe
1.3 Alphabetical Listing of W/D Parts and Their Functions
Part Name / Function
1st Wash Bath 1st of two baths to wash prints before drying
2nd Wash Bath 2nd of two baths to wash prints before drying
Adjustable Voltage Switch Sets voltage for correct rating
Air Filter Cleans air for intake of dryer fan
Control Drawer Set dryer temperature and standby time here
Drain Hose Drains each bath
Dryer Drain Hose Drains water away from dryer rack
Dryer Rack Roller system removes excess water and dries prints
Large Fuse 15 Amps
Main Gear Primary drive gear of each rack, which rests on drive shaft
Overflow Hose Drains overflow of water or excess chemical from baths
Power Cord Connects to 200, 220 or 240 volt single phase line
Small Fuse 1 Amp
Thermostat Attached to dryer
Top Cover To hold paper once dry
Ventilation Fan Draws air through lower chamber to prevent condensation and to cool electronics
Water Supply Inlet Pipe Connect your incoming water line to this pipe. Use reinforced hose and 2 pipe clamps for a secure connection.
Back to Top
Installation of W/D Module 2
2.1 Installation of W/D Requires Proper Conditions
Light-tight darkroom
Nearby source of water, preferably with water temperature control panel
Adequate ventilation
Safe electrical conditions. We strongly recommend the use of a Ground Fault Circuit Interrupt (GFCI) in the wiring for your CP51.
Air conditioning/heating (as needed)
NOTE : The pumps and electronic components will heat up the solutions 2-4o C above room temperature even when the heaters are not running. Room temperature should be at least 5o C (9o F) lower than the programmed temperature of the CP51 processor. i.e. If the CP51 is set for 30o C (86o F), then the room temperature should be at or below 25o
C (77o F).
2.2 Water Supply / Drainage Information
Connect a water supply hose from your water temperature control panel to the water supply inlet pipe. The inside diameter of the hose should be 16 mm (5/8") and it should be able to withstand at least 70 lbs. of pressure. Attach the hose to the inlet pipe as far as possible and use two hose clamps to secure it. (See illustration #2)
If needed, attach the drain hose extension to the drain hose. Insert the free end of the drain hose into a drain standpipe. (The extension hose should have an inside diameter of 19 mm (3/4").
2.3 Water Supply Requirements in use with W/D Module
Water Temperature 30-35o C/86-95o F (for RA-4; for other processes see chemical instructions)
Water Pressure 1.5-5 Kg/cm2 (15 - 70 lbs. of pressure)
Water Volume 1.5 liters per minute (approx. 1/3 gal. per minute)
Water pipe inside diameter 13 mm (1/2")
Water hose inside diameter 16 mm (5/8")
Filter recommendation 50 micron or smaller (as low as 5 microns) mounted in building's plumbing system near darkroom.
2.4 Drain Requirements for W/D Module
Drain flow 1.5 liters per minute (1/3 gallon per minute)
Drain overflow hose inside diameter 13mm (1/2")
Drain hose inside diameter 19 mm (3/4")
Pipe material Do not use copper or brass due to the corrosiveness of effluent.
2.5 Installation Dimensions
Please leave space around the processor. It is necessary for access to the control drawer of the MB and W/D, the air filter of the W/D, and for the various intake and overflow hoses of both modules.
{drawing showing...}
1. Positioning Pin
2. Connecting Sleeve
A. After the MB has been checked with a level, match the W/D with the height of the MB and then check it for level.
Lock the positioning pin on the MB to the W/D module. At the same time, attach the Connecting Sleeve of the W/D
Module drive shaft to the MB drive shaft.
B. Attach the connecting cable from the MB to the W/D module as shown in Diagram #2. This wire carries the signal from the IR sensors to turn on the dryer
C. Adjust the voltage setting on the W/D to match the voltage in your location. You should already have done this for the MB. Now is a good time to check both settings.
Back to Top
Testing for Operation 3
3.1 Powering Up
Turn on the power switch on the MB. Check to see that water is flowing properly through both circulated baths of the
MB. If the water is not flowing through the spray bars properly, TURN OFF THE MB POWER SWITCH IMMEDIATELY!
If the circulating pumps are not primed properly, you will probably hear a noisy screeching, indicating that the pumps are "dry" and in need of proper priming. Remove some of the water and pour it in again being sure to use the supplied funnels to prime the pumps. Also while the power is switched off, open and re-close the filter chamber caps to allow air to escape. (If you try this while the power is on you will have quite a mess to clean up!)
CAUTION!
Be sure the power switch is OFF when there are no chemicals or water in the baths or you may cause serious damage to the heaters, pumps and other components of the processor.
3.2 Modules
W/D Modules have no internal method for controlling the wash water temperature. This is controlled by use of an external water temperature control panel (such as JOBO art. no. 4190). Proper washing temperature is very important to the quality and life expectancy of the print. If the wash water temperature gets too hot, the paper can begin to deteriorate while washing. If the wash water temperature gets too cold, the wash will be inadequate and retained chemicals will shorten the life of the image.
If you are planning on using a water panel other than the JOBO 4190, make sure that it has a LOW-FLOW mixing valve in use. The 1.5 liter per minute flow rate is much too low for standard mixing valves to maintain temperature accurately.
Place the rack in the solution slowly and carefully to avoid any spills. Be certain to properly align the main gear of the rack with the worm gear of the drive shaft.
3.3 Illustration of W/D Module Control Drawer
1. Dryer standby control dial
2. Dryer Heater temperature control dial
3.4 Dryer/Heater Checkpoints
1. Adjust the dryer/heater temperature control dial to 5 or 6
2. Take the main gear off the worm gear on the inlet sensor rack of the MB. Leave it plugged in so it is active.
3. Insert a white piece of paper into the sensor rack
4. Check to make sure the dryer/heater switch is "on".
5. Remove the paper from the inlet sensor rack of the MB and check the dryer standby timing.
The dryer/heater is designed to automatically turn off when not being used. The dryer/heater has been set at "0" (at the factory), meaning that the timer will turn off automatically 5 minutes after the last edge of the paper has entered the inlet rack. With each additional increment of the dryer standby control dial, the dryer will run for an additional 5 minutes.
Scale No. Heated Time Suggested Process
0 5 minutes RA-4
2 15 minutes
(0:45 per bath)
2 Minute Process
3 20 minutes
(2:00 per bath)
EP-2
(3:00 per bath)
After the above steps (3.1-3.4) have been completed, turn off the power and remove the W/D racks and drain the baths.
CAUTION!
For ventilation purposes, turn off the main power switch ONLY after the dryer/heater standby timer has turned off. This allows time for it to cool down after use.
Back to Top
Preparation for Operation 4
4.1 Filling W/D Baths
Be sure the power switch is OFF when there are no chemicals or water in the baths or you may cause damage to the heaters, pumps and other components of the processor.
Approximately 11 liters of water are needed to fill the total of the two baths of the W/D. With the racks in place in the
W/D simply turn on the water temperature control panel, and allow sufficient time for both baths to be filled, before starting to process. (At the 1.5 liter per minute flow rate, it will take approximately 7-8 minutes for both baths to be filled and the water to be flowing out the overflow drain hose.
NOTE : When not actually using the processor, leave the top cover off both modules. This helps to prevent excessive condensation buildup.
4.2 Dryer Check
Check the dryer temperature control dial in the control drawer. Make sure that the dial is set at 5 or 6. Insert paper into the MB. Change the dial setting to different levels and check that the temperature changes accordingly.
Back to Top
Maintenance 5
1. Clean the air filter of the dryer once or twice a month.
2. Run one or more sheets of paper through the W/D Module to clean the rollers. It may be advisable to use
"cleanup film" from time to time for best cleaning results. These films are available from both Kodak and Fuji
Film.
3. Once a month add a single drop of oil (such as 3 in 1 "blue") to the main drive gear of the dryer rack. All the main drive gears of the various racks are silicone impregnated so they should not need lubrication, but the main drive gear of the dryer rack is exposed to a high level of heat and needs additional lubrication.
> Home D
> Home GB
> Service
> Back
| E-Mail Formular | Webmaster | Impressum | ©JOBO AG
Service Analog
Instruction Manual for the Fujimoto CP51
Roller Transport Processor
Index
Introduction
It is important to read completely through the following instructions before using the processor. Although the machine is easy to use, there are important aspects of it which may not be obvious without learning of them in this manual.
The Main Body plus either the Wash Dry Module or the Stabilize Dry Module make up a complete dry-to-dry print processor. However, the Main Body can be used alone, followed by manually washing and drying the prints after they come out of the Bleach/Fix.
Features of CP-51 Processor
Consistent print development is ensured due to automatic chemical replenishment measuring both width and length of the paper, as well as automatic temperature control of solution temperatures.
Print sizes from 3 x 4" to 20 x 30" can be processed.
Once the light-tight cover of the processor has been closed, development can take place in daylight.
Each solution bath needs only 6 liters of chemicals, keeping solution costs low.
The roller-transport system enables quick and smooth print processing.
Long life is assured for both the chemicals and rollers by a ventilation fan preventing excess condensation.
Standby circuitry reduces aeration of the solutions while protecting the rollers, and magnetic circulation pumps minimizing oxidation by intermittently turning off the processor during unused periods of operation.
Index
Main Body
1. Unpacking
2. Specifications
3. Pre-Installation
4. Installation
5. Operation
6. Troubleshooting
7. Processing Data
Wash / Dry Module
1. W/D Features and Specifications
2. Installation of W/D
3. Testing for Operation
4. Preparation for Operation
5. Maintenance
Stabilize / Dry Module
1. S/D Features and Specifications
2. Installation of S/D Module
3. Testing for Operation
4. Preparation for Operation
5. Maintenance
> Home D
> Home GB
> Service
> Back
| E-Mail Formular | Webmaster | Impressum | ©JOBO AG
Service Analog
Instruction Manual for the Fujimoto CP51
Roller Transport Processor
Main Body
Index
1. Unpacking
2. Specifications
3. Pre-Installation
4. Installation
5. Operation
6. Troubleshooting
7. Processing Data
Unpacking 1
1.1
.
Unpacking Your CP51 Processor
Your Fujimoto processor MB will arrive in a sealed carton. The shipping weight of the unit is approximately 112 pounds.
Due to its physical size and weight, it is advisable to have at least two people move the processor, when necessary.
The processor may arrive secured to a pallet depending on whether you ordered additional modules.
Once the carton is located near the installation site, carefully cut the packing tape and open all four flaps completely.
The racks and accessories for your processor are packed in separate boxes and are located on the top (Figure 2).
Remove all of the smaller boxes and place them aside until you have exposed the main body. Save all the packing materials.
The main body will be wrapped in plastic and surrounded by padded cardboard inserts that secure the main body from damage. Before you can remove the main body from the shipping carton, all accessory boxes must be removed.
Once all accessory boxes are removed, lift the flaps that cover the main body (Figure 3). Remove the spare parts box
(labeled "parts"), set it aside, and then remove the two inserts by pulling them straight up. The main body is now ready to be removed from its carton.
It does not matter from which side the processor is lifted. It is important, however, that two people remove the processor from its carton to avoid personal injury as well as damage to the processor. When removing the processor, be sure it is lifted from the bottom. You may find it easier to remove the plastic around the processor first in order to avoid having the processor slip while it is being removed from its carton (Figure 4).
Once the processor has been removed from its carton, place it on the surface where you intend to operate it. (See the chart in Chapter 3.5 referring to minimum table/counter sizes.) Check all packing materials for any small parts that may have fallen out of place during shipping.
1.2 Hidden Damage
Check the processor for any damage and, if found, immediately contact the shipping company that delivered the unit or the dealer from whom you purchased the unit.
1.3 Packing Material
It is advisable to retain and store the carton and packing material for future shipping and/or moving of your processor to prevent damage in transit.
Back to Top
Specifications 2
2.1 CP51 Main Body Specifications
Paper Compatibility RC paper. Maximum size of 510 mm wide by 610 mm long. (20 inches wide by 24 inches long) Minimum size of 76 mm wide by 100 mm long. (3 inches wide by 4 inches long)
Transport System Roller Transport System
Processing Time 45 seconds to 5 minutes (per bath)
Transport Speed 52 - 350 mm per minute (2-14 in./min.); transport speed is digitally displayed up to 3 figures, and adjustable by a single knob control.
Acceptable Processes RA-4, EP-2, B&W
Power Requirements Single Phase, 200/220/240 volts, 50-60 Hz, 600/680/800 watts
Processing Baths 2; solution capacity of 6 liters each
Chemical Circulation 1st and 2nd baths use magnetic drive pumps and built-in chemical filters
Replenishment 6 infrared sensors calculate paper's area (both length and width) and activate the replenishment pumps to provide individually accurate chemical replenishment for the surface area measured.
Temperature Control Temperature control is digitally displayed for each solution tank in the MB. In addition, the following additional information is displayed; heater "on" lamp, overheat warning lamp. Temperatures are programmable up to a maximum of 50o C, and accurate to ±0.1o C.
Dimensions 815 mm long, 645 mm wide, 300 mm high (approximately 32" L x 25" W x 12" H)
Hose Dimensions Replenishment pipe: 8mm (5/16") O.D. Overflow hoses: 15mm (9/16") O.D. Drain hoses:
8mm (5/16") I.D.
Shipping Weight 52 kg, (112 lbs.)
Other Features---
Standby Function If, after 45 minutes, paper has not been inserted into the processor, the circulation pump and roller transport motor automatically stop their "full-time" operation. While in this energy saving Standby mode, they turn on for approximately 4 seconds and off for approximately 10 seconds until paper is inserted into the processor, or the power switched off and on again. Then the CP51 resumes normal operation.
Ventilation Fan This fan has been designed to help prevent crystallization and condensation of chemicals.
Safety Device A built-in, overheat sensing switch shuts down the heating system, if an overheat condition is detected.
2.2 CP51 Main Body Parts Check List
3
2
1
1
2
1
1
1
1
2
1
Quantity Description
1
1
CP51 Main Body
Top Cover/ Light-tight Cover
Chemical recirculation filters
Inlet Rack (with 6 IR sensors)
Main Body Rack #1
Main Body Rack #2
Part No.
411405
65132
65120
65224
65130
65381
5 Amp fuse
Funnels
65102
65307
Extension hoses for overflow
Drain overflow hoses
65268 + 65380
(Call)
Wrench for adjusting leveling legs 65280
100 ml Graduated cylinder
This instruction manual
3303
66049
Please check to make sure that you received all of the parts listed above. If something is missing, contact the JOBO
Customer Service Department at 734-677-6989, extension 4721.
2.3 CP51 Main Body Parts and Functions
(in alphabetical order)
Name / Function
1st Rack This is the developer rack in the 1st solution bath.
2nd Rack This is the rack in the 2nd solution bath, normally used for bleach/fix or fixer, depending on the specific process in use.
2nd Bath Water Supply Hose Incoming water connection for conversion of MB 2nd bath to a flowing water wash.
Adjustable Power Switch Changes circuitry among 200/220/240 volt settings.
Control Drawer This houses the main PC Board for control of the speed of the processor, replenishment rates and other functions.
Drain Hose There is a drain hose for emptying each bath
Drive Shaft Transmits rotation of drive motor to each rack.
Fuse Normally rated 5 amps.
Gearbox Drain Hose Drains built-up water or chemicals from gearbox (drive shaft area).
Inlet Rack This is the small rack which receives the incoming sheets of paper, equipped with IR sensors to measure the surface area.
Inlet Rack Connector Provides electrical connection for IR sensors of inlet rack
Light-tight Cover After paper has been inserted into the processor and the cover closed, this cover protects the paper so room lights can be switched on.
Main Gear The primary gear attached to each rack which rests on the Worm Gears of the Drive Shaft.
Operation Control Panel Displays temperature, has "hidden" contact buttons for programming high and low temperatures.
Rack Assembly of rollers, springs and gears which transports the paper through each individual bath.
Replenishment Hose Supplies fresh replenisher to each solution bath.
Ventilation Fan Evacuates condensation and heat from the processor.
Water Supply Pipe Incoming water connection for conversion of MB 2nd bath to a flowing water wash.
W/D, S/D Connector Wire Signal wire which sends signal from Inlet Rack to activate Dryer when paper is inserted into processor and also sends information to activate replenisher system.
Worm Gear Corkscrew shaped gear(s) on drive shaft that turns Main Gear of individual solution racks
Back to Top
Pre-Installation 3
3.1 Proper Conditions For Setting Up The CP51 Processor
Light-tight darkroom
Adequate ventilation
Nearby water supply and drain for use with W/D Module
Safe electrical conditions. We strongly recommend the use of a Ground Fault Circuit Interrupt (GFCI) in the wiring for your CP51. It detects possible shock hazards and shuts off the current in a fraction of a second, to protect you from possible harmful shocks.
Air conditioning/heating (as needed)
NOTE: Room temperature should be at least 5o C (9o F) lower than the programmed temperature of the CP51 processor. i.e. If the CP51 is set for 30o C (86o F), then the room temperature should be at or below 25o C (77o F).
This is necessary because the circulating pumps and other components will give off some heat as the solutions pass
through them.
3.2 Water Supply Requirements In Use With W/D Module
Water Temperature 30-35o C/86-95o F (for RA-4; for other processes see chemical instructions)
Water Pressure 1.5-5 Kg/cm2 (21-70 psi)
Water Volume 1.5 liters per minute (approx. 1/3 gallon per minute)
Water pipe inside diameter 13 mm (1/2")
Filter recommendation 50 micron or smaller (as low as 5 microns) mounted in building's plumbing system near darkroom.
3.3 Drain Requirements For W/D Module
Drain flow at least 1.5 liters per minute (approx. 1/3 gallon per minute)
Drain overflow hose inside diameter 13mm (1/2")
Pipe material Do not use copper or brass due to corrosiveness of effluent.
3.4 Weights of Processor Components
Consider the weight of the modules as shown below, when you are deciding where to locate your processor. Be certain the supporting surface can handle the weight load.
Table of Processor Weights
Modules
MB
Weight Empty Weight with Solutions
51 Kg (112 lbs.) 63 Kg (139 lbs.)
MB + W/D 96 Kg (211 lbs.) 120 Kg (264 lbs.)
MB + S/D 102 Kg (224 lbs.) 126 Kg (277 lbs.)
3.5 Table and Counter Surface Dimensions
The figures in the chart below represent the surface dimensions needed on a free-standing table to support the adjustable feet of the CP51. Counters will need an additional 7-8 inches in depth due to chassis size and space needed for hoses behind the modules.
Support Dimensions
Modules
MB
Table Dimensions
580 x 600 mm (23 x 24")
Counter Dimensions
580 x 800 mm (23 x 32")
MB + W/D or S/D 1050 x 600 mm (42 x 24") 1050 x 800 mm (42 x 32")
3.6 Power Requirements
The Main Body and W/D (or S/D) each have their own power cords. You will need to have 2 NEMA code 6-20-R sockets to power the processor.
We strongly recommend that the circuit be Ground Fault Circuit Interrupt (GFCI) protected. In case of electrical shock hazard it will shut off the power in a fraction of a second to protect you. from danger.
The single phase "220" volt current most often found in the U.S.A. is generally either 208 or 240 volts. Either will be acceptable. In the chart below, the amperage has been calculated for 208 volts, providing a greater margin of safety for other voltage levels.
Power Requirements
Module Voltage Wattage Amperage
Main Body 208-240 810 3.9
W/D Module 208-240 2,200
S/D Module 208-240 2,900
10.6
14
To determine the minimum circuit amperage needed, add the amperage of the various modules to be used. Add a safety factor of 25% to the sum of the amperages to determine a minimum load-handling capability needed for your circuit. (i.e. MB 3.9A + W/D 10.6A = 14.5A +25% (3.625A) = minimum circuit of 18.125 amps, or rounded up to a 20 amp circuit.)
Back to Top
Installation 4
4.1 CP51 Installation
Remove the Main Body from its packaging. Get assistance since the Main Body is quite heavy. Check all packing materials carefully for any components. Funnels, a graduate, the leveling wrench and other small parts may be concealed inside some cardboard packing materials.
Place the MB on a table or counter. Do not "power up" your processor without liquid in the baths! Failure to have liquid properly in each bath may burn out the heaters and/or heater safety systems, and possibly void the warranty. Avoid installing the racks until you get to step 4.4.2. They will get in the way prior to that step.
Level the MB using the wrench supplied in package. Place your level on the chrome rails to check lateral level.
(See illustration number 5.) Place the level on the dividing wall between the 1st and 2nd baths to determine side-to-side level. This is very important for quality processing.
Pull out the drain hoses from their storage within the lower compartment of the MB. When you see the colored tapes wrapped around the hoses emerge from the MB, stop pulling out the hoses. The tapes are a warning that you have pulled them far enough!
Remove any additional W/D or S/D modules from their packaging and place them to the left of the MB.
Adjust the leveling legs of the additional module. First adjust the height to match that of the MB. Then level each module. It is very important that both modules are level and at the same height. Otherwise the drive shafts of the individual modules will not align properly. When the drive shaft couplings meet easily, then you know the modules are aligned well. You can visually check the height of the modules by comparing the black "waistbands" of each unit.
Insert one of the supplied funnels into the drain hole at the bottom of the bath. Pour warm water into the funnel until the spray bar starts to emit water. Then you can pour in the rest of the water without using the funnel. This procedure is essential to prime the circulation pumps. IT MUST BE DONE EVERY TIME YOU FILL THE
CHEMICAL BATHS! Fill each bath up to the line (several inches below the top of the dividing wall.) Do not
"power up" the processor yet.
CAUTION : Do not use water hotter than 50o C/ 122o F. Hot water is not necessary at this point in the preliminary installation.
Adjust the processor legs if necessary and check with your level to ensure the water surface is exactly on the line in the separate modules.
4.2 Preparation of the Environment
Prepare plastic containers for replenishment and overflow for each module. CAUTION: always store the plastic containers lower than the CP51 itself, such as under the table supporting the processor.
Fill the replenisher containers with water (for testing and calibrating.)
Run hoses from the overflow lines to overflow containers to catch effluent chemicals.
Use the provided extension hoses as needed. Remember to remove the extensions when storing the drain hoses, inside the processor's lower housing.
Connect W/D overflow hoses to a drain line capable of handling the 1.5 liter per minute flow rate of the wash water which will come from the W/D in use.
4.3 Filter Setup
With the power OFF (!) remove the filter chamber lid and insert the filter. Replace the lid on the chamber.
CAUTION! Whenever you remove the filter chamber lid, at any time in the life of the CP51 processor, be sure to have the power off, or you will have quite a mess as the chemical is pumped up from the filter chamber.
There are also small filters mounted in-line on the replenisher hoses. The replenisher hose should be removed from the replenisher storage vessel before opening the in-line filter housing. But also be ready to catch the liquid draining from the end of the hose in a suitable container.
4.4 Test Run
After pouring water into each bath (using the funnels as described above), turn the power on at the main body.
While there are no racks in the baths, check that the spray bars are working normally; water should be coming out of each hole in the bar. If the water is not flowing from the spray bar, switch off the main body, open the filter chamber lid, and close it again. Switch the power back on again. This procedure gets rid of any air trapped inside the circulation system, which can interfere with proper solution circulation. (When there is an air lock in the circulation system, you will usually hear a screeching sound that may cause you to think the bearings of the pump motor have been ruined. Normally, this is not indicative of damage to the bearings if you shut off the processor quickly, and correct the circulation problem as described above.)
Insert each rack. The worm gear on the drive shaft, and the main rack gear should mesh properly. Plug in the connector of the inlet rack to the receptacle on the end of the main body.
CAUTION!
The power MUST be switched OFF when there is no liquid in the chemical baths. Operating the processor with "empty" baths can severely damage the machine.
4.5 Chemical Temperature Setup for MB
In the following section, HIGH SET refers to a temperature 0.5o C above the "target " temperature of the process you will run. For example, 35.5o C (96o F) when the process will be run at 35.0o C (95o F). The purpose of HIGH SET is to program a temperature that will activate an "overheat" warning LED on the processor. LOW SET refers to the actual temperature that is to be set for the process. In the example above this would be 35.0o C (95o F). The LOW SET is used to program the actual process temperature. Any temperature between the HIGH SET and LOW SET programmed temperatures, is considered an "acceptable" temperature range for processing, but the processor will normally hold the low-set temperature to ±0.1o C.
In the following section, four single letters are used to represent function buttons on the control panel of the CP51 MB.
[S] represents "set". [D] represents "down". [U] represents "up". [R] represents "reset". (See illustration number 6.)
Push the [S] pad on the control panel for the first bath for at least 2 seconds. The 1st bath display will show
HIGH SET and 50o C, which is the maximum programmable temperature.
Push the [D] and set the temperature 0.5o C higher than the "target" temperature for this process. (35.5o C for
RA-4.)
Push the [S] pad. This will lock in the temperatures for the HIGH SET. Now the display will show LOW SET and
-20o C. (Please note: MINUS 20o C)
Push [U] on the display setting pad, and program the LOW SET for the "target temperature". (35o C for RA-4.)
When the set pad [S] is pushed, a triangular arrow and the actual bath temperature will be shown in the display.
This indicates the temperature programming has been completed for the 1st bath.
Repeat the entire procedure for the second (Bleach) bath.
4.6 Warning Lamp
A warning lamp will come on if the chemical temperature of the first bath goes higher than the HIGH SET programmed temperature. The lamp tells you the temperature of the 1st bath is too high. If this lamp comes ON, turn off the power switch and wait for the temperature to go down.
4.7 Reset Switch
If the programming cannot be done properly, or the operation control panel should show something wrong during programming of the temperatures, push the RESET button to go back to the default settings. Push RESET [R] and the
Fujimoto &127 symbol at the same time. Then start the temperature programming sequence for that bath from the beginning again.
4.8 Operation Control Panel
Green Lamp -- When a print is entering the processor, a green lamp will illuminate behind "Paper" on the display panel. After the print has passed through the inlet rack the green lamp will switch off. Wait a few seconds before feeding another print into the processor, to allow the first print to pass through the inlet rack completely.
Warning Lamp -- If the warning lamp illuminates, the temperature is too high. Turn off the power and open the entire top cover of the processor to allow the temperatures to cool.
4.9 Setting the Paper Transport Speed
The transport speed control is located in the control drawer. The speed is displayed in millimeters per minute. Refer to the chart in chapter 7.1 to determine which speeds to set for different developing times. For RA-4 set 347 mm/min. to get 45 seconds in each bath.
4.10 Insertion
Place the rack in the solution slowly and carefully to avoid any spills. Be certain to properly align the main gear of the rack with the worm gear of the drive shaft. Check to see the sensor connector of the inlet rack is firmly plugged into its socket. CAUTION! Be careful to avoid ANY moisture reaching the IR sensors of the inlet rack. They are extremely susceptible to damage from liquids. When pouring liquids, remove the inlet rack from the area where liquids could possibly splash. After placing the racks in the solution baths check the machine again to be sure the processor is properly leveled.
4.11 Replenisher Rate Adjustment (Control Drawer)
Dial No. 1 adjusts the replenishment rate for the 1st bath.
Dial No. 2 adjusts the replenishment rate for the 2nd bath.
Dial Setting ml/minute repl.
1 5 ml
2 10 ml
5
6
3
4
7
8
9
15 ml
20 ml
25 ml
30 ml
35 ml
40 ml
45 ml
Each increment on the dial scale increases the replenishment rate by approximately 5 ml. Please refer to the table in chapter 7.3 for a breakdown of different chemicals and replenishment levels. If you are trying to set 38 ml, then set the
dial to the nearest ml increment, i.e. setting #8 which is approximately 40 ml. The CP51 automatically calculates the replenishment amounts for each paper size, based on both the width and length, as measured by the six IR sensors of the input rack. The replenishment values of the scale must be considered approximate, since the actual delivery rate may be affected by such things as the length of the replenisher hose, and the Hz value of the current powering the processor.
For precise replenishment control it is best to test the actual delivery rate of replenisher. Fill a graduate (such as the
100 ml graduate supplied with the CP51) with 100 ml of developer replenisher. (Water has a higher viscosity than developer. It is more accurate to test with the actual solution when you have finally set up the processor with working chemicals than it is to test with water. But checking it first with water will get you very close to your final setting.) Make sure the replenisher line has already been "primed" so it is ready to pump replenisher when you place it in the graduate. Place the replenisher hose into the graduate and insert a single sheet of 8x10" paper into the processor. It is best to insert it with the 10 inch edge going in first. After it has passed through the intake roller, wait one full minute before removing the replenisher hose from the graduate to read the remaining volume of solution. Actual replenishment rates will vary from one chemical manufacturer to another. At the time these instructions were prepared, Tetenal RA-4 developer, from JOBO, had a replenishment rate of 8.25 ml per 8x10" print. Therefore you would adjust the replenisher control dial until the actual replenisher volume removed from the graduate was 8.25 ml. Do the same for the Bleach/Fix according to the chemical manufacturer's instructions. The Bleach/Fix rate may be different than the developer.
Installation and Testing are now complete !
Drain the MB
Turn off the main body power switch. Remove the drain hose cap so the water can drain from the bath(s). Replace the cap after you have drained the solution(s).
CAUTION : Before draining, make certain the power switch is OFF , otherwise the heater and the agitation pump can be seriously damaged!
Back to Top
Operation 5
5.1 Loading the MB with Chemicals
Remove the racks from each bath. Remove the inlet rack so it will not get splashed. Insert a funnel into the drain in the bottom of the 2nd bath.
Pour in 6 liters of the appropriate chemical (bleach/fix for RA-4). While pouring, look to see that the solution is coming out of the holes in the spray bar. Carefully lower the 2nd rack into the 2nd bath. Then carefully check and clean (if necessary) any droplets or spills of bleach/fix that may have gotten into the empty 1st bath.
CAUTION: Even small amounts of bleach/fix will affect developer. Avoid splashing or spilling, but if necessary, clean the spill immediately and thoroughly. NOTE: The reason for filling the 2nd bath first, is to allow you the opportunity to clean any spills which might otherwise ruin the developer. While you don't want to spill developer in the bleach/fix either, tiny amounts mixed into the entire 6 liter bath will have much less effect on the bleach/fix, than bleach/fix would have on the developer.
Insert the other funnel into the drain in the bottom of the 1st bath. Pour in 6 liters of working strength developer.
While pouring, look to see that the solution is coming out of the holes in the spray bar. Carefully lower the 1st rack into the 1st bath. Then clean up any droplets or spills that might have occurred while pouring.
Fill the replenisher vessels (not supplied with the CP51 processor) with replenisher. Insert the developer hose into the developer replenisher vessel and make sure the tube at the end of the hose reaches the bottom of the vessel. Do the same for the bleach/fix (or second bath) replenisher vessel.
Set up vessels to catch the overflow from the 1st bath and 2nd bath. They should be AT LEAST as large as the replenisher supply vessels.
Turn the power switch ON. If you hear any screeching sound, IMMEDIATELY turn the power switch OFF. The screeching sound is typical if you have an air-lock in the circulation pump system. With the power switch OFF , briefly open and close the chemical filter chamber to release any air trapped within. Switch the power on again to check the circulating system.
Press the manual replenishment buttons in the control drawer intermittently and check whether replenisher is
being pumped up properly through the replenisher hose. You can check it by either viewing the clear replenisher hose, or noticing the solution exiting through the overflow hoses when the solution baths are full. (The manual replenishment buttons are located in the control drawer, on the underside of the chamber above the removable control drawer. The first button you reach activates the 1st bath replenisher pump. The second button activates the 2nd bath replenisher pump.) If you have extreme difficulty getting either solution to begin pumping properly, raise the replenisher supply vessel higher than the processor. Then press the manual replenishment button again. Once the replenisher pump begins drawing the solution properly, place the replenisher supply vessel below the processor again.
Install the top cover over the processor.
Check the temperature displays. If the displays show the programmed temperatures, then you are ready to begin.
Check the control drawer to see that you have set the correct mm/minute speed for processing. (See the chart in chapter 7.1 for speed selections.) The speed shown in the mm/minute display of the control drawer, will fluctuate easily. Therefore it is not critical to be "exactly" at 347 mm/min. You will not see any difference at ±5 mm/min when using speeds over 150 mm/min. Close the control drawer before processing. The LED's showing paper speed could otherwise fog your color paper.
Open the light-tight cover in the darkroom. Insert an exposed sheet of paper, emulsion side down on the stainless steel feeder tray. Use the edge of the tray to align the paper. Gently slide the paper down the feeder tray until you feel the lead edge of the paper being grabbed by the intake rack. Then let go and let the processor advance the print. Close the light-tight cover, and turn on the room lights.
CAUTION : Remember when test printing, do not use prints smaller than 40 x 100 mm (1-5/8 x 4 inches). Use of smaller prints may cause the processor to jam. Insert prints properly "squared up" by aligning the paper with the edge of the feeder tray. When processing prints 8x10" or smaller, you can maximize the processor's throughput by alternating the prints on either side of the feeder tray.
When paper enters the inlet rack, a green lamp will turn on behind the word "paper". Once the paper has passed through the inlet rack, the lamp will turn off. This means the print is now passing through the processor and has cleared past the IR sensors of the inlet rack. Please check the paper indicator lamp each time you feed prints into the processor. Once the indicator lamp is illuminated you can close the light-tight cover. After the light-tight cover has been closed, you can turn on the room lights if needed and begin working on the next print. Please wait 5-10 seconds after the paper lamp has turned off before inserting the next print.
IMPORTANT
Even though the paper indicator lamp is off do not open the light-tight cover in "daylight". Only open the light-tight cover with the room lights off if there is any paper still in the MB! The paper indicator light only indicates the print is passing the IR sensors. If you open the light-tight cover while paper is still in the MB, light can reach into the 1st or 2nd bath and ruin any prints still there.
If you don't have a W/D or S/D module connected to your MB, please wash your print immediately after it has been processed.
If you have prepared a stack of prints to be processed, feed them into the processor as described above. Wait 5-10 seconds after the paper indicator lamp has gone out before feeding the next print. This allows a small gap between prints to prevent them from interfering with each other. If you are feeding a lot of prints into the processor you may need to slightly increase the heat setting for the W/D or S/D module to assure that the prints are dry when they emerge. This is because normally the dryer will have at least some recovery time between prints. When a large quantity of prints is being sent through the processor, there is virtually no recovery time available for the dryer between prints.
5.2 Maintenance After Use
Turn OFF the power switch on the MB.
Do not drain the chemicals from their baths.
Remove the complete top cover to avoid a buildup of moisture.
Remove the 1st bath rack and then the 2nd bath rack being careful to avoid dripping solutions from either rack into the other bath. Clean the racks being certain to rotate the main gear to turn the rollers for a thorough rinse under running water. Hang the racks to allow them to dry.
Cover the remaining solutions in the 1st and 2nd baths with the optional floating lids. (Part No. 411423)
CAUTION: The inlet rack has many electronic components. DO NOT clean the inlet rack with water. If needed, please wipe the rollers with a damp cloth.
5.3 Maintenance Before the Next Use
Check the replenisher level in the replenisher supply vessels. If there isn't enough replenisher, the hose will suck up air and there will be an air lock in the hose and the replenishment pump.
Check the overflow catch vessels. Empty them as needed.
Gently and carefully place the 2nd and 1st racks back into their respective baths. This time you may want to cover the "other" bath with a sheet of plastic while you are lowering the rack into "this" bath to prevent any possible splashing from contaminating the chemicals.
If the solution level has dropped slightly in the 1st or 2nd baths, add water to bring the solution level back up to the level line, to make up for evaporation.
Turn the power switch ON and wait until the chemical temperature reaches the programmed temperature. Now the CP51 is ready to start work.
5.4 Shut Down for Longer than One Week
Turn the power switch OFF.
Drain all chemicals.
Remove each rack and wash thoroughly. Remember to rotate the main gear of each rack to eliminate any
"hidden" chemicals between rollers. Leave the racks on a bench or hang them to dry naturally.
Place warm water in each bath and turn the power switch ON for approximately 30 minutes. This allows the water to thoroughly clean throughout the processor, including inside the pumps and heaters.
Remove the replenishment hoses from their respective replenisher supply vessels and insert them into separate water containers. (If you use a single water container for both replenisher lines, you may cause contamination.)
Push the manual replenishment buttons (located inside the control drawer housing) intermittently for each bath.
This will clean and flush out a buildup of chemicals in the hose. Repeat this step at least 3 times. Finally leave some water in the replenishment pumps to keep the valves lubricated.
Turn the power switch OFF. Drain the water from the baths. Remove the circulation filters from their chambers and store them in separate containers of water. (Mark the containers for DEVELOPER and BLEACH/FIX so that there will be no future chance of contamination.) If the filters dry out with even a trace of the chemicals in them, they may become blocked and useless.
Wipe down the processor with a clean dry cloth.
5.5 Regular Maintenance Schedule
Weekly Maintenance
Remove the top cover and clean it inside and outside.
Wipe each roller on each rack with a damp cloth.
Clean the area around each bath.
When not in use, remove the top cover to avoid condensation buildup.
Monthly Maintenance
Drain all chemicals and clean the 1st and 2nd baths and racks.
Clean holes on agitation pipe thoroughly.
Check the replenishment and circulation filters to make sure there is no buildup of crystals or dirt. Replace if dirty.
If you are using a W/D or S/D module, add a drop of oil to the worm gear that drives the dryer rack. All the main gears and worm gears are silicone impregnated, but the heat from the dryer, evaporates the silicone from the set closest to the heat.
5.6 Optional Monthly Maintenance Program
Use of JOBO Processor Clean II will do a remarkable job of cleaning your CP51 with little or no "elbow grease" required. It is available in two sizes; a 4 oz. pouch or a 4.7 lb. jar. The 4oz. pouch is too small to be practical for the
CP51. The quantity of powder in the 4.7 lb. jar (part no. 4135) is sufficient to clean the processor approximately 8 times. It will clean the rollers, baths, pumps, heaters, etc. by running the processor for at least 8 hours, or overnight.
Drain all chemicals (you can save them for reuse after the cleaning) and fill the 1st and 2nd baths with water.
Remove the replenisher filters from their housings, and store them in their own marked containers. Remove the replenisher lines from their supply vessels, and put them in separate vessels of water.
Turn the power switch ON and let the processor run for 10-15 minutes to flush out any remaining chemicals within the baths and their hoses.
While the water is circulating in the baths, press the manual replenisher buttons to clear any chemicals from the replenisher lines.
Turn the power switch OFF. Drain the water from the baths and partly fill them with about 3 liters of water.
Remove the circulation filters and if they are dirty dispose of them. If they seem clean, store them in their own marked containers filled with water, for reuse later.
Mix the Processor Clean II. Mix 6-3/4 oz., by volume, (about 200 ml) of the powder with about 2 liters of water.
Pour this into the 1st bath and top off with additional water until the solution just barely reaches the overflow drain.
Mix 4-1/2 oz. (about 135 ml) of the powder with about 2 liters of water. Pour it into about 3 liters of water already in the 2nd bath, and top off with additional water until it just barely reaches the overflow drain.
Turn the power switch ON and let the processor operate at normal working temperature for at least 8 hours.
Longer is okay. The processor will go into its standby mode after 45 minutes. This is okay and will still give the cleaning that you want. If you have the W/D or S/D module you can unplug from its power source to make sure it does not operate during this time, since the dryer is not needed for the cleaning function.
After at least 8 hours, turn the power switch OFF. Remove the racks and wipe the rollers with a clean cloth or paper towel. This is especially helpful on the 1st rack where silver may tend to accumulate if it has not been cleaned weekly.
Return each rack to its bath. Turn the power switch ON and let it run for another 15-30 minutes. Then wipe the rollers on each rack again.
Turn the power switch OFF. Drain the solutions from the baths and refill the baths with water. Let the water circulate for 10-15 minutes.
Repeat step 10 at least two more times.
Install clean filters into the circulation filter chambers. Refill the baths with their chemicals. Remember to fill the
2nd bath first, using the funnel and then clean up any spills or droplets before filling the 1st bath with developer using its funnel.
Turn the power switch ON and when the solutions are up to the programmed temperatures, begin processing.
Back to Top
Troubleshooting 6
CP51 power switch is on but machine isn't working.
Check plug.
Check that the breaker in the power box is on and has not blown.
Check the main fuse on the CP51 MB.
CP51 Power switch is on but chemicals don't circulate.
The circulation hose may be air locked. Turn the power switch OFF.
Remove the circulation filter chamber lid to release air.
Replace the lid.
Turn the power switch ON.
Paper doesn't come out.
Paper doesn't come out.
If paper is smaller than 100 mm / 4 inches long, lift up the lid and take out the paper. It is too small.
Make sure the main gear of each rack is properly seated on the matching worm gear on the drive shaft.
Make sure the standby function is off. (Turn the power switch OFF. Wait a few seconds and turn the power switch back ON.)
When density is too light (prints from negatives)
Check the developer temperature. Make sure it's not too low.
Make sure of the developing time. Check the mm/minute display in the control drawer to be sure it is appropriate for the chemicals in use.
Make sure the developer solution isn't too weak from age or under-replenishment, or if it's freshly mixed, make sure it was mixed accurately.
Make sure the replenishment rate is set accurately and delivering accurately.
When density is too dark (prints from slides)
Check the developer temperature. Make sure it's not too low.
Make sure of the developing time. Check the mm/minute display in the control drawer to be sure it is appropriate for the chemicals in use.
Make sure the developer solution isn't too weak from age or under-replenishment, or if it's freshly mixed, make sure it was mixed accurately.
Make sure the replenishment rate is set accurately and delivering accurately.
When paper becomes scratched
Is something stuck in the paper guide or inlet rack guide?
Has each rack been installed properly?
Are there any crystals or unwanted substances on the rollers?
When developer is not being replenished
Check the replenishment dial in the control drawer. It should not be on zero.
Make sure the paper processed was not smaller than 76 mm / 3 inches wide. (Less than this width may pass between the IR sensors without activating the replenisher pumps. This could also cause the dryer not to run, and the processor could go into its standby mode.)
Make sure the replenisher filter is clean.
Make sure the replenisher filter chamber is tightly closed.
Is the replenishment check valve in good condition?
Make sure the replenisher hose is not bent severely; a collapsed hose can stop the flow of replenisher.
Uneven development (lines on prints)
If the size of the paper was small, make sure the processor was not in standby mode. The 15 second cycle of turning on and off will cause the lines.
Make sure the power switch has not accidentally been switched off.
Make sure the rollers are rotating smoothly.
Check that the main gear and worm gear are properly interlocked.
Check that the processor is properly leveled.
Cloud marks on paper
If inlet rack rollers are wet, please wipe dry. If they have ever gotten developer on them, remove the rollers from the inlet rack. Clean them thoroughly with a damp cloth and re-install them in the inlet rack after you have thoroughly dried them.
Dirty paper
Run 2-3 test prints all across the width of the processor, to get rid of unwanted substances on the rollers.
If the prints are still dirty, please clean the rack rollers.
Make sure the W/D water is clean and flowing.
Paper is fogged
Was the light switched on accidentally while processing?
Is the top cover resting properly on the main body?
Make sure the paper wasn't exposed to the temperature control setting lamp on the operation control panel for too long.
Are there any LED's in the darkroom anywhere. LED's have a remarkable intensity and can easily fog color photographic paper. Make sure the control drawer is closed; its LED's could fog color paper.
When the warning lamp remains on
Room temperature is too high. (Room temperature should be at least 5 C lower than the 1st bath programmed temperature. The motors and pumps of the processor generate some heat and warm the solutions slightly.)
Chemical solutions may not be circulating properly. Check for an airlock in the lines. Turn OFF the power switch.
Remove the circulation filter chamber lid and put it back on. Turn the power switch back ON.
Back to Top
Processing Data 7
7.1 Process Time and Transport Speed
If you would like to calculate your own transport speed, there is a simple formula to assist you. 15,600 divided by the desired processing time in seconds equals the transport speed in mm/minute, which is the number you will need to set on the speed setting in the control drawer of the MB. For instance, if you are looking for a developing time of 2 minutes
30 seconds (150 seconds) simply divide 15,600 by 150. The answer is 104 mm/minute.
The chart that follows will simplify this for most developing times, but you can use the formula if the developing time you want is not in the chart.
PROCESSING TIME / TRANSPORT SPEED REFERENCE CHART
Processing Time in each bath
45 seconds
1 minute
1 minute 30 seconds
2 minutes
2 minutes 30 seconds
3 minutes
3 minutes 30 seconds
4 minutes
5 minutes
Transport Speed setting in control drawer (mm/min.)
347
260
173
130
104
87
74
65
54
7.2 Hourly Processing Capacity
The following chart illustrates approximately how many prints of each size can be processed per hour at the various transport speeds shown.
Hourly Processing Capacity by Size and Speed
Print Size 45 sec/bath 60 sec/bath 90 sec/bath 210 sec/ bath
20x24"
16x20"
11x14"
8x10"
(347 mm/min) (260 mm/min) (173mm/min) (74 mm/min)
31
45
23
33
16
23
6
9
61
166
46
124
30
84
13
34
7.3 RA-4 Processing Data
Process Brand Developer temp/
Kodak RA-4
Bleach/Fix temp/ Super Stabilizer/ replenishment rate
35o C ± 0.3o
replenishment rate
32-38o C replenishment rate
30-37o C
Tetenal RA-4
Fuji CP40FAII
38 ml/min
35o C ± 0.3o
21 ml/min
Konica CPK-20QA 35o C ± 0.3o
29 ml/min
35o C ± 0.2o
Agfa AP94
35 ml/min
35o C ± 0.2o
28 ml/min
38 ml/min
32-38o C
29 ml/min
30-36o C
38 ml/min
33-37o C
40 ml/min
30-36o C
38 ml/min
79 ml/min
30-37o C
34 ml/min
30-37o C
45 ml/min
33-37o C
120 ml/min
30-37o C
79 ml/min
Replenishment rate is based on maximum paper width.
All brands run at 347 mm/minute (45 seconds per bath)
7.4 Black & White Processing
Set temperature at 28o C for developer and fixing baths. (Use rapid fixer.) Set transport speed at 347mm/minute (45 seconds each bath). It is important to know that you cannot process at room temperature. Heat given off by the motors and circulating pumps in the CP51 will heat the solutions generally 2-4o C above room temperature. Most RC papers will process well at 28o C. (The CP51 is not designed for processing fiber-based papers. They are too thick for the rack design and may jam and cause damage.) Replenishment rates will vary by developer.
> Home D
> Home GB
> Service
> Back
| E-Mail Formular | Webmaster | Impressum | ©JOBO AG
Service Analog
Instruction Manual for the Fujimoto CP51
Roller Transport Processor
Wash / Dry Module
Contents
1. W/D Features and Specifications
2. Installation of W/D
3. Testing for Operation
4. Preparation for Operation
5. Maintenance
W/D Module Features and Specifications 1
The W/D Module is used for washing and drying prints using a flowing water wash through two baths in counter-flow design for efficient use of the water.
1.1 CP51 W/D Module Specifications
Function
Product Type
Transportation/
Types of Paper
Power
Number of baths
Bath Capacity
Constant Flow Valve
Wash Water
Description
Washer/Dryer (connects to CP51 Main Body)
Same as CP51 MB
200/220/240 volts, 1750/2300/2500 watts, 50/60 MHz (adjustable)
2 baths
1st bath = 5.2 liters; 2nd bath = 5.4 liters
5.2 liter per minute flow rate
Wash water temperature controlled by external water temperature control panel (such as
Temperature
Dryer/Heater
Temperature
Dimensions
Shipping Weight
Safety Systems
Other features
Accessories
JOBO art. no. 4190) Water temperature will be 25o C or higher for BW; 35o C for RA-4.
Adjustable from 45-80o C
767 mm D x 480 W x 405 H (approx. 30 ¼ " D x 19" W x 16" H)
34 Kg (approx. 75 lbs.)
Overheat safety device on temperature control of dryer heater.
Drive motor in main body switches to standby operation after 45 minutes of inactivity.
2
1
1
1
1
1
1
1
1
Dryer standby timer is adjustable from 5 minutes to 55 minutes for electrical economy.
Drain Pipe Joint
Main Body Connector Cable
Hose clamps
1st Wash Rack
2nd Wash Rack
Dryer Rack
15 Amp Fuse
1 Amp Fuse
Drain Extension Hose
1.2 CP51 M/B and W/D Module (See illustration # 1)
1. Paper Outlet
2. W/D Module
3. Adjustable Voltage Switch
4. W/D On/Off Power Switch
5. 1Amp Fuse
6. Control Drawer
7. Drain Hoses
8. Operation Control Panel
9. Main Body Power Switch
10. Ventilation Fan
11. Inlet Rack Connector
12. Main Body Control Drawer
13. Main Body Adjustable Voltage Switch
14. Main Body
15. Light-Tight Cover
16. Top Cover
CP51 MB and W/D Module (See illustration # 2) a. Top Cover b. 1 A Fuse c. 220 Volt Power Cord d. Replenishment Hose e. Gearbox Drain Hose f. Water Supply Hose g. Overflow Hose h. Connecting Cord i. W/D Module Overflow Hose j. Dryer Drain Hose k. W/D Module Power Cord l. Air Filter m. W/D Module 15A Fuse n. Water Supply Inlet Pipe
1.3 Alphabetical Listing of W/D Parts and Their Functions
Part Name / Function
1st Wash Bath 1st of two baths to wash prints before drying
2nd Wash Bath 2nd of two baths to wash prints before drying
Adjustable Voltage Switch Sets voltage for correct rating
Air Filter Cleans air for intake of dryer fan
Control Drawer Set dryer temperature and standby time here
Drain Hose Drains each bath
Dryer Drain Hose Drains water away from dryer rack
Dryer Rack Roller system removes excess water and dries prints
Large Fuse 15 Amps
Main Gear Primary drive gear of each rack, which rests on drive shaft
Overflow Hose Drains overflow of water or excess chemical from baths
Power Cord Connects to 200, 220 or 240 volt single phase line
Small Fuse 1 Amp
Thermostat Attached to dryer
Top Cover To hold paper once dry
Ventilation Fan Draws air through lower chamber to prevent condensation and to cool electronics
Water Supply Inlet Pipe Connect your incoming water line to this pipe. Use reinforced hose and 2 pipe clamps for a secure connection.
Back to Top
Installation of W/D Module 2
2.1 Installation of W/D Requires Proper Conditions
Light-tight darkroom
Nearby source of water, preferably with water temperature control panel
Adequate ventilation
Safe electrical conditions. We strongly recommend the use of a Ground Fault Circuit Interrupt (GFCI) in the wiring for your CP51.
Air conditioning/heating (as needed)
NOTE : The pumps and electronic components will heat up the solutions 2-4o C above room temperature even when the heaters are not running. Room temperature should be at least 5o C (9o F) lower than the programmed temperature of the CP51 processor. i.e. If the CP51 is set for 30o C (86o F), then the room temperature should be at or below 25o
C (77o F).
2.2 Water Supply / Drainage Information
Connect a water supply hose from your water temperature control panel to the water supply inlet pipe. The inside diameter of the hose should be 16 mm (5/8") and it should be able to withstand at least 70 lbs. of pressure. Attach the hose to the inlet pipe as far as possible and use two hose clamps to secure it. (See illustration #2)
If needed, attach the drain hose extension to the drain hose. Insert the free end of the drain hose into a drain standpipe. (The extension hose should have an inside diameter of 19 mm (3/4").
2.3 Water Supply Requirements in use with W/D Module
Water Temperature 30-35o C/86-95o F (for RA-4; for other processes see chemical instructions)
Water Pressure 1.5-5 Kg/cm2 (15 - 70 lbs. of pressure)
Water Volume 1.5 liters per minute (approx. 1/3 gal. per minute)
Water pipe inside diameter 13 mm (1/2")
Water hose inside diameter 16 mm (5/8")
Filter recommendation 50 micron or smaller (as low as 5 microns) mounted in building's plumbing system near darkroom.
2.4 Drain Requirements for W/D Module
Drain flow 1.5 liters per minute (1/3 gallon per minute)
Drain overflow hose inside diameter 13mm (1/2")
Drain hose inside diameter 19 mm (3/4")
Pipe material Do not use copper or brass due to the corrosiveness of effluent.
2.5 Installation Dimensions
Please leave space around the processor. It is necessary for access to the control drawer of the MB and W/D, the air filter of the W/D, and for the various intake and overflow hoses of both modules.
{drawing showing...}
1. Positioning Pin
2. Connecting Sleeve
A. After the MB has been checked with a level, match the W/D with the height of the MB and then check it for level.
Lock the positioning pin on the MB to the W/D module. At the same time, attach the Connecting Sleeve of the W/D
Module drive shaft to the MB drive shaft.
B. Attach the connecting cable from the MB to the W/D module as shown in Diagram #2. This wire carries the signal from the IR sensors to turn on the dryer
C. Adjust the voltage setting on the W/D to match the voltage in your location. You should already have done this for the MB. Now is a good time to check both settings.
Back to Top
Testing for Operation 3
3.1 Powering Up
Turn on the power switch on the MB. Check to see that water is flowing properly through both circulated baths of the
MB. If the water is not flowing through the spray bars properly, TURN OFF THE MB POWER SWITCH IMMEDIATELY!
If the circulating pumps are not primed properly, you will probably hear a noisy screeching, indicating that the pumps are "dry" and in need of proper priming. Remove some of the water and pour it in again being sure to use the supplied funnels to prime the pumps. Also while the power is switched off, open and re-close the filter chamber caps to allow air to escape. (If you try this while the power is on you will have quite a mess to clean up!)
CAUTION!
Be sure the power switch is OFF when there are no chemicals or water in the baths or you may cause serious damage to the heaters, pumps and other components of the processor.
3.2 Modules
W/D Modules have no internal method for controlling the wash water temperature. This is controlled by use of an external water temperature control panel (such as JOBO art. no. 4190). Proper washing temperature is very important to the quality and life expectancy of the print. If the wash water temperature gets too hot, the paper can begin to deteriorate while washing. If the wash water temperature gets too cold, the wash will be inadequate and retained chemicals will shorten the life of the image.
If you are planning on using a water panel other than the JOBO 4190, make sure that it has a LOW-FLOW mixing valve in use. The 1.5 liter per minute flow rate is much too low for standard mixing valves to maintain temperature accurately.
Place the rack in the solution slowly and carefully to avoid any spills. Be certain to properly align the main gear of the rack with the worm gear of the drive shaft.
3.3 Illustration of W/D Module Control Drawer
1. Dryer standby control dial
2. Dryer Heater temperature control dial
3.4 Dryer/Heater Checkpoints
1. Adjust the dryer/heater temperature control dial to 5 or 6
2. Take the main gear off the worm gear on the inlet sensor rack of the MB. Leave it plugged in so it is active.
3. Insert a white piece of paper into the sensor rack
4. Check to make sure the dryer/heater switch is "on".
5. Remove the paper from the inlet sensor rack of the MB and check the dryer standby timing.
The dryer/heater is designed to automatically turn off when not being used. The dryer/heater has been set at "0" (at the factory), meaning that the timer will turn off automatically 5 minutes after the last edge of the paper has entered the inlet rack. With each additional increment of the dryer standby control dial, the dryer will run for an additional 5 minutes.
Scale No. Heated Time Suggested Process
0 5 minutes RA-4
2 15 minutes
(0:45 per bath)
2 Minute Process
3 20 minutes
(2:00 per bath)
EP-2
(3:00 per bath)
After the above steps (3.1-3.4) have been completed, turn off the power and remove the W/D racks and drain the baths.
CAUTION!
For ventilation purposes, turn off the main power switch ONLY after the dryer/heater standby timer has turned off. This allows time for it to cool down after use.
Back to Top
Preparation for Operation 4
4.1 Filling W/D Baths
Be sure the power switch is OFF when there are no chemicals or water in the baths or you may cause damage to the heaters, pumps and other components of the processor.
Approximately 11 liters of water are needed to fill the total of the two baths of the W/D. With the racks in place in the
W/D simply turn on the water temperature control panel, and allow sufficient time for both baths to be filled, before starting to process. (At the 1.5 liter per minute flow rate, it will take approximately 7-8 minutes for both baths to be filled and the water to be flowing out the overflow drain hose.
NOTE : When not actually using the processor, leave the top cover off both modules. This helps to prevent excessive condensation buildup.
4.2 Dryer Check
Check the dryer temperature control dial in the control drawer. Make sure that the dial is set at 5 or 6. Insert paper into the MB. Change the dial setting to different levels and check that the temperature changes accordingly.
Back to Top
Maintenance 5
1. Clean the air filter of the dryer once or twice a month.
2. Run one or more sheets of paper through the W/D Module to clean the rollers. It may be advisable to use
"cleanup film" from time to time for best cleaning results. These films are available from both Kodak and Fuji
Film.
3. Once a month add a single drop of oil (such as 3 in 1 "blue") to the main drive gear of the dryer rack. All the main drive gears of the various racks are silicone impregnated so they should not need lubrication, but the main drive gear of the dryer rack is exposed to a high level of heat and needs additional lubrication.
> Home D
> Home GB
> Service
> Back
| E-Mail Formular | Webmaster | Impressum | ©JOBO AG
Service Analog
Instruction Manual for the Fujimoto CP51
Roller Transport Processor
Stabilize / Dry Module
Contents
1. S/D Features and Specifications
2. Installation of S/D Module
3. Testing for Operation
4. Preparation for Operation
5. Maintenance
S/D Features and Specifications 1
The S/D Module is used for washing and drying prints using waterless type chemicals. (Super Stabilizer)
1.1 CP51 S/D Module Specifications
Function
Product Type
Transportation/
Types of Paper
Power
Number of baths
Bath Capacity
Chemical Circulation
Temperature Control
Replenishment
Dryer Temperature
Dimensions
Shipping Weight
Description
Waterless Washer/Dryer (connects to CP51 Main Body)
Same as CP51 MB
200/220/240 volts, 2350/2900/3400 watts, 50/60 MHz (adjustable)
2 baths
1st bath = 5.2 liters; 2nd bath = 5.4 liters
Magnetic pump circulation
Temperature control dial in S/D control drawer sets temperature for both baths. Chemical temperature adjustment is between 20o -40o C. Accuracy range is ± 0.2o C
IR sensors on the entry rack in the MB send a signal to the S/D Module to supply the correct amount of replenisher to the baths. Fresh replenisher flows into the 2nd bath and counterflows into the 1st bath of the S/D Module.
Adjustable from 20-80o C
767mm D x 480 W x 405 H (approx. 30 ¼ " D x 19" W x 16" H)
40 Kg (approx. 88 lbs.)
Safety Systems
Other features
Accessories 1
1
1
1
2
Overheat safety device on temperature control of solution heater and on dryer heater.
Drive motor in main body switches to standby operation after 45 minutes of inactivity.
Dryer standby timer is adjustable from 5 minutes to 55 minutes for electrical economy.
Main Body Connector
1st Rack
2nd Rack
15 Amp Fuse
Drain Extension Hoses
1.2 CP51 MB and S/D Module
1. Paper Outlet
2. S/D Module
3. Adjustable Voltage Switch
4. S/D On/Off Power Switch
5. Fuse 1.5 A
6. Control Drawer (and Manual Replenishment Switch on S/D)
7. Drain Hoses
8. Operation Control Panel
9. Ventilation Fan
10. Main Body Power Switch
11. Inlet Rack Connector Socket
12. Main Body Control Drawer
13. Main Body Adjustable Voltage Switch
14. Main Body
15. Light-Tight Cover
16. Top Cover
1.3 CP51 MB and S/D Module a. Top Cover b. 5 A Fuse c. 220 Volt Power Cord d. Replenishment Hose e. Gearbox Drain Hose f. Water Supply Hose g. Overflow Hose h. Connecting Cord
i. S/D Module Overflow Hose j. Drain and Replenishment Tank k. Dryer Drain Hose l. S/D Module Replenishment Hose m. RS Filter n. S/D Module Power Cord o. Air Filter p. S/D Module 15A Fuse
1.4 S/D - Module
A. Dryer Rack
B. 2nd Rack
C. 1st Rack
D. Worm Gear
E. Temperature Ventilation Outlet
F. Drive Shaft
G. 1st Bath
H. 2nd Bath
1.5 Paper Transport Path a. 1st Bath of MB b. 2nd Bath of MB c. 1st Bath of S/D d. 2nd Bath of S/D e. Dryer
1.6 Alphabetical Listing of Parts and Their Functions
Part Name / Function
1st Wash Bath 1st of two baths to wash prints before drying
2nd Wash Bath 2nd of two baths to wash prints before drying
Adjustable Voltage Switch Sets voltage for correct rating
Air Filter Cleans air for intake of dryer fan
Control Drawer Set dryer temperature, temperature of solution, replenishment rate and standby time for dryer
Drain Hose Drains each bath
Dryer Drain Hose Drains water or Super Stabilizer away from dryer rack
Dryer Rack Roller system removes excess liquid and dries prints
Fuse, Large 15 Amps
Fuse, Small 1.5 Amps
Main Gear Primary drive gear of each rack, which rests on drive shaft
Overflow Hose Drains overflow of water or excess chemical from baths
Power Cord Connects to 200, 220 or 240 volt single phase line
Replenishment Hose Supplies replenisher to each bath
Thermostat Attached to dryer
Top Cover To hold paper once dry
Ventilation Fan Draws air through lower chamber to prevent condensation and to cool electronics
Back to Top
Installation of S/D Module 2
2.1 Installation of S/D Requires Proper Conditions
Light-tight darkroom
Adequate ventilation
Safe electrical conditions. The S/D Module will need a NEMA socket 6-20-R (see illustrations #3, 4) of its own, in addition to the one needed for the MB. We strongly recommend the use of a Ground Fault Circuit Interrupt
(GFCI) in the wiring for your CP51.
Air conditioning/heating (as needed)
NOTE : The pumps and electronic components will heat up the solutions 2-4o C above room temperature even when the heaters are not running. Room temperature should be at least 5o C (9o F) lower than the programmed temperature of the CP51 processor. i.e. If the CP51 is set for 30o C (86o F), then the room temperature should be at or below 25o
C (77o F).
2.2 Additional Requirements for S/D Module
Replenisher supply container for fresh Super Stabilizer replenisher
Overflow container to catch used Super Stabilizer. The overflow container should be at least as large as the
Super Stabilizer replenisher container. The rate of replenishment for most brands of Super Stabilizer is generally about twice the replenishment rate of the RA-4 Developer. (See the chemical manufacturer's instructions for specific information.)
2.3 Installation Dimensions
Please leave space around the processor as indicated in the drawing. It is necessary for access to the control drawer of the MB and S/D, the air filter of the S/D, and for the various intake and overflow hoses of the processor.
A. After the MB has been checked with a level, match the S/D with the height of the MB and then check it for level.
Lock the positioning pin on the MB to the S/D module. At the same time, attach the Connecting Sleeve of the S/D
Module drive shaft to the MB drive shaft.
B. Pour warm water into each bath (about 33o C / 90o F) in the S/D Module. Be sure to use the supplied funnels positioned directly into the intakes at the bottom of each bath to assure proper priming of the circulation pumps. (This is the same technique as needed in the MB.)
C. Prepare replenisher and waste containers according to the diagram. If the dryer drain hose or overflow hose is too short use the provided extension hose. Normally place the replenisher containers under the processor. If you have difficulty getting the replenisher pumps to take up the solution, temporarily raise the fresh replenisher container higher than the processor. When the pumps have the solution flowing properly, then return the container to a position lower than the processor.
D. Attach the connecting cable from the MB to the S/D module as shown in Diagram #2. This wire carries the signal from the IR sensors to turn on the dryer and to indicate to the replenisher pumps, the amount of replenisher needed for the current print being processed.
E. Adjust the voltage setting on the S/D to match the voltage in your location. You should already have done this for
the MB. Now is a good time to check both settings.
Back to Top
Testing for Operation 3
3.1 Powering Up
Turn on the power switch on the MB. Check to see that water is flowing properly through all circulated baths. (MB and
S/D) If the water is not flowing through the spray bars properly, TURN OFF THE MB POWER SWITCH IMMEDIATELY!
If the circulating pumps are not primed properly, you will probably hear a noisy screeching, indicating that the pumps are "dry" and in need of proper priming. Remove some of the water and pour it in again being sure to use the supplied funnels to prime the pumps. Also while the power is switched off, open and re-close the filter chamber caps to allow air to escape. (If you try this while the power is on you will have quite a mess to clean up!)
CAUTION!
Be sure the power switch is OFF when there are no chemicals or water in any of the baths or you may cause serious damage to the heaters, pumps and other components of the processor MB or S/D Modules.
3.2 Modules
S/D Modules control their temperature with thermostats, heaters and circulating pumps. They are pre-set at the factory for approximately 35o C. Usually this temperature is appropriate for Super Stabilizer.
If it is necessary to adjust the temperature turn the temperature setting dial in the S/D Module Control Drawer clockwise to increase the temperature, or counterclockwise to decrease the temperature. Pour warm water into the 1st bath. Ensure the water is 1-2o C lower than Super Stabilizer working temperature. Check it with a thermometer. With the processor switched on, adjust the temperature setting dial with a screwdriver. Stop turning when the LED indicator comes on. Then turn the temperature setting dial counterclockwise to turn the LED off. The temperature will then be set. Wait 2-3 minutes. Then check with a thermometer again.
3.3 Replenishment
To set the replenishment rate, pull out the S/D control drawer. (Refer to the control drawer diagram.) Each increment on the S/D replenishment control dial represents an increase of 15 ml.
1 = 15 ml
2 = 30 ml
3 = 45 ml
9 = 135 ml
Setting the replenishment amount is otherwise the same as the CP51 MB. The CP51 automatically calculates the replenishment amounts for each paper size, based on both the width and length, as measured by the six IR sensors of the input rack. The replenishment values of the scale must be considered approximate, since the actual delivery rate may be affected by such things as the length of the replenisher hose, and the Hz value of the current powering the processor.
The manual replenishment button is located in the control drawer, on the underside of the chamber above the removable circuit board drawer. Manual replenishment should be done when cleaning or when pouring the chemical solutions. If you have difficulty getting solution to begin pumping properly, raise the replenisher supply vessel above the processor. Then press the manual replenishment button again. Once the replenisher pump begins drawing the solution properly, place the replenisher supply vessel below the processor again. Place the racks in the solution slowly and carefully to avoid any chemical spills. Be certain to properly align the main gear of the rack with the worm gear of the drive shaft.
3.4 Illustration of S/D Module Control Drawer
1. Chemical temperature LED (L1)
2. Chemical temperature control dial
3. Dryer standby control dial
4. Dryer Heater temperature control dial
5. Replenishment volume control dial
3.5 Dryer/Heater Checkpoints
1. Adjust the dryer/heater temperature control dial to 5 or 6
2. Take the main gear off the worm gear on the inlet sensor rack of the MB. Leave it plugged in so it is active.
3. Insert a white piece of paper into the sensor rack
4. Check to make sure the dryer/heater switch is "on".
5. Check dryer standby timing. The dryer/heater is designed to automatically turn off when not being used. The dryer/heater has been set at "0" (at the factory), meaning that the timer will turn off automatically 5 minutes after the last edge of the paper has entered the inlet rack. With each additional increment of the dryer standby control dial, the dryer will run for an additional 5 minutes.
Scale No. Heated Time Suggested Process
0 5 minutes RA-4
2 15 minutes
(0:45 per bath)
2 Minute Process
3 20 minutes
(2:00 per bath)
EP-2
(3:00 per bath)
After the above steps (3.1-3.5) have been completed, turn off the power and remove the S/D racks and drain the baths.
CAUTION!
For ventilation purposes, turn off the main power switch ONLY after the dryer/heater standby timer has turned off.
Back to Top
Preparation for Operation 4
4.1 Pouring the Super Stabilizer
Be sure the power switch is OFF when there are no chemicals or water in the baths or you may cause damage to the heaters, pumps and other components of the processor.
Insert one of the supplied funnels into the drain hole at the bottom of the bath. 11 liters of super stabilizer are needed to fill the total of the two baths. Once the super stabilizer is flowing from the spray bar, then you can continue pouring without the funnel.
4.2 Rack Loading
When the solution is up to the ridge around the bath, then gently lower the racks into place. Be careful not to splash the solutions outside of the baths. Clean up any spills and replace the top cover.
NOTE : When not actually using the processor, leave the top cover off both modules. This helps to prevent excessive condensation buildup.
4.3 Dryer Check
Check the dryer temperature control dial in the control drawer. Make sure that the dial is set at 5 or 6 as a starting point. Insert paper into the MB. Change the dial setting to different levels and check that the temperature changes accordingly.
Back to Top
Maintenance 5
1. Make sure replenisher is in each replenishment container.
2. Make certain the effluent container is ready.
3. Once a week, drain the Super Stabilizer from the baths. (You can save it for use after the cleaning if you are replenishing it.) Fill the baths with water, let them circulate for 10-15 minutes, drain out the water and repeat.
Then pour the Super Stabilizer back in for further use. Once a month you may want to use Processor Clean II for a thorough cleaning. See the MB instructions for further details.
4. Clean the air filter of the dryer once or twice a month.
5. Run one or more sheets of paper through the S/D Module to get rid of unwanted substances which may have become stuck on the rollers. It may be advisable to use "cleanup film" from time to time for best cleaning results.
These films are available from both Kodak and Fuji Film.
6. Once a month add a single drop of oil (such as 3 in 1 "blue") to the main drive gear of the dryer rack. All the main drive gears of the various racks are silicone impregnated so they should not need lubrication, but the main drive gear of the dryer rack is exposed to a high level of heat and needs additional lubrication.
advertisement
Related manuals
advertisement