AUDIOLINE Baby Care 5 Owner's manual
PDF
Document
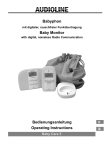
Baby Monitor
with digital, noiseless Radio Communication
Bedienungsanleitung
Operating Instructions
Baby Care 5
Baby Care 5
Operating Instructions__19
2
1
2
3
4
5
6
7
8
4
4
4
4
5
6
6
7
7
8
8
8
8
8
Bedienung Ihres Babyphons . . . . . . . . . . . . . . . . . . .
9
9
9
9
9
10
10
11
11
11
12
12
12
12
13
13
13
13
14
14
14
14
14
15
16
16
16
Garantie . . . . . . . . . . . . . . . . . . . . . . . . . . . . . . . . . .
17
3
4
2. Ebene
Empfindlk.
Stufe
Stufe
Temp. Alarm
Temperatur
3. Ebene
4. Ebene
Twinkle
Silent Night
Minuet in G
Danny Boy
Gymnopedie
Alle absp.
Stufe
Grad CIGrad F
Uhr
Stundeformat
Fü.Intervall
Alarm
Stufe
Deutsch
Espanol
Italiano
PYCCKÈÉ
English
Francais
5
Temperatur Sensor
Fühlt die Temperatur im Babyzimmer.
2
3
4
5
6
7
8
9
1
3 4 5
2
6
7
8
10
9
6
13
12
14
11
18
19
17
16
15
7
12
11
8
9
10
11
12
13
14
15
Input: 230 VAC, 35 mA
Output: 6 VDC, 300 mA, Innen = +
Typ AA, 1,5 V Alkaline
Input: 230 VAC, 35 mA
Output: 6 VDC, 200 mA
Typ AAA 1,2 V 800 mAh NiMH
10 °C bis 30 °C
20 % bis 75 %
16
17
18
− Contents −
1
2
3
4
5
6
7
8
General Information . . . . . . . . . . . . . . . . . . . . . . . . .
20
Intended use . . . . . . . . . . . . . . . . . . . . . . . . . . . . . . . . . . . . . . .
Safety notes . . . . . . . . . . . . . . . . . . . . . . . . . . . . . . . . . . . . . . .
Disposal . . . . . . . . . . . . . . . . . . . . . . . . . . . . . . . . . . . . . . . . . .
20
20
20
Menu Structure . . . . . . . . . . . . . . . . . . . . . . . . . . . . .
Operating Elements . . . . . . . . . . . . . . . . . . . . . . . . . .
21
22
22
23
23
Starting Up . . . . . . . . . . . . . . . . . . . . . . . . . . . . . . . .
24
Safety notes . . . . . . . . . . . . . . . . . . . . . . . . . . . . . . . . . . . . . . .
Checking the package contents . . . . . . . . . . . . . . . . . . . . . . . . .
At the Parent Unit . . . . . . . . . . . . . . . . . . . . . . . . . . . . . . . . . . .
At the Baby Unit . . . . . . . . . . . . . . . . . . . . . . . . . . . . . . . . . . . .
24
24
24
24
Operation . . . . . . . . . . . . . . . . . . . . . . . . . . . . . . . . .
25
Volume . . . . . . . . . . . . . . . . . . . . . . . . . . . . . . . . . . . . . . . . . . .
Battery Charge indicator and battery low warning . . . . . . . . . . . . .
Language . . . . . . . . . . . . . . . . . . . . . . . . . . . . . . . . . . . . . . . . .
Clock . . . . . . . . . . . . . . . . . . . . . . . . . . . . . . . . . . . . . . . . . . . .
Baby alert! . . . . . . . . . . . . . . . . . . . . . . . . . . . . . . . . . . . . . . . .
Lullaby . . . . . . . . . . . . . . . . . . . . . . . . . . . . . . . . . . . . . . . . . . .
To select and start a lullaby . . . . . . . . . . . . . . . . . . . . . . . . . . . .
Temperature . . . . . . . . . . . . . . . . . . . . . . . . . . . . . . . . . . . . . . .
Changing the temperature range . . . . . . . . . . . . . . . . . . . . . . . . .
Setting the Temperature Alert . . . . . . . . . . . . . . . . . . . . . . . . . . .
Changing from Centigrade to Fahrenheit . . . . . . . . . . . . . . . . . . .
Parent to parent paging . . . . . . . . . . . . . . . . . . . . . . . . . . . . . . .
Talk to your Baby . . . . . . . . . . . . . . . . . . . . . . . . . . . . . . . . . . . .
Night Light . . . . . . . . . . . . . . . . . . . . . . . . . . . . . . . . . . . . . . . .
Torch . . . . . . . . . . . . . . . . . . . . . . . . . . . . . . . . . . . . . . . . . . . .
Time for a Feed . . . . . . . . . . . . . . . . . . . . . . . . . . . . . . . . . . . . .
To set the first or next feed time . . . . . . . . . . . . . . . . . . . . . . . . .
To set the interval for following feeds . . . . . . . . . . . . . . . . . . . . . .
To turn the feed alarm on . . . . . . . . . . . . . . . . . . . . . . . . . . . . . .
To turn the feed alarm off . . . . . . . . . . . . . . . . . . . . . . . . . . . . . .
Customise your Baby Monitor to your Baby . . . . . . . . . . . . . . . . .
Eco Mode . . . . . . . . . . . . . . . . . . . . . . . . . . . . . . . . . . . . . . . . .
25
25
25
25
26
26
26
27
27
27
27
28
28
28
28
29
29
29
29
30
30
30
Troubleshooting . . . . . . . . . . . . . . . . . . . . . . . . . . . .
Technical Data . . . . . . . . . . . . . . . . . . . . . . . . . . . . .
31
32
Cleaning and upkeep . . . . . . . . . . . . . . . . . . . . . . . . . . . . . . . . .
Declaration of Conformity . . . . . . . . . . . . . . . . . . . . . . . . . . . . . .
32
32
Guarantee . . . . . . . . . . . . . . . . . . . . . . . . . . . . . . . . .
33
Service−Hotline Germany: Tel. 0180 5 001388, cost via German landline at time of going to print: 14 ct/min.,
different costs possible via mobile telephone systems
19
− General Information −
1 General Information
Please read this operating instruction manual thoroughly.
Under no circumstances open the equipment or complete any repair work yourself. In the case of
claims under the terms of guarantee, contact your sales outlet.
We reserve the right to make technical and appearance modifications to the product during the course
of product improvement.
Intended use
The Baby Monitor serves to monitor rooms. The baby unit (sender) transmits vocal sounds and other
noises from the baby to the parent unit (receiver). Any other use is considered unintended use.
Use of the equipment is no substitute for personal attention and supervision of a child. Rights to
claims for liability beyond the scope of legal regulations are excluded.
Safety notes
The Baby Monitor has been designed to provide added reassurance for those times when you cannot
be in the same room as your baby. It is NOT a substitute for adult supervision. A parent must always
stay within range of the monitor during use. Your Baby Monitor is not a medical device, nor a device to
prevent cases of Sudden Infant Death Syndrome or `cot death´, and you should not rely on it for your
baby´s wellbeing. It is important that you regularly check on your baby personally
Never place anything over your Baby Monitor or cover it in any way.
Do not place your Parent or Baby Unit near water or in a damp environment.
If travelling abroad, make sure that the voltage shown on the mains power adaptor corresponds
to the local mains power supply.
Never dispose of batteries in the household rubbish. Check with you local authority for correct
disposal options.
Never use non−rechargeable batteries in your Parent Unit. Use only the recommended type
− 2 x AAA 1.2 V 800 mAH NiMH.
Use only the mains adaptor supplied or you may risk damaging your Baby Monitor.
When your Baby Monitor is not in use, it is recommended that you disconnect it from the mains
supply and remove the batteries.
Do not spray it with cleaning polish. Disconnect it from the mains power before cleaning.
The adaptors may become warm during use, please take care when handling.
Do not place your Parent or Baby Unit in direct sunlight.
The charge capacity of the re−chargeable batteries in the Parent Unit will reduce with time and will
eventually need to be replaced. New re-chargeable batteries are obtainable from our Helpline.
Disposal
In order to dispose of your device, take it to a collection point
provided by your local public waste authorities (e.g. recycling centre). The adjacent symbol
indicates that the device must not be disposed of in normal domestic waste! According to
laws on the disposal of electronic and electrical devices, owners are obliged to dispose of old
electronic and electrical devices in a separate waste container.
Batteries/Rechargeable batteries must be disposed of at the point of
sale or at the appropriate collection points provided by the public waste
authorities.
Packaging materials must be disposed of according to local
regulations.
20
Service−Hotline Germany: Tel. 0180 5 001388, cost via German landline at time of going to print: 14 ct/min.,
different costs possible via mobile telephone systems
− Menu Structure −
2 Menu Structure
1. Level
2. Level
Night Light
On?IOff?
Lullaby
Play?IStop?
Select new
Sensitivity
Level
On?IOff?
Volume
Level
Set Range
Up Limit xx
Low Limit xx
Temp. Alert
Temperature
3. Level
4. Level
Twinkle
Silent Night
Minuet in G
Danny Boy
Gymnopedie
Play All
Level
Degree CIDegree F
Clock
Feed Time
Language
Set Time
Year
Month
Day
Hour
Minute
Hour Format
12 Hrs?I24 Hrs?
Set Time
Hour
Minute
Set Interval
Hour
Minute
Alarm
On?IOff?
Volume
Level
Deutsch
Espanol
Italiano
PYCCKÈÉ
English
Francais
Service−Hotline Germany: Tel. 0180 5 001388, cost via German landline at time of going to print: 14 ct/min.,
different costs possible via mobile telephone systems
21
− Operating Elements −
3 Operating Elements
Baby unit (Sender)
1
Temperature Sensor
Picks up the temperature in your baby’s room.
2
Battery Cover
For non rechargeable batteries (not supplied).
3
Night Light Key
Press to turn On the night light. The light will glow softly
through the front panel. Press again to fade the
light to Off.
4
Power Key On/Off
Press and release to turn ON the Baby unit.
Press and hold to turn OFF.
5
Page Key
Press and hold for 2 seconds to Page" the Parent
Unit with an audible alert. Useful to call for assistance or to
locate a missing Parent Unit.
6
Display
Indicates the current settings of your Baby Monitor
including: Battery level, Date and Time, Temperature,
Lullaby on/off, Lullaby melody.
7
Play/Stop Key (Lullabies)
Starts or stops the lullaby music.
8
Music Key (Lullabies)
Selects the lullaby melody.
9
Microphone
Picks up the sounds from your baby’s room.
1
3 4 5
2
6
7
8
10
9
10 Volume Key Up/Down
Volume −: Reduces the lullaby volume.
Volume +: Increases the lullaby volume.
22
Service−Hotline Germany: Tel. 0180 5 001388, cost via German landline at time of going to print: 14 ct/min.,
different costs possible via mobile telephone systems
− Operating Elements −
Parent unit (Receiver)
11 Battery Cover
Rechargeable batteries.
12 Belt Clip
13 Volume Key Up/Down
Adjust the volume at which you hear the sounds from your
baby’s room and also to navigate through the menu‘s.
14 Power Key On/Off
Press and release to switch the unit ON.
Press and hold to switch OFF.
13
12
14
11
15 Menu Key, OK Key
The Menu and OK key work as a team with the Up and Down
keys to help you adjust the features of your Baby Monitor.
Press the Menu Key to enter the menu options, use the Up
and Down keys to scroll through the menu choices and the OK
Key to select. Press the Menu key, if you want to step back
one level in the Menu.
16 Link Light
Green light ON means Linked" to the Baby Unit.
A flashing light means the Link" has been lost.
17 Display
Indicates the current settings of your Baby Monitor including:
Battery level, Date and Time, Temperature, Lullaby on/off,
Lullaby melody.
18
19
17
16
15
18 Torch Key
Press and hold to emit a soft beam of light from the top of the Parent Unit.
19 Talk Key
Press and hold to talk to your baby or partner in the baby‘s
room via the Baby Unit.
Charger Pod
20 Charging Light
When the Parent unit is placed in the Charger Pod the red
charger light comes ON to indicate that the batteries are
charging. The light will remain ON to ensure optimum charge is
maintained.
20
Service−Hotline Germany: Tel. 0180 5 001388, cost via German landline at time of going to print: 14 ct/min.,
different costs possible via mobile telephone systems
23
− Starting Up −
4 Starting Up
Safety notes
It is essential to read the General Information" at the beginning of this manual before starting
up.
Checking the package contents
The package contains:
1 Parent unit (receiver)
1 mains adapter with charger pod
2 NiMH rechargeable batteries
Type AAA, 800 mAh
1 Baby unit (sender)
1 mains adapter with power cord
1 Handy Transport bag
At the Parent Unit
12
1. Remove the Belt Clip by lifting the clip (12) at the top and sliding it
downwards.
2. Then remove the battery cover (11) on the back of the Parent
Unit by applying pressure and sliding it down. Insert the
rechargeable batteries as marked on the unit and close the
cover again.
3. Place the Parent Unit into the Charger Pod.
11
4. Plug the mains adaptor into a mains power socket. The red charger light on the charger pod will
illuminate indicating that the Parent Unit is charging (the light will remain on to ensure optimum
charge is maintained).
5. Press and release the Power Key" to turn the Parent Unit on.
Before first use, or if it has been out of use for a long time, the Parent Unit will need to be
charged for 13 hours. During this time, the Parent Unit will operate from the Charger pod when
switched on. Note that the Parent Unit cannot be used without batteries, even if it is placed
in the charger.
At the Baby Unit
1. In event of a power failure, your Baby Monitor can switch to battery power. It is therefore
recommended that you insert non-rechargeable batteries in the Baby Unit.
2. Remove the battery cover on the back of the Baby Unit by applying pressure and sliding it down.
Insert 3 alkaline batteries of the type AA (not provided) as marked on the unit and close the cover
again. Do not use rechargeable batteries in the Baby Unit.
3. Plug the power cord into the power input at the side of the Baby Unit and plug the adaptor plug
into a mains power socket.
4. Press and release the Power Key" to turn the Baby Unit on.
The Baby Unit should be placed about 1 m to 1.5 m away from the baby‘s cot on a flat surface.
Never place the Baby Unit inside the cot, bed or playpen. Make sure the unit, cords and mains
adaptor are out of reach of the baby and other young children. Never place either Unit on
antique or polished surfaces.
24
Service−Hotline Germany: Tel. 0180 5 001388, cost via German landline at time of going to print: 14 ct/min.,
different costs possible via mobile telephone systems
− Operation −
5 Operation
Once you have set up your Baby Monitor, you will be able to hear the sounds in your baby´s room
through the Parent Unit. You will also be able to see those sounds as green and red sound sensor
lights around the top of the Parent Unit, which rise and fall with the volume level − the more lights, the
louder the noise, with the red lights being the loudest.
If the connection between the Parent Unit and Baby Unit is broken at any time the green Link"
light on the Parent Unit will flash and the green and red sensor lights will cease to react to any
sounds. To re−establish the Link", follow the directions in the Troubleshooting" chapter.
Volume
You can adjust the volume at which you hear your baby by using the Up/Down Keys on the side of
the Parent Unit. This will not effect the sensitivity of your Baby Monitor, only the volume at which you
hear those sounds through the Parent Unit.
Battery Charge indicator and battery low warning
The Parent Unit will work up to 10 hours out of the Charger Pod, but this depends on the level of
charge in the batteries. The charge level is indicated by the battery icon on the Display. If the charge
becomes low, a battery low warning beep" will sound and the battery icon on the Parent Unit´s
Display will begin to flash. If this occurs you should return the Parent Unit to the Charger Pod to
re−charge the batteries. You can still use your Parent Unit from the Charger Pod.
Language
Your Baby Monitor can be set to Display its information in different languages.
To change the language
At the Parent Unit
1. Press the Menu Key, then use the Up/Down Keys to scroll to [Language]. Press the OK Key.
2. The Display shows [ENGLISH]. Use the Up/Down Keys to scroll to your chosen language. Press
the OK Key. The Display briefly shows [Saved] and your chosen language will now be set.
Clock
You can set the Display of the Parent Unit to show the current day and time. This can be shown as
either the 24 or 12 hour clock (your monitor is pre−set to show the 24 hour clock). You will need to set
the clock if you wish to use the Feed Timer feature.
If you have unplugged your Baby Monitor from the power supply, you will need to reset the
Clock the next time you use it.
To set the time
At the Parent Unit
1. Press the Menu Key then use the Up/Down Keys to scroll to [Clock]. Press the OK Key.
2. Display shows [Set time]. Press the OK Key.
3. Display shows [Year]. Use the Up/Down Keys to scroll to the correct year. Press the OK Key.
4. Display shows [Month]. Use the Up/Down Keys to scroll to the correct month. Press the
OK Key.
5. Display shows [Day]. Use the Up/Down Keys to scroll to the correct day. Press the OK Key.
6. Display shows [Hour]. Use the Up/Down Keys to scroll to the correct hour using the 24 hour
clock. Press the OK Key.
Service−Hotline Germany: Tel. 0180 5 001388, cost via German landline at time of going to print: 14 ct/min.,
different costs possible via mobile telephone systems
25
− Operation −
7. Display shows [Minute]. Use the Up/Down Keys to scroll to the correct minute. Press the
OK Key. The display briefly shows [Saved] and gives a confirming beep". The date and time will
now be displayed on the Parent Unit.
To select the 12 or 24 hour clock format
At the Parent Unit
1. Press the Menu Key then use the Up/Down Keys to scroll to [Clock]. Press the OK Key.
2. The Display shows [Set time]. Press the Up/Down Keys to scroll to [Hour Format]. Press the
OK Key.
3. The Display shows [12 Hrs?] (asking if you would like to change to the 12 hour clock format).
Press the OK Key or if you do not want to change, press the Menu Key to exit without changing.
The Display briefly shows [Saved] to confirm that the 12 hour clock has been set.
Time displayed in the 12 hour clock format will include a small a" to denote AM and a small
p" for PM.
4. To change back to the 24 hour clock format ,repeat the steps above, at step 3 the Display will
show [24 Hrs?]. Press the OK Key to confirm.
Baby alert!
You can set your Parent Unit to give an extra warning beep" should the noise levels in your baby’s
room activate the red lights on the sound sensor. This is particularly useful if the volume of your
Parent Unit is turned down and you are just using the sensor lights to monitor the noise levels in your
baby’s room.
On the Parent Unit
1. Press the Menu Key then use the Up/Down Keys to scroll to [Sound Alert]. Press the OK Key.
2. The Display shows [On?]. Press the OK Key to turn the alert on or Menu Key to exit without
change. The Display will briefly show [Saved] and a confirmation tone sounds.
3. If you want to change the volume level of the alarm tone, press the Menu Key and navigate to
the [Sound Alert] Menu, press the OK Key and navigate to the [Volume] Menu and press the
OK Key and adjust the volume. The display shows [Level] and a row of blocks representing the
volume of the Baby Alert tone. Use the Up/Down Keys to select the required volume level
(full =l oudest).
4. The display will briefly show [Saved]. An alert tone will now sound at the Parent Unit should your
babys noise levels reach the red.
5. To turn the Baby Alert alarm off, just follow the steps above. The display will show [Off?]. Press
the OK Key. The Display will briefly show [Saved].
Lullaby
Your baby can be soothed to sleep by a gentle lullaby from the Baby Unit. There are 5 tunes from
which to choose, or you can opt to play through all of them in turn by selecting [Play All]. The lullaby
feature can be turned on and off from both the Baby Unit and the Parent Unit and is indicated on both
by a musical note icon. The icon and the lullaby title show on both Displays whilst the lullaby is
playing. The lullabies will play for 15 minutes.
To select and start a lullaby
At the Baby Unit
1. Press the Music Key. The Display will illuminate. The lullaby is shown.
2. Continue to press the Music Key to scroll to the tune of your choice, or to select
[Play all?].
3. Press the Play/Stop Key again to start or stop the lullaby.
26
Service−Hotline Germany: Tel. 0180 5 001388, cost via German landline at time of going to print: 14 ct/min.,
different costs possible via mobile telephone systems
− Operation −
At the Parent Unit
1. Press the Menu Key, then use the Up/Down Keys to scroll to [Lullaby]. Press the OK Key.
2. The Display shows [Play?]. Use the Up/Down Keys to scroll to [Select New]. Press the OK Key.
3. The Display shows the current lullaby. Use the Up/Down Keys to scroll to your choice of tune, or
to [Play All]. Press the OK Key. The Display briefly shows [Saved].
4. The Display shows [Lullaby]. Press the OK Key twice.
5. To stop playing press the OK Key twice when you are still in the lullaby mode.
Even if you do not stop the lullaby, it will automatically stop playing after 15 minutes.
Temperature
It is very important for your baby’s health to ensure that they are a kept at a safe temperature. This
includes the room temperature, baby’s temperature, baby clothing and bedding (contact your local
health authority to ensure you are aware of the current guidelines). Your Baby Monitor can help by
displaying the current room temperature on the Baby Unit and the Parent Unit − and can even be set
to alert you if the temperature falls outside of a definable range.
Changing the temperature range
If you wish, you can set the upper and lower temperature limits of your Baby Monitor so that if the
temperature in the babys room goes above or below your pre−set range and the temperature
displayed on the Parent Unit will flash and an alert, if set, will sound. Additional High" or Low" is
shown.
At the Parent Unit
1. Press the Menu Key, then use the Up/Down Keys to scroll to [Temperature]. Press the OK Key.
2. Use the Up/Down Keys to scroll to [Set Range]. Press the OK Key. The current upper
temperature range is displayed as [Up Limit xx].
3. Use the Up/Down Keys to scroll up or down the temperature setting until you reach the number
of degrees you wish to set as the maximum, then press the OK Key. The Display briefly shows
[Saved]. The lower range limit is now displayed as [Low Limit xx].
4. Use the Up/Down Keys to scroll up or down the temperature settings until you reach the number
of degrees you wish to set as the minimum, then press the OK Key. The display briefly shows
[Saved].
You have now set your minimum and maximum temperature range.
Setting the Temperature Alert
If you wish, you can set your Parent Unit to give an additional double−beep" warning to alert you that
the temperature has moved outside of the set temperature range.
At the Parent Unit
1. Press the Menu Key, then use the Up/Down Keys to scroll to [Temperature]. Press the OK Key.
2. Use the Up/Down Keys to scroll to [Temp Alert]. Press the OK Key.
3. The Display will show [On?]. Press the OK Key to turn the alert on, or Menu Key to exit without
change. Display briefly shows [Saved]. The Temperature alert is now on.
4. If you wish to turn the Temperature Alert, follow the instructions above. At step 3 the Display will
show [Off?]. Press the OK Key to confirm.
Changing from Centigrade to Fahrenheit
You can choose whether to view the temperature of your babys room in degrees Centigrade or degrees
Fahrenheit. Your monitor is pre−set to Centigrade, but if you wish to change it, follow the steps below.
At the Parent Unit
1. Press the Menu Key, then use the keys to scroll to [Temperature]. Press the OK Key.
Service−Hotline Germany: Tel. 0180 5 001388, cost via German landline at time of going to print: 14 ct/min.,
different costs possible via mobile telephone systems
27
− Operation −
2. Use the Up/Down Keys to scroll to [Degree F?]. Press the OK Key to select Fahrenheit or
Menu Key to exit without change. Display will briefly show [Saved]. The temperature of your
babys room will now be shown in degrees Fahrenheit.
3. If you wish to change the temperature display back to degrees Centigrade, follow the above
steps. At step 2 the display will show [Degree C?]. Press the OK Key.
Parent to parent paging
Useful if one parent is in the baby’s room and needs to contact the other. Also helps to find a mislaid
Parent Unit.
At the Baby Unit
1. Press and hold the Page Key for 2 seconds. The Parent Unit will emit a tone.
At the Parent Unit
1. When the Page tone sounds you can silence it by pressing any key on the Parent Unit.
2. If you wish, you can then speak to your partner in the baby’s room. Press and hold the Talk Key
and speak into the front of the Parent Unit. Release the Talk Key and you can hear what is said
in the baby’s room again.
Talk to your Baby
You can speak to your baby from the Parent Unit −perhaps to re−assure them that you are on your
way.
At the Parent Unit
1. Press and hold the Talk Key and speak into the front of the Parent Unit. Release the key to hear
your baby again.
Please note that you will not be able to hear your baby while you are speaking to
them until you release the Talk Key again.
Night Light
The Baby Unit has a one touch night light which emits a soft starry glow, providing comfort and
re−assurance for your baby and allowing you to see them in a darkened room. You may also turn the
night light on and off from the Parent Unit.
At the Baby Unit
1. Press the Light Key on the top of the unit. A soft light will gently turn on. Press again and the light
will fade away.
At the Parent Unit
1. Press the Menu Key, then use the Up/Down Keys to scroll to [Night Light]. Press the OK Key.
2. The Display will show [On?] (asking if you would like to switch the night light on). Press the
OK Key. The display will briefly show [Saved] and gives a confirming beep". The night light on
the Baby Unit will gently turn on. A lightbulb icon will appear on the Display of the Parent Unit to
let you know the night light on the Baby Unit is on.
3. To turn the night light off again from the Parent Unit, follow the above steps. The Display will show
[Off?]. Press the OK Key. The Display will briefly show [Saved] and gives a confirming beep".
The lightbulb icon will disappear.
Torch
Your Parent Unit has a useful Torch feature. At the press of a button a soft beam of light is emitted
from the top of the Parent Unit − helpful when peeping into a darkened room to check on your baby.
28
Service−Hotline Germany: Tel. 0180 5 001388, cost via German landline at time of going to print: 14 ct/min.,
different costs possible via mobile telephone systems
− Operation −
At the Parent Unit
1. Press and hold the Torch Key (indicated by the lightbulb icon above the Display) to turn the light
on. A soft beam of light will turn on.
The torch only works whilst the Parent Unit is turned on.
Time for a Feed
If your baby is in a routine of regular feeding intervals, you may wish to set your Baby Monitor to alert
you when your baby’s feeds are due. You have the choice to either set an alert just for your baby’s
next feed time, or for your baby’s next feed time plus subsequent feeds based on the interval time
between them.
Firstly you will need to ensure that you have set the date and time on your Parent Unit’s inbuilt clock.
Once you have done this, you can either:
1. Set the Time of day or night (24hr clock) at which your baby’s next feed is due (eg. 10.30) and
then if you wish,
2. set the Interval between your baby’s following feed start times, (eg. every 3hrs 30mins) − be sure
to include the time it takes to feed your baby.
3. Finally, you will need to switch the Feed Alarm on. Now, when your baby’s next
feed is due, your Parent Unit will start beeping and the Display will show [Feed Alarm]. Pressing
any button on the Parent Unit will silence the alert and you can feed your baby. If you have set the
interval, the alert will sound again when the next feed is due.
To set the first or next feed time
At the Parent Unit
1. Press the Menu Key, then use the Up/Down Keys to scroll to [Feed Time]. Press the OK Key.
2. The Display shows [Set time]. Press the OK Key.
3. The Display shows [Hour] and a number between 00 and 23, representing hours of the day. Use
the Up/Down Keys to scroll to the hour of your baby’s feed. Press the OK Key.
4. The Display shows [Minute] and a number between 00 and 59, representing the minutes of an
hour. Use the Up/Down Keys to scroll to the minutes past the hour of your baby’s feed. Press the
OK Key. The Display briefly shows [Saved] and the time of your baby’s first feed is stored.
To set the interval for following feeds
At the Parent Unit Follow steps 1−4 above then,
5. The Display shows [Set Time]. Use the Up/Down Keys to scroll to [Set Interval]. Press the
OK Key.
6. The Display shows [Hour] and a two digit number representing the hours between your baby’s
feeds. Use the Up/Down Keys to scroll to the hour between your babys feeds (e.g. 03) Press the
OK Key.
7. Display shows [Minute]. Use the Up/Down Keys to scroll to the minutes after the hour between
your baby’s feed’s (eg. 30) Press the OK Key. Display briefly shows [Saved] and the interval
between your baby’s feeds is stored (in this case as 3hrs 30mins).
When calculating feed interval, please remember to include the time it takes to feed your baby.
Please remember to turn the alarm on as detailed in the next section.
To turn the feed alarm on
At the Parent Unit Follow steps 1−7 then,
8. The Display shows [Set Interval]. Use the Up/Down Keys to scroll to [Set Interval]. Press the
OK Key to set or the Menu Key to exit without change.
9. The Display shows [On?]. Press the OK Key.
Service−Hotline Germany: Tel. 0180 5 001388, cost via German landline at time of going to print: 14 ct/min.,
different costs possible via mobile telephone systems
29
− Operation −
10. If you will change the volume level of the alarm tone, select with the Up/Down Keys the subitem
[Volume] and press the OK Key. The display shows [Level] and a row of blocks representing the
volume of the Baby Alert tone. Use the Up/Down Keys to select the required volume level
(full = loudest). Press the OK Key. Display briefly shows [Saved]. The alarm will now sound at
the Parent Unit each time a feed is due. Press any button on the Parent Unit to silence the alarm.
To turn the feed alarm off
If you no longer want the alarm to sound when a feed is due, you will need to turn the feed alarm off.
Follow steps 8−9 above.
11. Display shows [Off?]. Press the OK Key. The Display briefly shows [Saved]. The alarm is now
turned off and will not sound when the next feed is due.
Customise your Baby Monitor to your Baby
Some babys are louder than others! You can customise the sound sensitivity of your Baby Monitor to
suit your baby. Set the sensitivity High" for a quiet sleeper with a soft cry and set to Low" sensitivity if
they tend to make noise whilst sleeping or can make quite loud noises before they are truly crying.
At the Parent Unit
1. Press the Menu Key, then use the Up/Down Keys to scroll to [Sensitivity]. Press the OK Key.
2. The Display shows [Level] and a row of blocks indicating the volume level
(full = high sensitivity). Use the Up/Down Keys to select the sensitivity level. Press the OK Key.
The Display briefly shows [Saved].
Eco Mode
The Baby Unit is performed with a special transmission technology.
The low radiation feature works by lowering the radiated radio transmission power from the Baby Unit,
and at the same time increasing the sensitivity of the receiver to maintain the normal range.
30
Service−Hotline Germany: Tel. 0180 5 001388, cost via German landline at time of going to print: 14 ct/min.,
different costs possible via mobile telephone systems
− Troubleshooting −
6 Troubleshooting
In the case of technical problems, contact our Hotline, tel. 0180 5 00 13 88 (Cost via German landline
at time of going to print: 14 ct/min., different costs possible via mobile telephone systems). In the case
of claims under the terms of guarantee, contact your sales outlet. There is a 2 year period of
guarantee.
Faults
Causes
Units cannot be
turned on.
− Check that you have turned the power on from the mains and that the
connections are firm.
The green Link"
light on the Parent
Unit is flashing
and you cannot
hear the sounds
from your baby‘s
room.
− 1. You may have moved out of range −move closer to the Baby Unit and
wait 5 seconds for the Link" to establish.
− 2. You may need to re−establish the Link" between the two units. Turn both
units off and then:
On the Baby Unit:
−Press and release the On/Off key.
On the Parent Unit:
−Press and release the On/Off key. The green Link" light comes on (this
may take a few seconds).
Can’t hear your
baby on the
Parent Unit, but
the Link" light is
still glowing
steadily.
− 1. Check the volume is turned up on the Parent Unit.
− 2. You may need to turn up the sensitivity of your Baby Monitor.
Your Baby Monitor
is emitting an high
pitched
ear−piercing noise.
− This may happen if your Parent and Baby Units are too close together.
Move them further apart.
Service−Hotline Germany: Tel. 0180 5 001388, cost via German landline at time of going to print: 14 ct/min.,
different costs possible via mobile telephone systems
31
− Technical Data −
7 Technical Data
Feature
Operating Frequency
Range
Value
1.8 GHz
Up to 300 m under optimum conditions. The range is
reduced in buildings (up to 50 m) as a result of walls,
doors etc.
Power supply, baby unit (sender)
Input: 230 VAC, 35 mA
Output: 6 VDC, 300 mA, Center is +
Non rechargeable batteries
for the baby unit (sender)
(not included in the package contents)
Type: AA, 1.5 V Alkaline
Transmitting power
Average: 10 mW
Maximum: 250 mW
Power supply, parent unit (receiver)
(hard wired)
Input: 230 VAC, 35 mA
Output: 6 VDC, 200 mA
Rechargeable batteries
for the parent unit (receiver)
Type: AAA, 1.2 V, 800 mAh NiMH
Operating time with charged battery
Permissible ambient temperature
Permissible relative humidity
Approx. 10 hours
10 °C to 30 °C
20 % to 75 %
Cleaning and upkeep
Clean the equipment with a dry, soft, lint−free cloth. Never use cleaning agents or solvents.
Declaration of Conformity
This device fulfils the requirements stipulated in the EU directive:
1999/5/EU directive on radio equipment and telecommunications terminal equipment
and the mutual recognition of their conformity. Conformity with the above mentioned
directive is confirmed by the CE symbol on the device.
To view the complete Declaration of Conformity, please refer to the free download available
on our web site www.audioline.de.
32
Service−Hotline Germany: Tel. 0180 5 001388, cost via German landline at time of going to print: 14 ct/min.,
different costs possible via mobile telephone systems
− Guarantee −
8 Guarantee
AUDIOLINE equipment is produced and tested according to the latest production methods. Carefully
selected materials and highly developed technology ensure perfect functioning and a long service life.
The terms of guarantee do not apply to the batteries or power packs used in the products. The period
of guarantee is 24 months from the date of purchase.
All deficiencies related to material or manufacturing errors within the period of guarantee will be
redressed free of charge. Rights to claims under the terms of guarantee are annulled following
tampering by the purchaser or third parties. Damage caused as the result of improper handling or
operation, incorrect positioning or storage, improper connection or installation or Acts of God and
other external influences are excluded from the terms of guarantee. In the case of complaints, we
reserve the right to repair defect parts, replace them or replace the entire device. Replaced parts or
devices become our property. Rights to compensation in the case of damage are excluded where
there is no evidence of intent or gross negligence by the manufacturer.
If your device does show signs of a defect within the period of guarantee, please contact the sales
outlet where you purchased the AUDIOLINE device, producing the purchase receipt as evidence. All
claims under the terms of guarantee in accordance with this agreement can only be asserted at the
sales outlet. No claims under the terms of guarantee can be asserted after a period of two years from
the date of purchase and hand−over of the product.
Service−Hotline Germany: Tel. 0180 5 001388, cost via German landline at time of going to print: 14 ct/min.,
different costs possible via mobile telephone systems
33
Notes
Notes
34
Service−Hotline Germany: Tel. 0180 5 001388, cost via German landline at time of going to print: 14 ct/min.,
different costs possible via mobile telephone systems
Notes
Notes
Service−Hotline Germany: Tel. 0180 5 001388, cost via German landline at time of going to print: 14 ct/min.,
different costs possible via mobile telephone systems
35">
/
Download
Just a friendly reminder. You can view the document right here. But most importantly, our AI has already read it. It can explain complex things in simple terms, answer your questions in any language, and help you quickly navigate even the longest or most compilcated documents.
Public link updated
The public link to your chat has been updated. You may view and manage your chat links after registration here.

