advertisement

QUICK S TART
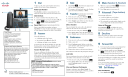
Cisco IP Phone 8841, 8851, and
8861
1 Dial
2 Answer
3 Hold
4 Transfer
5 Conference
6 Mute
7 Voicemail
8 Divert
9 Forward All
10 Call History
11 Directories
12 Settings
13 Navigation
14 USB Charging
15 Intelligent Proximity
16 Tips
Note For best results, print on
8.5inch x 14inch (legal-sized) paper.
1 Dial
To place a call, pick up the handset and enter a
number. Or, try one of these alternatives.
Redial Last Number
Press Redial to redial on your primary line. To
redial on another line, press the line button first.
Dial On-Hook
1. Enter a number when the phone is idle.
2. Lift the handset or press one of these: Call, the
headset button, the speakerphone
button, or the Select button.
Speed Dial
Enter a speed-dial item number and press
SpeedDial. You may also have speed dials assigned
to some buttons along the left side of your phone.
2 Answer
New call indicators:
• A flashing amber line button
• An animated icon and caller ID
• A flashing red light on your handset
To answer the call, lift the handset. Or, press the
flashing amber session button, Answer, the unlit
headset button, or the speakerphone button.
Answer Multiple Lines
If you are talking on the phone when you get
another call, a message appears briefly on the
phone screen. Press the flashing amber line button
to switch lines and then press the session button to
answer the second call and put the first call on hold
automatically.
You can answer a call through an actionable
incoming call alert if this feature is enabled by your
administrator.
3 Hold
1. Press Hold . The hold icon appears and
the line button flashes green.
2. To resume a call from hold, press the flashing
green line button, Resume, or Hold.
4 Transfer
1. From an active call, press Transfer .
2. Enter the transfer recipient’s phone number.
3. Press Transfer again (before or after the party
answers). The transfer completes.
Direct Transfer
You can transfer the active call to the held call
either on the same line or across lines
• From an active call, press Transfer .
• Press Active calls to select the held call, and
press Transfer again to finish the call transfer.
5 Conference
1. From an active call, press Conference .
2. Make a new call.
3. Press Conference again (before or after the
party answers). The conference begins and the
phone displays “Conference.”
4. Repeat these steps to add more participants.
The conference ends when all participants hang up.
Join Calls
You can conference the active call with the held
calls either on the same line or across lines.
• From an active call, press Conference .
• Press Active calls to select the held call, and
press Conference again to create the
conference.
View and Remove Participants
During a conference, press Show Details. To
remove a participant from the conference, scroll to
the participant and press Remove.
6 Mute
1. While on a call, press Mute . The button
glows to indicate that mute is on.
2. Press Mute again to turn mute off.
7 Voicemail
New message indicators:
• A solid red light on your handset
• A stutter dial tone (if available)
• The voicemail icon and number display on the
screen along with one idle session button
Listen to Messages
Press Messages and follow the voice
prompts. To check messages for a specific line,
press the line button first.
8 Divert
Press Divert when the call is ringing, active, or on
hold. Divert redirects an individual call to
voicemail or to another number set up by your
system administrator.
9 Forward All
1. To forward calls received on your primary line
to another number, press Forward all.
2. Enter a phone number or press Messages
to forward all calls to voicemail. Look
for confirmation on your phone screen.
3. To cancel call forwarding, press Forward off.
To set up forwarding on a secondary line, press the
line button to select the second line and press
Forward all.
To set up forwarding remotely, access your Self
Care Portal.
10 Call History
View Call History
1. Press Applications .

Americas Headquarters
Cisco Systems, Inc.
170 West Tasman Drive
San Jose, CA 95134-1706
USA
http://www.cisco.com
Tel: 408 526-4000
800 553-NETS (6387)
Fax: 408 527-0883
Cisco and the Cisco logo are trademarks or registered trademarks of Cisco and/or its affiliates in the
U.S. and other countries. To view a list of Cisco trademarks, go to this URL:
www.cisco.com/go/trademarks. Third-party trademarks mentioned are the property of their
respective owners. The use of the word partner does not imply a partnership relationship between
Cisco and any other company. (1110R)
2. Scroll and select Call History.
3. Select a line to view. Your phone displays the
last 150 missed, placed, and received calls.
4. To view details for a call, scroll to the call,
press More, and then press Details.
View Missed Calls Only
1. View your call history.
2. Press Missed. Alternately, press the session
button mapped to the Call History icon.
Dial Call History
1. View your call history, or navigate to your
missed or placed calls.
2. Scroll to a listing and lift the handset, or press
Select.
3. To edit a number before dialing, press More >
EditDial.
11 Directories
1. Press Contacts .
2. Scroll and select a directory.
3. Use your keypad to input search criteria.
4. Press Submit.
5. To dial, scroll to a listing and press Dial.
12 Settings
Volume
The Volume bar is located to the left of the keypad.
• To adjust the handset, headset, or
speakerphone volume, press Volume when the
phone is in use.
• To adjust the ringer volume, press Volume on
the left (-) or right (+).
• To silence the phone when ringing, press
Volume left one time. Pressing Volume
multiple times lowers the ringer volume.
Ringtone
1. Press Applications .
2. Select Settings > Ringtone.
3. Select a line.
4. Scroll through the list of ringtones and press
Play to hear a sample.
5. Press Set and Apply to save a selection.
Screen Contrast
1. Press Applications .
2. Select Settings > Brightness.
3. Press the Navigation cluster left or right to
change the contrast and press Save.
Font Size
1. Press Applications .
2. Select Settings > Font Size.
3. Select Tiny, Small, Regular, Large, or Huge.
4. Press Save.
13 Navigation
Where are the Line Buttons?
Line buttons are located on the left side of the
phone screen. Buttons that are not assigned to
phone lines can be used for speed-dials and other
features. Contact your system administrator for
more information.
Note If you are using a locale that reads right to
left, such as Arabic, the line button and
session button locations are swapped.
Where are the Session Buttons?
Session buttons are located on the right side of the
phone screen.
Where are the Softkeys?
Four softkey buttons are located below the phone
screen. You can press More (when available) to
reveal additional softkeys.
How Do I Navigate in a List or Menu?
Press up, down, left, or right on the four-way
Navigation cluster.
A scroll bar on the screen indicates your relative
position within a list.
How Do I Select an Item in a List or
Menu?
With the item highlighted, press Select. Or, use the
keypad to enter the corresponding item number.
How Do I Exit a Menu?
To exit a menu completely, press Exit.
To go back one level in a menu, press Back .
Note If you press and hold Back, you exit a
menu completely.
14 USB Charging
To charge your mobile phone, use the side USB port
of the Cisco IP Phone 8851, or use the side or back
USB port of the Cisco IP Phone 8861.
To charge your tablet, use the back USB port of
Cisco IP Phone 8861.
15 Intelligent Proximity
If your administrator has enabled this feature, you
can press the second line button to open the
Bluetooth menu to pair and connect your
smartphone. After your smartphone connects, its
name displays on the second line label and you can
use this line to manage your smartphone calls. You
can also enable or disable this feature using the
Hands-free 2-way audio entry in the Bluetooth
menu. For more information, contact your system
administrator.
1. Press Applications .
2. Select Bluetooth.
3. Enable or disable Hands-free 2-way audio.
16 Tips
How Can I Keep Track of Multiple Calls?
Line button colors indicate call states and can help
you stay oriented when handling multiple calls
including shared line:
• Ringing call—Flashing amber
• Connected call—Solid green
• Held call—Flashing green
• Shared line in-use remotely—Solid red
• Shared line on hold remotely—Flashing red
What Is the Best Way to Use My Headset?
If you use a headset to dial or answer a call, your
headset serves as the primary audio path and a
headset icon is displayed in the right corner of the
header bar. Once you use a headset, press Answer
to automatically answer the call using the headset.
How Do I Set Up Speed Dials?
To set up Speed Dials and customize other features
and settings for your phone, use a web browser on
your computer to access the Self Care Portal.
Where Can I Find a Complete User Guide?
http://www.cisco.com/c/en/us/support/collaborati
on-endpoints/unified-ip-phone-8800-series/produc
ts-user-guide-list.html


advertisement
Related manuals
advertisement