3.5 Preset (Shortcut: PRST). Revo RELPTZ22-1
Add to my manuals
41 Pages
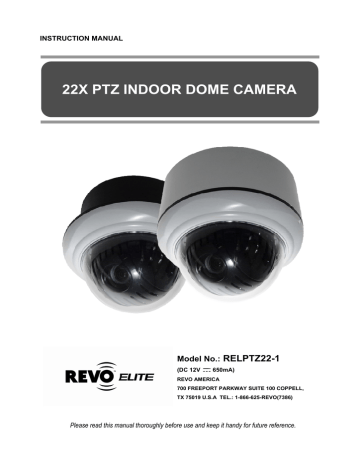
Revo RELPTZ22-1 is a versatile indoor dome camera with pan, tilt, and zoom capabilities, providing comprehensive surveillance and security solutions for various applications. It features a built-in optical power zoom camera with True Night Shot, ensuring clear images even in low-light conditions. With 120 preset positions, 4 tours, 4 auto scans, and endless auto-pan, you can easily monitor and capture important details.
advertisement

6. Select “END ANGLE”. Hold down the CTRL key while moving the Joystick to select the end position. The end position angle should be larger than start position. Release the CTRL key to complete the selection of the end position. Or press the IRIS Open key then the “CTRL” displays. Move the desired position and the zoom position. Press the IRIS Close key then the
“CTRL” disappears.
7. Set “SCAN DIR” to CCW or CW.
8. Select “SWAP”, Set to ON, to exchange the start angle and the end angle.
9. Set “DWELL TIME”.
10. Select “SAVE AND EXIT” and push the Joystick to the right or press the IRIS Open key.
Press the ESC or IRIS Close key to exit the program without saving.
NOTE: Pressing the HOME key delete stored data at the angle field.
NOTE: 09:AUTO-PAN mode (Endless panning)
3.5 Preset (Shortcut: PRST)
If you need to view specific places routinely, you should program Presets. A Preset is a programmed video scene with automatic pan, tilt, zoom, focus and motion settings. Once programmed, placing the number position and pressing the PRST key on your controller calls up that Preset automatically. In addition, Presets may be assigned to alarm action or as the “home” position for the dome camera. As many as 120 Presets, whose positions are saved in the dome’s firmware, may be programmed.
There are two pages of Preset menu. Each page has 60 Presets. Pages can be scrolled by pushing the Joystick to the left or right on the first or last No. of Preset.
PRESET SETUP
NUMBER : 001
TITLE : ---
CAMERA SET
DWELL : -- SEC
12345678901234567890
00 █**-----------------
02 --------------------
04 --------------------
NEXT PAGE
SAVE AND EXIT(ESC TO CANCEL)
- : blank Preset position
* : position has the Preset
█ : current cursor position
Follow steps below to store the Preset positions:
1. Press the MENU key to display the main menu on the monitor. Scroll to Preset and push the
Joystick to the right.
2. Select the blank Preset position to be stored by pushing the Joystick up, down, right, or left.
18
3. After selecting a blank position, press and hold the CTRL key. Use the Joystick to control the direction of the camera and lens.
4. After aiming the camera (view direction and lens control), release the CTRL key. The cursor will be on the “TITLE” after saving data then twist the Joystick or press the Tele or Wide key to edit the Preset title. Follow the procedure of the Auto Scan above to edit titles.
5. Select “CAMERA SET” and pushing the Joystick to the left or right. Then the Preset camera setup displays.
PRESET CAMERA SETUP
FOCUS : AUTO
MOTION : OFF
MOTION SETUP
SAVE AND EXIT(ESC TO CANCEL)
Set FOCUS
Set MOTION
: AUTO, MANUAL, ONE PUSH
: OFF, ON
Select “MOTION SETUP” and pushing the Joystick to the left or right. Then the MOTION setup displays.
MOTION SETUP
SENSITIVITY : 06
POSITION : ALL
DELAY : 00 SEC
OUTPUT : OFF
HOLD TIME : 03 SEC
EXIT(ESC TO EXIT)
Set SENSITIVITY : 01 ~ 10
Set POSITION : ALL, CENTER
Set DELAY
Set OUTPUT
Set HOLD TIME
: 00 ~ 05 SEC
: OFF, ON
: 03 ~ 99 SEC
6. Set “DWELL TIME”. (03 ~ 99 seconds)
7. To select the next page of Presets, scroll the page by pushing the Joystick to the left on the first and last columns of the menu.
8. Repeat step 2 through 7 for each additional Preset position.
9. Select “SAVE AND EXIT” and push the Joystick to the right or press the IRIS Open key.
Press the ESC or IRIS Close key to exit the program without saving.
NOTE: Press the HOME key at programmed Preset position(*) to delete a programmed
Preset view.
The position, which is marked with the
*, already has the Preset view assigned. To review the stored Preset, twist the Joystick on the
*.
19
advertisement
* Your assessment is very important for improving the workof artificial intelligence, which forms the content of this project
Related manuals
advertisement
Table of contents
- 6 Chapter 1 — Introduction
- 6 1.1 Features
- 7 Chapter 2 — Installation and Configuration
- 7 2.1 Package Contents
- 8 2.2 Installation
- 10 2.3 Basic Configuration of Dome Camera System
- 11 2.4 Setting Dome Camera Termination
- 11 2.5 Setting Dome Camera Address (ID)
- 18 2.6 Setting Dome Camera Protocol
- 19 2.7 Connections
- 20 2.8 Getting Started
- 21 Chapter 3 — Program and Operation
- 21 3.1 Dome Camera Selection
- 21 3.2 Accessing the On-Screen Menu Utility
- 21 3.3 How to control the On-Screen Menu Utility
- 22 3.4 Auto Scan (Shortcut: SCAN)
- 23 3.5 Preset (Shortcut: PRST)
- 25 3.6 Shortcut of Preset Program
- 25 3.7 Tour (Shortcut: TOUR)
- 26 3.8 Alarm
- 26 3.9 Area Title
- 27 3.10 Camera Menu
- 30 3.11 Dome Setup
- 35 Appendix A — Specifications
- 38 Appendix B — Troubleshooting
- 39 Appendix C — Short Cut Key