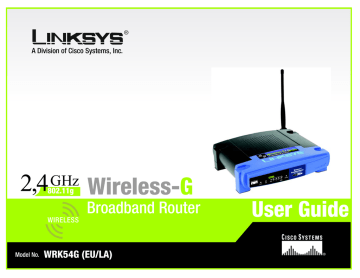
Chapter 4: Software Installation and Configuration. Linksys WRK54G (EU/LA)
Add to My manuals137 Pages
advertisement

Wireless-G Notebook Adapter
Chapter 4: Software Installation and Configuration
The Wireless-G Notebook Adapter Setup Wizard will guide you through the installation procedure. The Setup
Wizard will install the WLAN Monitor and driver, as well as configure the Adapter.
NOTE: You must run the Setup Wizard to install the software before installing the hardware.
Insert the Setup Wizard CD-ROM into your CD-ROM drive. The Setup Wizard should run automatically, and the
Welcome screen should appear. If it does not, click the Start button and choose Run. In the field that appears, enter D:\setup.exe (if “D” is the letter of your CD-ROM drive).
On the Welcome screen, you have the following choices:
Install - Click the Install button to begin the software installation process.
User Guide - Click the User Guide button to open the PDF file of this User Guide.
Exit - Click the Exit button to exit the Setup Wizard.
Figure 4-1: The Setup Wizard’s Welcome screen
Chapter 4: Software Installation and Configuration 7
Wireless-G Notebook Adapter
The Installation Procedure
1. To install the Adapter, click the Install button on the Welcome screen.
2. After reading the License Agreement, click the Next button if you agree, or click the Cancel button to end the installation.
Figure 4-2: The Setup Wizard’s License Agreement
3. The Setup Wizard will ask you to choose a network mode. Click the Infrastructure Mode radio button if you want your wireless computers to network with computers on your wired network using a wireless access point. Click the Ad-Hoc Mode radio button if you want multiple wireless computers to network directly with each other.
In the SSID field, enter the SSID of your wireless network. The SSID must be identical for all devices in the network. The default setting is linksys (all lowercase). Click the Next button.
NOTE: Network SSIDs should be unique to your network and identical for all devices within the network.
Chapter 4: Software Installation and Configuration
The Installation Procedure
Figure 4-3: The Setup Wizard’s Network Mode screen
8
Wireless-G Notebook Adapter
4. If you chose Infrastructure Mode, go to Step 5 now. If you chose Ad-Hoc Mode, select the correct operating channel for your network. Then, select the Network Mode from the drop-down menu. Click the
Next button, and go to Step 5. Click the Back button to change any settings.
Channel - The channel you choose should match the channel set on the other devices in your wireless network. If you are unsure about which channel to use, select the default channel.
Network Mode - Select Mixed Mode, and both Wireless-G and Wireless-B computers will be allowed on the network, but the speed will be reduced. Select G-Only Mode for maximum speed, but no Wireless-B users will be allowed on the network.
5. The Setup Wizard will ask you to review your settings before it starts to copy files. Click the Next button to save these settings, or click the Back button to change any settings.
If you’re using Windows 2000, you may see a Windows Digital Signature warning. As this product has been tested to work with Windows, you may continue.
Figure 4-4: The Setup Wizard’s Wireless Channels screen
Chapter 4: Software Installation and Configuration
The Installation Procedure
Figure 4-5: The Setup Wizard’s Finalize Settings screen
9
Wireless-G Notebook Adapter
6. After the software has been successfully installed, the Congratulations screen will appear. Click the Exit button.
Proceed to “Chapter 5: Hardware Installation.”
Figure 4-6: The Setup Wizard’s Congratulations Screen
Chapter 4: Software Installation and Configuration
The Installation Procedure
10
advertisement
Related manuals
advertisement
Table of contents
- 2 Copyrights and Trademarks
- 3 Table of Contents
- 5 List of Figures
- 7 Chapter 1: Introduction
- 10 Chapter 2: Planning Your Wireless Network
- 12 Chapter 3: Getting to Know the Wireless-G Broadband Router
- 14 Chapter 4: Connecting the Wireless-G Broadband Router
- 16 Chapter 5: Configuring the PCs
- 19 Chapter 6: Configuring the Wireless-G Broadband Router
- 44 Appendix A: Troubleshooting
- 58 Appendix B: Wireless Security
- 61 Appendix C: Upgrading Firmware
- 62 Appendix D: Windows Help
- 63 Appendix E: Finding the MAC Address and IP Address for Your Ethernet Adapter
- 65 Appendix F: Glossary
- 71 Appendix G: Specifications
- 73 Appendix H: Warranty Information
- 74 Appendix I: Regulatory Information
- 80 Appendix J: Contact Information
- 82 Copyright and Trademarks
- 83 Table of Contents
- 86 Chapter 1: Introduction
- 89 Chapter 2: Planning Your Wireless Network
- 91 Chapter 3: Getting to Know the Wireless-G Notebook Adapter
- 92 Chapter 4: Software Installation and Configuration
- 96 Chapter 5: Hardware Installation
- 97 Chapter 6: Using the WLAN Monitor
- 114 Appendix A: Troubleshooting
- 118 Appendix B: Wireless Security
- 61 Appendix C: Windows Help
- 122 Appendix D: Glossary
- 63 Appendix E: Specifications
- 65 Appendix F: Warranty Information
- 71 Appendix G: Regulatory Information
- 137 Appendix H: Contact Information