Configuration of Alarm and Security Jumper Procedures. Kobold PAS-...N, PAS
Add to my manuals
61 Pages
advertisement

PAS
5.5.2 Zero and Span Magnetic Buttons
To access push buttons please remove top name plate to expose the magnetic style push buttons labelled zero/ span. To disable please unscrew and remove these push buttons.
5.6 Configuration of Alarm and Security Jumper Procedures
To change Jumper/ DIP switch position in field:
(1) If transmitter is already wired and installed, cut off power.
(2) Open the housing front side covers.
Warning: In hazardous areas DO NOT open the covers of
Transmitter when power is energized as this can create a potential dangerous situation. Always kill power and de-energize the transmitter prior to opening front OR back covers in a hazardous location.
(3) Adjust required jumper/ DIP position as detailed in section 5.4 & 5.5 above.
(4) Close the housing covers. You must fully engage all cover threads to ensure compliance to explosion proof requirements
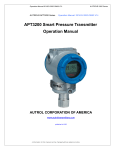
5.7 Configuration of Zero and Span Procedures with Buttons
There are ZERO and SPAN Buttons to be seen when the nameplate is opened
(Figure 5-4). You may reconfigure the function settings of ZERO, SPAN, ZERO
TRIM, ZERO ADJ, Units, Range, Damping, LCD and Decimal place, using
ZERO / SPAN buttons. page 22
[Figure 5-4 Transmitter Zero/Span configuration Buttons]
PAS K16/0522
PAS
(a) Unscrew both name plate screws on upper part of transmitter.
(b) Flip the name plate to access Zero and Span Buttons. (Figure 5-4)
Caution: Do not fully unscrew all screws in order not to lose them.
5.7.1 Advance Configuration via Push Buttons
The advanced “smart” functions which can be initiated using ZERO / SPAN
Buttons are shown below. This includes re-ranging of transmitters (Set URV/LRV) without an external pressure source.
To access advanced configuration and enter programming menu press both
(Zero + Span) buttons simultaneously for 3 seconds. When display reads
“MENU” release both push buttons immediately. This will put user into top of main programming menu indicated by message “1-TRIM” on display. To navigate through Main Menus and/ or Sub-Menus:
(1) Use (Zero) button to scroll down a menu (or sub-menu if active).
Example: Press (approx. 3 sec.) / Release (Zero) to scroll down from Main
Menu 1-Trim> 2-Setup > 3-LCD>1-Trim > 2-Setup etc. Or from an active submenu press/ release (Zero) to scroll down within a sub menu Example 21-
Units> 22-URL > 23-LRL > 24-Damping > 21-Units > 22-URL etc.
(2) Use (Span) button to enter into a specific Sub Menu or data input function.
Example: Pressing (approx. 3 sec.) (Span) button from Main Menu <1-TRIM> will put user into Sub menu “11 ZERO TRIM”. Releasing and pressing (Span) button again will initiate Zero Trim configuration or releasing and pressing
(Zero) button instead will increment user down to submenu “12 Z- ADJ”
(3) Within an active sub-menu use of (Span) button also acts as an <enter> key to allow user to save changes and exit programming mode.
(4) For moving back to previous menu press (Zero + Span) button together.
During numeric value entry mode use (Zero + Span) button together to save numeric data inputted and exit from programming menu. See 5.7.3.3 below
Caution:
- After 30 seconds inactivity the automatic time out feature will default user back to normal measurement mode with a “BT-Err” message on display.
- Please refer to Appendix 1 for LCD display messages and the button errors.
PAS K16/0522 page 23
PAS
5.7.2 Basic function of each or both button
Grey colour parts in the following menu tree 5.7.3
Function in section
Zero
Sets the current process value for Lower
Range Value (4 mA)
Span
Zero Trim
Zero Adjustment
Sets the current process value for Upper
Range Value (20 mA)
To modify exact “zero shift” to compensate for the mounting position allows user to add a pre-defined offset
(other than zero) to measured PV
To modify units as user desires Change Unit
Change Upper Range
Value
Change Lower Range
Value
Damping Second
Change LCD Mode
Decimal Place
To modify upper range value as user desires
To modify lower range value as user desires
Modifies damping setting based on the required response time, signal stability, and other requirements of the loop dynamics of your system
To modify LCD Mode as user desires
To modify decimal place as user desires
5.7.3
NORMAL zero
Menu Tree of ZERO/ SPAN Button Functions
Zero zero Zero span zero+span
Span
Menu span
1 Trim
Span span 11 Z-TRIM span Zero Trim
Remark
12 Z-ADJ span Zero Adjustment
2 Setup span 21 UNIT span Change Unit
22 U-RNG span Change Upper Range Value page 24
23 L-RNG span Change Lower Range Value
24 DAMP span Damping Second
3 LCD span 31 LCD-MD span Change LCD Mode
32 DEC-PL span Decimal Place
PAS K16/0522
PAS
5.7.3.1 Zero Configuration
Sets the current process value for Lower Range Value (4 mA).
Apply zero value pressure for 10 seconds and press ZERO button over 3 seconds. The LCD should display “ZERO”. After checking this message, remove finger from the button.
After 1 second, push the Zero button for 3 seconds. The LCD should display “-
ZR-“. This message means that the Zero configuration is completed and saved.
If Zero Configuration was incorrectly performed the LCD will display error code
“ZR-ERR” indicating failure and possible LRV setting out of sensor range capabilities. Try repeating the Zero configuration steps.
5.7.3.2 Span Configuration
Sets the current process value for Upper Range Value (20 mA).
Apply the desired pressure for 10 seconds and press SPAN button over 3 seconds. The LCD should display “SPAN”. After checking this message, remove finger from the button.
After 1 second, push the Span button for 3 seconds. The LCD should display “-
SP-“. This message means that the Span configuration is completed and saved.
If the Span configuration was incorrectly performed the LCD will display error code “SP-ERR” indicating failure and possible URV setting out of sensor range capabilities. Try repeating the Span configuration steps.
5.7.3.3 STEPS TO INPUT NUMERIC DATA VALUE:
Specific functions that need users to input a numerical value are found in following sub-menus:
12 Zero Adjustment,
22 Change Upper Range Value,
23 Change Lower Range Value,
24 Damping Second
First time users should familiarize themselves with numeric value input sequence prior to accessing above sub menus. Due to limited flexibility with only 2 push buttons available for configuration, it is not possible to directly input numeric values within these sub-menus. Instead, the correct sequence requires user to first set an increment (10x) rate e.g. 0.01, 0.1, 1.0, 10. 100, 1000 etc and then proceed with changing numeric value by the set rate increment.
For example, to input a numeric value as “3810” from existing displayed value of
“0000”:
->First Set increment rate as “1000”
->Increase display “0000” value 3 times in steps of 1000 till it reads “3000”
->Then set increment rate again as “100”
->Increase 8 times in steps of 100 till display reads “3800”
->Set increment rate again as 10
->Increase 1 time for a step change of 10 till display reads 3810.
PAS K16/0522 page 25
PAS
This section outlines the push button sequence for facilitating direct numeric value input from following sub-menus:
“12 Zero Adjustment”, “22 Change Upper Range Value”,
“23 Change Lower Range Value” and “24 Damping”.
When activating these sub-menus (by pushing down & releasing (span) button from within its active menu) the display will automatically prompt for “SEL INC” message.
From here: a) To select an increment rate push down on (Zero) button when “SEL INC”
Message is displayed on LCD sub-menu. Release (Zero) button when display value changes. Each subsequent (Zero) push-release key stroke will shift display decimal point to left. Example when display shows “SEL INC” 1000.
Subsequently for every push release keystroke of (Zero) button the display will cycle from >100>10>1>0.1>0.01>100>10 etc b) Once desired “SEL INC” (0.1, 1, 10, 100 etc) increment rate is set, push the
(Span) button to accept and enable set numeric “VALUE” mode.
Note: When executing (Span) button from “SEL INC” menu the
LCD display will typically show the last saved numerical value along with a “VALUE” message on second line indicating that user can now initiate changes by incrementing or decrementing numeric value. c) From within “VALUE” menu pushing down on either (Zero) or (Span) button
(not both) will allow the numeric value to increment (Zero) or decrement
(Span) by the “SEL INC” value selected by user in the previous step (b). d) After desired numeric value is displayed, push down on (Zero + Span) buttons together to accept new data inputted and this will bring user back to <SEL
INC> menu. Step (a) screen above. e) Repeat steps (a) through (c) detailed above until the final numeric value required is displayed in “VALUE” Menu. f) To store final numeric value to EEPROM push (Zero + Span) button twice to save and exit.
Note pressing Zero + Span once from “VALUE” menu will bring user back to “SEL INC” menu step (a). However pressing (Zero +
Span) buttons together second time (from “SEL INC” menu) and releasing these buttons, when screen shows “INC OK” message, will save the last numeric value inputted and brings the user back to Measurement Mode. g) If the programming sequence is successful, the display will read –DONE- else
“BT-ERR” to indicate failure. If display shows “RANGOVR” it indicates numerical value inputted is out of specs. page 26 PAS K16/0522
PAS
5.7.4 Push Button sequence for each Programming Sub-Menu
5.7.4.1 ZERO TRIM (Sub Menu 11)
Enter programming menu by pushing both (ZERO+SPAN) buttons together for 3 seconds. Release buttons when LCD displays MENU and display will automatically change to “1 TRIM” confirming access into programming menu.
Access “Zero Trim” Function by pressing the SPAN button until “11 Z-TRIM” message appears.
To save the settings, press SPAN button again until “-TR-“ message appears.
Important Note: make sure process input to transmitter is at true zero else this may create an incorrect Zero Offset. If a wrong zero is suspected please execute Zero Trim again ensuring the proper steps & correct Zero PV input is applied to transmitter.
5.7.4.2 ZERO ADJUSTMENT (Sub Menu 12)
Example used to show changing the PV value as 14
Enter programming menu by pushing both (ZERO + SPAN) buttons together for
3 seconds. Release buttons when LCD displays MENU and display will automatically change to “1 TRIM” confirming access into programming menu.
Access Zero Trim Function by pressing the SPAN button until “11 Z-TRIM” message appears.
Press ZERO button until the “12 Z-ADJ” message appears.
Press SPAN button to access the “Zero Adjustment” function.
When the “SEL INC” message appears, press ZERO button repetitively until
LCD value changes to 10.0. Select it as increment rate by pressing SPAN button.
When “VALUE” message appears on display, increment forward (Zero) or decrement backward (Span) to set the LCD value to “10.0”. You will note the
LCD display will increment or decrement by factor of 10 which is the “SEL INC” value selected in previous menu. Once desired base value of “10” is displayed push (Zero + Span) button to accept new value and “SEL INC” message appears upon which release buttons.
From menu where “SEL INC” message appears again, change the LCD value to
1.0 by pushing (Zero) button once and then push (Span) button to enter input
“VALUE” menu.
Here push (Zero) or (Span) to increment or decrement by SEL INC (1) until display reads “14” . Push (Zero + Span) button after LCD value is changed to
14.0 and release both buttons when display reads “SEL INC”.
To save the numeric value of 14 set from previous steps push ZERO + SPAN buttons until the “IN_OK” message appears.
Release ZERO + SPAN buttons. Message “ZA” confirms that Zero Adjustment is finished.
If display shows “BT-ERR” instead of –ZA- please repeat all steps once again.
If display shows “ADJ-U” or “ADJ-L” the inputted numerical value is out of specs for zero adjustment range for the supplied range codes.
PAS K16/0522 page 27
PAS
5.7.4.3 CHANGE UNITS (Sub-Menu 21)
Enter programming menu by pushing both (ZERO+SPAN) buttons together for 3 seconds. Release buttons when LCD displays MENU and display will automatically change to “1 TRIM” confirming access into programming menu.
Move to the next menu by pressing ZERO button until the “2 SETUP” message appears.
Press SPAN button to access 21 UNIT, press SPAN button to access function of “Change Unit”. To execute this function push SPAN button. Release button when display changes to 211 (xxx) where “ xxx “ are the last units (e.g. bar, kpa,
“H2O etc) saved previously.
Press ZERO button repetitively until the desired unit is displayed on the bottom of the LCD. Save and exit by pressing (Span) button.
5.7.4.4 CHANGE Upper Range Value (Sub-Menu 22)
Enter programming menu by pushing both (ZERO + SPAN) buttons together for
3 seconds. Release buttons when LCD displays MENU and display will automatically change to “1 TRIM” confirming access into programming menu.
Move to the next menu by pressing ZERO button until the “2 SETUP” message appears.
Press SPAN button until the “21 Unit” message appears.
Press ZERO button until the 22 U-RNG message appears.
Press SPAN button to access function “Change Upper Range Value”.
Follow Set numeric value procedure explained under section 5.7.3.3 to input desired URV numeric value.
5.7.4.5 CHANGE Lower Range Value (Sub-Menu 23)
Enter programming menu by pushing both (ZERO + SPAN) buttons together for
3 seconds. Release buttons when LCD displays MENU and display will automatically change to “1 TRIM” confirming access into programming menu.
Move to the next menu by pressing the Zero button until the “2 SETUP” message appears.
Press SPAN button until the “21 Unit” message appears.
Press ZERO button until the “23 L-RNG” message appears.
Press SPAN button to access function “Change Lower Range Value”.
Follow Set numeric value procedure explained under section 5.7.3.3 to input desired LRV numeric value.
Note: When setting URV/ LRV numeric data please ensure values being inputted fall within the allowed minimum/maximum specifications published for the installed sensor range code.
Only if display shows –DONE- will the transmitter update its stored configuration & accept the new values. If out of limits the transmitter will reject values entered and default to previous saved values after displaying a “RNGOVR” error message.
5.7.4.6 CHANGE Damping Value (Sub-Menu 24)
Enter programming menu by pushing both (ZERO + SPAN) button together for 3 seconds. Release buttons when LCD displays Menu and display will automatically change to “1 TRIM” confirming access into programming menu. page 28 PAS K16/0522
PAS
Push (Zero) button when “1 TRIM” message appears on LCD. Release button when display changes to “2 SETUP”.
To move into sub directory push (Span) button when “2 SETUP” message appears on display. Release button when 21 UNIT message is displayed.
Push (Zero) button to move down to sub-menu 22. When display shows “22 U-
RNG” release button.
Push (Zero) button to move down to sub-menu 23. When display shows “23 L-
RNG” release button.
Push (Zero) button to move down to sub-menu 24. When display shows “24
DAMP” release button.
You are now in Change Damping sub menu. To execute this function push
(Span) button when “24-Damping” message appears on display. Release button when display changes to 241 (xxxx) when xxxx is last configured damping value saved.
Follow Set numeric value procedure explained under section 5.7.3.3 to input desired URV numeric value.
5.7.4.7 CHANGE LCD Mode (Cyclic or Fixed Display) (Menu 31)
Enter programming menu by pushing both (ZERO + SPAN) button together for 3 seconds. Release buttons when LCD displays Menu and display will automatically change to “1 TRIM” confirming access into programming menu.
Move to the next menu by pressing ZERO button until the “2 SETUP” message appears.
Move to the next menu by pressing ZERO button until the “3 LCD” message appears
Press SPAN button until “31 LCD-MD” message appears. Press SPAN button again to access function “LCD Multi-display”.
Press ZERO button repetitively until the desired display form is displayed on the bottom of the LCD (see table below for different options).
Message on LCD
Definition Description Remark
NOR_RO Normal Rotation Mode
Indicating the value with PV, %, mA units in rotation on LCD
NOR_PV Normal PV Mode Indicating measured PV value on LCD
NOR_% Normal Percent Mode
NOR_mA
ENG_RO
Normal mA Mode
Engineering Rotation
Mode
ENG_PV Engineering PV Mode
Indicating measured PV value in percentage of Cal. Range on LCD
Indicating 4 ~ 20 mA value depending on measured PV value on LCD
Indicating the value with Engineering
PV, Engineering %, Engineering mA units in rotation on LCD
Indicating changed PV value with modified Engineering range
To save the settings, press SPAN button until “DONE” message appears.
Important Note: Always select only one of NOR (normal) modes.
Though it is possible to set ENG (engineering) modes also from this menu it is not recommended unless specific Engineering mode parameters such as engineering units, High/Low values,
PAS K16/0522 page 29
PAS
Linear/Sq-Root functions etc have been pre-configured either from factory (if specified on your order) or using an external HHC based configuration when available. With engineering mode enabled users have the added flexibility of configuring LCD display to emulate custom preferences separate from the transmitter current output functions. As such with engineering mode enabled users can program custom units, engineering units for flow, volume totals and level, scale different URV/LRV, linear mode etc independent of those explained in previous sections.
5.7.4.8 CHANGE LCD Resolution (Decimal Place) (Sub-Menu 32)
Enter programming menu by pushing both (ZERO + SPAN) button together for 3 seconds. Release buttons when LCD displays MENU and display will automatically change to “1 TRIM” confirming access into programming menu.
Move to the next menu by pressing ZERO button until the “2 SETUP” message appears.
Move to the next menu by pressing the Zero button until the “3 LCD” message appears.
Press the Span button until the “31 LCD-MD” message appears.
Push (Zero) button to move down one sub menu and release button when “32-
DEC-PL” message is displayed.
Press the Span button to access function “Decimal Place”.
All available resolution modes are listed in table below.
Push Zero button to cycle through display options i.e. AUTO, 5-0, 4-1, 3-2, 2-3 and 1-4 and once desired resolution is displayed push SPAN to save and exit.
Display Description
AUTO Auto ranging of display
5 - 0 No decimal place
4 - 1 Display one decimal place
Max. Value
99999
99999
9999.9
*3 - 2 Display two decimal place
2 - 3 Display three decimal place
1 - 4 Display four decimal place
999.99
99.999
9.9999
*3-2 format will be displayed for mA and % regardless of any other setting.
The set value will be applicable for displaying PV value and Engineering value.
The LCD will display “LCD_OV” and current setting unit when the pressure exceeds the limit of the setting value.
•
Please refer to Appendix 1 for LCD display message and the button errors. page 30 PAS K16/0522
advertisement
* Your assessment is very important for improving the workof artificial intelligence, which forms the content of this project
Related manuals
advertisement