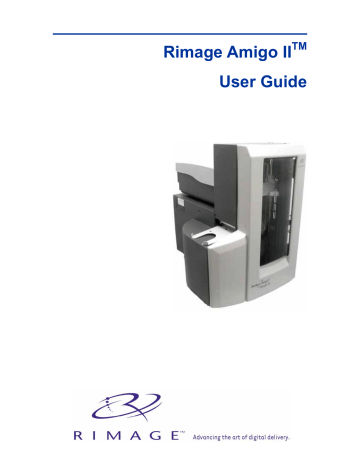
Maintain the Amigo II. Rimage Amigo II
Add to my manuals
19 Pages
Rimage Amigo II is a device designed to help you produce high-quality CDs and DVDs. With its advanced features, the Amigo II can help you streamline your workflow and create professional-looking discs that will impress your clients and customers.
Some of the key features of the Amigo II include:
- High-speed recording: The Amigo II can record CDs and DVDs at speeds of up to 52x, so you can quickly and easily create large batches of discs.
- Professional-quality printing: The Amigo II's built-in printer can produce vibrant, full-color labels that will make your discs stand out from the crowd.
advertisement

Rimage Amigo II
Maintain the Amigo II
Maintenance schedule
Task Frequency
Clean the Amigo II
Once a week. Remove dust from Amigo II and surrounding work area using a lint-free cloth.
Align the printer
Upon installation and again if the printed label is not centered on the disc. Refer to the procedures below for more information.
Note:
For information on cleaning and maintaining your printer, refer to your
Everest Printer
User Guide
or
PrismPlus! Printer User Guide
.
Everest Printer
To align your Everest Printer, refer to the following instructions.
Required tools:
•
T 25 Torx screwdriver
•
5/32” wrench
1. To power on the Amigo II, press the Amigo II
power switch
.
2. Wait until the unit completes the initialization.
#
Tip:
The Everest II Printer take s 1 to 2 minutes to complete the initialization.
3. Prepare the unit for alignment. a. Manually move the
lift arm
to the top of the Amigo II. b. To place a disc in the
lift arm
, press the
disc
up into the Lift Arm while pressing the
disc release button
. c. To open the print drawer, press the
printer button
. d. Close and re-open the
door
of the
Amigo II. This releases the lift arm so you can manually move it.
Gripper
Lift
Arm
Disc Release Button
Maintain the Amigo II
4. Align the printer. a. Slowly move the
lift arm
down until the disc just touches the print pad.
Printer
Button
Lift
Arm
Side to Side
Alignment
Pad
Holding
Pins
b. If the disc is not centered side to side on the print pad, align the printer side to side. the . the , not the print drawer, until the side edges of the disc and printer pad are aligned. the .
Side to Side
Screws
Front to Back Screw
c. Using either the T25 Torx driver or the
5/32” Allen wrench, turn the
front to back alignment screw
until there is a
1/16” (1.5mm) gap between the front edge of the disc and the raised edge of the disc retainer.
Disc
Retainer
Gap
the out of the way of the print drawer.
6. To close the print drawer, press the
printer button
.
7. To release the disc from the gripper, press the
disc release button
.
#
Tip:
Place your hand under the disc to catch it.
110654_F 7
Rimage Amigo II
PrismPlus printer
To align your Prism
Plus
printer, refer to the following instructions.
Required tools:
•
T 25 Torx screwdriver
•
5/32” wrench
1. To power on the Amigo II, press the
PrismPlus power switch
and the
Amigo II power switch
.
2. Wait for the unit to complete the initialization.
3. Prepare the unit for alignment. a. Manually move the
lift arm
to the top of the Amigo II. b. To place a disc in the lift arm, press the
disc
up into the
lift arm
while pressing the
disc release button
. c. To open the print drawer, press the
printer button
. d. Close and re-open the door. This releases the lift arm so you can manually move it.
Gripper
Disc Release Button
Lift
Arm
4. Align the printer. a. Slowly move the
lift arm
down until the disc just touches the
print pad
.
Printer
Button
Side to Side
Alignment
Lift
Arm
Pad
Holding Pins
b. If the disc is not centered side-to-side on the print pad, align the printer side to side. the . the , not the drawer, until the side edges of the disc and printer pad are aligned. the .
Maintain the Amigo II
Side to Side Screws
Front to Back
Alignment Screw
c. Using either the T25 Torx driver or the 5/32” Allen wrench, turn the
front-to-back alignment screw
until the disc hangs over the edge of the print pad by 0.010” –
0.015”. the to the top the unit.
6. To close the print drawer, press the
printer button
.
7. To release the disc from the gripper, press the
disc release button
.
#
Tip:
Place your hand under the disc to catch it. the .
110654_F 9
advertisement
* Your assessment is very important for improving the workof artificial intelligence, which forms the content of this project
Related manuals
advertisement
Table of contents
- 7 Introduction
- 7 Requirements
- 7 Software requirements
- 7 Operating System requirements
- 7 Media requirements
- 7 Ribbon requirements
- 7 Label design requirements
- 7 Networking ability
- 8 Identify the parts of the Amigo II
- 8 Front view
- 9 Rear view
- 10 Operate the Amigo II
- 10 Powering on the Amigo II
- 10 Pausing the system
- 10 Loading and unloading discs
- 11 Setting up your printing preferences
- 12 Maintain the Amigo II
- 12 Maintenance schedule
- 16 Learn more
- 16 Amigo II Specifications
- 17 Technical support and product updates
- 17 Safety information
- 18 Safety testing
- 19 Rimage Producer II Limited One Year Warranty