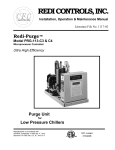
Carrier 19XB Positive Pressure Storage System Installation, Operating, and Maintenance Instructions
Reklama
Reklama
19XB
Positive Pressure Storage System
50/60 Hz
Installation, Operating, and Maintenance
Instructions
For Use With Positive Pressure Chillers
SAFETY CONSIDERATIONS
Positive pressure storage systems are designed to provide safe and reliable service when operated within design specifications. When operating this equipment, use good judgment and safety precautions to avoid damage to equipment and property or injury to personnel.
Be sure you understand and follow the procedures and safety precautions contained in this guide.
with soap and water. If any enters the eyes, IMMEDIATELY FLUSH
EYES with water and consult a physician.
NEVER APPLY an open flame or live steam to a refrigerant cylinder. Dangerous overpressure can result. When necessary to heat refrigerant, use only warm (110 F [43 C]) water.
DO NOT REUSE disposable (nonreturnable) cylinders or attempt to refill them. It is DANGEROUS AND ILLEGAL. When cylinder is emptied, evacuate remaining gas pressure, loosen the collar and unscrew and discard the valve stem. DO NOT
INCINERATE.
DO NOT VENT refrigerant relief valves within a building. Outlet from rupture disc or relief valve must be vented outdoors in accordance with the latest edition of ASHRAE 15 (American Society of Heating, Refrigeration, and Air Conditioning Engineers). The accumulation of refrigerant in an enclosed space can displace oxygen and cause asphyxiation.
CHECK THE REFRIGERANT TYPE before transferring refrigerant to the machine. The introduction of the wrong refrigerant can cause damage or malfunction to this machine.
Operation of this equipment with refrigerants other than those cited herein should comply with ASHRAE 15 (latest edition). Contact Carrier for further information on use of this machine with other refrigerants.
PROVIDE adequate ventilation in accordance with ASHRAE 15, especially for enclosed and low overhead spaces. Inhalation of high concentrations of vapor is harmful and may cause heart irregularities, unconsciousness, or death. Misuse can be fatal. Vapor is heavier than air and reduces the amount of oxygen available for breathing.
Product causes eye and skin irritation. Decomposition products are hazardous.
DO NOT ATTEMPT TO REMOVE fittings, covers, etc., while machine is under pressure or while machine is running. Be sure pressure is at 0 psig (0 kPa) before breaking any refrigerant connection.
DO NOT USE OXYGEN to purge lines or to pressurize a machine for any purpose. Oxygen gas reacts violently with oil, grease, and other common substances.
CAREFULLY INSPECT all relief devices, rupture discs, and other relief devices AT LEAST ONCE A YEAR. If machine operates in a corrosive atmosphere, inspect the devices at more frequent intervals.
NEVER EXCEED specified test pressures, VERIFY the allowable test pressure by checking the instruction literature and the design pressures on the equipment nameplate.
DO NOT USE air for leak testing. Use only tracer gases and dry nitrogen.
DO NOT ATTEMPT TO REPAIR OR RECONDITION any relief device when corrosion or build-up of foreign material (rust, dirt, scale, etc.) is found within the valve body or mechanism. Replace the device.
DO NOT install relief devices in series or backwards.
DO NOT VALVE OFF any safety device.
BE SURE that all pressure relief devices are properly installed and functioning before operating any machine.
USE CARE when working near or in line with a compressed spring.
Sudden release of the spring can cause it and objects in its path to act as projectiles.
DO NOT WELD OR FLAMECUT any refrigerant line or vessel until all refrigerant (liquid and vapor) has been removed from chiller.
Traces of vapor should be displaced with dry air or nitrogen and the work area should be well ventilated. Refrigerant in contact with
an open flame produces toxic gases.
DO NOT USE eyebolts or eyebolt holes to rig machine sections or the entire assembly.
DO NOT work on high-voltage equipment unless you are a qualified electrician.
DO NOT WORK ON electrical components, including control panels, switches, starters, or oil heater until you are sure ALL POWER
IS OFF and no residual voltage can leak from capacitors or solidstate components.
LOCK OPEN AND TAG electrical circuits during servicing. IF WORK
IS INTERRUPTED, confirm that all circuits are deenergized before resuming work.
DO NOT syphon refrigerant by mouth.
AVOID SPILLING liquid refrigerant on skin or getting it into the eyes. USE SAFETY GOGGLES. Wash any spills from the skin
DO NOT STEP on refrigerant lines. Broken lines can whip about and cause personal injury and damage to the machine.
DO NOT climb over a machine. Use platform, catwalk, or staging.
Follow safe practices when using ladders.
USE MECHANICAL EQUIPMENT (crane, hoist, etc.) to lift or move inspection covers or other heavy components. Even if components are light, use such equipment when there is a risk of slipping or losing your balance.
BE AWARE that certain automatic start arrangements CAN EN-
GAGE THE STARTER. Open the disconnect ahead of the starter in addition to shutting off the machine or pump.
USE only repair or replacement parts that meet the code requirements of the original equipment.
DOUBLE-CHECK that coupling nut wrenches, dial indicators, or other items have been removed before rotating any shafts.
DO NOT LOOSEN a packing gland nut before checking that the nut has a positive thread engagement.
PERIODICALLY INSPECT all valves, fittings, and piping for corrosion, rust, leaks, or damage.
DO NOT MIX REFRIGERANT from chillers that use different compressor oils. Compressor damage can result.
Manufacturer reserves the right to discontinue, or change at any time, specifications or designs without notice and without incurring obligations.
Book 2
Tab 5a
PC 211 Catalog No. 531-927 Printed in U.S.A.
Form 19XB-1SI Pg 1 6-96 Replaces: New
CONTENTS
Page
SAFETY CONSIDERATIONS
. . . . . . . . . . . . . . . . . . . 1
INTRODUCTION
. . . . . . . . . . . . . . . . . . . . . . . . . . . . . . 2
INSTALLATION
. . . . . . . . . . . . . . . . . . . . . . . . . . . . . 2-10
Complete Pre-Installation Checks
. . . . . . . . . . . . . 2
• IDENTIFY UNIT
• INSPECT SHIPMENT
Mount the Pumpout Unit
. . . . . . . . . . . . . . . . . . . . . 3
• MOUNTING ON THE CHILLER
• FLOOR MOUNTING
Rig the Storage Tank
. . . . . . . . . . . . . . . . . . . . . . . . . 3
Make Piping Connections
. . . . . . . . . . . . . . . . . . . . 7
• INSTALL VENT PIPING TO RELIEF DEVICES
Make Electrical Connections
. . . . . . . . . . . . . . . . . . 7
CONTROLS AND COMPONENTS
. . . . . . . . . . . . . . 11
Pumpout Unit
. . . . . . . . . . . . . . . . . . . . . . . . . . . . . . . . 11
• CONTROLS
• SAFETY CONTROL SETTINGS
• COMPRESSOR
• CONDENSER
• OIL SEPARATOR
• SUCTION AND DISCHARGE VALVES
Storage Tank
. . . . . . . . . . . . . . . . . . . . . . . . . . . . . . . . 11
• DRAIN VALVE
• DUAL RELIEF VALVES
• PRESSURE GAGE
• LEVEL GAGE
OPERATION
. . . . . . . . . . . . . . . . . . . . . . . . . . . . . . . 11-15
Overview
. . . . . . . . . . . . . . . . . . . . . . . . . . . . . . . . . . . 11
• REFRIGERANT TRANSFER
• TRANSFERRING LIQUID REFRIGERANT FROM
THE CHILLER COOLER TO THE CHILLER
CONDENSER OR PUMPOUT STORAGE TANK
• TRANSFERRING LIQUID REFRIGERANT FROM
THE CHILLER CONDENSER OR PUMPOUT
STORAGE TANK TO THE CHILLER COOLER
• DISTILLING THE REFRIGERANT
Pumpout and Refrigerant Transfer
Procedures
. . . . . . . . . . . . . . . . . . . . . . . . . . . . . . . 12
• OPERATING THE PUMPOUT UNIT
• TO READ REFRIGERANT PRESSURES
• POSITIVE PRESSURE CHILLERS WITH STORAGE
TANKS
• CHILLERS WITH ISOLATION VALVES
• DISTILLING THE REFRIGERANT
MAINTENANCE
. . . . . . . . . . . . . . . . . . . . . . . . . . . . 15,16
Pumpout Unit
. . . . . . . . . . . . . . . . . . . . . . . . . . . . . . . 15
• PUMPOUT COMPRESSOR OIL CHARGE
Storage Tank
. . . . . . . . . . . . . . . . . . . . . . . . . . . . . . . 16
Ordering Replacement Parts
. . . . . . . . . . . . . . . . . 16
TROUBLESHOOTING
. . . . . . . . . . . . . . . . . . . . . . . . 16
INTRODUCTION
The 19XB Positive Pressure Storage (PPS) System has been designed to help owners and operators of positive pressure chillers store refrigerants HCFC-22 and HFC-134a during service and repair work. The 19XB system conserves these refrigerants and prevents the release of excessive amounts of refrigerant into the atmosphere. The proper use of this equipment minimizes the loss of HFCs and HCFCs.
The 19XB PPS system shown in Fig. 1 consists of a pumpout unit mounted on a storage tank. The pumpout unit is offered as a free-standing unit that can be used with chillers that have an existing storage tank or with chillers that have isolation valves that permit built-in refrigerant storage.
The 19XB PPS systems are factory tested and certified to the American Society of Mechanical Engineers (ASME) pressure vessel code. The tanks are constructed of certified steel and are pressure rated at 300 psig (2068 kPa). The PPS storage tank is equipped with dual relief valves for proper venting per ASHRAE 15 (American Society of Heating Refrigeration, and Air Conditioning Engineers) guidelines. An automatic level switch is prewired to the control circuit to ensure proper storage levels.
The 19EA pumpout unit is a complete, hermetic, compact unit that consists of:
• a spring-mounted reciprocating compressor with a directdrive motor
• a water-cooled refrigerant condenser
• an oil separator
• suction and discharge valves to control refrigerant flow
• prewired safety and control devices.
When referencing refrigerant charges in this manual, the
HCFC-22 charge will be listed first and the HFC-134a value will follow in brackets.
INSTALLATION
Complete Pre-Installation Checks
IDENTIFY UNIT — Identify the assembly number
(Table 1) printed on the pumpout unit and storage tank nameplates. Check this information against the job requirements.
Fig. 1 shows the PPS system and its major components.
Refer to Tables 2 and 3 for physical data.
INSPECT SHIPMENT — Inspect unit for damage before removing unit from shipping conveyance. If unit appears damaged, it should be inspected by a shipping inspector before removal. File a claim with the shipping company if shipment is damaged or incomplete. The manufacturer is not responsible for damage incurred during transit.
Check all components. Notify the supplier immediately if any item is missing. To prevent loss or damage, leave all parts in their original package until they are needed.
2
Table 1 — Positive Pressure System Assembly Numbers
POSITIVE PRESSURE
SYSTEM ASSEMBLY
NUMBER
19XB04280205
19XB04280206
19XB04280207
19XB04280208
19XB04280213
19XB04280214
19XB04280215
19XB04280216
19XB04280601
19XB04280602
19XB04280603
19XB04280604
19XB04280605
19XB04280606
19XB04280607
19XB04280608
19XB04520205
19XB04520206
19XB04520207
19XB04520208
19XB04520213
19XB04520214
19XB04520215
19XB04520216
LEGEND
LRA — Locked Rotor Amps
RLA — Rated Load Amps
PUMPOUT UNIT
ASSEMBLY NO.
19EA42-748
19EA44-748
19EA46-748
19EA47-748
19EA48-748
19EA49-748
19EA51-748
19EA52-748
19EA42-748
19EA44-748
19EA46-748
19EA47-748
19EA48-658
19EA49-658
19EA51-658
19EA52-658
19EA42-748
19EA44-748
19EA46-748
19EA47-748
19EA48-748
19EA49-748
19EA51-748
19EA52-748
REFRIGERANT
R-22
R-22
R-22
R-22
R-134a
R-134a
R-134a
R-134a
R-22
R-22
R-22
R-22
R-134a
R-134a
R-134a
R-134a
R-22
R-22
R-22
R-22
R-134a
R-134a
R-134a
R-134a
COMPRESSOR MOTOR
(V-Ph-Hz)
208-3-60
230-3-60
400/460-3-50/60
575-3-60
208-3-60
230-3-60
400/460-3-50/60
575-3-60
208-3-60
230-3-60
400/460-3-50/60
575-3-60
208-3-60
230-3-60
400/460-3-50/60
575-3-60
208-3-60
230-3-60
400/460-3-50/60
575-3-60
208-3-60
230-3-60
400/460-3-50/60
575-3-60
MAXIMUM
RLA
13.2
11.5
5.8
4.6
13.2
11.5
5.8
4.6
13.2
11.5
5.8
4.6
13.2
11.5
5.8
4.6
13.2
11.5
5.8
4.6
13.2
11.5
5.8
4.6
LRA
28.8
23.0
63.5
57.5
28.8
23.0
63.5
57.5
63.5
57.5
28.8
23.0
63.5
57.5
28.8
23.0
63.5
57.5
28.8
23.0
63.5
57.5
28.8
23.0
NOTES:
1. All storage vessels are 300 psig (2068 kPa) designs per the ASME
(American Society of Mechanical Engineers) Boiler Pressure
Vessel Code, Section VIII Division 1.
2. All units above are shipped with a 15 psig (103 kPa) nitrogen charge.
3. Nominal horsepower for all pumpout units is 3.0.
STORAGE
TANK
28 cu ft
28 cu ft
28 cu ft
28 cu ft
28 cu ft
28 cu ft
28 cu ft
28 cu ft
None
None
None
None
None
None
None
None
52 cu ft
52 cu ft
52 cu ft
52 cu ft
52 cu ft
52 cu ft
52 cu ft
52 cu ft
Mount the Pumpout Unit —
The pumpout unit, if purchased separately, may be mounted directly on the chiller or it may be floor mounted.
MOUNTING ON THE CHILLER — See instructions provided with the chiller for mounting the pumpout unit. A typical chiller mount is shown in Fig. 2.
FLOOR MOUNTING — Select a ventilated and accessible area, free of traffic or other hazards. Remove and discard the
4 angle supports at the base of the pumpout unit and bolt the unit to the floor through the 4 7 ⁄
16 in. holes at the base of the pumpout unit. Special isolation is unnecessary. Contact surface and dimensions for the pumpout unit are given in
Fig. 3.
Rig the Storage Tank —
The complete 19XB system can be rigged as a single assembly. See the rigging instructions on the label attached to the assembly. Also refer to the rigging guide (Fig. 4), physical data in Tables 2 and 3, and contact surface and dimensions for the complete system in
Fig. 5. Lift the assembly only from the 4 points indicated in
the rigging guide. Each rigging cable must be capable of supporting the entire weight of the assembly.
Lifting the assembly from points other than those specified may result in serious damage to the assembly and personal injury. Rigging equipment and procedures must be adequate for assembly. See Tables 2 and 3 for weights.
NOTE: These weights are broken down into pumpout unit and storage tank weights. For the complete assembly weight, add all components together.
3
VENT VALVE
VALVES
VALVES
CONDENSER
WATER
CONNECTIONS
(FIELD PIPING)
REFRIGERANT
INLET VALVE
19EA PUMPOUT UNIT
CONTROL BOX
(WIRING BY
CONTRACTOR)
COMPRESSOR
19EA PUMPOUT UNITS
19EA CONTROL BOX (INTERIOR)
Fig. 1 — 19XB Positive Pressure Storage System
4
* 3 ⁄
8
-16 bolts × 1-in. lg; 4 required.
Fig. 2 — 19EA Pumpout Unit: Typical Chiller Mount
ELECTRICAL CONNECTION
OPTION LIST
TRADE SIZE
1 ⁄
2
(
3 ⁄
4
(
1
(
1 1 ⁄
4
(
QTY
1
1
1
1
LOCATION
TOP
BOTTOM
MIDDLE
MIDDLE
Fig. 3 — Pumpout Unit Contact Surfaces and Dimensions
5
NOTES:
1. Each chain must be capable of supporting the entire weight of the machine.
2. Minimum chain length:
28 ft
52 ft
3
3 tank — 10
8
-0
9 tank — 15
8
-6
9
3. Total weight equals empty weight from chart and charge weight given on label.
STORAGE
TANK SIZE
28 Ft
52 Ft
3
3
CENTER OF GRAVITY
APPROX. DIM. — ft-in. (mm)
A B
4- 5 1 ⁄
4
(1353)
6-10 1 ⁄
8
(2086)
1-7 7 ⁄
8
(505)
1-8 3 ⁄
4
(527)
EMPTY WEIGHT
LB (Kg)
2380
(1080)
3460
(1569)
Fig. 4 — Rigging Guide
Table 2 — Physical Data
19EA Pumpout Unit
Pumpout Unit Weight*
Pumpout Condenser Water Flow Rate
Pumpout Condenser Water Pressure Drop
Maximum Entering Condenser Water Temperature
Maximum Leaving Condenser Water Temperature
Condenser Relief Valve (Fusible Plug)
Condenser Pressure Rating
Refrigerant Side
Waterside
Compressor Rating 1750 rpm (29 r/s) Reciprocating
Valves (4-Valve Manifold, Copper with
Brass Turn Knob Valves) lb (kg) gpm (L/s) psig (kPa)
F (C)
F (C) psig (kPa) psig (kPa) psig (kPa) cfm (L/s) in. OD
*The pumpout unit weight includes the compressor/condenser, control box, and the oil separator.
NOTES:
1. The motor is hermetic with thermal protection.
2. The control box is mounted and wired with a fuse on/off switch according to NEMA 1 (National
Electrical Manufacturing Association).
3. The starter contactor is located in the control box. The overloads on the motor are wired and the disconnect switch is supplied by the customer.
4. The condenser tube is copper.
ENGLISH
210
5 to 7
6 to 10.7
85
100
385
385
150
8.7
1 ⁄
2
(SI)
(95)
(.32 to .44)
(41.4 to 73.8)
(29)
(37)
(2655)
(2655)
(1034)
(.25)
1 ⁄
2
6
SIZE CODE
0428
0452
Table 3 — 19XB Storage Tank Rated Dry Weight and Refrigerant Capacity
English
TANK OD
(in.)
24.00
27.25
DRY WEIGHT*
(lb)
2380
3460
R-22
1842
MAXIMUM REFRIGERANT CAPACITY (lb)
ASHRAE/ANSI 15 UL 1963
3527
R-134a
1860
3563
R-22
1704
3264
R-134a
1716
3286
SI
SIZE CODE
0428
0452
TANK OD
(mm)
610
592
DRY WEIGHT*
(kg)
1080
1569
LEGEND
ANSI
— American National Standards Institute
ASHRAE — American Society of Heating, Refrigeration, and Air Conditioning Engineers
UL
— Underwriters’ Laboratories
*The above dry weight includes the pumpout unit weight of 210 lbs (95 kg).
MAXIMUM REFRIGERANT CAPACITY (kg)
ASHRAE/ANSI 15
R-22 R-134a R-22
UL 1963
R-134a
836
1600
844
1616
773
1481
778
1491
Make Piping Connections —
Figure 6 represents typical pumpout unit/chiller piping connections. Standard connections for 1 ⁄
2
-in. OD copper tubing are provided. Install the field-supplied FPT tee with pipe plug in the piping as shown in Fig. 6. This tee is used for refrigerant charging.
NOTE: If any field piping runs exceed 50 ft in length, use
7 ⁄
8
-in. OD copper tubing to minimize pressure drop.
Pumpout unit water piping connections are shown in
Fig. 6. Both connections are 1 ⁄
2
-in. NPT (female). A shutoff valve should be installed in the water line. Provide a means for blowing water from the condenser coil at winter shutdown to prevent freeze-up damage. Refer to the Job Data for water piping particulars.
INSTALL VENT PIPING TO RELIEF DEVICES — The pumpout storage tank is factory-equipped with relief devices. Refer to Fig. 5 and Table 2 for size and location of the relief devices. Vent the relief devices to the outdoors in accordance with ANSI/ASHRAE 15 Safety Code (latest edition) for Mechanical Refrigeration and all other applicable codes. Relief devices are set to relieve at 300 psig
(2068 kPa).
Refrigerant discharged into confined spaces can displace oxygen and cause asphyxiation.
1. If relief devices are manifolded, the cross-sectional area of the relief pipe must at least equal the sum of the areas required for individual relief pipes.
2. Provide a pipe plug near outlet side of each relief device for leak testing. Provide pipe fittings that allow vent piping to be disconnected periodically for inspection of valve mechanism.
3. Piping to relief devices must not apply stress to the device. Adequately support piping. A length of flexible tubing or piping near the device is essential on springisolated machines.
4. Cover the outdoor vent with a rain cap and place a condensation drain at the low point in the vent piping to prevent water build-up on the atmospheric side of the relief device.
Make Electrical Connections —
See nameplate on compressor of pumpout unit and Table 1 for motor electrical data. Wire unit according to the diagram inside the control box.
Fig. 7 is the wiring schematic for a complete system that includes the 19XB storage tank and the pumpout unit.
Fig. 8 is the wiring schematic for the pumpout unit. Use this schematic for installations that do not include an auxiliary pumpout storage tank.
NOTE: Use copper conductors only.
7
DIMENSIONS
ENGLISH (ft-in.)
TANK
SIZE
0428
A
10- 5
B
9-10
C
4-9
D E F G
2-4
3
⁄
4
1-2
3
⁄
8
3-1
3
⁄
16
4-11
H
3-8
1
⁄
8
3- 8
0452
14-11 1 ⁄
4
14- 4 1 ⁄
2
5-0 7 ⁄
8
2-8 1 ⁄
2
1-4 1 ⁄
4
3-4 7 ⁄
16
7- 2 1 ⁄
4
4-0
J
3-11 7 ⁄
8
K
2-9
3-1
7
5
⁄
⁄
16
16
L
3-2
3-5 7 ⁄
8
M
0-3
0-3
1
3
⁄
⁄
2
8
N
4-8
7-1
3
1
⁄
⁄
4
2
P
1-7
1-8
7
3
⁄
⁄
8
4
R
1-7
1-7
5
9
⁄
⁄
16
16
S
3-7
3-8
3
⁄
4
T
5-0
5-0
1
1 ⁄
⁄
4
2
TANK
SIZE
0428
0452
SI (mm)
A B C D E F G H J K L M N P R S T
3175 2997 1448 730 365 945 1499 1121 1118 849 965 89 1442 505 491 1111 1530
4553 4382 1546 826 413 1027 2191 1219 1216 948 1064 86 2172 528 497 1118 1537
NOTES:
1.
Denotes center of gravity.
2. Dimensions in ( ) are in millimeters.
3. The weights and center of gravity values given are for an empty storage tank.
4. For additional information on the pumpout unit, see certified drawings.
5. The available conduit knockout sizes are:
TRADE
SIZE
1 ⁄
2
(
3 ⁄
4
(
1
(
1 1 ⁄
4
(
QTY
1
1
1
1
LOCATION
top bottom middle middle
Fig. 5 — PPS Contact Surface and Dimensions
8
CHILLERS WITHOUT ISOLATION VALVES CHILLERS WITH ISOLATION VALVES
(WITH OR WITHOUT PUMPOUT STORAGE TANKS)
GENERAL PIPING CONNECTION SIZES
CONNECTION
Refrigerant Transfer Connections
Condenser Water Cooling Connectors
1
1
SIZE (in.)
⁄
2
ODS (female)
⁄
2
NPT (female)
Safety Relief Head Pumpdown Condenser
3 ⁄
8
Flare (male)
ODS — Outside Diameter, Sweat
NOTES:
1. The field-supplied tubing is to be 1 ⁄
2
-in. OD tubing (min.) and must be arranged and supported to avoid stresses on the equipment, transmission of vibrations, and interference with routine access during the reading, adjusting, and servicing of the equipment. If the distance from the chiller to the pumpout unit is over 50 ft, then
7 ⁄
8
-in. OD tubing (min.) must be used. Provisions should be made for adjustment in each plane of the tubing and for both periodic and major servicing of the equipment. Special care must be taken so that the safety head does not experience tubing strain. Vent the safety head per ASHRAE 15 (American Society of Heating,
Refrigeration, and Air Conditioning Engineers), latest revision.
2. The tubing and valve from the storage tank to the pumpout compressor is factory supplied when the unit is factory mounted.
LEGEND
Factory-Supplied Tubing
Field-Supplied Tubing
Field-Supplied Tubing (Multiple Chillers)
Service Valve (Factory Supplied)
Service Valve (Field Supplied)
Fig. 6 — Typical Pumpout Unit/Chiller Connection Schematic
9
STORAGE
TANK SIZE
28
52
Table 4 — Relief Devices
RELIEF VALVE
OUTLET SIZE
1 in. NPT
Female Connector
1 in. NPT
Female Connector
QUANTITY
2
2
REQUIRED FACTOR lb air min
Kg air min
31.4
14.2
52.3
23.7
Fig. 7 — 19XB Pumpout System Wiring Schematic
LEGEND
Ground
Field Wiring
Factory Wiring
Contactor Term.
Overload Term.
Pumpdown Term.
Pumpdown Comp’r.
Term.
LEGEND
C
Fu
HP
L
— Contactor
— Fuse, 3 Amps
— High-Pressure Cutout
— Compressor Motor Voltage Line (3-phase)
LL
OL
— Low-Line Control Voltage (single-phase)
— Compressor Overload
T’stat — Internal Thermostat
Compressor Terminal
Contactor Terminal
Overload Terminal
Pumpout Unit Terminal
*Bimetal thermal protector imbedded in motor winding.
Fig. 8 — Pumpout Unit Wiring Schematic
10
CONTROLS AND COMPONENTS
Figure 1 shows the major components of the PPS system.
Pumpout Unit —
The pumpout unit consists of a springmounted direct motor-driven reciprocating compressor, a watercooled refrigerant condenser, an oil separator, suction and discharge valves to control refrigerant flow, and prewired safety and control devices. The pumpout unit comes equipped with a 4-way transfer valve manifold to interconnect both liquid and vapor transfer and to pressurize the chiller during transfer of refrigerant from chiller to storage tank.
CONTROLS — The pumpout unit has the following controls: an on/off switch, a 3-amp fuse, compressor overloads, an internal thermostat, a compressor contactor, and a refrigerant high pressure cutout.
SAFETY CONTROL SETTINGS — The pumpout unit highpressure switch (Fig. 1) is set to open at the settings listed in Table 5. The switch setting is checked by operating the pumpout condenser and slowly throttling the pumpout condenser water.
Table 5 — High Condition Pressure Switch Settings
English
REFRIGERANT
R-134a
R-22
REFRIGERANT
R-134a
R-22
HIGH-PRESSURE SWITCH
Cutout CutIn
161 ± 5 psig
220 ± 5 psig
+ 0
130 − 5 psig
+ 0
185 − 5 psig
SI
HIGH-PRESSURE SWITCH
Cutout
1110 ± 34 kPa
1517 ± 34 kPa
Cut-In
+ 0
896 − 34 kPa
+ 0
1276 − 34 kPa
NOTES:
1. R-22 units use high-pressure cutout switch HK01UA181.
2. R-134a units use high-pressure cutout switch HK01UA187.
COMPRESSOR — The pumpout compressor assembly has a positive displacement of 1750 rpm (29 r/s) and 8.7 cfm
(0.004 m
3
/s). It comes equipped with thermal protection on the motor and an in-line oil separator.
CONDENSER — The water-cooled condenser is fully ASME constructed. During transfer, it condenses refrigerant vapor to liquid. The condenser transfer tank safety relief valves comply with ASHRAE 15 standards.
OIL SEPARATOR — The pumpout unit includes an in-line oil separator to remove oil that becomes mixed with refrigerant and returns the oil to the compressor.
SUCTION AND DISCHARGE VALVES — The pumpout unit comes with a 4-way transfer valve manifold to interconnect both liquid and vapor transfer and to pressurize the chiller during transfer of refrigerant from chiller to storage tank or from one chiller vessel to another.
Storage Tank —
The storage tank is rated for positive pressure refrigerants under ASME Section VIII pressure vessel codes with a minimum of 300 psig (2068 kPa) rating.
The tank components include:
DRAIN VALVE — Located at its lowest point of drain with a minimum of 1 in. NPT.
DUAL RELIEF VALVES — Two relief valves and a 3-way shut-off valve.
PRESSURE GAGE — A 30 in.-0-400 psig (101-0-2760 kPa) compound pressure gage.
LEVEL GAGE — Liquid level gage (magnetically coupled dial type) with electronic shut-off at 90% liquid capacity.
11
During transfer of refrigerant into and out of the pumpout storage tank, carefully monitor the storage tank level gage. Do not fill the tank more than 90% of capacity to allow for refrigerant expansion. Overfilling may result in damage to the tank and personal injury. For maximum refrigerant capacity, refer to Table 2.
OPERATION
Overview —
Transferring refrigerant from one vessel to another is accomplished by using either gravity or pressure differential. A difference in elevation between 2 vessels results in a gravity flow of liquid; a difference in pressure forces the liquid from one vessel to the other. The latter method requires lowering the pressure in one vessel. If there is liquid in that vessel, its temperature must be lowered, and the pressure in the other vessel must be simultaneously increased.
Under most circumstances, creating the pressure differential is not a difficult process. Some applications, such as ice storage, outdoor installations, or installations with high temperature differentials between the storage tank and the chiller may require additional consideration. In some instances, it may be necessary to add auxiliary heat to one of the vessels or to insulate the storage tank at job sites where high ambient temperature or sun load make it difficult to reduce the temperature and pressure in the tank. Outdoor installations must have a roof or cover over the storage tank to ensure that the pressure in the tank does not exceed the chiller relief pressure setting.
REFRIGERANT TRANSFER — When refrigerant is being evacuated from the chiller cooler or condenser vessels, any liquid refrigerant left in a vessel will flash off, lowering the temperature in that vessel enough to freeze the fluid (usually water) flowing through the cooler or condenser tubes. This event, called tube freeze-up, can cause extensive damage to the chiller; therefore, all liquid refrigerant must be removed from a vessel before evacuation of refrigerant vapor is started.
If all the liquid cannot be removed, then the cooler water and condenser water pumps must be operated throughout the process of evacuating refrigerant vapor to keep fluid moving through the cooler and condenser tubes.
TRANSFERRING LIQUID REFRIGERANT FROM THE
CHILLER COOLER TO THE CHILLER CONDENSER OR
PUMPOUT STORAGE TANK — Chiller and pumpout unit valves are set to permit the pumpout compressor to discharge refrigerant vapor into the cooler vessel, lowering pressure in the condenser vessel/storage tank. The pressure differential forces liquid from the cooler vessel into the condenser vessel/storage tank. After all the liquid is transferred, the refrigerant vapor remaining in the cooler vessel can be drawn off by reducing pressure in the chiller and discharging the vapor through the pumpout unit condenser into the condenser vessel/storage tank.
TRANSFERRING LIQUID REFRIGERANT FROM THE
CHILLER CONDENSER OR PUMPOUT STORAGE TANK
TO THE CHILLER COOLER — Chiller and pumpout unit valves are set to increase pressure in the chiller condenser vessel/storage tank and to reduce pressure in the cooler vessel. Pressure in the cooler vessel is lowered to correspond to a saturated refrigerant liquid temperature 2 F (1.1 C) above the freezing temperature of the liquid circulating through the chiller cooler/condenser tubes (34 F [1.1 C] for water). The valves are set so that the pressure in the cooler vessel is lower than that of the condenser vessel/storage tank, forcing the liquid into the cooler vessel.
NOTE: During this operation, maintain water circulation through the chiller cooler and condenser vessels to prevent tube freeze-up.
DISTILLING THE REFRIGERANT — Refrigerant vapor is transferred from the chiller cooler vessel or pumpout storage tank through the pumpout condenser, condensed to a liquid, and pumped to the chiller condenser vessel. During this operation, water circulation must be maintained in the pumpout condenser. Refrigerant impurities left in the chiller cooler vessel or storage tank are then drained off. This operation can take from 4 to 14 hours, depending on the type and amount of refrigerant being distilled.
The Pumpout and Refrigerant Transfer Procedures section gives step-by-step instructions on performing these operations.
Pumpout and Refrigerant Transfer Procedures
—
Three possibilities are available:
1. If there are no isolation valves on the chiller, a complete pumpout system with a pumpout storage tank and pumpout unit is needed.
2. Whether or not isolation valves are available on the chiller, the refrigerant can be pumped to and isolated in a pumpout storage tank by using the pumpout unit.
3. If isolation valves are available on the chiller, the refrigerant can be pumped to either the cooler vessel or the condenser vessel using the pumpout unit.
The following procedures describe how to transfer refrigerant from one vessel to another and how to evacuate the chiller.
Do not mix refrigerants from chillers that use different compressor oils. Compressor damage can result. For example, the compressor oil in a 23XL chiller that uses
HCFC-22 refrigerant can cause severe lubrication problems in a 19XL chiller that uses HCFC-22 refrigerant.
OPERATING THE PUMPOUT UNIT
1. Be sure that the suction and the discharge service valves on the pumpout compressor (Fig. 9) are open (backseated) during operation. Rotate the valve stem fully counterclockwise to open. Frontseating the valve closes the refrigerant line and opens the gage port to compressor pressure.
2. Make sure that the pumpout compressor holddown bolts
(Fig. 2) have been loosened to allow free spring travel.
Transfer, addition, or removal of refrigerant in springisolated chillers may place severe stress on external piping if springs on the chiller have not been blocked in both up and down directions.
3. Open the refrigerant inlet valve (Fig. 9) on the pumpout compressor.
4. Oil should be visible in the pumpout compressor sight glass under all operating conditions and during shutdown. If oil is low, add oil as described in the Maintenance section.
TO READ REFRIGERANT PRESSURES — During pumpout or leak testing:
1. Refer to the display on the chiller control center to determine refrigerant-side pressures and low (soft) vacuum.
Use a quality vacuum indicator or manometer to measure evacuation and dehydration and to ensure the desired range and accuracy.
12
OIL RETURN
LINE
CONNECTION
VENT VALVE 8
PUMPOUT
CONTROL BOX
(WIRING BY
CONTRACTOR)
CONDENSER
WATER
CONNECTIONS
REFRIGERANT
INLET VALVE
Fig. 9 — Pumpout Unit
2. Attach a 30 in.-0-400 psi (101-0-2760 kPa) gage to the storage tank to determine its pressure.
POSITIVE PRESSURE CHILLERS WITH STORAGE
TANKS — In the Valve/Condition tables that accompany these instructions, the letter
9C9 indicates a closed valve.
Figures 9 and 10 show the locations of the valves.
Always run chiller cooler and condenser water pumps and always charge or transfer refrigerant as a gas when chiller vessel pressure is less than 60 psig (414 kPa)
[30 psig (207 kPa)]. Below these pressures, liquid refrigerant flashes into gas, resulting in extremely low temperatures in the cooler/condenser tubes and possibly causing tube freeze-up.
Transfer Refrigerant from Pumpout Storage Tank to Chiller:
During transfer of refrigerant into and out of the 19XB storage tank, carefully monitor the storage tank level gage.
Do not fill the tank more than 90% of capacity to allow for refrigerant expansion. Overfilling may result in damage to the tank and personal injury.
1. Equalize refrigerant pressure.
a. Turn on chiller water pumps and monitor chiller pressures.
b. Close pumpout and storage tank valves 2, 4, 5, 8, and
10, and close refrigerant charging valve 7; open chiller isolation valve 11 and any other chiller isolation valves, if present.
c. Open pumpout and storage tank valves 3 and 6; open chiller valves 1a and 1b.
VALVE
CONDITION
1a 1b 2 3 4 5 6 7 8 10 11
C C C C C C
d. Gradually crack open valve 5 to increase chiller pressure to 60 psig (414 kPa), [ 30 psig (207 kPa)]. Slowly feed refrigerant to prevent freeze-up.
Fig. 10 — Valve Locations for 19XB Pumpout Unit With 19XB Storage Tank
e. Open valve 5 fully after the chiller pressure rises above the freezing point of the refrigerant. Let the storage tank and chiller pressure equalize. Open refrigerant charging valve 7 and storage tank charging valve 10 to let liquid refrigerant drain into the chiller.
VALVE
CONDITION
1a 1b 2 3 4 5 6 7 8 10 11
C C C
2. Transfer remaining refrigerant.
a. Close valve 5 and open valve 4.
VALVE
CONDITION
1a 1b 2 3 4 5 6 7 8 10 11
C C C
b. Turn off the pumpout condenser water, and turn on the pumpout compressor to push liquid refrigerant out of the storage tank. Monitor the storage tank level until the tank is empty.
c. Close refrigerant charging valves 7 and 10.
d. Turn off the pumpout compressor.
e. Turn off the chiller water pumps.
f. Close valves 3 and 4.
g. Open valves 2 and 5.
VALVE
CONDITION
1a 1b 2 3 4 5 6 7 8 10 11
C C C C C
h. Turn on pumpout condenser water.
i. Run the pumpout compressor until the storage tank pressure reaches 5 psig (34 kPa), 18 in. Hg (41 kPa absolute).
j. Turn off the pumpout compressor.
k. Close valves 1a, 1b, 2, 5, and 6.
VALVE 1a 1b 2 3 4 5 6 7 8 10 11
CONDITION C C C C C C C C C C
l. Turn off pumpout condenser water.
Transfer the Refrigerant from Chiller to Pumpout Storage
Tank.
1. Equalize refrigerant pressure.
a. Valve positions:
VALVE
CONDITION
1a 1b 2 3 4 5 6 7 8 10 11
C C C C C C
b. Slowly open valve 5 and refrigerant charging valves 7 and 10 to allow liquid refrigerant to drain by gravity into the storage tank.
VALVE
CONDITION
1a 1b 2 3 4 5 6 7 8 10 11
C C C
2. Transfer the remaining liquid.
a. Turn off pumpout condenser water. Place valves in the following positions:
VALVE
CONDITION
1a 1b 2 3 4 5 6 7 8 10 11
C C C
b. Run the pumpout compressor for approximately 30 minutes, then close valve 7 and 10.
VALVE
CONDITION
1a 1b 2 3 4 5 6 7 8 10 11
C C C C C
c. Turn off the pumpout compressor.
13
3. Remove any remaining refrigerant.
a. Turn on chiller water pumps.
b. Turn on pumpout condenser water.
c. Place valves in the following positions:
VALVE
CONDITION
1a 1b 2 3 4 5 6 7 8 10 11
C C C C C
d. Run the pumpout compressor until the chiller pressure reaches 60 psig (414 kPa), [30 psig (207 kPa)]; then, shut off the pumpout compressor. Warm chiller condenser water will boil off any entrapped liquid refrigerant and chiller pressure will rise.
e. When chiller pressure rises to 70 psig (483 kPa),
[40 psig (276 kPa)]; turn on the pumpout compressor until the pressure again reaches 60 psig (414 kPa)
[30 psig (207 kPa)]; then, turn off the pumpout compressor. Repeat this process until the chiller pressure no longer rises; then, turn on the pumpout compressor and pump out until the chiller pressure reaches
18 in. Hg (41 kPa absolute).
f. Close valves 1a, 1b, 3, 4, and 6.
VALVE 1a 1b 2 3 4 5 6 7 8 10 11
CONDITION C C C C C C C C C C
g. Turn off the pumpout condenser water.
4. Establish vacuum for service. To conserve refrigerant, operate the pumpout compressor as described in Step 3e until the chiller pressure is reduced to 18 in. Hg (41 kPa absolute).
CHILLERS WITH ISOLATION VALVES — The valves referred to in the following instructions are shown in Fig. 9 and 11. Valve 7 remains closed.
Transfer All Refrigerant to Chiller Condenser Vessel:
1. Push refrigerant into chiller condenser vessel.
a. Turn on the chiller water pumps and monitor the chiller pressure.
b. Valve positions:
VALVE
CONDITION
1a 1b 2 3
C
4
C
5 8
C
11
c. Equalize the refrigerant in the chiller cooler and condenser.
d. Turn off chiller water pumps and pumpout condenser water supply.
e. Turn on pumpout compressor to push liquid out of the chiller cooler vessel.
f. When all liquid has been pushed into the chiller condenser vessel, close the cooler refrigerant isolation valve
(11).
g. Turn on the chiller water pumps.
h. Turn off the pumpout compressor.
2. Evacuate gas from chiller cooler vessel.
a. Close pumpout valves 2 and 5; open valves 3 and 4.
VALVE
CONDITION
1a 1b 2
C
3 4 5
C
8
C
11
C
b. Turn on pumpout condenser water.
c. Run pumpout compressor until the chiller cooler vessel pressure reaches 18 in. Hg vac (41 kPa absolute).
Monitor pressures on the chiller control panel and on refrigerant gages.
Fig. 11 — Valve Locations for 19XB Pumpout Unit Without Storage Tank
14
d. Close valve 1a.
e. Turn off pumpout compressor.
f. Close valves 1b, 3, and 4.
VALVE
CONDITION
1a
C
1b
C
2
C
3
C
4
C
g. Turn off pumpout condenser water.
5
C
8
C
11
C
h. Turn off chiller water pumps and lock out chiller compressor.
Transfer All Refrigerant to Chiller Cooler Vessel:
1. Push refrigerant into the chiller cooler vessel.
a. Turn on the chiller water pumps and monitor the chiller pressure.
b. Valve positions:
VALVE
CONDITION
1a 1b 2 3
C
4
C
5 8
C
11
c. Equalize the refrigerant in the chiller cooler and condenser.
d. Turn off chiller water pumps and pumpout condenser water.
e. Turn on pumpout compressor to push refrigerant out of the chiller condenser.
f. When all liquid is out of the chiller condenser, close valve 11 and any other liquid isolation valves on the chiller.
g. Turn off the pumpout compressor.
2. Evacuate gas from chiller condenser vessel.
a. Turn on chiller water pumps.
b. Make sure that pumpout valves 3 and 4 are closed and valves 2 and 5 are open.
VALVE
CONDITION
1a 1b 2 3
C
4
C
5 8
C
11
C
c. Turn on pumpout condenser water.
d. Run the pumpout compressor until the chiller condenser reaches 18 in. Hg (41 kPa absolute). Monitor pressure at the chiller control panel and refrigerant gages.
e. Close valve 1b.
f. Turn off pumpout compressor.
g. Close valves 1a, 2, and 5.
VALVE
CONDITION
1a
C
1b
C
2
C
3
C
4
C
5
C
8
C
11
C
h. Turn off pumpout condenser water.
i. Turn off chiller water pumps and lock out chiller compressor.
Return Refrigerant to Normal Operating Conditions
1. Be sure that the chiller vessel that was opened has been evacuated.
2. Turn on chiller water pumps.
3. Open valves 1a, 1b, and 3.
VALVE
CONDITION
1a 1b 2
C
3 4
C
5
C
8
C
11
C
4. Crack open valve 5, gradually increasing pressure in the evacuated chiller vessel to 60 psig (414 kPa), [30 psig
(207 kPa)]. Feed refrigerant slowly to prevent tube freeze-up.
5. Leak test to ensure chiller vessel integrity.
15
6. Open valve 5 fully.
VALVE
CONDITION
1a 1b 2
C
3 4
C
5 8
C
11
C
7. Close valves 1a, 1b, 3, and 5.
8. Open chiller isolation valve 11 and any other isolation valves, if present.
VALVE
CONDITION
1a
C
1b
C
2
C
3
C
4
C
5
C
8
C
11
9. Turn off chiller water pumps.
DISTILLING THE REFRIGERANT
1. Transfer the refrigerant from the chiller to the pumpout storage tank as described in the Transfer the Refrigerant from Chiller to Pumpout Storage Tank section.
2. Equalize the refrigerant pressure.
a. Turn on chiller water pumps and monitor chiller pressures.
b. Close pumpout and storage tank valves 2, 4, 5, 8, and
10, and close chiller charging valve 7; open chiller isolation valve 11 and any other chiller isolation valves, if present.
c. Open pumpout and storage tank valves 3 and 6; open chiller valves 1a and 1b.
VALVE
CONDITION
1a 1b 2 3 4 5 6 7 8 10 11
C C C C C C
d. Gradually crack open valve 5 to increase chiller pressure to 60 psig (414 kPa), [30 psig (207 kPa)]. Slowly feed refrigerant to prevent freeze-up.
e. Open valve 5 fully after the chiller pressure rises above the freezing point of the refrigerant. Let the storage tank and chiller pressure equalize.
3. Transfer remaining refrigerant.
a. Close valve 3.
b. Open valve 2.
VALVE
CONDITION
1a 1b 2 3 4 5 6 7 8 10 11
C C C C C
c. Turn on pumpout condenser water.
d. Run the pumpout compressor until the storage tank pressure reaches 5 psig (34 kPa), 18 in. Hg (41 kPa absolute).
e. Turn off the pumpout compressor.
f. Close valves 1a, 1b, 2, 5, and 6.
g. Turn off pumpout condenser water.
VALVE 1a 1b 2 3 4 5 6 7 8 10 11
CONDITION C C C C C C C C C C
4. Drain the contaminants from the bottom of the storage tank into a container. Dispose of contaminants safely.
MAINTENANCE
Periodic maintenance is necessary to keep all components functioning as designed. A maintenance log is recommended to ensure a proper maintenance schedule is followed.
Pumpout Unit —
For maintenance details, refer to the
06D, 07D Installation, Start-Up, and Service Instructions.
PUMPOUT COMPRESSOR OIL CHARGE — Use oil conforming to Carrier specifications for reciprocating compressor use. Oil requirements are listed in Table 6.
Table 6 — Pumpout Compressor Oil Requirements
REFRIGERANT
R-22
R-134a
ISO
VISCOSITY
86
68
CARRIER
SPECIFICATION
NO.
PP49-7
PP47-31
CARRIER
PART NO.
PP23BZ101
PP23BZ103
The total oil charge, 4.5 pints (2.6 L), consists of 3.5 pints
(2.0 L) for the compressor and one additional pint (0.6 L) for the oil separator.
Oil should be visible in one of the pumpout compressor sight glasses both during operation and at shutdown. Always check the oil level before operating the pumpout compressor. Before adding or changing oil, relieve the refrigerant pressure as follows:
1. Attach a pressure gage to the gage port of either pumpout compressor service valve (Fig. 10).
2. Close the suction service valve and open the discharge line to the pumpout storage tank or the chiller.
3. Operate the compressor until the crankcase pressure drops to 2 psig (13 kPa).
4. Stop the pumpout compressor and isolate the pumpout system by closing the discharge service valve.
5. Slowly remove the oil return line connection (Fig. 9). Add oil as required.
6. Replace the connections and reopen the pumpout compressor service valves.
Storage Tank —
To prevent moisture and contaminants from entering the storage tank, maintain positive pressure in the tank when not transferring refrigerant. Leak test the storage tank according to your normal vessel leak test procedures and schedule.
Ordering Replacement Parts —
The following information must accompany an order for Carrier-specified parts:
• machine model number and serial number
• name, quantity, and part number of the part required
• delivery address and method of shipment
TROUBLESHOOTING
Information on troubleshooting for the PPS is included in
Table 7.
SYMPTOM
Compressor does not run
Compressor cycles on high-pressure control
Unit operates too long
System Noises
Compressor Loses Oil
Table 7 — Troubleshooting
PROBABLE CAUSE
Main power line open
Loose terminal connection
Improperly wired controls
Low line voltage
Compressor motor defective
Seized compressor
High level gage alarm
High-pressure control erratic in action
Discharge valve partially closed.
Air in system
Condenser scaled.
Condenser water pump or fans not operating.
Isolation valves partially open
Piping vibrations
Compressor noisy
Insufficient compressor oil
Leak in system
Plugged or stuck compressor oil return check valve
Dirty accumulator
REMEDY
Replace fuse or reset circuit breaker.
Check connections.
Check wiring and rewire.
Check line voltage; determine location of voltage drop.
Check motor winding for open or short. Replace compressor if necessary.
Replace compressor.
Check refrigerant level and remove excess.
Check capillary tube for pinches. Set control as required..
Open valve.
Purge system.
Clean condenser.
Start pump or fans.
Close valves.
Support piping as required. Check for loose pipe connectors.
Check valve plates for valve noise. Replace compressor (worn bearings). Check for loose compressor holddown bolts.
Add oil.
Locate and repair leak.
Repair or replace valve.
Clean accumulator.
Copyright 1996 Carrier Corporation
Manufacturer reserves the right to discontinue, or change at any time, specifications or designs without notice and without incurring obligations.
Book 2
Tab 5a
PC 211 Catalog No. 531-927 Printed in U.S.A.
Form 19XB-1SI Pg 16 6-96 Replaces: New

Pobierz
Publiczny link zaktualizowany
Publiczny link do Twojego czatu został zaktualizowany. You may view and manage your chat links after registration here.
Publiczny link do dokumentu
Reklama