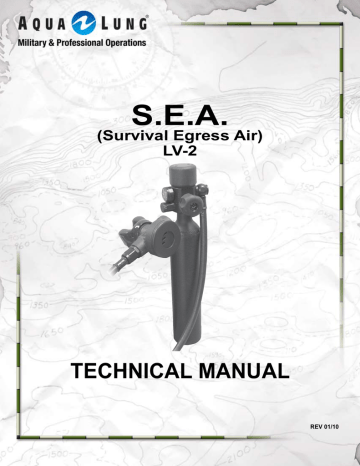
Initial Pre-Issue Procedures for the SEA MK/LV2/HESP. Aqua Lung S.E.A. LV-2, SEA MK
Add to My manuals34 Pages
advertisement

22
iniTial pRE-iSSuE pRocEDuRE FoR ThE
SEa MK/lV2/hESp
Upon initial receipt of the SEA MK/LV2/HESP (here after referred to as SEA) from the OEM or storage and prior to the initial issue of the SEA, the following procedure must be performed.
1. Remove the SEA from the OEM packaging
2. Inspect the SEA IAW local instructions and verify it is in good condition.
3. Remove the Fill Port Plug and set it aside. Ensure there is no debris in the Fill Port Adapter. Remove the Protective
Rubber Cover from the top of the SEA and set it aside.
4. Turn on the SEA On/Off Valve.
5. Connect the Air Charging Source Connector to the SEA and slowly charge the unit to 3000 psi IAW local procedures.
6. Depress the 2nd Stage purge cover two times for about
5 seconds each with a 5 second pause between each purge.
7. Turn off the Air Supply. Vent/purge the charging lines and remove from the charging source.
8. With the SEA On/Off valve still in the OPEN position, submerge the entire SEA in water for no less than 2 minutes and observe for leaks. Verify that no residual air is in the void spaces of the unit.
a. If no leaks – remove from the water, shake out any excess water and conduct the pressure drop test, set the
SEA aside for a minimum of 8 hours in a stable temperature environment, note the pressure on the gauge. Recheck the unit after the time has elapsed and verify the pressure is the same +/- 300 psi or still in the green. If the pressure is stable continue to step 9.
b. If a leak is detected go to step 15 and continue procedure c. If the unit fails the leak test a second time go to step 16
SEa lV2 Technical Maintenance Manual
9. Connect the Charging system to the SEA unit and recharge to 3000 psi.
10. Secure the Air supply and remove the SEA from the charging connector.
11. Upon completion of the pressure drop test, verify no water is remaining in the unit and reinstall the Protective Rubber
Cover on the Regulator.
12. Reinstall the Fill Port Cap.
13. The SEA unit is now ready for service.
14. Prior to issue perform the Pre-Flight checks IAW Local
Procedures
TRouBlEShooTing
15. If a 2nd stage leak is detected, remove the unit from the water and shake out any excess water. Purge the 2nd Stage regulator as follows: a. Depress the Purge Cover for 15 seconds, then release.
b. Wait 5 seconds.
c. Depress the Purge Cover for 15 seconds, then release.
d. Wait 5 seconds e. Continue to repeat this procedure until the gauge reads
1500 psi.
f. After the cylinder is at 1500 psi, refill the cylinder to 3000 psi IAW local procedures. Repeat step 8.
16. If a leak is still present – 2 options a. Return to OEM thru local command instructions b. Shut the On/Off valve and purge the 2nd stage. When the pressure has been relieved, remove the medium hose from the 2nd stage. Remove the Inlet fitting. Inspect the gray seat for debris or damage. Remove the seat using the pointed Brass O-ring Tool (DO NOT puncture), clean it and put it back in with the DIMPLE UP. Depress the purge cover and re-install the Inlet Fitting and Torque to 50+/-3 in.lbs.
Connect the Medium hose to the 2nd Stage and torque to
45 +/-3 in.lbs. Open the On/Off valve and repeat the entire procedure from step 5.
advertisement
Related manuals
advertisement
Table of contents
- 2 Copyright Notice
- 4 Change Record
- 5 General Guidelines
- 5 General Conventions
- 6 Initial Inspection Procedure
- 6 External Inspection
- 6 Immersion/Leak Test
- 6 Medium Pressure (Over-Bottom) Test
- 7 DISASSEMBLY PROCEDURE
- 10 Second Stage Disassembly
- 12 REASSEMBLY PROCEDURE
- 12 First Stage Reassembly
- 18 Second Stage Reassembly
- 21 FINAL TESTING
- 21 Immersion Test
- 21 Final Assembly
- 22 Initial Pre-Issue Procedures for the SEA MK/LV2/HESP
- 23 Table 1: Troubleshooting Guide for First Stage/Valve Assembly
- 24 Table 2: Troubleshooting Guide for Second Stage
- 25 Table 3: List of Tools and Service Kits
- 29 Table 4: Torque Specifications
- 29 Table 5: Checking Specifications
- 29 Table 6: Recommended Cleaners and Lubricants
- 30 Procedure A: Cleaning and Lubricating
- 31 S.E.A. First Stage with Cylinder Assembly, Exploded View
- 33 Maintenance Notes