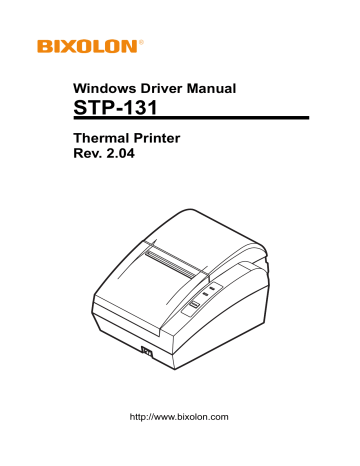
4-3-1 Via Serial Port or Parallel Port. BIXOLON STP-131
Add to my manuals
29 Pages
BIXOLON STP-131 is a versatile thermal printer designed for a range of printing tasks. With its ability to connect via serial or parallel ports, it offers flexible connectivity options. The printer supports various paper sizes, including custom sizes, and provides detailed settings for paper supply methods, allowing you to choose between automatic selection, receipt with partial cut or no cut, form with no cut or partial cut, and more. Additionally, you can utilize the Additional Commands feature to add custom commands to your printouts.
advertisement

4-3 Installing on Windows VISTA/7
4-3-1 Via Serial Port or Parallel Port
1) Double-click the Windows Driver installation file (STP-131_Vx.x.xx.exe).
2) Click the “Next” button.
STP-131
Rev. 2.04 - 12 -
3) Select the COM or LPT (Which one you want to use) port to be used and click
the “Next” button.
STP-131
4) Clicking the ”Yes” button will reboot the PC.
Rev. 2.04 - 13 -
STP-131
5) Open the printer properties window in the Windows OS.
6) Click the “Port Settings” button in the ”Ports” tab.
7) Match the communication settings to those of the printer.
(The communication settings of the printer can be performed by conducting a self-test.)
Rev. 2.04 - 14 -
8) Click the “Print Test Page” button and check printing status.
STP-131
9) Proper installation of the driver is indicated if the test page is printed normally.
Rev. 2.04 - 15 -
STP-131
5. Detailed Windows Driver Settings
The following functions can be set in detail after the Windows Driver installation is complete.
5-1 Paper Supply Method
The printer structure is such that the print head, which carries out printing, and the cutter, which cuts the printing paper, are separated. After printing, the location of the end section can be adjusted as follows.
- Automatically Select: Select the “Receipt[Partial cut]” automatically.
- Receipt[Partial cut]: After printed text is transferred up to the cutter (auto cutter),
a paper is cut by auto cutter.
- Receipt[No cut]: Printed text is transferred up to the cutter (manual cutter).
- Receipt[Partial cut without paper feeding]: A paper is cut by auto cutter without
paper feeding.
- Receipt [No feed]: Printed text is transferred up to the next line only.
(minimum transfer: 0x0A).
- Form[No Cut]: For long print jobs, printed text is transferred according to the Receipt option per selected paper size.
- Form[Partial Cut]: For long print jobs, printed text is transferred and cut according to the Receipt option per selected paper size.
Detailed setting can be done as follows.
Rev. 2.04 - 16 -
1) Open the printer properties window in the Windows OS.
STP-131
2) Click the “Printing Preferences” button in the ”General” tab.
The button name varies by Windows OS. Refer to the following.
- Windows 95/98/ME: “Properties”
- Windows NT4.0: “Document Defaults”
- Windows 2000/XP/2003 Server: “Printing Preferences”
- Windows WEPOS/VISTA: “Printing Preferences”
Rev. 2.04 - 17 -
3) Select the desired setting in the ”Paper/Quality” tab.
(Resolution is fixed at 180 × 180.)
STP-131
Rev. 2.04 - 18 -
5-2 Paper Size
The paper sizes available in the Windows Driver are as follows.
- 80 × 297 mm [131]
- 80 × 3276 mm [131]
- 80 × 40 mm [131]
- 80 × 80 mm [131]
- 80 × 120 mm [131]
- 80 × 160 mm [131]
- 80 × 200 mm [131]
- Custom Size (Windows 9x supported)
Detailed setting can be done as follows.
1) Open the printer properties window in the Windows OS.
2) Click the “Printing Preferences” button in the ”General” tab.
The button name varies by Windows OS. Refer to the following.
- Windows 95/98/ME: “Properties”
- Windows NT4.0: “Document Defaults”
- Windows 2000/XP/2003 Server: “Printing Preferences”
- Windows WEPOS/VISTA: “Printing Preferences”
3) Select the ”Paper/Quality” tab, and click the ”Advanced” button.
Select the desired setting.
STP-131
Rev. 2.04 - 19 -
advertisement
* Your assessment is very important for improving the workof artificial intelligence, which forms the content of this project
Related manuals
advertisement