SECTION 5 - OPERATION. Crossfire S 604T / S 604MT
Add to My manuals24 Pages
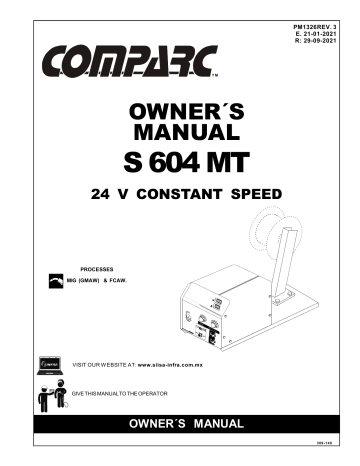
Crossfire S 604T / S 604MT is a constant speed welder designed for MIG (GMAW) & FCAW welding processes. The device is suitable for welding with solid and flux-cored wires. S 604MT model allows for 24 V welding. It is equipped with a wire feeder mechanism that ensures precise and stable wire feeding, which translates into high-quality welds. The device has a number of features that make it easy to use, including: adjustable welding parameters, digital display, and thermal overload protection.
advertisement

CAUTION
5-1. CONTROLS
SECTION 5 OPERATION
SEE SAFETY SIGNAL AT THE BEGINING
THIS M A NUA L
REMOTE VOLTAGE
ADJUSTMENT CONTROL
WIRE SPEED
CONTROL
PURGE BUTTON
JOG BUTTON
BURN BACK
TIME
1 2
GUN TRIGGER
RECEPTACLE
TRIGGER MODE
SELECTOR
FIGURE 5-1 CONTROLS
3
1- Insulating Gloves.
2- Safety Glasses With Side Shields.
3- Welding Helmet.
Wear dry insulating gloves, safety glasses with side shields, and a welding helmet with a correct shade of filter (see ANSI Z49.1).
FIGURE 5-2 SAFETY EQUIPMENT
1- Work Clamp.
Use wire brush or sandpaper to clean metal at weld joint area. Use chipping hammer to remove slag after welding.
Connect work clamp to a clean, paint-free location on workpiece, as close to weld area as possible.
FIGURE 5-3 WORK CLAMP
1 Tools needed:
7
Place the switch in ON position to turn on the unit.
Place the switch in OFF position to turn off the unit.
FIGURE 5-4 INPUT POWER SWITCH
ON
POWER
OFF
PM1326
1.- WIRE SPEED CONTROL.
Use this control to select wire feed speed in speed ranges.
Turn in clock wise to increase speed. The numbers is a percentage respect a maximun rated speed (900ipm)
30
20
10
40
50
60
0
100
70
80
90
FIGURE 5-5 WIRE SPEED CONTROL
BURNBACK
5
4
6
3
2
7
8
1
9
0
10
BURNBACK
Use control to adjust the time that the welding wire is energized after wire feeding stops.
By adjusting control properly, the welding wire will not freeze in weld puddle or in contact tip of gun. If welding wire freezes to work, increase burnback time. If welding wire burns back into contact tip, decrease burnback time.
FIGURE 5-6 BURNBACK CONTROL
1
JOG BUTTON
1.- JOG BUTTON
Push and hold button to momentarilly energize feed welding wire at speed set on wire speed control without energizing welding circuit of shielding gas valve.
FIGURE 5-7 JOG BUTTON
GAS PURGE BUTTON.
Push and hold button to momentarilly energize gas solenoid and purge air from gun shielding gas regulator without energizing the welding circuit.
TRIGGER
PURGE
BUTTON
FIGURE 5-8 PURGE BUTTON
TRIGGER MODE SELECTOR.Use this control to select the desired trigger mode.
Select always one trigger mode:
1.
2T Trigger mode : When trigger is depressed, weld starts. When trigger is released, weld stops.
2.
4T Trigger mode : When trigger is depressed, weld starts. When trigger is released, weld remains. After depressing and releasing the trigger for the second time, weld stops.
FIGURE 5-9 TRIGGER MODE SELECTOR.
Install & Connect
Wire Feeder
Install & Prepare
Gun And Power
Source
Put On Personal
Safety Equipment
Set All
Controls.
Turn On
Shielding Gas
(If Applicable)
Turn On
Wire Feeder &
Power Source
Beging
Welding
Readjust
Controls If Is
Necessary
FIGURE 5-10 GAS METAL ARC WELDING (GMAW) & FLUX CORED ARC WELDING (FCAW).
8
PM1326
advertisement
Related manuals
advertisement
Table of contents
- 6 SECTION 2 -- SAFETY INFORMATION
- 6 SECTION 3 - SPECIFICATION
- 6 3-1. Rating Label Location
- 6 3-2. Specifications
- 6 3-3. Environmental Specification
- 7 SECTION 4 - INSTALLATION
- 7 4-1. Site Selecction
- 7 4-2. Typical Connections Diagram
- 8 4-3. Connecting Welding Gun, Voltaje Clamp And Weld cable
- 8 4-4. 14 Pin Plug Information
- 9 4-5. Installing Welding Gun
- 10 4-6. Spool Wire Installation
- 10 4-7. Shielded Gas Connection
- 10 4-8. Welding Wire Installation
- 12 SECTION 5 - OPERATION
- 12 5-1. Controls
- 14 SECTION 6 - MAINTENANCE & TROUBLESHOOTING
- 14 6-1. Routine Maintenance
- 14 6-3. Overload Protection
- 15 6-3. Troubleshooting
- 16 SECTION 7 - ELECTRICAL DIAGRAMS
- 17 SECTION 8 - PARTS LIST
- 17 8-1. Main Asembly
- 18 8-2. List Control Box
- 19 8-3. Part List Of Feeder Mechanism Of Wire