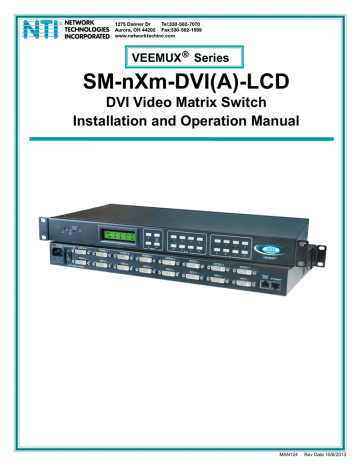
- Computers & electronics
- Audio & home theatre
- Video switches
- Broadcast Tools
- VEEMUX SM-nXm-DVI-LCD
- Installation and Operation Manual
Operating the VEEMUX. Network Technologies VEEMUX SM-nXm-DVIA-LCD, SS 4x4 Stereo Audio Matrix Switcher INC, VEEMUX SM-nXm-DVI-LCD
Add to my manuals
61 Pages
advertisement

NTI VEEMUX DVI VIDEO MATRIX SWITCH
OPERATING THE VEEMUX
The VEEMUX video matrix switch has four methods of control:
• Front Panel LCD with Keypad
• Directly via an RS232 Interface
• Remotely via Ethernet
• Infrared Remote (optional).
Every unit comes standard with all control methods built-in. An IRT-UNV-IR Remote Control is required (purchased separately) to use the Infrared option. No software is involved (see Infrared Control on page 49). With the RS232 option, there are no external devices to be purchased. NTI provides software commands as well as a test program to ensure the RS232 functions properly (see page 18 – RS232 Control).
Front Panel LCD with Keypad Control
The front panel LCD and keypad allow the user to monitor switch status and route any user to any video source on the switch.
When the unit is first powered-up, each monitor is automatically connected to the video source of its equal number (i.e. monitor 1 to source 1, monitor 2 to source 2, monitor 3 to source 3, etc.). (After configurations have been saved (page 33), upon power-up the VEEMUX will load the configuration saved into memory location 0.) Along with the routing of the inputs (video sources) to the outputs (monitors) the keypad and LCD allow the users to configure the RS232 control interface. The keypad buttons perform the following functions:
Model SM-8X8-DVI-LCD
OUT: 1 2 3 4
IN: 1 2 3 4
Key Functions:
Menu
1
5
2
6
Out
Up Arrow- Scroll up the menu
Down Arrow- Scroll down the menu
Left Arrow (Enter Key)- Select the menu item
List - Open the menu, or exit the menu (also used to back
out of the menu, one step at a time)
Out-1- through 8 Used in command sequence to select which
output (display device) to connect
In-1-though 8 Used in command sequence to select which
input (video source) to connect
3
7
4
8
Up
Arrow
Down
Arrow
1
5
2
6
In
Menu
3
7
4
8
List
Enter
Note: Models with Video and Audio support will display a “v” or “a” next to the “IN” to indicate which ports connections are being displayed. When using the keypad, both video and audio connection changes are effected by selections. To make changes individually to video and audio connections, use either the web interface (page 47) or the optional infra- red remote control (page 49).
9
advertisement
* Your assessment is very important for improving the workof artificial intelligence, which forms the content of this project
Related manuals
advertisement
Table of contents
- 6 Introduction
- 6 Supported Web Browsers
- 7 Materials
- 8 Features and Functions
- 9 Installation
- 9 To Mount to a Rack
- 10 Make All Connections
- 13 Audio Connections
- 14 Operating the VEEMUX
- 14 Front Panel LCD with Keypad Control
- 15 LCD Menus
- 17 Save and Load (Recall) Config
- 18 USB Console Port
- 18 Installing Drivers
- 18 Windows XP-32 bit Installation
- 20 Windows 7-64 bit Installation
- 22 Using the USB Console Port
- 23 RS232 Control
- 23 Remote Connection
- 23 Baud Rate
- 23 Unit Address and Loop Back
- 25 Command Protocol
- 26 Autostatus
- 26 Matrix Switcher’s Control Program For Windows 9X, NT, 2000, XP, Vista and
- 27 SerTest- RS232 Interface Test Program
- 27 Main Options
- 27 Matrix Operations
- 27 Ethernet Operations
- 28 Setup Options
- 29 Ethernet Control
- 29 Telnet Interface-Port
- 31 Command Summary
- 32 Command Detail
- 32 Read Unit Size
- 32 Read Connection for Output Port
- 32 Connect Output Port to Input Port
- 32 Connect All Output Ports to Input Port
- 33 Enable Auto Status Mode
- 33 Disable Auto Status Mode
- 33 Examine connections
- 34 AO-Read Audio Connection for Output Port
- 34 AS-Connect Audio Output Port to Input Port
- 34 AA-Connect All Audio Outputs to Input Port
- 35 AV- Set Audio Volume for Output Port
- 35 AM- Mute/Unmute Audio Output Port
- 35 Terminate telnet session
- 36 Web Interface
- 36 Enter the Password
- 37 Main Menu
- 38 Video Switch Page
- 39 Administration
- 39 System Configuration
- 40 Network Configuration
- 41 Video Input Names
- 42 Video Output Names
- 43 Scanning Sequences
- 45 User Config