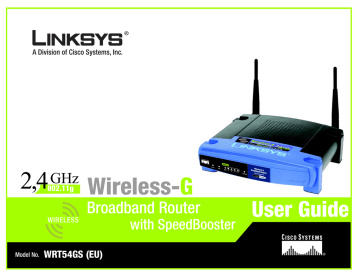
Chapter 1: Getting to Know the Wireless-G Broadband Router. Linksys WRT54GS, WRT54GS EU
Add to My manuals
453 Pages
advertisement

Wireless-G Broadband Router with SpeedBooster
Chapter 1: Getting to Know the Wireless-G
Broadband Router
The Back Panel
The Router's ports, where the cables are connected, are located on the back panel.
Figure 1-1: The Router’s Back Panel
Reset Button
Internet
1, 2, 3, 4
Power
There are two ways to reset the Router's factory defaults. Either press the Reset Button, for approximately five seconds, or restore the defaults from the Administration tab - Factory
Defaults in the Router's Web-based Utility.
The Internet port is where you will connect your broadband Internet connection.
These ports (1, 2, 3, 4) connect the Router to PCs on your wired network and other Ethernet network devices.
The Power port is where you will connect the power adapter.
Chapter 1: Getting to Know the Wireless-G Broadband Router
The Back Panel
IMPORTANT: Resetting the Router will erase all of your settings (WEP Encryption, network settings, etc.) and replace them with the factory defaults. Do not reset the Router if you want to retain these settings.
2
Wireless-G Broadband Router with SpeedBooster
The Front Panel
The Router’s LEDs, where information about network activity is displayed, are located on the front panel.
NOTE: SecureEasySetup is a feature that makes it easy to set up your wireless network. If you have
SecureEasySetup devices, run the Router’s Setup
Wizard CD-ROM and follow the on-screen instructions to use SecureEasySetup.
Figure 1-2: The Router’s Front Panel
(Cisco logo)
Orange/White. The Cisco logo is the Router’s SecureEasySetup button. It lights up and will stay orange when the Router is powered on. The color orange indicates that the Router is not using the SecureEasySetup feature, while the color white indicates that the Router is using the
SecureEasySetup feature. When the Router enters SecureEasySetup mode, the Cisco logo will turn white and start flashing. After the Router has generated the SSID and WPA-PSK (also called WPA-Personal) key, the Cisco logo will stop flashing and stay white.
Power
DMZ
WLAN
To clear the SSID and WPA-PSK key, press and hold down the Cisco logo for five seconds. The
Cisco logo will flash slowly as the Router resets itself. The Cisco logo will turn orange to indicate a successful reset.
Green. The Power LED lights up and will stay on while the Router is powered on. When the
Router goes through its self-diagnostic mode during every boot-up, this LED will flash. When the diagnostic is complete, the LED will be solidly lit.
Green. The DMZ LED indicates when the DMZ function is being used. This LED will remain lit as long as DMZ is enabled.
Green. The WLAN LED lights up whenever there is a successful wireless connection. If the LED is flashing, the Router is actively sending or receiving data over the network.
1, 2, 3, 4
Green. These numbered LEDs, corresponding with the numbered ports on the Router’s back panel, serve two purposes. If the LED is continuously lit, the Router is successfully connected to a device through that port. A flashing LED indicates network activity over that port.
Internet
Green. The Internet LED lights up when there is a connection made through the Internet port.
Chapter 1: Getting to Know the Wireless-G Broadband Router
The Front Panel
3
advertisement
Key Features
- Black, Blue
- Fast Ethernet
- Ethernet WAN
- Ethernet LAN (RJ-45) ports: 4
- Web-based management
Related manuals
advertisement
Table of contents
- 1 English, User Guide
- 3 Chapter 1: Getting to Know the Wireless-G Broadband Router
- 5 Chapter 2: Connecting the Wireless-G Broadband Router
- 8 Chapter 3: Configuring the Wireless-G Broadband Router
- 34 Appendix A: Troubleshooting
- 46 Appendix B: Specifications
- 47 Appendix C: Warranty Information
- 48 Appendix D: Regulatory Information
- 62 Appendix E: Contact Information
- 259 Deutsch, Benutzerhandbuch
- 261 Kapitel 1: Kennenlernen des Wireless-G Broadband-Routers
- 263 Kapitel 2: Anschließen des Wireless-G Broadband-Routers
- 266 Kapitel 3: Konfigurieren des Wireless-G Broadband- Routers mit SRX400
- 294 Anhang A: Fehlerbehebung
- 308 Anhang B: Spezifikationen
- 309 Anhang C: Garantieinformationen
- 310 Anhang D: Zulassungsinformationen
- 324 Anhang E: Kontaktinformationen
- 326 Français, Guide de l'utilisateur
- 328 Chapitre 1 : Présentation du routeur haut débit sans fil G
- 330 Chapitre 2 : Connexion du routeur haut débit sans fil - G
- 333 Chapitre 3 : Configuration du routeur haut débit sans fil - G
- 359 Annexe A : Dépannage
- 373 Annexe B : Spécifications
- 374 Annexe C : Informations de garantie
- 375 Annexe D : Réglementation
- 389 Annexe E : Contacts
- 391 Nederlands, Gebruikershandleiding
- 393 Hoofdstuk 1: Bekend raken met de Wireless-G- breedbandrouter
- 395 Hoofdstuk 2: Het aansluiten van de Wireless-G- breedbandrouter
- 398 Hoofdstuk 3: De Wireless-G-breedbandrouter configureren
- 424 Bijlage A: Probleemoplossing
- 436 Bijlage B: Specificaties
- 437 Bijlage C: Informatie over garantie
- 438 Bijlage D: Informatie over regelgeving
- 452 Bijlage E: Contactgegevens