- Computers & electronics
- Networking
- Lathem
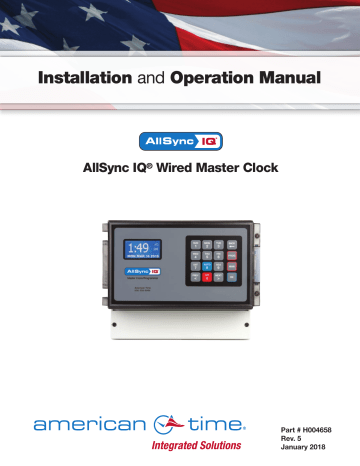
- AllSync IQ Wired Master Clock
- Installation and Operation Manual
Appendix A: Ethernet Timekeeping. American Time AllSync IQ Wired Master Clock, AllSync IQ ASQMSTR-00X2E, AllSync IQ ASQMSTR-00X6E, AllSync IQ ASQMSTR-00X8E
Add to My manuals57 Pages
advertisement

AllSync IQ Installation Manual
Appendix A: Ethernet Timekeeping
NIST Internet Time Servers
n Note: Please reference http:/tf.nist.gov/tf-cgi/servrs.cgi for the latest NIST Internet Time servers list, which includes the status of each server.
Using the AllSync IQ Master as a Time Server
The AllSync IQ Master with Ethernet option can be used as a time server supporting the SNTP and Daytime protocols and can be used to synchronize computers or other devices via the Ethernet.
To set up your computer or other device to synchronize to the AllSync IQ, simply enter the IP address of the AllSync IQ master as the time server address for the computer or device.
In Windows XP:
1. Right-click your clock and then click Adjust Date/Time .
2. Click the Internet Time tab. Click the Server down arrow, and then enter the IP address of the AllSync IQ master you wish
to synchronize this computer to (example: 192.168.1.200).
3. Click Update Now . Windows XP will connect to the AllSync IQ master and set the computer's clock.
In Windows Vista/Windows 7:
1. Right-click your clock and then click Adjust Date/Time .
2. Click the Internet Time tab, and then click Change Settings .
3. Click Automatically synchronize with an Internet time server , enter the IP address of the AllSync IQ master you wish to
synchronize this computer to (example: 192.168.1.200), and then click OK.
In Windows 10:
1. Open the Control Panel (icons view), and click on the Date and Time icon.
2. Click on the Internet Time tab, and click on the Change Settings button.
3. If prompted by UAC, click/tap on Yes .
4. Check the Synchronize with an Internet time server box, select a time server, and click on Update now .
5. Select server box and enter AllSync IQ master you wish to synchronize this computer to (example: 192.168.1.200), and
then click OK .
n Important Notes:
• Setting up your computer to synchronize to the AllSync IQ master via Ethernet does not account for time zone &
Daylight Saving Time settings, which must be properly set on the computer (they are not transferred via Ethernet).
• The computer or other device being synchronized to the AllSync IQ master must be on the same network as the
AllSync IQ master, or have access to it through a firewall (port 123 open for SNTP and port 13 open for Daytime Protocol).
• If your computer is on a domain, it is set up to get the time from the domain controller and you will not be able to
perform the above tasks. Domain controllers using the Windows Time Service can be set up by your network administrator
to synchronize directly to time servers on the Internet or to the AllSync IQ master. Contact American Time Technical
Support at 800-328-8996 with any questions.
© American Time
41
Appendix B: Supported Time Zones
AllSync IQ Installation Manual
Time
Zone
Code
16
17
18
19
20
21
22
23
24
25
26
27
28
29
30
31
32
33
34
35
36
37
38
39
99
00
01
02
03
04
05
06
07
08
09
10
11
12
13
14
15
Description
Hours Difference from UTC (Winter)
Automatic
Hours Difference Daylight Saving
from UTC
(Summer)
Time
Adjustment?
LMT (Local Mean Time) - based on longitude CALCULATED CALCULATED CONFIG
USA Alaska
USA Aleutian (HAST/HADT)
USA Arizona
USA Atlantic / Puerto Rico (AST)
USA Central (CST/CDT)
USA Chammoro (chST)
USA Eastern (EST/EDT)
USA Hawaii (HST)
USA Indiana East
USA Mountain (MST/MDT)
USA Pacific (PST/PDT)
USA Midway Island / Samoa (SST)
USA Wake Islands (WAKT)
UTC+0
UTC+1
UTC+2
UTC+3
UTC+4
UTC+5
UTC+6
UTC+7
UTC+8
UTC+9
UTC+10
UTC+11
UTC+12
UTC+13
UTC-1
UTC-2
UTC-3
UTC-4
UTC-5
UTC-6
UTC-7
UTC-8
UTC-9
UTC-10
UTC-11
UTC-12
Custom Time Zone
-9
-10
-7
-4
-6
+10
-5
-10
-5
-7
-8
-11
+11
+0
+1
+2
+3
+4
+5
+6
+7
+8
+9
+10
+11
+12
+13
-1
-2
-3
-4
-5
-6
-7
-8
-9
-10
-11
-12
CONFIG
-8
-9
-7
-4
YES
YES
NO
NO
YES
NO
YES
NO
-2
-3
-4
-5
-6
-7
-8
-9
+7
+8
+9
+10
+11
+12
+13
-1
-10
-11
-12
CONFIG
+11
+0
+1
+2
+3
+4
+5
+6
-5
+10
-4
-10
-5
-6
-7
-11
CONFIG
CONFIG
CONFIG
CONFIG
CONFIG
CONFIG
CONFIG
CONFIG
CONFIG
CONFIG
CONFIG
CONFIG
CONFIG
CONFIG
CONFIG
CONFIG
NO
YES
YES
NO
NO
CONFIG
CONFIG
CONFIG
CONFIG
CONFIG
CONFIG
CONFIG
CONFIG
CONFIG
CONFIG
CONFIG
42
© American Time
AllSync IQ Installation Manual
Appendix C: Tone Generator Wiring
Multi-Tone Generator
GAIN
12VDC
(500 mA MAX)
SPKR
AUDIO IN
AUDIO OUT
COM
(+)
(-)
T3
T4
T1
T2
COM
SPKR
IN
COM
PA/AMP
RED (+)
BLACK (-)
ALLSYNC IQ MASTER TERMINALS
© American Time
43
advertisement
Related manuals
advertisement
Table of contents
- 4 Introduction
- 10 Ethernet Installation
- 12 Wired Clock Circuit Option
- 14 Wired Signal Circuit Installation
- 15 Wired Signal Circuit Programming
- 24 Remote Connect Web Interface-10 pages
- 32 Settings & Configurations
- 38 Troubleshooting Wired Clock Circuit
- 37 Troubleshooting Remote Connect
- 35 Troubleshooting GPS
- 41 Appendix A: Ethernet Timekeeping
- 44 Appendix D: Wired Signal Circuit Programming Examples
- 47 Appendix E: Checking IQ System Controller Status Information
- 48 Appendix H: Maintenance Guide
- 50 Appendix I: Clock Circuit Wiring Diagrams-5 pages
- 56 Glossary