![](http://s3.manualzz.com/store/data/023031265_1-f6e0e37ced6df3fcad6d7ab828153f70-128x128.png)
advertisement
![Nokia 3200 User Guide | Manualzz Nokia 3200 User Guide | Manualzz](http://s3.manualzz.com/store/data/023031265_1-f6e0e37ced6df3fcad6d7ab828153f70-360x466.png)
3200.ENv1_9310067.book Page 43 Thursday, September 18, 2003 8:42 AM
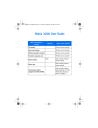
Messages (Menu 1)
Forward to many—Forward the message to multiple recipients.
Message details—View the message subject, size, and class.
Play presentation—View the slides of the message in sequence.
Continue present.—Continue to view the message after stopping it.
View text—View the text part of the message.
Open image—View the image included in the message. Select Options to zoom the image, save it in the gallery, set its contrast, or view its details.
Open sound clip—Select Options to play the sound clip, save it in the gallery, or view its details.
Copyright protections may prevent some images, ringing tones, and other content from being copied, modified, transferred, or forwarded.
• VOICE MESSAGES
If you subscribe to voice mail, your service provider will furnish you with a voice mailbox number. You need to save this number to your phone to use voice mail.
When you receive a voice message, your phone lets you know by beeping, displaying a message, or both. If you receive more than one message, your phone shows the number of messages received.
Save your voice mailbox number
Your service provider may have already saved your voice mailbox number to your phone. If so, the number will appear in the display in step 2. Select OK to leave the number unchanged.
1
From the menus, select Messages > Voice messages > Voice mailbox number.
After a brief pause, the Mailbox number screen appears.
2
If the box is empty, enter the voice mailbox area code and number and select OK.
The phone confirms that the number has been saved.
Save yourself the trouble of entering the mailbox codes each time you dial voice mail. See “Automate voice mail” on page 44.
Call and set up your voice mail
1
Once you have saved the voice mailbox number, press and hold the 1 key.
2
When you connect to voice mail and the prerecorded greeting begins, follow the service’s automated instructions to set up your voice mail.
Listen to your voice messages
Once you have set up voice mail, you can dial the number in one of four ways:
• Dial the number using the keypad.
Nokia 3200 User Guide
43
Copyright © Nokia 2003
3200.ENv1_9310067.book Page 44 Thursday, September 18, 2003 8:42 AM
• Press and hold the 1 key.
• Select Listen if there is a notification message in the display.
• From the menus, select Messages > Voice messages > Listen to
voice messages.
Once you connect and the prerecorded greeting begins, follow the automated instructions to listen to your voice messages.
Automate voice mail
You can insert special characters called dialing codes into phone numbers such as voice mail and then save the number to a 1-touch dialing location. Dialing codes instruct the receiving system to pause, wait, bypass, or accept the numbers that follow them in the dialing string.
Note: Each voice mail service can vary. The examples and steps that follow are for clarification. Check with your service provider if you have specific questions about your voice mail service.
WRITE DOWN SOME INFORMATION
You will need this information in “Set up voice mail with dialing codes” on page 45.
Be sure to record all of the information correctly.
1
Write down your voice mailbox number.
2
Call and check your voice mail as you normally would.
3
Write down your interaction with the recorded prompts step-by-step. Keep in mind that each voice mail service may vary. However, it should look something like this:
Dial 2145551212, pause 5 seconds, press 1, pause 2 seconds, press 1234, press # key.
INSERT DIALING CODES
Press the * key repeatedly to cycle through dialing codes. Once the desired code appears in the display, pause briefly and the code is inserted into the dialing string.
For example, press the * key four times to display w (wait character). Pause briefly and the wait character is inserted into the dialing string. Available dialing codes are as follows:
*
Bypasses a set of instructions.
+
Precedes an international telephone number.
p
Pauses for 2.5 seconds before sending any numbers that follow.
w
Wait. Your phone waits for you to press the Talk key before it sends any numbers or codes that follow.
44 Copyright © Nokia 2003
advertisement
Related manuals
advertisement
Table of contents
- 13 For your safety
- 14 About your device
- 15 Network services
- 15 Shared memory
- 16 Overview of functions
- 16 Camera
- 16 FM radio
- 16 Flashlight
- 16 Multimedia messaging service (MMS)
- 17 Speakerphone
- 17 GPRS and EDGE
- 17 MIDP Java™ applications
- 17 Polyphonic sound (MIDI)
- 17 Advanced multimedia player
- 18 Browser
- 18 Special user interface features
- 19 About your phone
- 19 Register your phone
- 19 Terms
- 20 Find information about your phone
- 20 Get help
- 22 Start screen
- 24 Copyright protection
- 24 Accessibility solutions
- 24 Nokia PC Suite
- 24 Phone menus
- 26 Basic operations
- 26 Install the SIM card
- 28 Switch the phone on or off
- 28 Antenna
- 28 Set the clock
- 29 Make and answer calls
- 30 Earpiece volume
- 30 Loudspeaker
- 31 Options during a call
- 32 Text entry
- 32 Standard mode
- 33 Predictive text input
- 34 Punctuation and special characters
- 35 Phone security
- 35 Keyguard
- 35 PIN code request
- 35 Call restrictions
- 36 Fixed dialing
- 38 Closed user groups
- 38 Security levels
- 39 Access codes
- 41 Messages (Menu 1)
- 41 Linked messages
- 41 Before you can send and receive messages
- 42 Icons
- 42 Options
- 43 Default message type
- 43 Font size
- 43 Save your message center number
- 44 Organize messages with folders
- 45 Delete messages
- 46 Message settings
- 48 Write and send a text message
- 48 Read messages
- 49 Reply to a message
- 49 Forward a message
- 50 Picture messages
- 52 E-mail
- 52 Multimedia messages
- 55 Voice messages
- 57 Info message service
- 57 Service commands
- 58 Call log (Menu 2)
- 58 Options
- 58 View calls options
- 59 Missed calls
- 59 Received calls
- 59 Dialed numbers
- 60 Call times
- 60 Delete call lists
- 60 Call duration
- 61 Contacts (Menu 3)
- 61 Types of information
- 62 Save information
- 63 Change the default (primary) number
- 63 Search for an entry
- 64 Make a call
- 64 Add an image to a name or number
- 64 Edit an entry
- 64 Delete names and numbers
- 65 Copy entries
- 65 Business cards
- 66 1-touch dialing
- 67 Info, service, and own numbers
- 67 Caller groups
- 68 Select contacts view and memory
- 69 10 Settings (Menu 4)
- 69 Over the Air (OTA) settings service
- 69 Profiles
- 70 Tone settings
- 70 Display settings
- 72 Time and date settings
- 73 Personal shortcuts
- 75 Connectivity
- 77 Call settings
- 80 Phone settings
- 82 Enhancement settings
- 83 Security settings
- 84 Restore factory settings
- 85 11 Gallery (Menu 5)
- 85 Folders
- 85 Folder items
- 86 Edit an image
- 88 12 Media (Menu 6)
- 88 Camera
- 90 Radio
- 91 Voice recorder
- 93 13 Organizer (Menu 7)
- 93 Alarm clock
- 94 Calendar
- 98 Calculator
- 100 14 Applications (Menu 8)
- 100 Games
- 101 Collection
- 104 15 Services (Menu 9)
- 104 Set up for browsing
- 105 Sign on to the mobile Internet
- 105 Navigate the mobile Internet
- 106 Examples of mobile Internet sites
- 106 Bookmarks
- 107 Service inbox
- 108 File upload
- 108 Disconnect from the mobile Internet
- 108 Set up an automatic connection
- 108 Receive a call while online
- 108 Make a call while online
- 109 Make an emergency call while online
- 109 Options while online
- 110 Security
- 110 Allow or reject cookies
- 111 Create a digital signature
- 111 Appearance settings
- 112 16 Go to (Menu 10)
- 113 17 SIM services (Menu 11)
- 114 18 Instant messaging
- 114 Network selection
- 115 Obtain user name and password
- 115 Log into service
- 116 Set your availability
- 116 Instant messages
- 116 Chat Sessions
- 118 Contacts
- 120 Private groups
- 121 Instant messaging settings
- 122 Log off service
- 124 19 Hardware and enhancements
- 124 Hardware
- 126 Enhancements
- 127 20 Reference information
- 127 Battery information
- 127 Enhancements
- 128 Enhancements, Batteries, and Chargers
- 128 Care and Maintenance
- 129 Additional safety information
- 134 21 Technical information
- 135 22 Nokia one-year limited warranty
- 139 Appendix A
- 143 Appendix B
- 149 Index